


Welcome! In this guide, we will be diving into wallet creation on Soneium. By the end, you will be able to onboard your users into your onchain application by creating embedded custodial wallets on Soneium for them using the Crossmint Wallet API.
Best of all, these wallets integrate seamlessly with Crossmint Auth, making wallet management simple and flexible for your users through familiar sign-in methods like Email OTP (One Time Password) or Social Accounts (Google, Apple, X). Want to see it in action? Check out our Smarter Wallet demo to experience just how smooth the onboarding process can be.
Looking for non-custodial smart wallet solutions instead? Our quickstart guides have you covered.
For any assistance, our sales team is always ready to help and can answer all questions about pricing, features, and implementation.
Prerequisites for Creating Soneium Wallets
Before you start, you will need to create a Crossmint Account so that you can access Crossmint's suite of onchain developer and no-code tools.
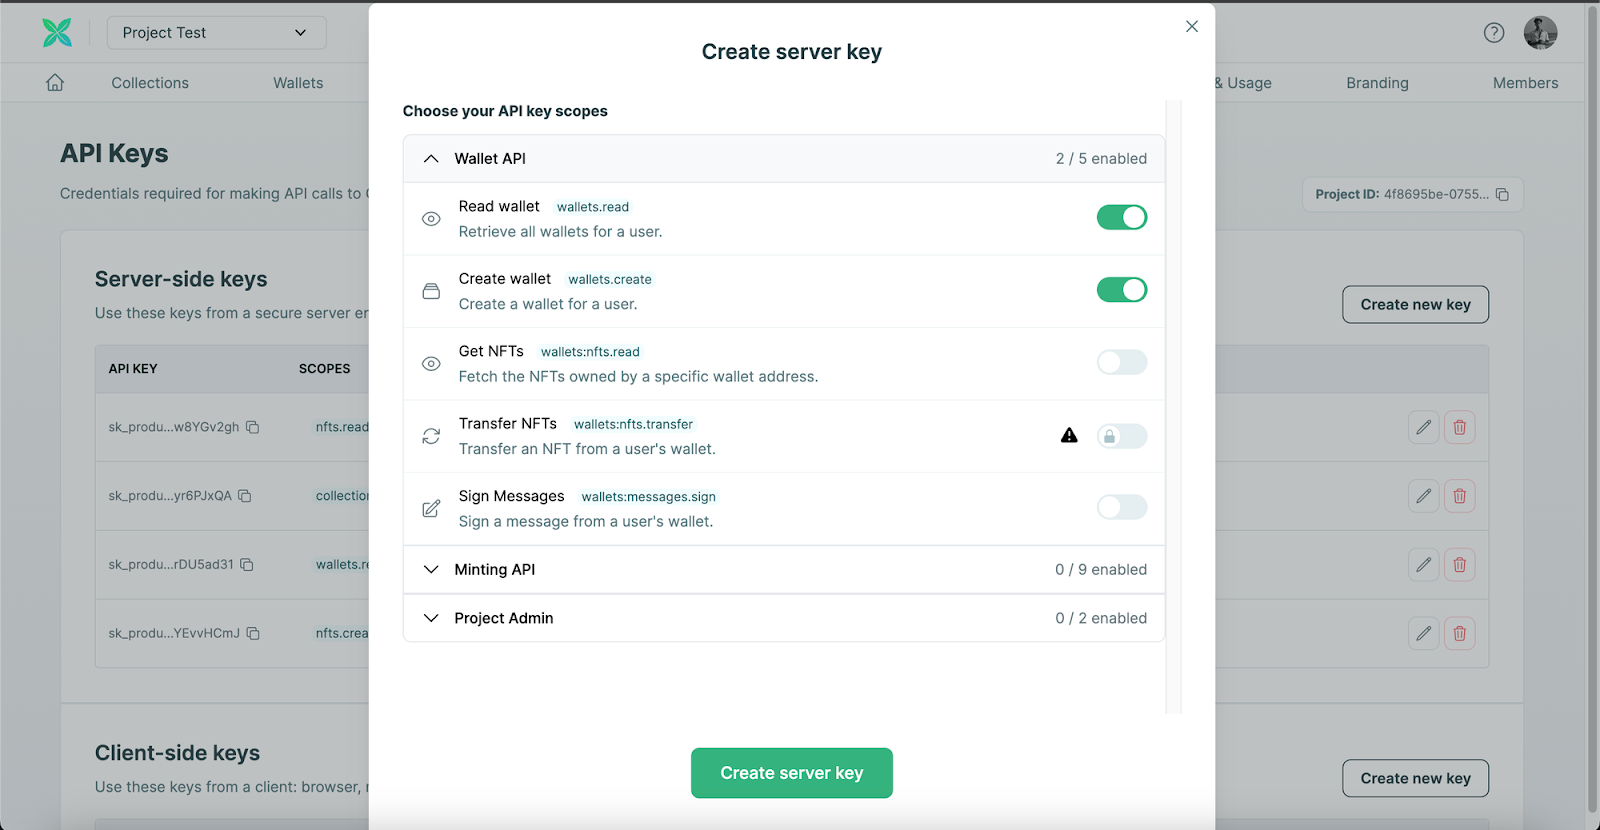
Next, navigate to the "Developers" section and create a Server-side API Key:
- Select essential scopes:
- "wallets.read"
- "wallets.create"
You need the scopes specified above to create Soneium wallets.
Creating Custodial Wallets on Soneium
Now that you have everything set up, let's look at how you can create an embedded Soneium wallet.
First, create a Javascript code file on your computer and then paste the below boilerplate-code within that code file. Use this to create wallets via email:
const options = {
  method: "POST",
  headers: {
    "X-API-KEY": "<your-api-key-here>",
    "Content-Type": "application/json"
  },
  body: '{"email":"yourEmail@email.com","chain":"soneium"}'
};

fetch("<https://www.crossmint.com/api/v1-alpha2/wallets>", options)
  .then((response) => response.json())
  .then((response) => console.log(response))
  .catch((err) => console.error(err));
Alternatively, you can create wallets by UserID:
const options = {
  method: "POST",
  headers: {
    "X-API-KEY": "<your-api-key-here>",
    "Content-Type": "application/json"
  },
  body: '{"userId":"anyUserId","chain":"soneium"}'
};

fetch("<https://www.crossmint.com/api/v1-alpha2/wallets>", options)
  .then((response) => response.json())
  .then((response) => console.log(response))
.catch((err) => console.error(err));- Replace "<your-api-key-here>" with the API key that you created earlier.
- Replace "yourEmail@email.com" with the actual email address of the user that you are trying to create the wallet for.
- With UserID, replace "anyUserId" with any value of userId that you want to assign to a user. This value is of String type.
Pro Tips
- Use the staging environment (staging.crossmint.com/console) for testing
- Replace placeholders with your actual API key and user information
- Run the script using Node.js: node createWallet.js
Next Steps
Now that you have wallets for your users, you can transfer tokens between wallets, check wallet balances, fetch NFTs that are held by wallets and more.
Ready to dive deeper? Learn how to create and mint NFTs on Soneium.
Need Support?
- Contact our Sales Team
- Join the Crossmint Discord Server
- Visit the Crossmint Help Page