


Boost community participation by effortlessly issuing and managing membership NFTs, no coding necessary.
Table of Contents
- What is an NFT membership
- NFT membership benefits
- NFT membership: use cases
- How to create an NFT membership using Crossmint
- Requirements to create the NFT membership collection
- Setting up Airtable
- Copying the Airtable base
- Understanding the Airtable base template
- Setting up & Automating with Zapier
- Flow for issuing Membership NFTs upon onboarding
- Flow for adding a contribution and updating the membership NFT
- Conclusion
What is an NFT membership?
An NFT Membership represents a revolutionary approach to digital access and exclusivity. It functions as a unique, blockchain-based asset, distinguishing itself from traditional membership models that are person or account-specific. This type of membership leverages the security and transparency of blockchain technology, ensuring the authenticity and verifiable ownership of each token. Holders of NFT Memberships gain exclusive access, benefits, or privileges within specific online communities, services, or platforms. Moreover, the inherent tradability of NFTs allows members to securely transfer or sell their access rights, introducing a dynamic market for exclusive memberships. This innovation in digital membership models showcases the growing intersection of blockchain technology with everyday online interactions and access control.
NFT membership benefits
NFTs are powerful tools for recognizing and rewarding contributions to projects and communities. NFT Memberships, in particular, offer unique opportunities to connect, engage, and incentivize members, by:
- Attracting Early Adopters: NFT Memberships instill a sense of exclusivity and pride among early adopters, enticing them to be part of something special right from the beginning.
- Incentivizing Impactful Contributions: These NFTs serve as incentives and rewards for meaningful contributions, thereby fostering growth and encouraging active participation within your community.
- Granting Exclusive Access and Privileges: Loyal members are granted exclusive access and privileges through NFT Memberships, adding value to their involvement and providing a sense of recognition for their commitment.
- Providing Verifiable Proof of Contribution, Ownership, and Authenticity: NFTs offer an immutable and transparent record of contributions, ownership, and authenticity, which builds trust and enhances credibility within the community.
- Integrating with Governance Protocols: NFT Memberships can seamlessly integrate with governance protocols, empowering community members to actively participate in decision-making processes, shaping the direction of the project or community.
NFT membership: use cases
Notable examples of NFT Memberships include:
Gary Vee's VeeFriends: Created by renowned entrepreneur and influencer Gary Vaynerchuk, VeeFriends is a collection of hand-drawn NFTs that unlock various unique experiences. Each NFT acts as a ticket to an event, conference, or even a personal interaction with Gary Vee himself. This approach has fostered a vibrant community of loyal followers.
Flyfish Club: The world's first private dining club to sell membership through NFTs. Members get unlimited access to a private dining room in Manhattan and various culinary, cultural, and social experiences.
Bored Ape Yacht Club (BAYC): BAYC consists of 10,000 unique Bored Ape NFTs functioning as membership cards to a club filled with exclusive benefits. Owning a Bored Ape NFT grants access to online parties, real-life meetups, and even intellectual property rights to the ape's image, creating a strong sense of belonging among the members.
This tutorial shows how to issue NFT Memberships and track contributions using Crossmint's APIs and no-code tools. You can use NFT Memberships to build a community of dedicated members.
How to create a NFT membership collection using Crossmint
To make this tutorial more engaging, let’s imagine we have a developer community called "Alpha Team X" where people join and contribute to level up. Each member’s basic membership information is stored, along with other details such as total XP earned from contributions and membership status in the form of an NFT. Membership status is determined by XP earned, with Master Artisan status awarded for over 100 XP, Seasoned Crafter status for over 25 XP, and Newbie status for 25 XP or less.
To become a member, individuals fill out an Airtable form. Once submitted, an NFT is minted to their email address using Crossmint’s API. For each member, contributions update the metadata of their NFT to reflect XP and status changes, creating an NFT that dynamically updates based on contributions.
To automate this process, you’ll learn how to:
- Issue a membership NFT to each individual on signup.
- Update membership NFTs when individuals contribute to the community.
Requirements to create the NFT membership collection
Before we begin issuing membership NFTs, we need:
- A Crossmint account : This will enable us to create a wallet with an email, and edit our NFTs. Note: Use API credentials from your Crossmint’s staging account for testing on the Testnet.
- An Airtable account : This is necessary for organizing member information.
- A premium Zapier account : This is required for automating processes throughout the tutorial.
Let's get started with issuing our first Membership NFT!
Part 1. Setting up Airtable
Airtable is powerful platform that combines the best of spreadsheets and databases. It has many integrations with other tools, making it popular among no-code builders worldwide.
1.1 : Copying the Airtable base
Airtable Base - https://airtable.com/shrJ4xxZh1Ejbl9bZ
Open the Airtable base link mentioned above. Click the "Copy base" button to add the template to your Airtable account. Add the base to your workspace and continue.
1.2 : Understanding the Airtable base template
Once you’ve successfully copied the base to your own Airtable account, you’ll see that your account has two tables -
Members table :
Manages the details of our members & handles the form for onboarding our members. Our Members table contains :
1. Grid View :
For storing all the user related informations.
Note: The "XP Point" column in this table shows the total XP points earned by our members from our "Internal" table.

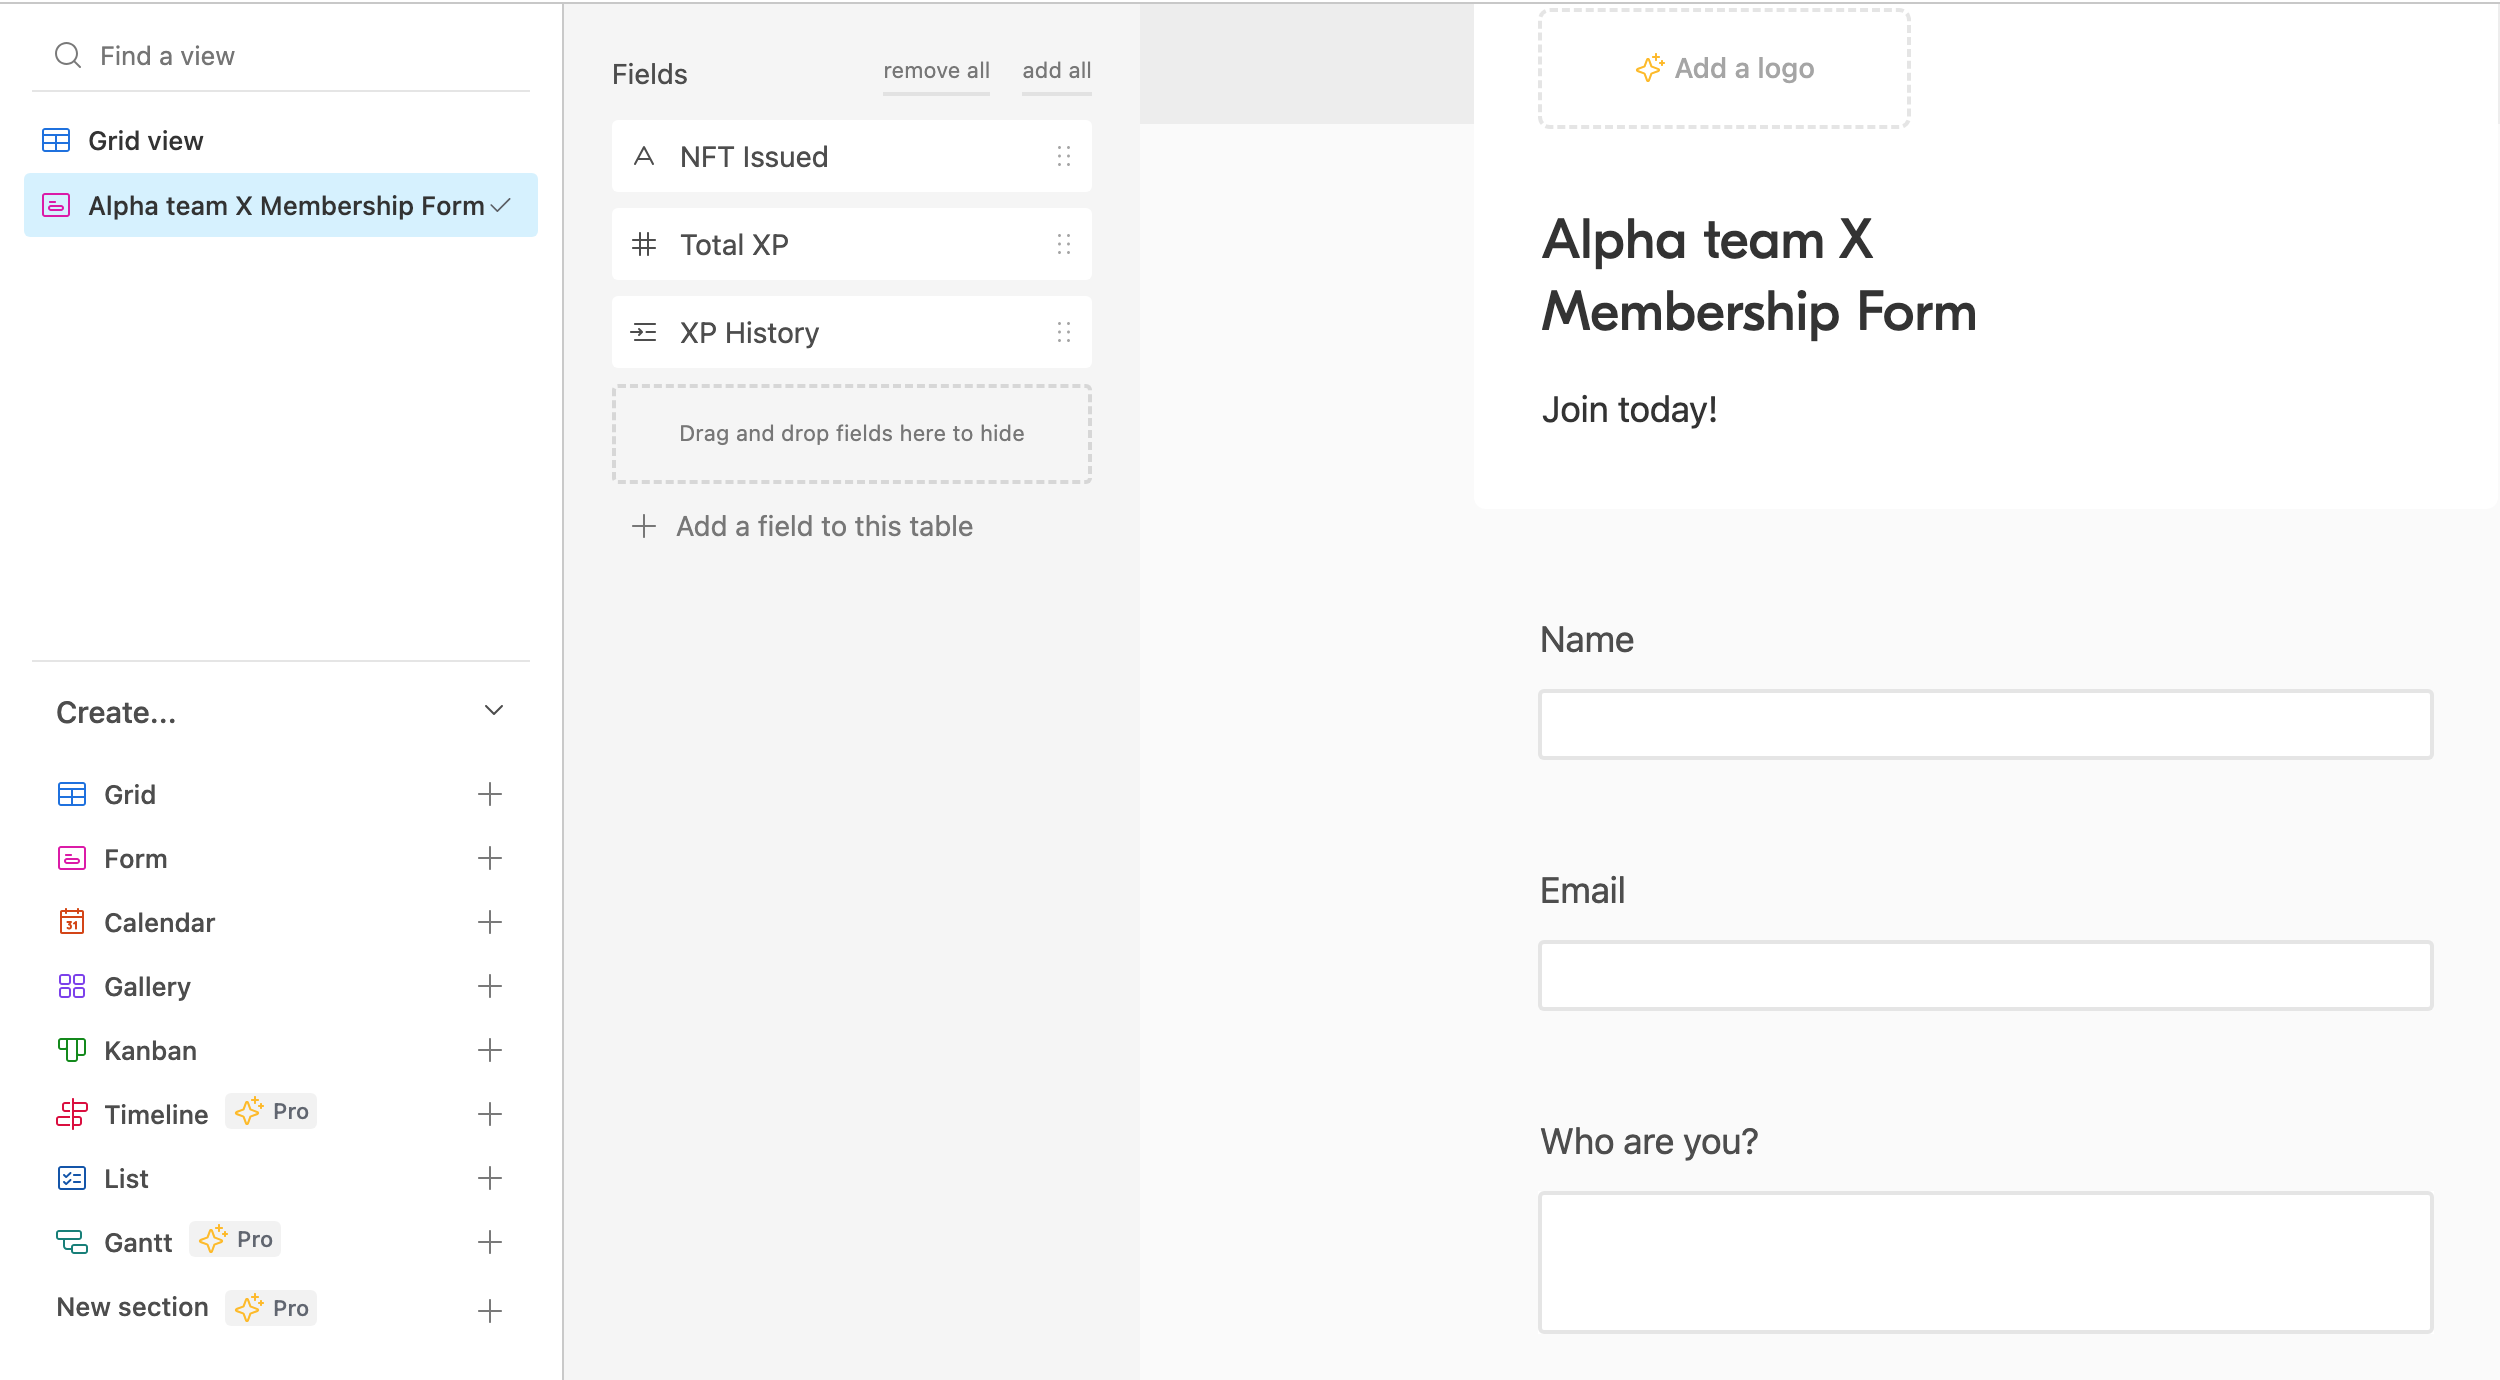
2. Form tab :
That has a customizable form tab to gather information for your community. Click "Share form," open the link, and fill your details for testing purposes. These details would automatically be updated on the grid view
Internals Table :
Maps out all the contributions done by members & act like our ledger. Our Internals Table also has two elements :
1. Grid view:
Stores transaction information, including XP points and other relevant data for better integration with Zapier.
Note: Some columns in this table are linked to the Members table using Airtable's linked records feature, which allows for powerful data relationships.

2. Form tab:
Customizable and shareable form that automatically updates the fields in the Grid view upon filling.
Note : This form is only for authorized personnel to update contributions. Do not share it publicly with everyone otherwise anyone would be able to add contributions on the behalf of other members.
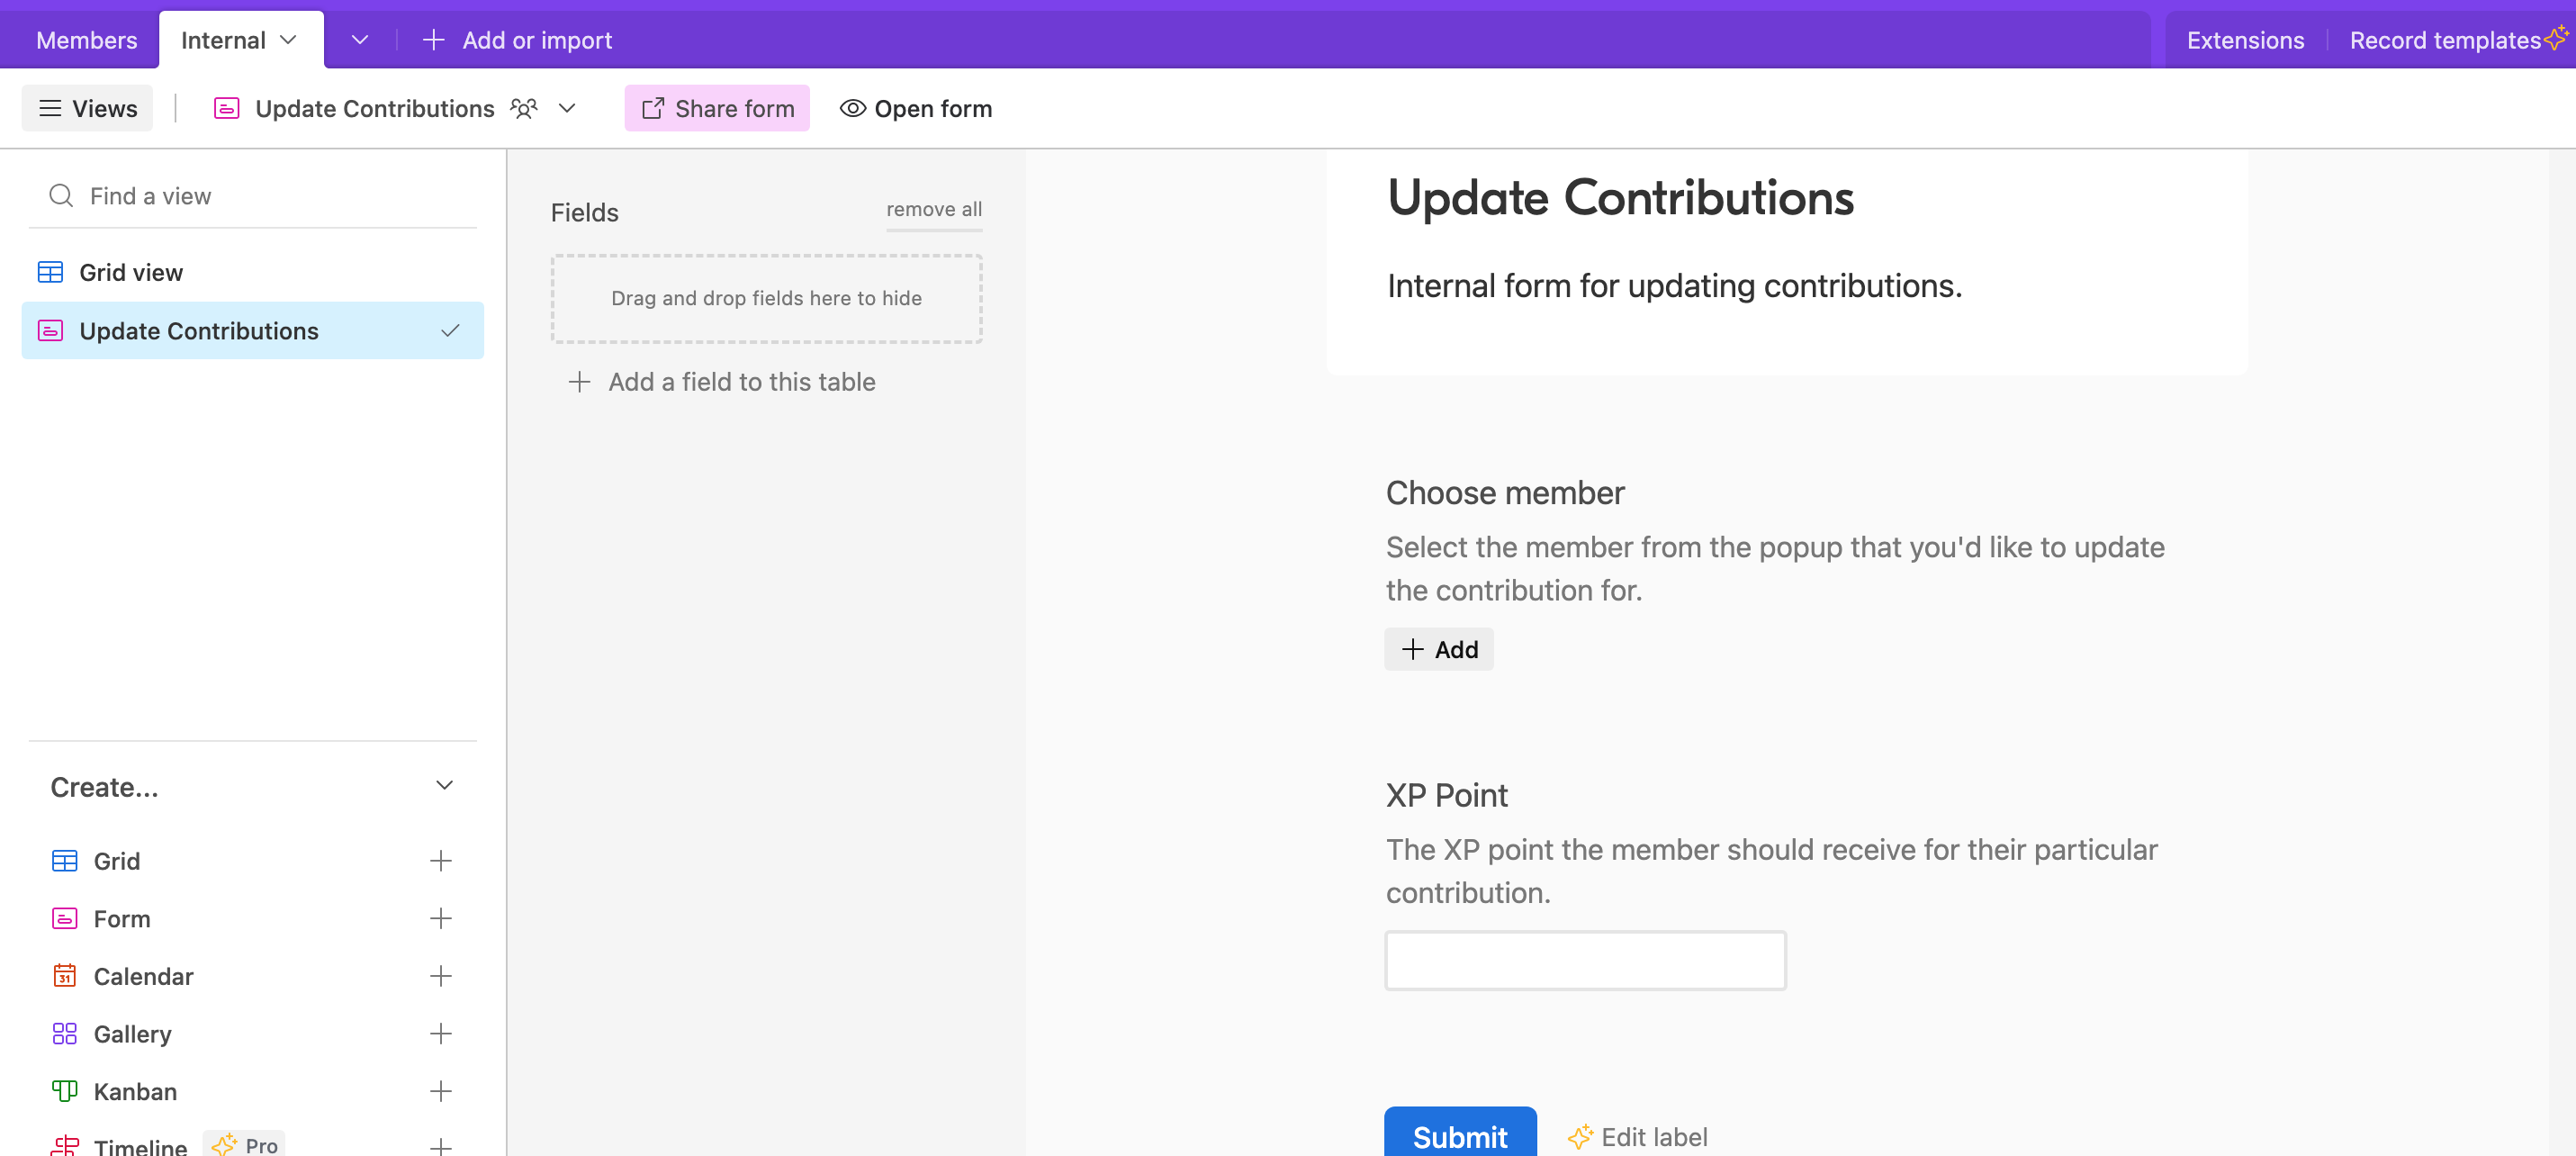
When opening this form with existing members in the "Members" table, select a member from the list.

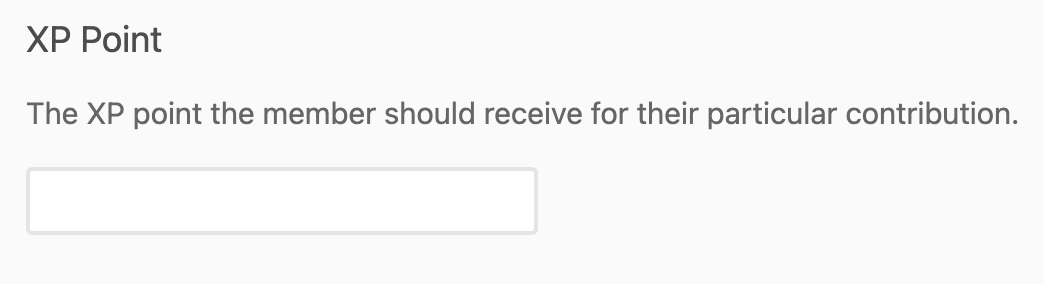
Specify XP points (Integer) and proceed.
We have an Airtable account with a base that has two sharable forms for admins and members. We will now connect everything with Zapier.
Part 2. Setting up & Automating with Zapier
Zapier is a powerful tool that connects apps and services, allowing you to create automated workflows without coding. First, we'll start by automating the issuing of membership NFTs. Then, we'll create a flow to update contributions and NFT metadata.
2.1: Flow for issuing Membership NFTs upon onboarding
Flow demo
To begin, we'll issue an NFT each time a member fills out our onboarding form, which is stored in the "Members" table.
Duplicating the Zapier template
Open the Zapier template link and click "Try this Zap" to duplicate the template designed for this tutorial with all necessary triggers and actions for seamless integration.
Understanding & configuring the Zapier Template
After copying the Zapier template, let's understand what's happening here & configure everything.
[Trigger 1] New Record in Airtable :
To automate fetching details of members, follow these steps to configure the flow:
1. Select "New Record" as the event.
2. Connect your Airtable account with Zapier and choose the account with the Airtable base template.
3. In the trigger section, set the following:
Base: Alpha Team X
Table: Members
Limit to View: Grid View
4. Test the trigger and you should be able to fetch the last updated record on Airtable. Make sure there is data in the Members table after filling the onboarding form.
[Action 2] Mint an NFT in Crossmint
Once the user is registered, we want to mint an NFT to their email address.
To configure this action follow these steps to configure the action:
1. Select "Mint an NFT" as the event.
2. Connect your Crossmint account with Zapier using your Project ID and Secret Key.
3. In the Action section, provide the following details:
Collection ID: Choose the desired collection from the dropdown menu. For example, select "default-polygon" for the default polygon collection.
Chain: Select "Polygon" as the collection is polygon-based.
Mint to: Choose "Email" as the recipient's identifier.
Email or wallet address: Select the "Email" variable from the Airtable trigger response dropdown.
Title: Enter a name for the NFT, such as "Alpha Team X: Member."
Image URL: Add the online image link for the membership NFT.
Description: Provide a brief description of the NFT (maximum 64 words).
Additional metadata: Specify the member's name as additional metadata. Enter "Issued to" for the key and select the "Name" variable from the Airtable trigger response.
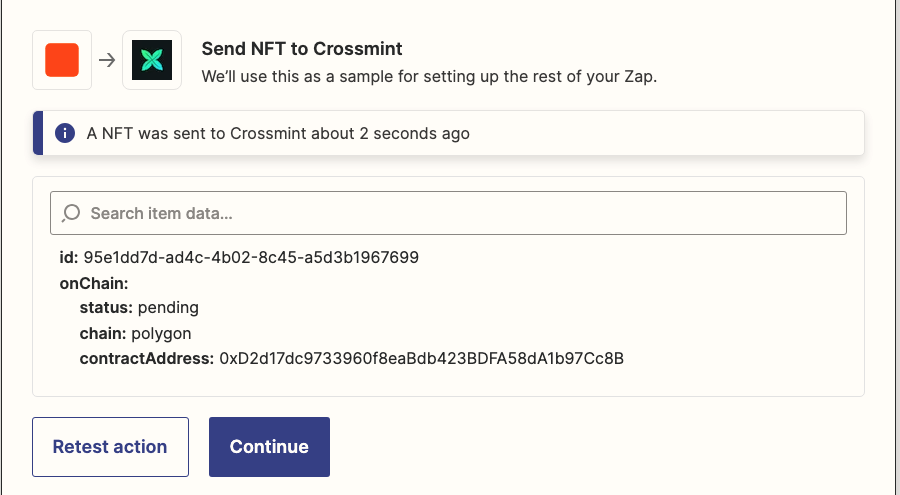
4. Click continue to test the action. If configured correctly, the NFT will be minted to the member's email address. You can view the minted NFT by logging into your wallet on the Live or Staging Crossmint using the email address associated with the NFT.
[Action 3] Update Record in Airtable
After minting the NFT, we need to update the Airtable record for each member to store the NFT ID. This ID will be essential for future updates related to the member's NFT contributions.
To configure this action, follow these steps:
1. Select "Update Record" from the dropdown as the event.
2. Connect your Airtable account.
3. In the Action section, provide the following details:
Base: Choose the Airtable base containing our details, such as "Alpha Team X".
Table: Select "Members" from the dropdown.
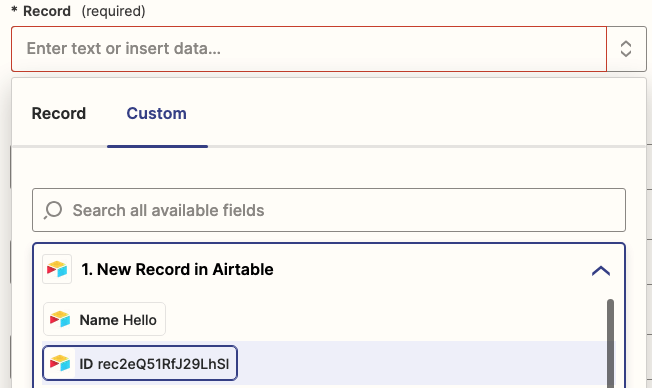
Record: Choose "Custom" from the dropdown and select the "ID Airtable" response variable. This ensures that only the specific member's row is updated.
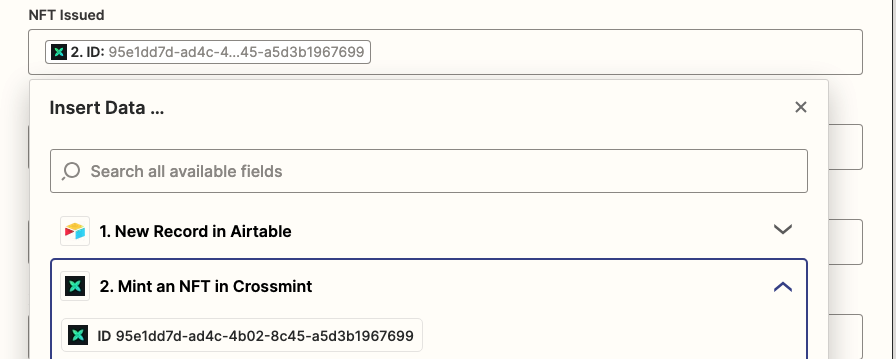
NFT Issued: Select the "ID Crossmint" response variable here.
XP History: Set this field as "0" to initialize the member's XP as zero.
4. Leave all other fields blank.
5. Click on "Continue" and test the action.
6. Finally, publish the Zap to ensure the flow works automatically in the background, checking for new entries in the member's form.
If you followed all steps correctly, the Airtable Members table should have been updated and an NFT should have been minted. View the NFT by logging into your Crossmint wallet with your email address 🥳 (if you used your email for the membership onboarding form).
Note: This flow assumes that you want to give a Membership NFT to every person who fills out the form. In an ideal scenario, you may only want to mint NFTs to approved applicants. In this case, add an approval flow to the Zap, enabling you or the project admin to be notified of form submissions, approve membership requests, and then mint the NFT. To set up an approval flow, add another action after the New Record in Airtable trigger & use a service like Approvaldonkey, a commonly used platform with Zapier to easily add an approval flow to your Zaps.
2.2: Flow for adding a contribution and updating the membership NFT
Flow Demo
We gave an NFT to our first Alpha Team X member. Now, members can submit their contributions to us and we'll update their NFT by selecting their name and adding XPs. Then, our flow will handle the rest. Let's implement this now.
Duplicating the Zapier template
Duplicate the Zapier template mentioned above to your own Zapier acount by clicking on the “Try Zap” button.
[Trigger 1] New Record in Airtable :
We search for new records in the "Internals" table, which contains all the details of members' contributions. Every response is automatically added to our grid view tables using the "Update Contributions" form in the Internal table.

To set up the Zap flow to update NFT metadata with new Internal table entries, including membership status and updated XP points for the selected member. Follow these steps in your Zapier account for the recent template:
1. Select "New Record" as the event.
2. Connect your Airtable account with Zapier.
3. In the trigger section, set the following:
Base: Choose "Alpha Team X".
Table: Select "Internals" from the dropdown.
Limit to View: Choose "Grid View".
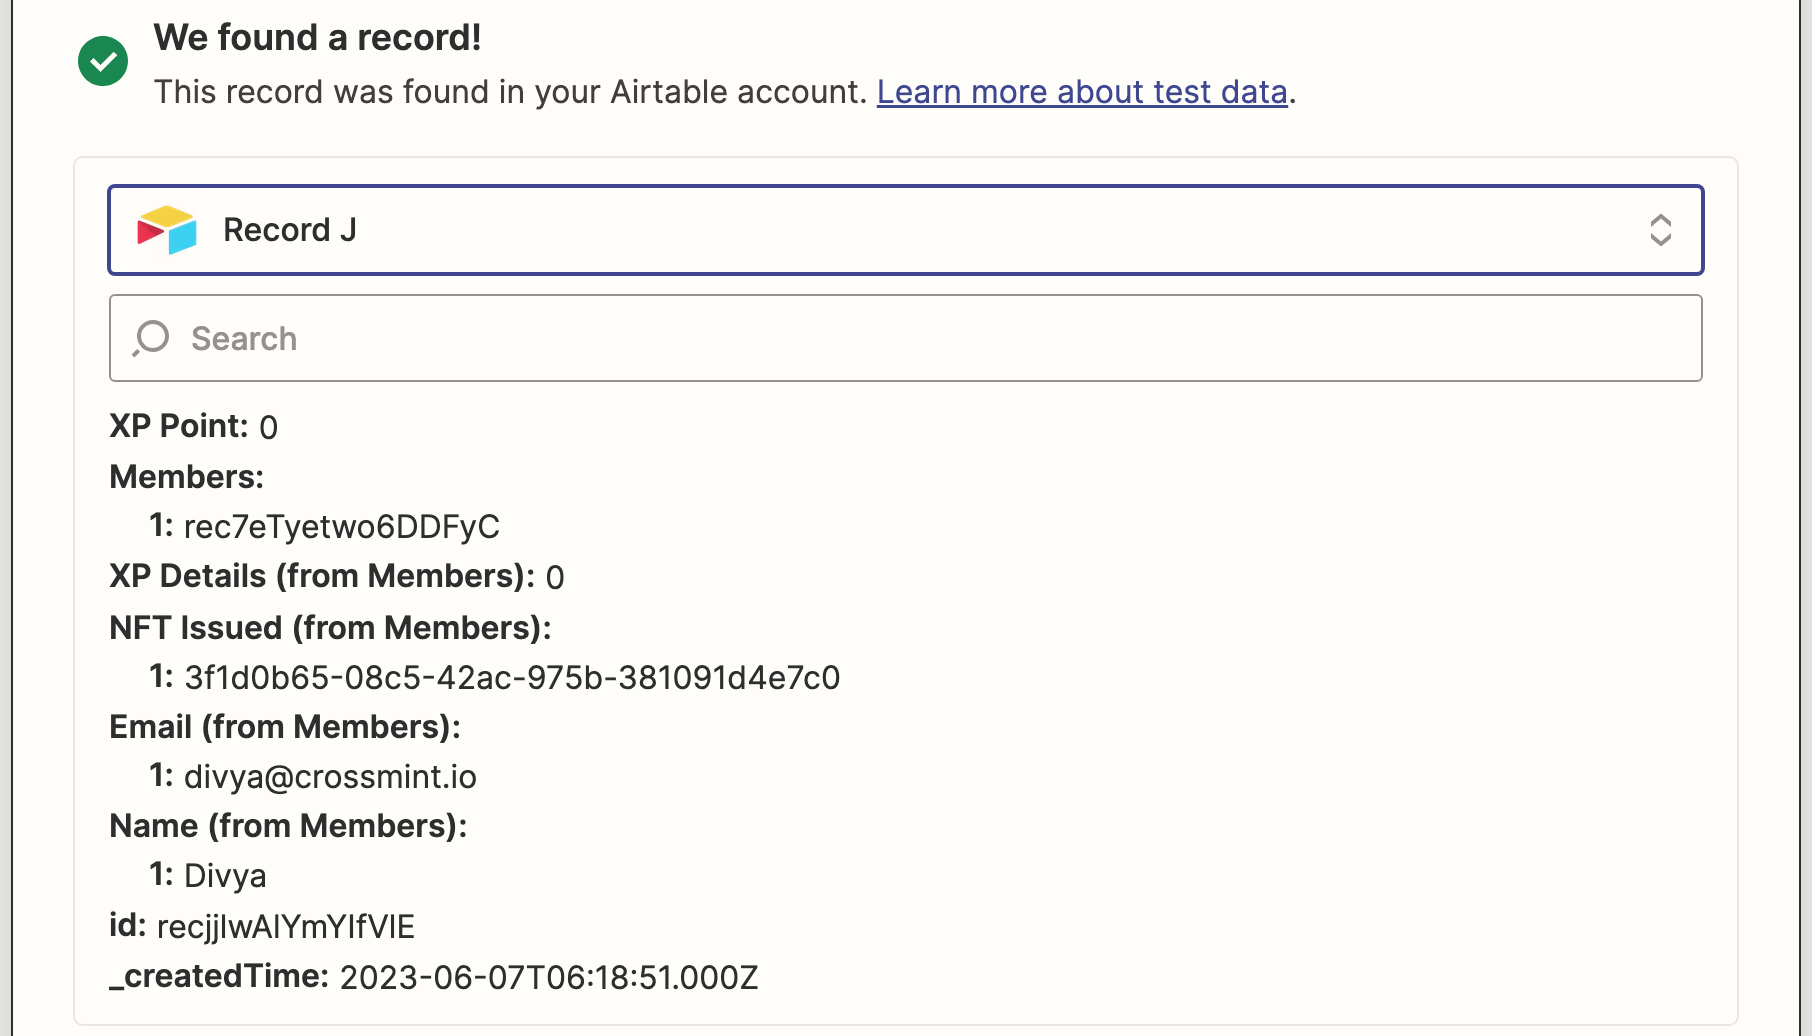
4. Click on "Continue" and test the trigger. If there is a new entry in the Internals table, you will see the details in the response.
Note: To avoid filling out the form personally, you can modify the flow to share the form with your members. Then, use apps like Approvaldonkey in Zapier to add an approval step. Modify the form so that members can select their name, the project they contributed to, and submit. You'll receive a notification on your Approvaldonkey dashboard about their submission and can manually approve or reject their requests. The rest of the flow will update the NFT metadata and Airtable record.
[Action 2] : Run Javascript in Code by Zapier
We now want to update the metadata with the earned XP information, as well as the membership status. Currently, we are only able to get XP points. If you remember, the membership statuses for our members are:
- Master Artisan status if the XP is over 100
- Seasoned Crafter status if the XP is over 25
- Newbie status if the XP is less than or equal to 25
To extract membership status based on earned XP points using Zapier we’ll use use a simple javascript code, follow these steps :
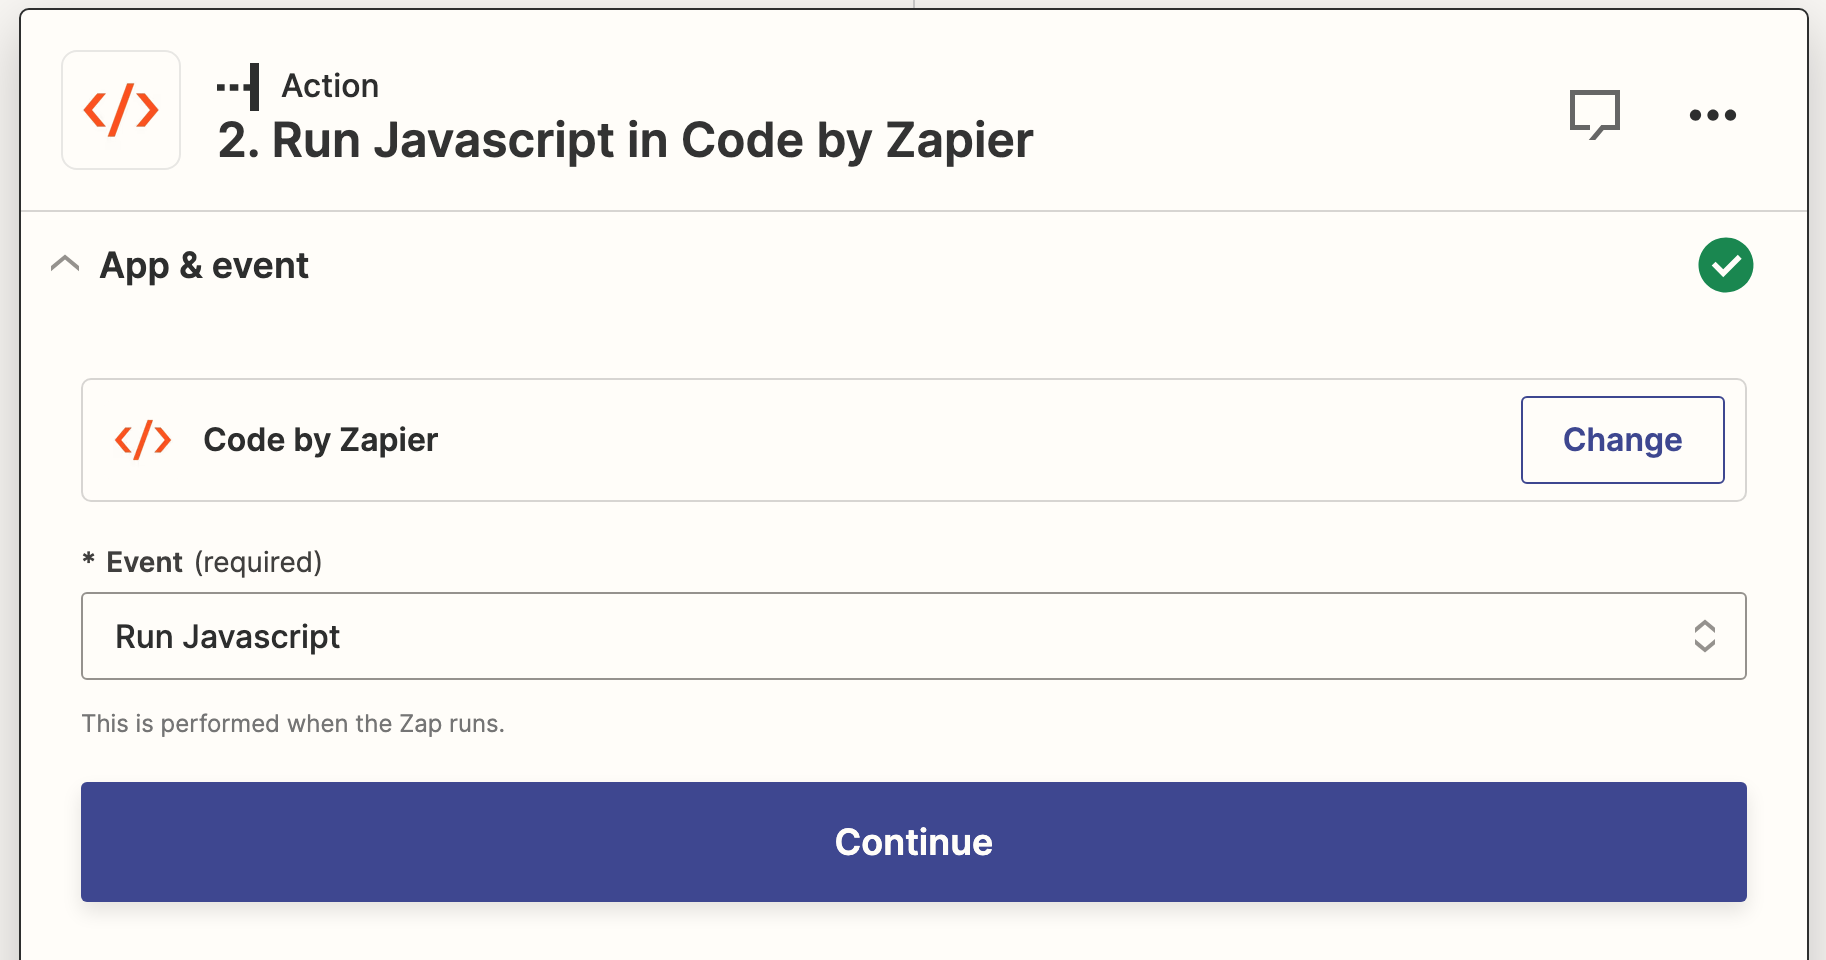
1. Add "Code" action to Zapier & Select "Run Javascript" as the event.
2. In the "Input Data Field" section, enter "xp" and then select the "XP Point" variable from the Airtable response.

3. Paste the following code:
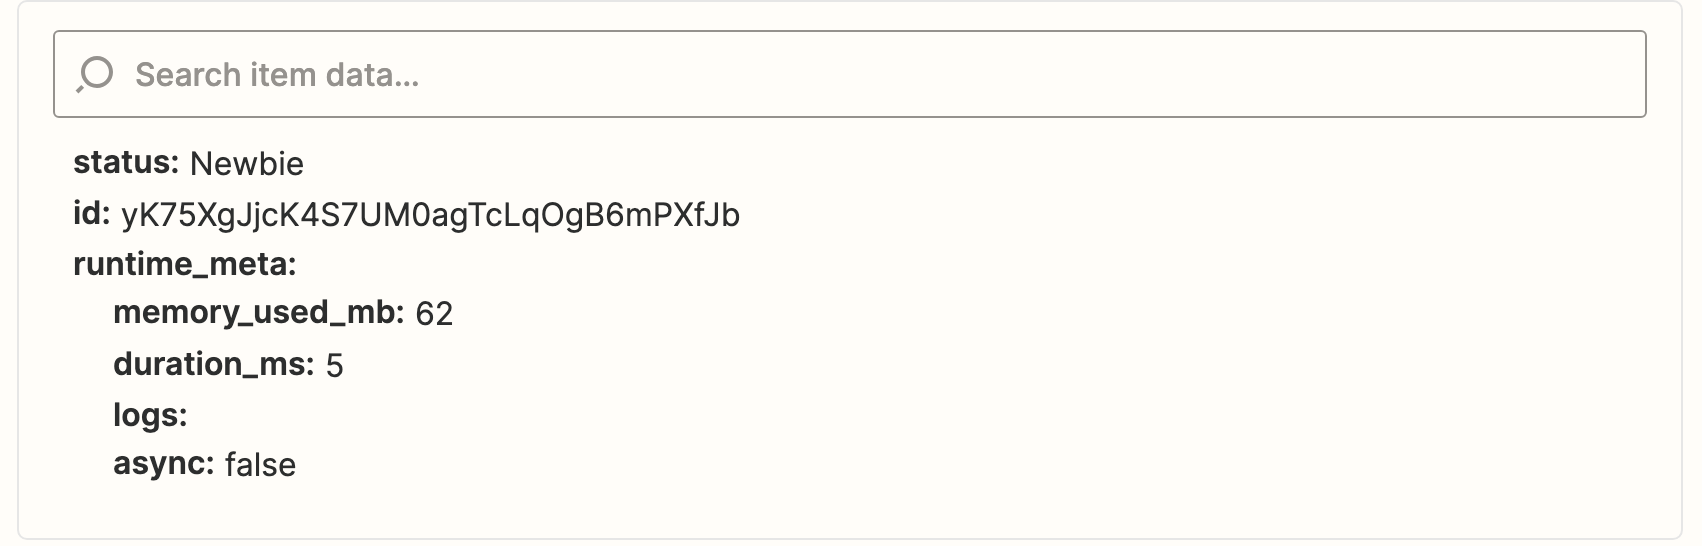
const xp = inputData.xp; let status; if (xp > 100) { status = 'Master Artisan'; } else if (xp > 25) { status = 'Seasoned Crafter'; } else { status = 'Newbie'; } output = { status };
Test the action to ensure it successfully returns the membership status.
[Action 3] Edit an NFT in Crossmint :
Now we have all the bits we need. Let's update the contents of our NFT to reflect both the XP points earned and the membership status of the member. Follow these steps :
1. Select "New Record" as the event.
2. Choose the Crossmint account that was used to mint the NFT in the previous setups.
3. In the Action section, provide the following details:
Collection ID: Select the name of the collection from the dropdown that the NFT was minted from previously.
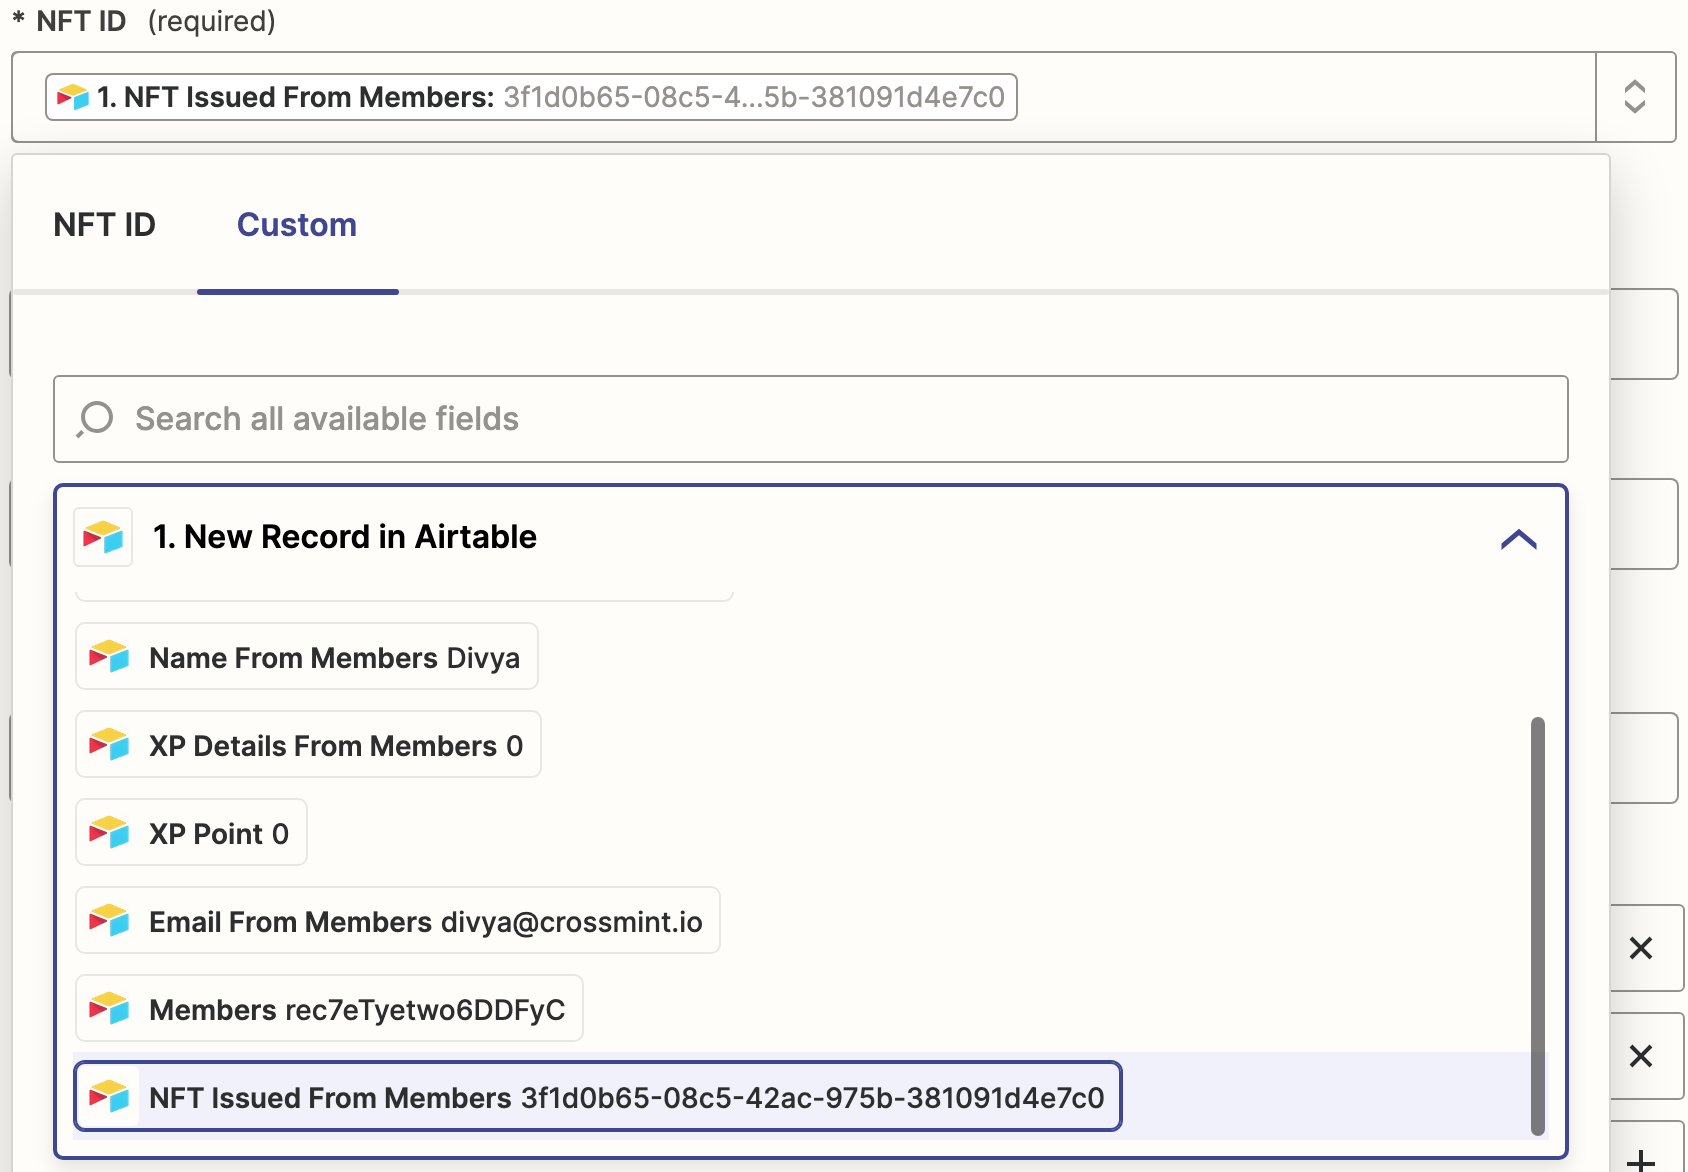
NFT ID: Choose "Custom" and then select the "NFT Issued From Member" variable from the Airtable response.
Name: Enter the name of the membership NFT, such as "Alpha Team: Membership."
Image URL: Add the image link for the NFT.
Description: Provide a description for the membership NFT collection (maximum 64 words).
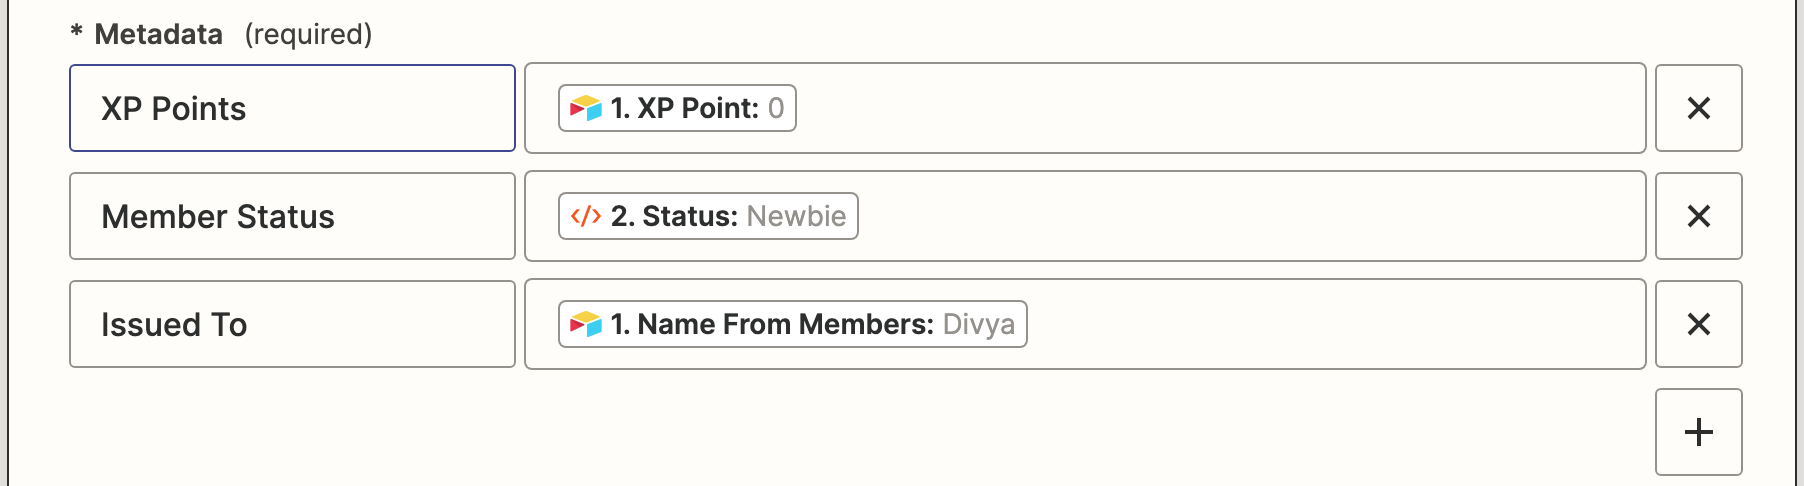
Metadata:
- Type "XP Points" for the key and select the "XP Points" variable from the Airtable response.
- Type "Membership Status" for the key and select the "Status" variable from the JavaScript code response.
- Type "Issued To" for the key and select the "Name from Members" variable from the Airtable response.
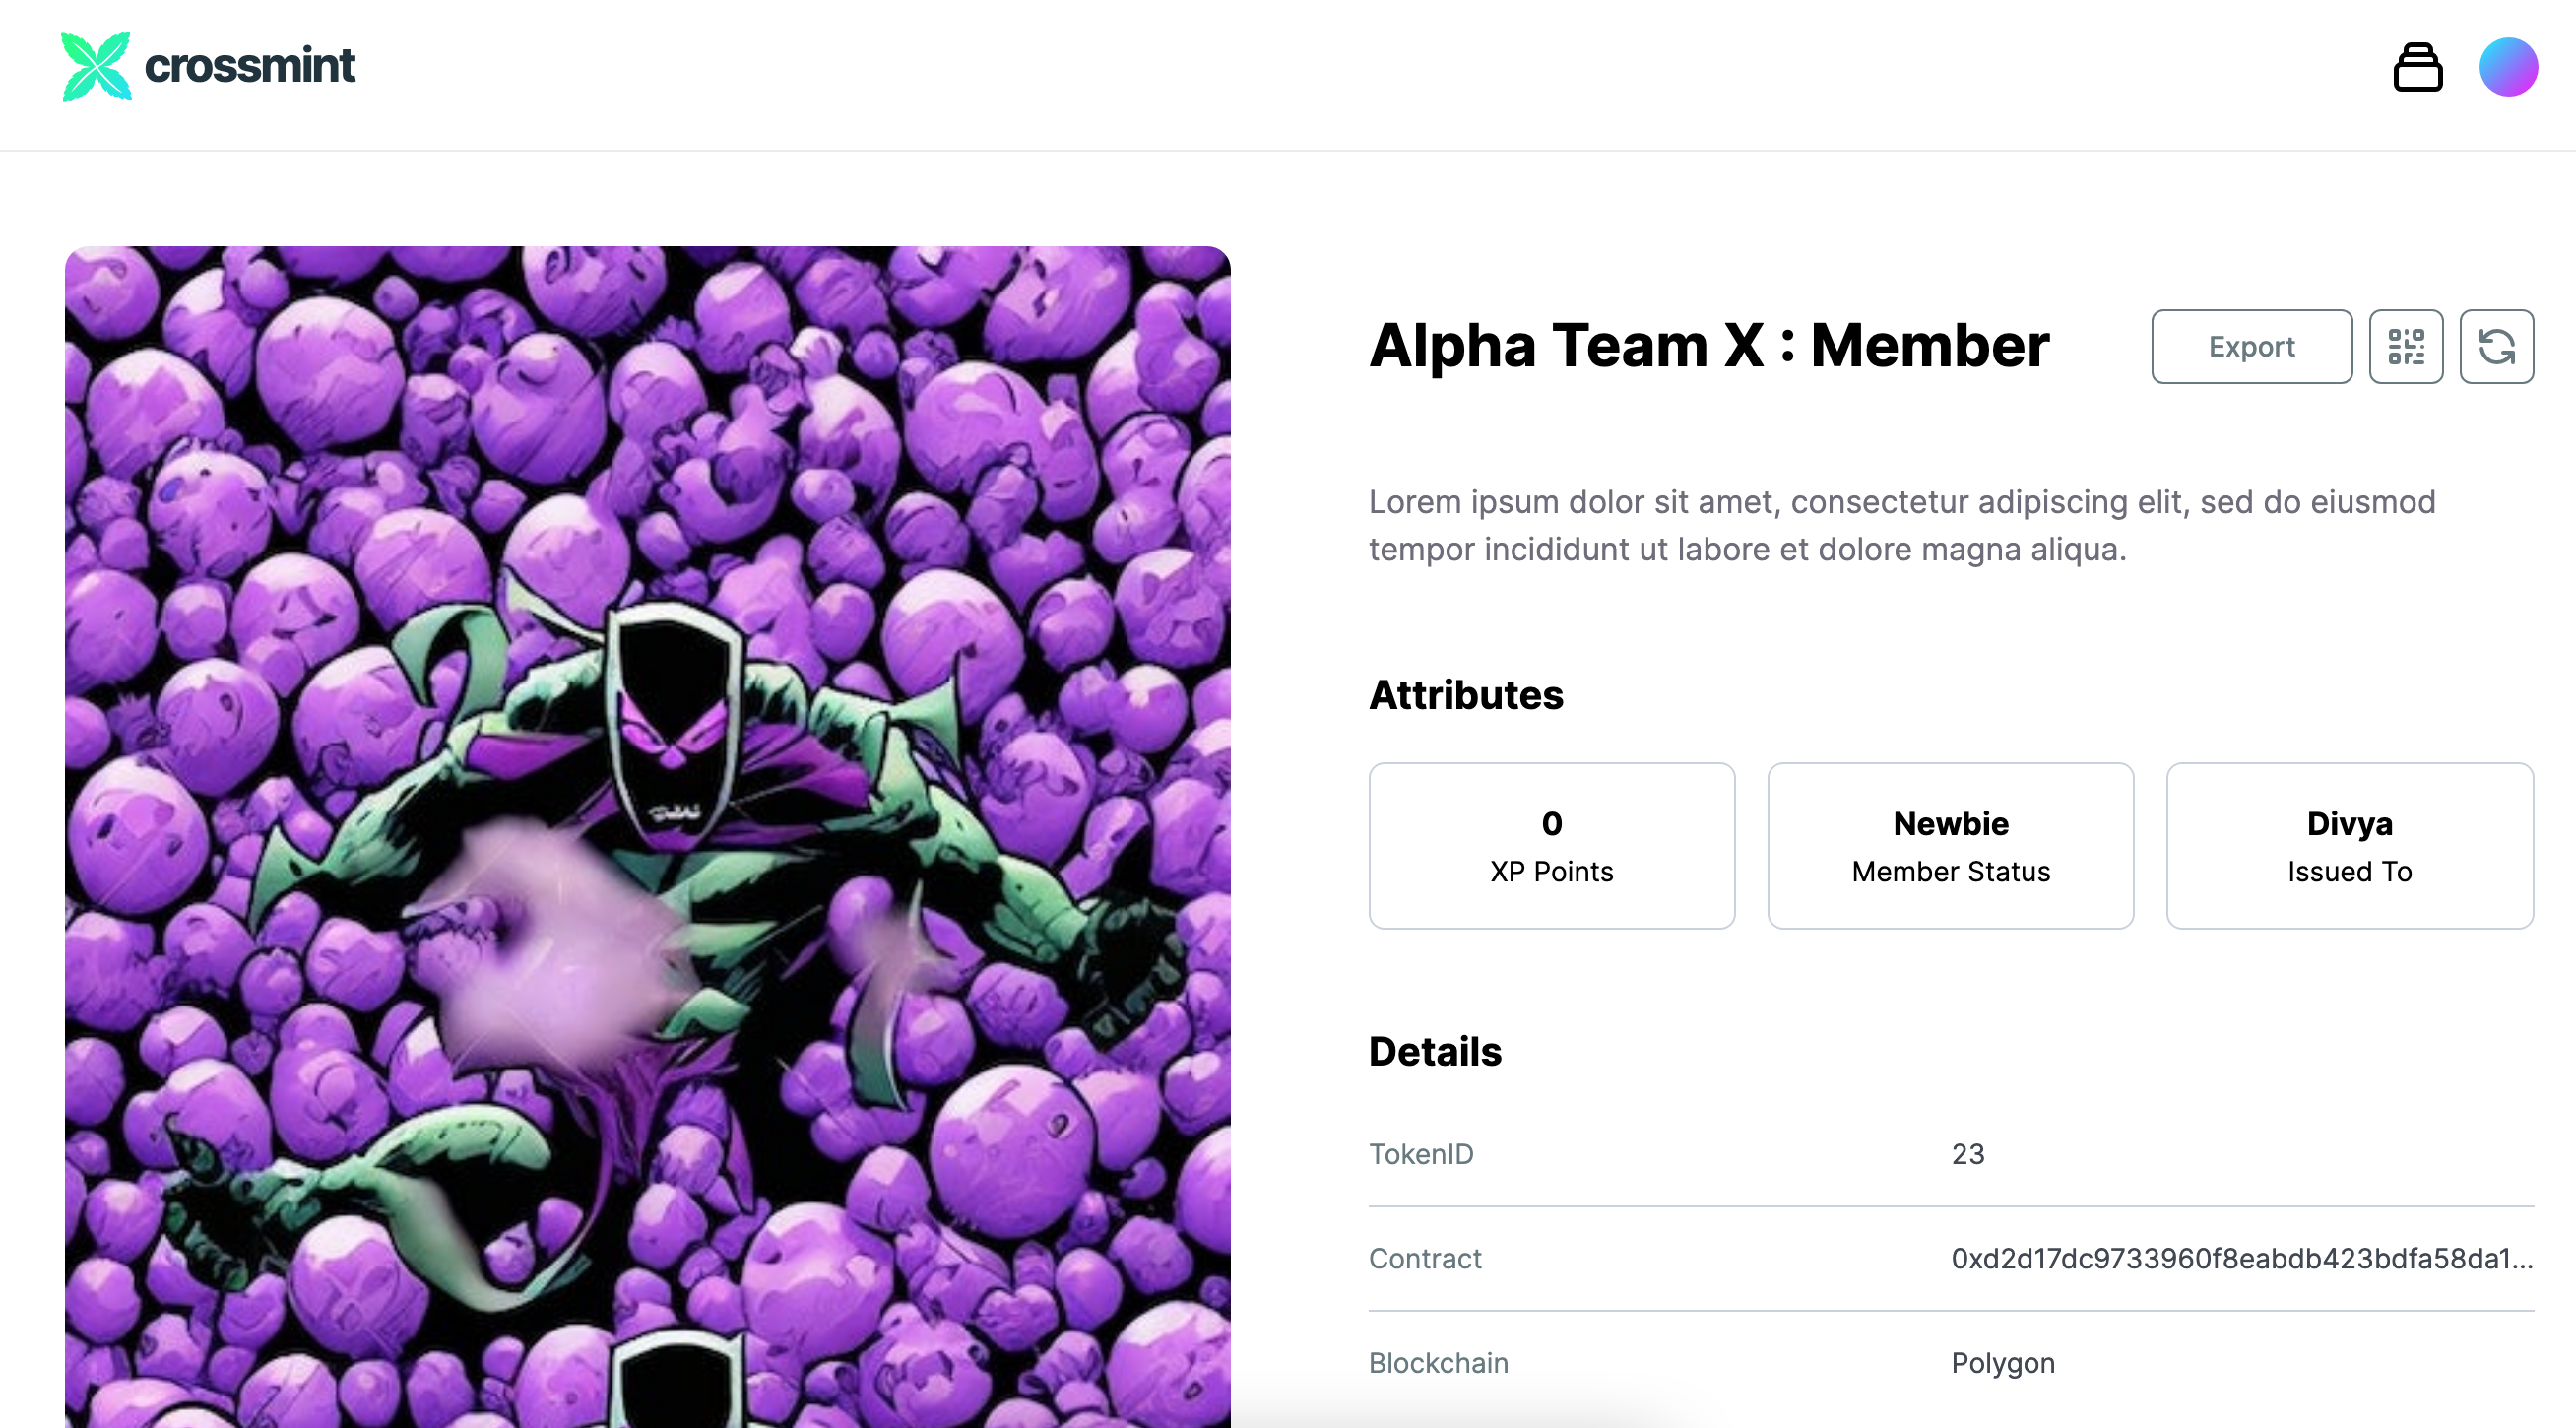
4. Click on "Continue" and test the action. The member's NFT should be updated with the new metadata.
5. Log in to your Crossmint wallet using the email address used to mint the NFT and you will see your NFT in your wallet.
Once the Zap is working properly, publish it to keep it running in the background. That's all you need to do. The flows we just created will automatically take care of everything else.
Conclusion
Congratulations on successfully setting up a system to issue membership NFTs and update contributions! You can now use this knowledge to build a community of dedicated members who feel recognized for their contributions.
For the next steps, try using Matrica or Collab.land to token-gate your community's Discord. This will make the experience easier and enable people to have access to specific channels based on their membership status. You can also run custom airdrops to members with specific statuses, among other possibilities.
We can't wait to see what you come up with! If you need credits or support, reach out to us on Discord or Twitter.


