


Crossmint now supports Astar zkEVM on both Production and Staging. This guide will teach you how to create an NFT Collection on Astar zkEVM and mint NFTs using Crossmint. You can mint an NFT on Astar zkEVM to both an email address or a wallet address.
By the end, you will learn how to:
- Deploy an NFT Collection on Astar zkEVM using an API
- Create and mint NFTs using the Mint API.
- Create and airdrop NFTs using the Console with No-code.
This guide will take you 10 mins to complete (approximately).
Let's get started!
Table of Contents:
- What is Astar zkEVM?
- How to create and mint NFTs on Astar zkEVM using Crossmint?
- What's Next?
- Need Help?
What is Astar zkEVM?
Astar zkEVM is the gateway for projects across enterprises, entertainment & gaming in Japan and beyond, driving global adoption and delivering web3 to billions. It leverages a cross-virtual machine powered by Polygon to offer customizable blockchain solutions that accelerate web3 adoption. With zk-powered Ethereum L2 Scaling (zkEVM) and a cutting-edge ecosystem, Astar delivers robust, secure, and interoperable web3 technology. Astar zkEVM is the Layer-2 solution to scale a web3 experience on Ethereum with zero knowledge (ZK) technology. Astar Network connects you to Web 3.
How to create and mint NFTs on Astar zkEVM using Crossmint?
Crossmint allows you to create NFT Collections on the Astar zkEVM using a single API call. You do not need to code and deploy the smart contract yourself. Using the Create Collection API, you can deploy a smart contract on Astar zkEVM and create an NFT collection.
Let's learn how we can use this.
Create an API Key
Before proceeding, verify that you have a Developer Account set up with Crossmint. If you haven't already, visit the Crossmint Console to create your account.
For operations such as creating NFT Collections, creating NFTs and minting NFTs on Astar zkEVM, creating a Crossmint API Key is required.
Go to the "API Keys" section within the Console. Since you'll need a Server-side Key for these operations, select "Create new key" to generate one. This key will enable you to securely integrate Crossmint's functionalities into your application.
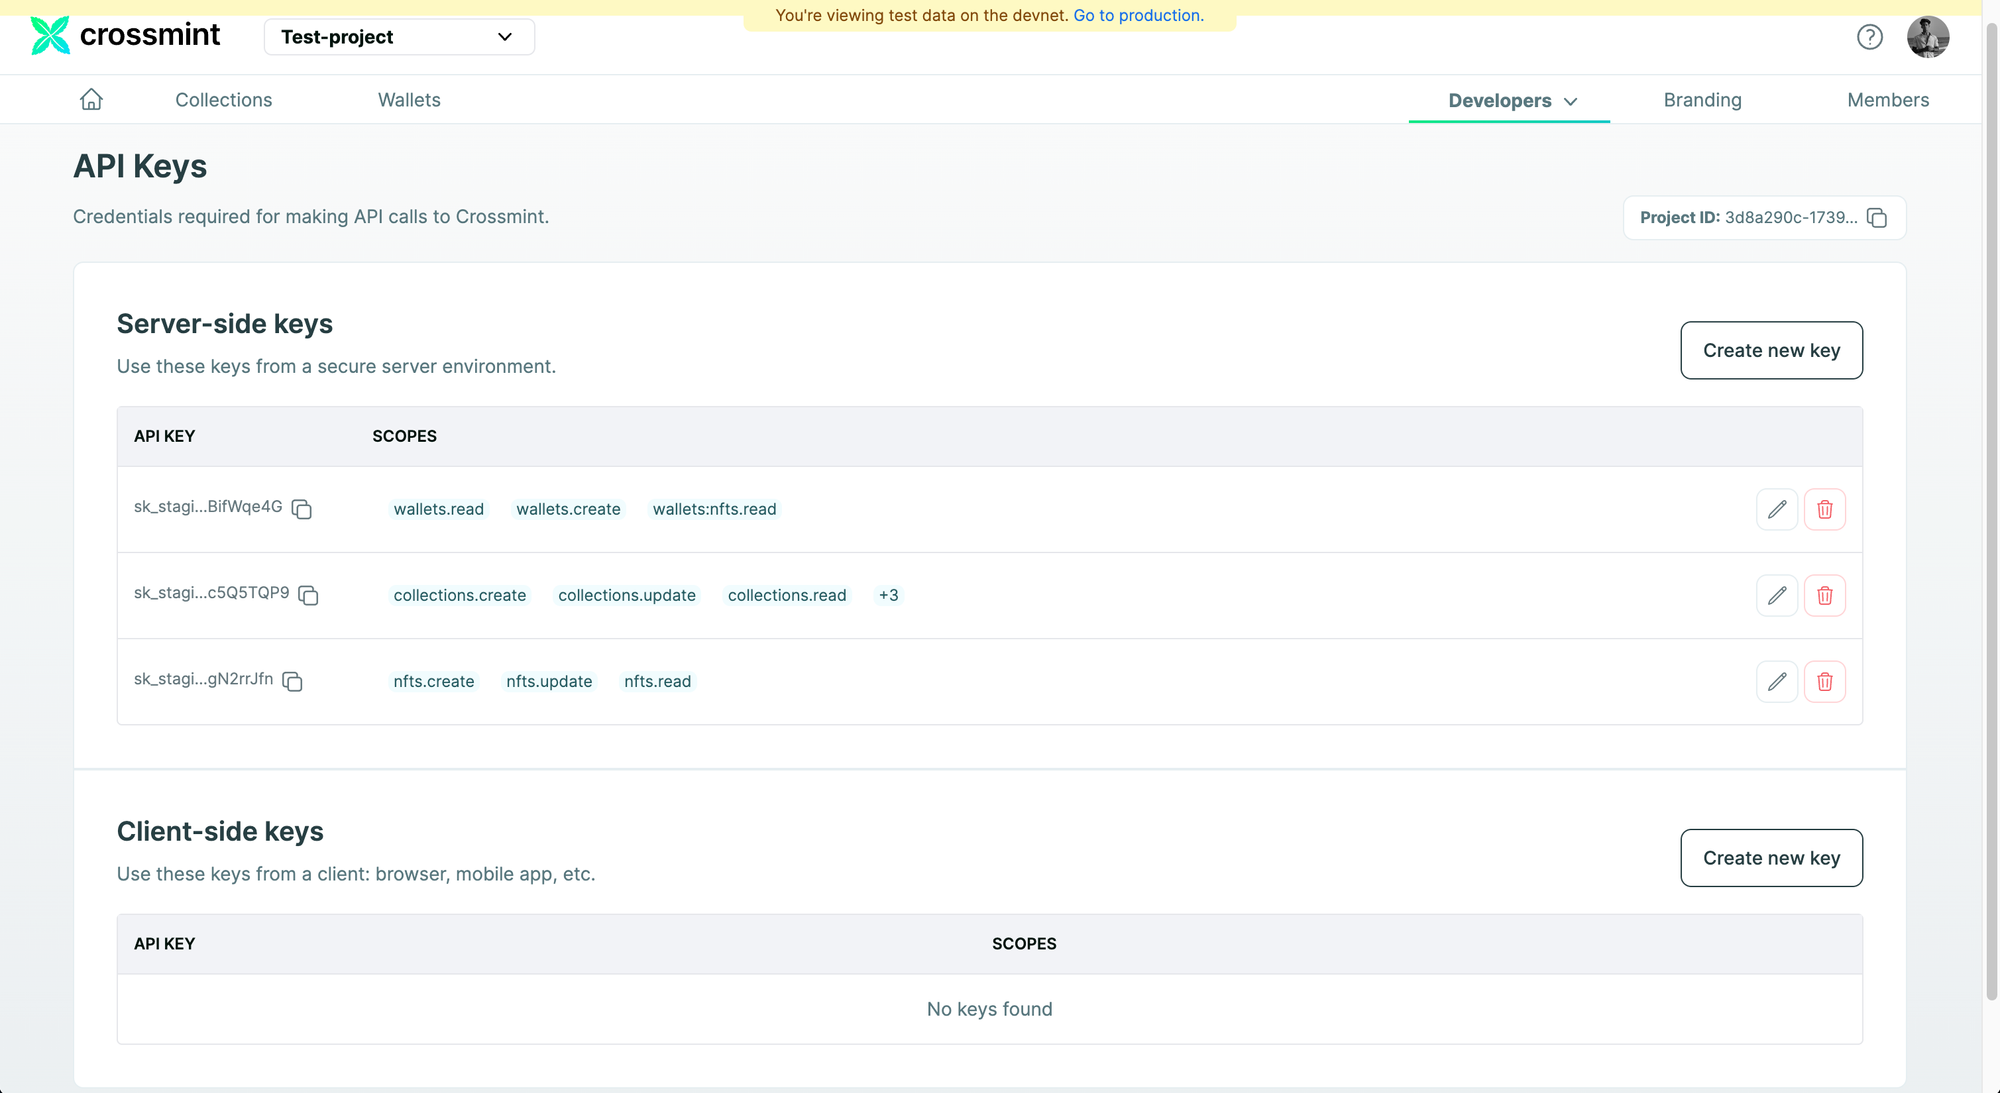
Recommended Scopes for your API Key:
- nfts.create
- nfts.read
- collections.create
- collections.update
- collections.read
If you're unsure about the process of creating an API Key on Crossmint, or if you need more detailed instructions, consider referring to the tutorial below. This will guide you through each step, ensuring you successfully generate an API Key with the appropriate scopes for your project.
Create an NFT Collection on Astar zkEVM
To create an NFT Collection on Astar zkEVM, you'll be employing the Create Collection API provided by Crossmint.
Note: This tutorial will be using Crossmint's Staging Console. It is strongly advised to practice and become comfortable with the operations on the Staging Console before proceeding in the Production environment. You can access the Production Console here
Use the code snippet shared below to create the NFT Collection.
const options = {
  method: "POST",
  headers: {
    "X-API-KEY": "<api-key>"",
    "Content-Type": "application/json",
  },
  body: '{"chain":"zkatana","fungibility":"non-fungible","metadata":{"description":"Astar zkEVM NFT Collection","imageUrl":"https://solarplex-nft-frame.vercel.app/nft.png","name":"Astar Collection"},"payments":{"price":"0.0001","recipientAddress":"0xCbE80A330F5221ac28392933BdeE65f1F2dAb834"}}',
};

fetch("https://staging.crossmint.com/api/2022-06-09/collections/", options)
  .then((response) => response.json())
  .then((response) => console.log(response))
  .catch((err) => console.error(err));
- X-API-KEY - You can get this from Crossmint's Developer Console.
Replace "<api-key>" with the API Key you created using the Developer Console.
For example:
'X-API-KEY: sk_staging_5ekzWyM7WTTTCB3iw5WFPfZuWif5wZCarQadyboR3oXKLbKstWrYMM'Note: It's crucial to keep your API Keys, projectId, and collectionId confidential. Revealing these details can lead to unauthorized use that may incur costs or alterations to your NFT Collection. Although these values are shown for educational purposes in this tutorial, always practice secure handling of sensitive information, especially in Production environments.
- chain - The Blockchain in which you want to create the NFT Collection. In this case, you need to pass the value as "zkatana" (As shown in the sample code snippet). You can refer to our docs here to see the chain slugs for different blockchains.
- fungibility - Set this to "non-fungible" to indicate that the collection will contain NFTs, which are unique and not interchangeable (fungible).
- description - Provide a short description of your NFT Collection.
- imageURL - Include the direct link to the cover image of your NFT Collection. This should be a URL.
- name - Name of your NFT Collection.
Note: Astar zkEVM is an EVM compatible blockchain. You can use your normal EVM wallet address for operations within this chain.
Once you've filled out all necessary fields and configured your code correctly, execute the snippet.
If the process is successful, you'll receive an output similar to the provided example below, confirming the successful creation of your NFT Collection on Astar zkEVM using Crossmint.
If you received an error or a different output, you can refer to our docs here to learn more about the Create Collection API and how to use it. You can also view the complete Create Collection API reference here.
{
  id: '4c2f6b61-5709-4b78-851d-c1284a67e8f9',
  metadata: {
    name: 'Astar Collection',
    description: 'Astar zkEVM NFT Collection',
    imageUrl: 'ipfs://QmS2pv5FRAEZ2iuxaZxWCWpi1P92ddQJDzT7D5WieRcRbt'
  },
  fungibility: 'non-fungible',
  onChain: { chain: 'zkatana', type: 'erc-721' },
  actionId: '4c2f6b61-5709-4b78-851d-c1284a67e8f9'
}
Please note the value of "actionId" returned. This can be used to check the status of the collection creation by using this API.
For example, in my case, the "actionId" returned was "4c2f6b61-5709-4b78-851d-c1284a67e8f9".
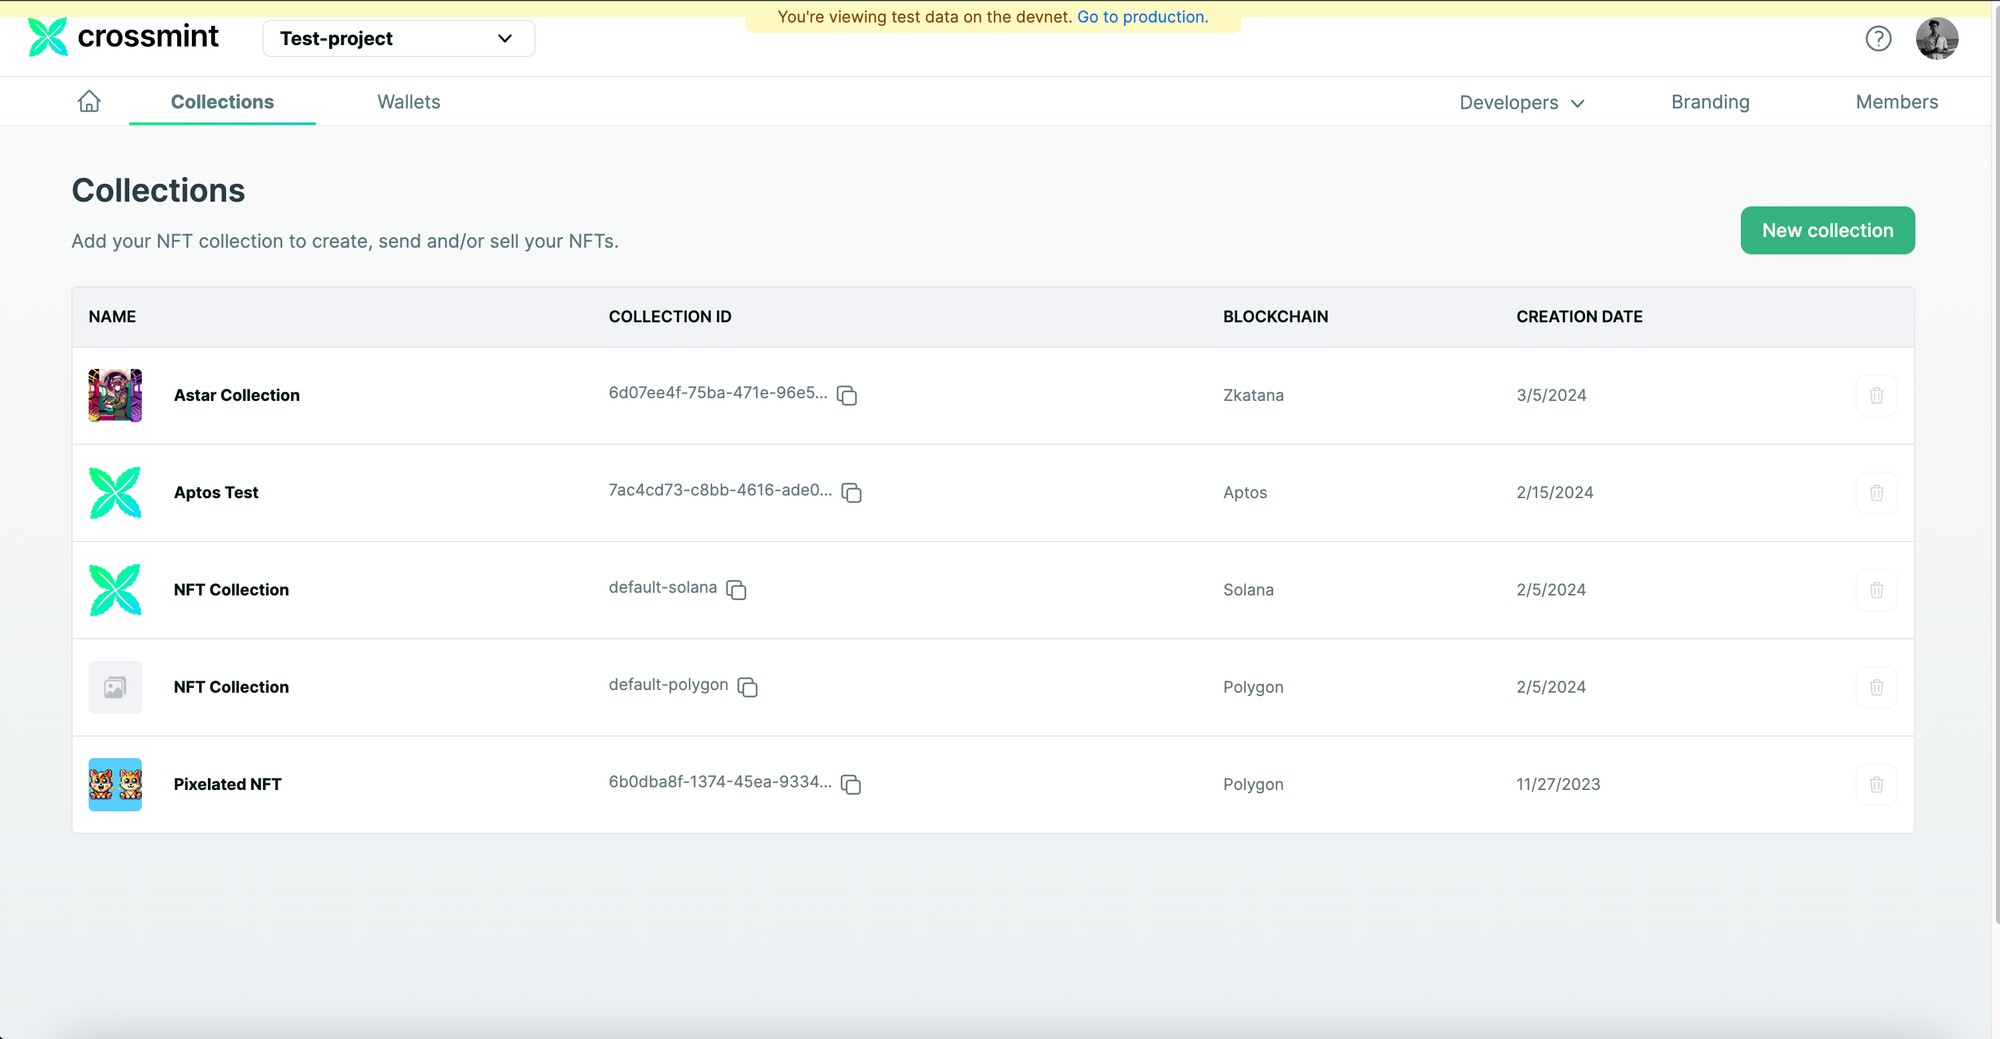
After the NFT Collection is created, you can go to Crossmint Console and you will be able to see the NFT Collection along with its Collection Id. In my case, the name of the collection is "Astar Collection".
Create and Mint an NFT on Astar zkEVM using No-code
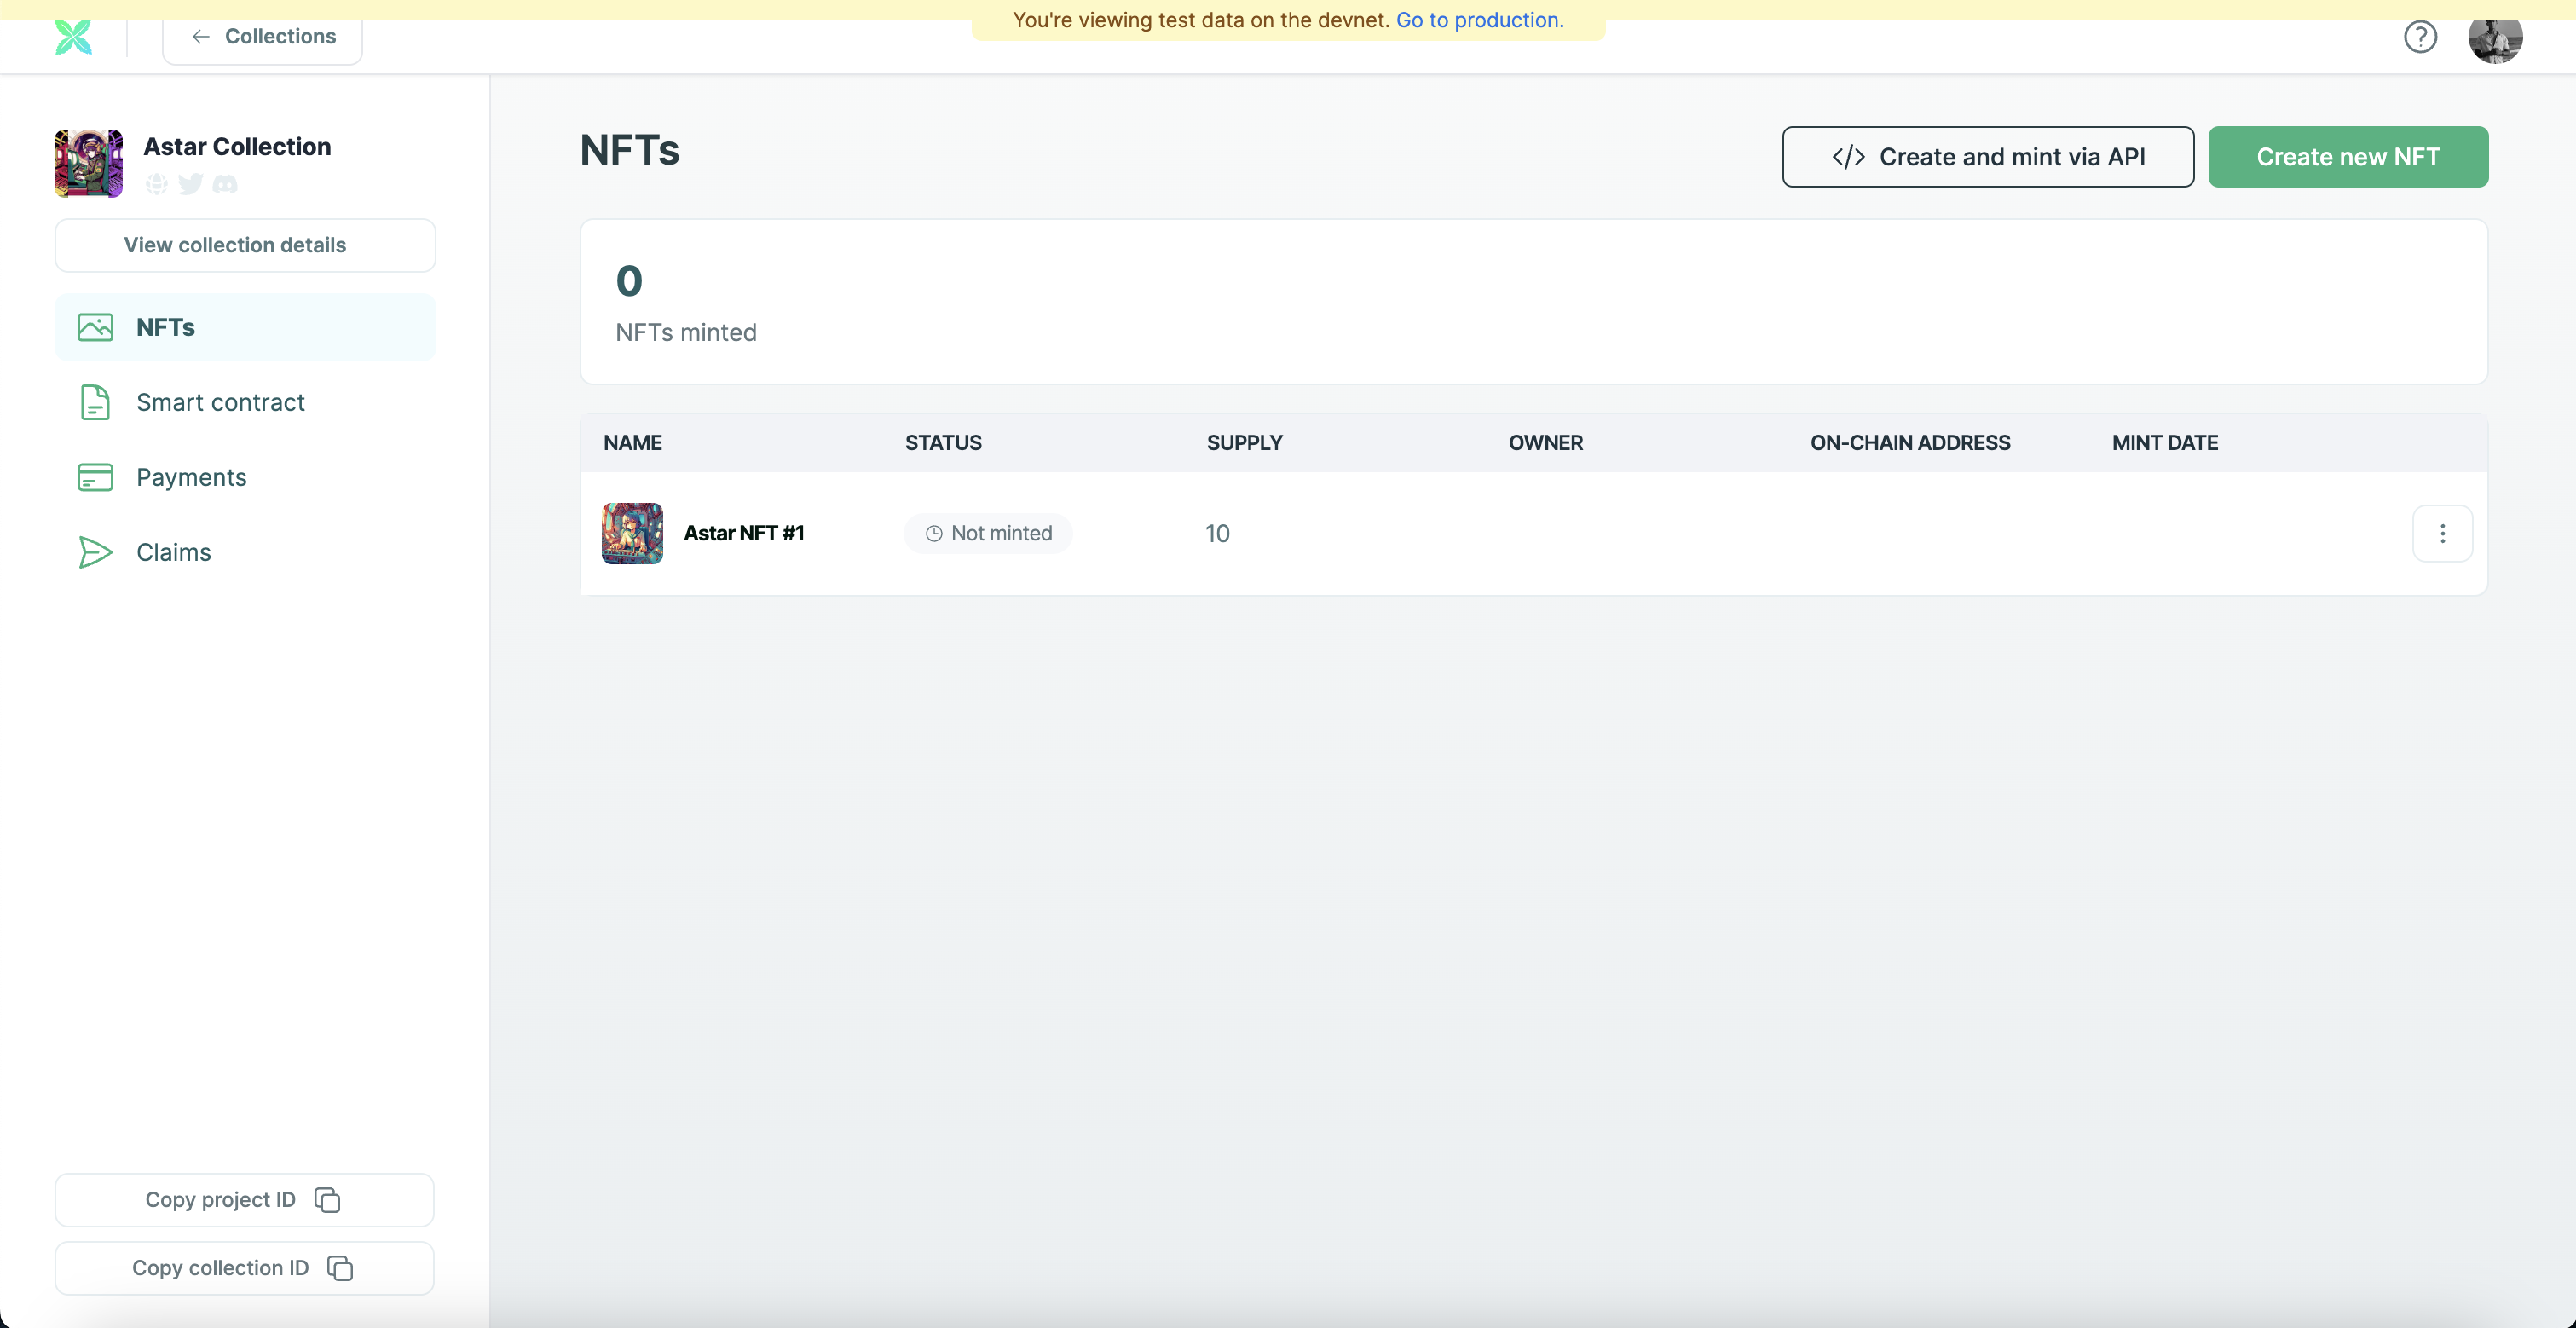
Now, click on the collection you just created (on Crossmint Console). You will be able to see that there are no NFTs on your collection.
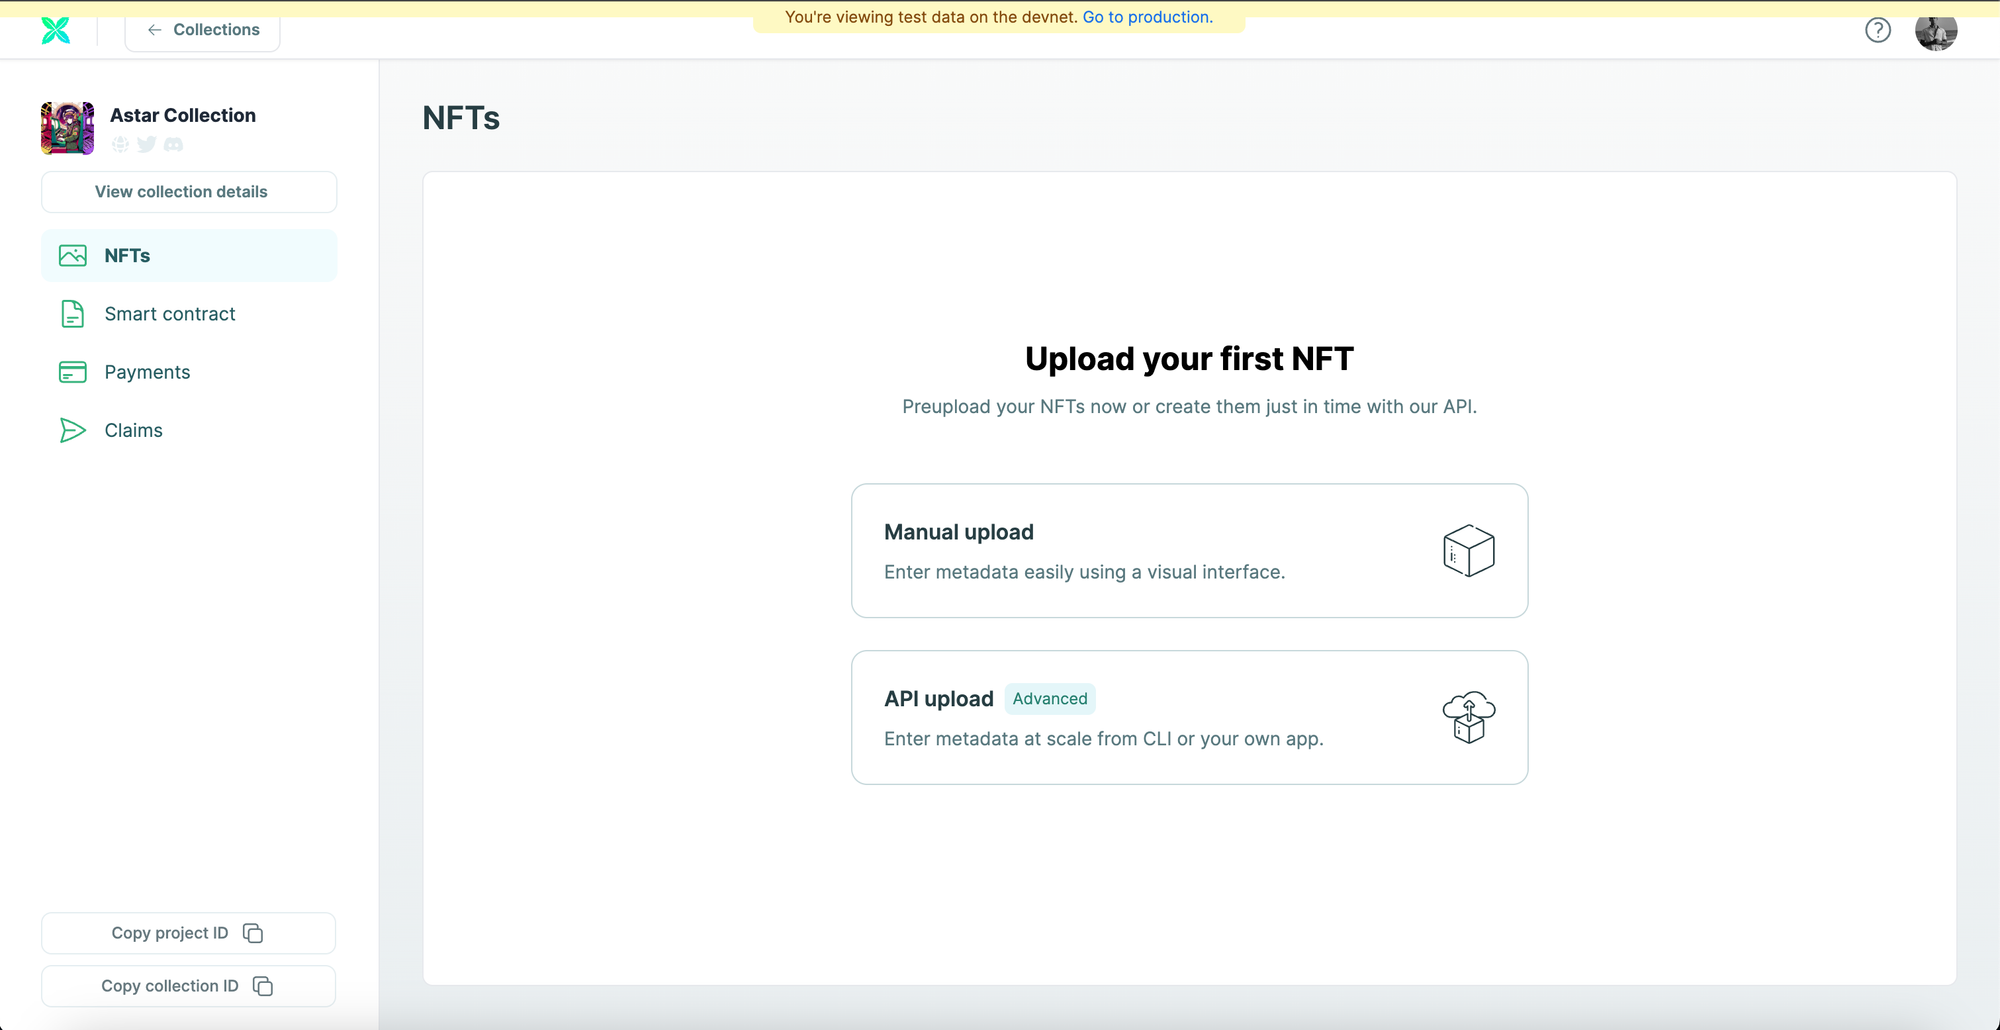
You can now create a new NFT either directly from the Console using the "Manual upload" option or you can use the "API upload" option to create NFTs using a CLI.
For this tutorial, we will be using the "Manual upload" option. So click on "Manual upload" to proceed.
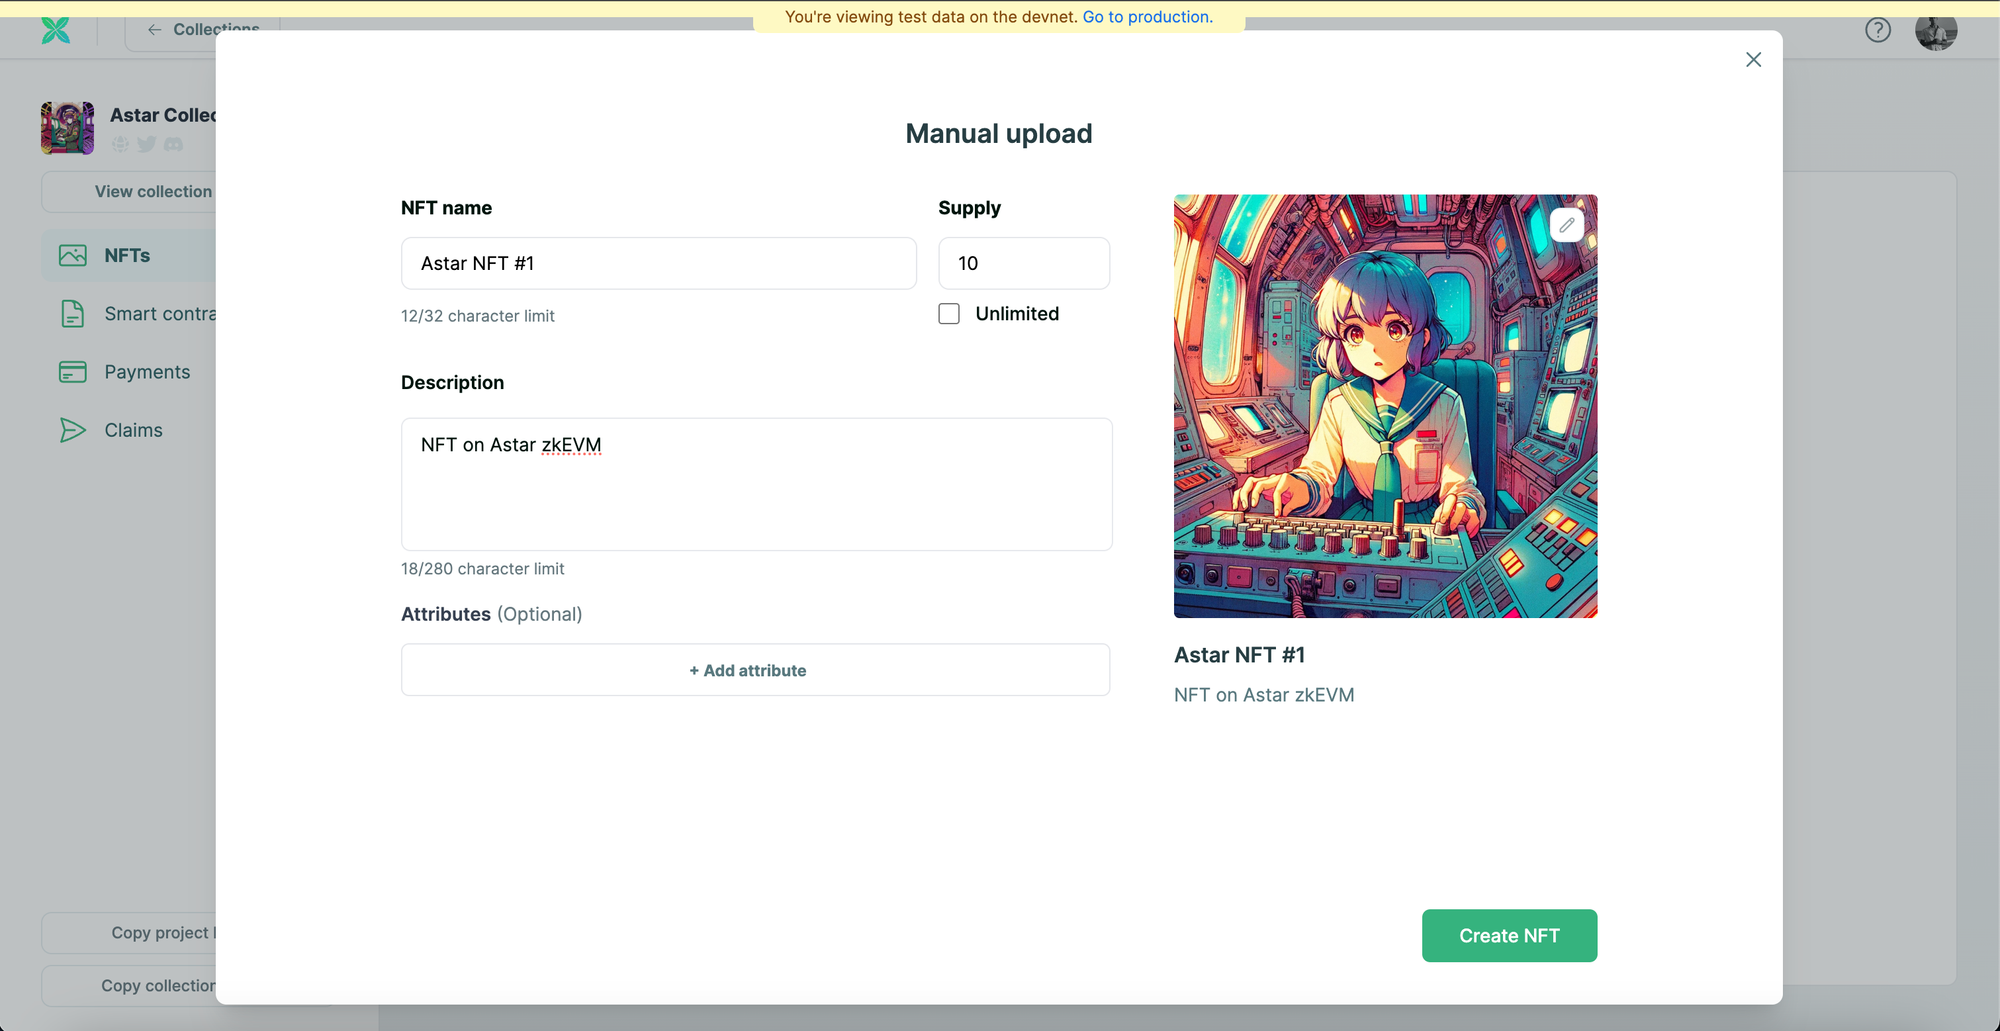
Enter the NFT details such as the "NFT name", "Supply" and "Description". You also need to upload the NFT image or media file. Once you have done this, click on "Create NFT" and the NFT will be created.
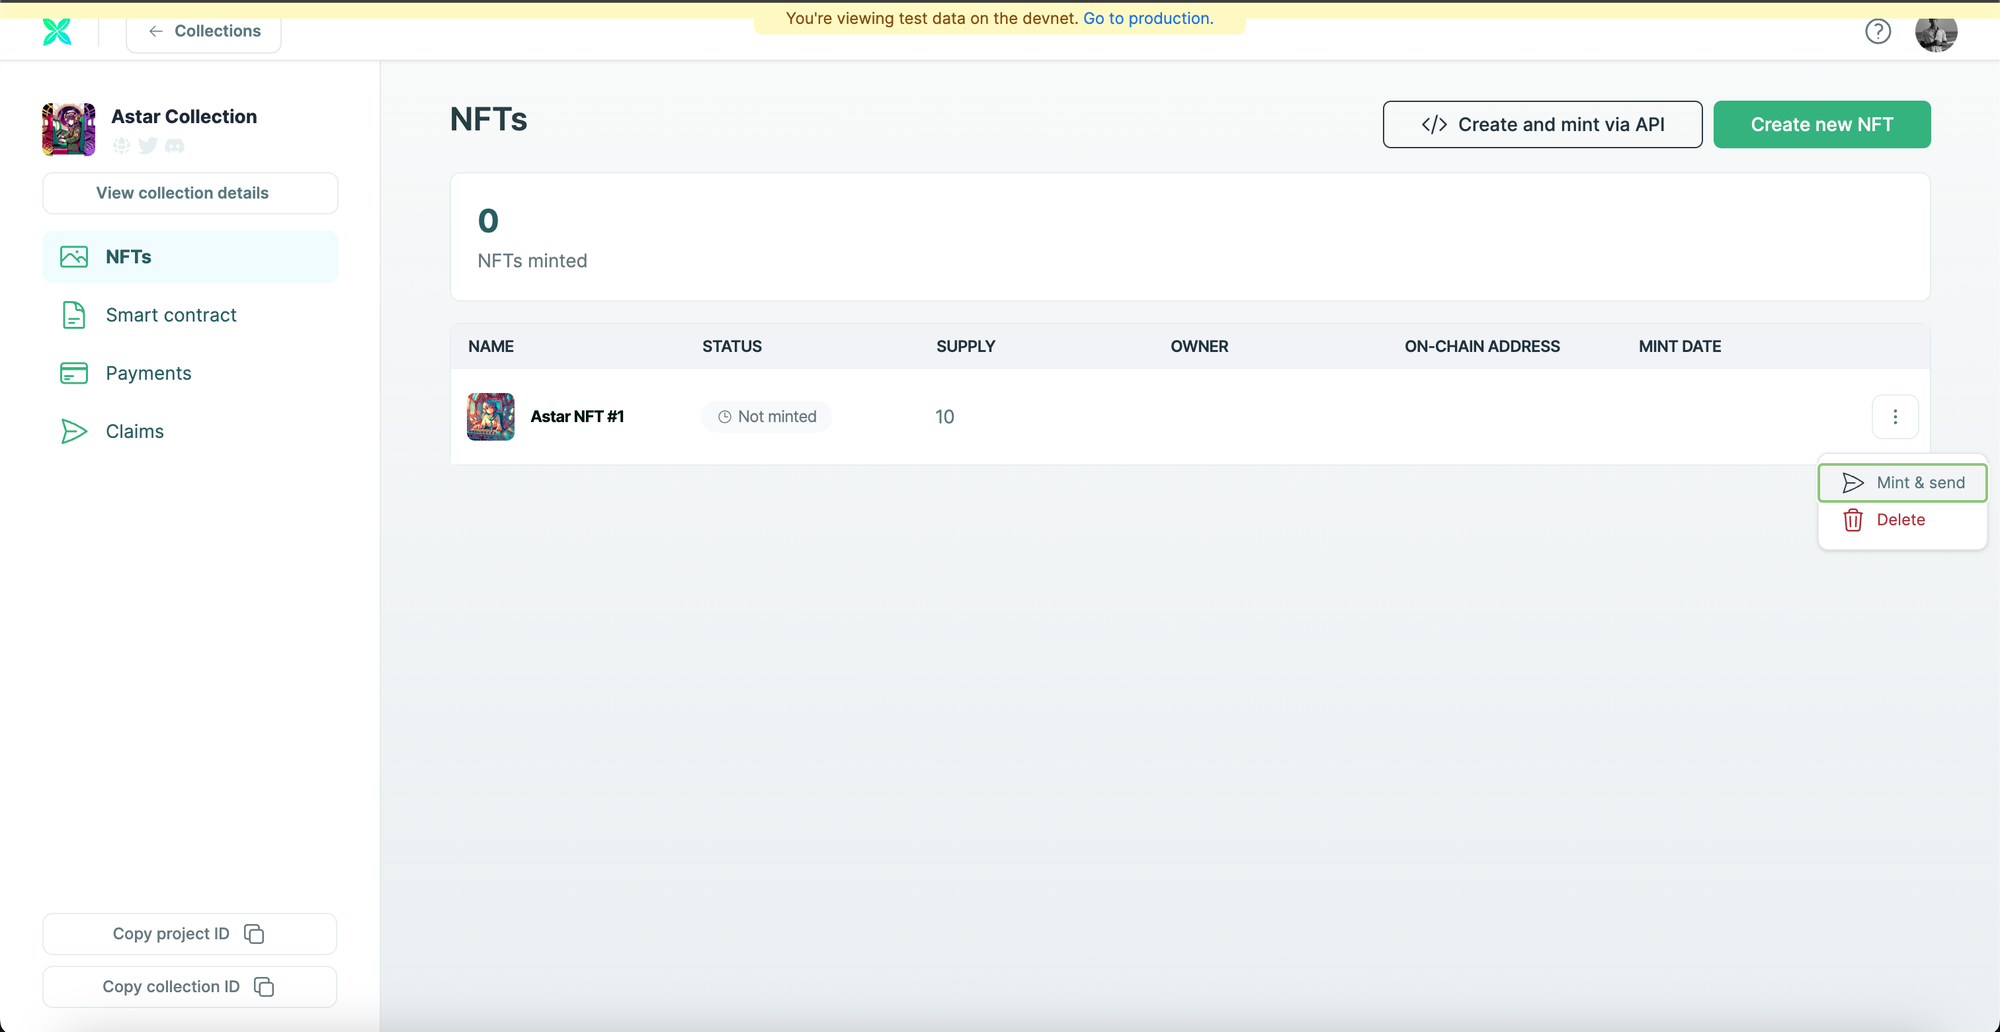
Click on the three dots next to the NFT you just created, click on "Mint & send".
Now, you can either send the NFT to an email address or send it to a wallet address. When you send it to an email address, Crossmint creates a custodial wallet for that email address and then sends the NFT to that wallet. The user can login into Crossmint Wallet using the same email address and can view the NFT there.
You can also send it to an EVM wallet address and the user should receive the NFT directly on their wallet.
Enter the recipient address and click on "Mint".
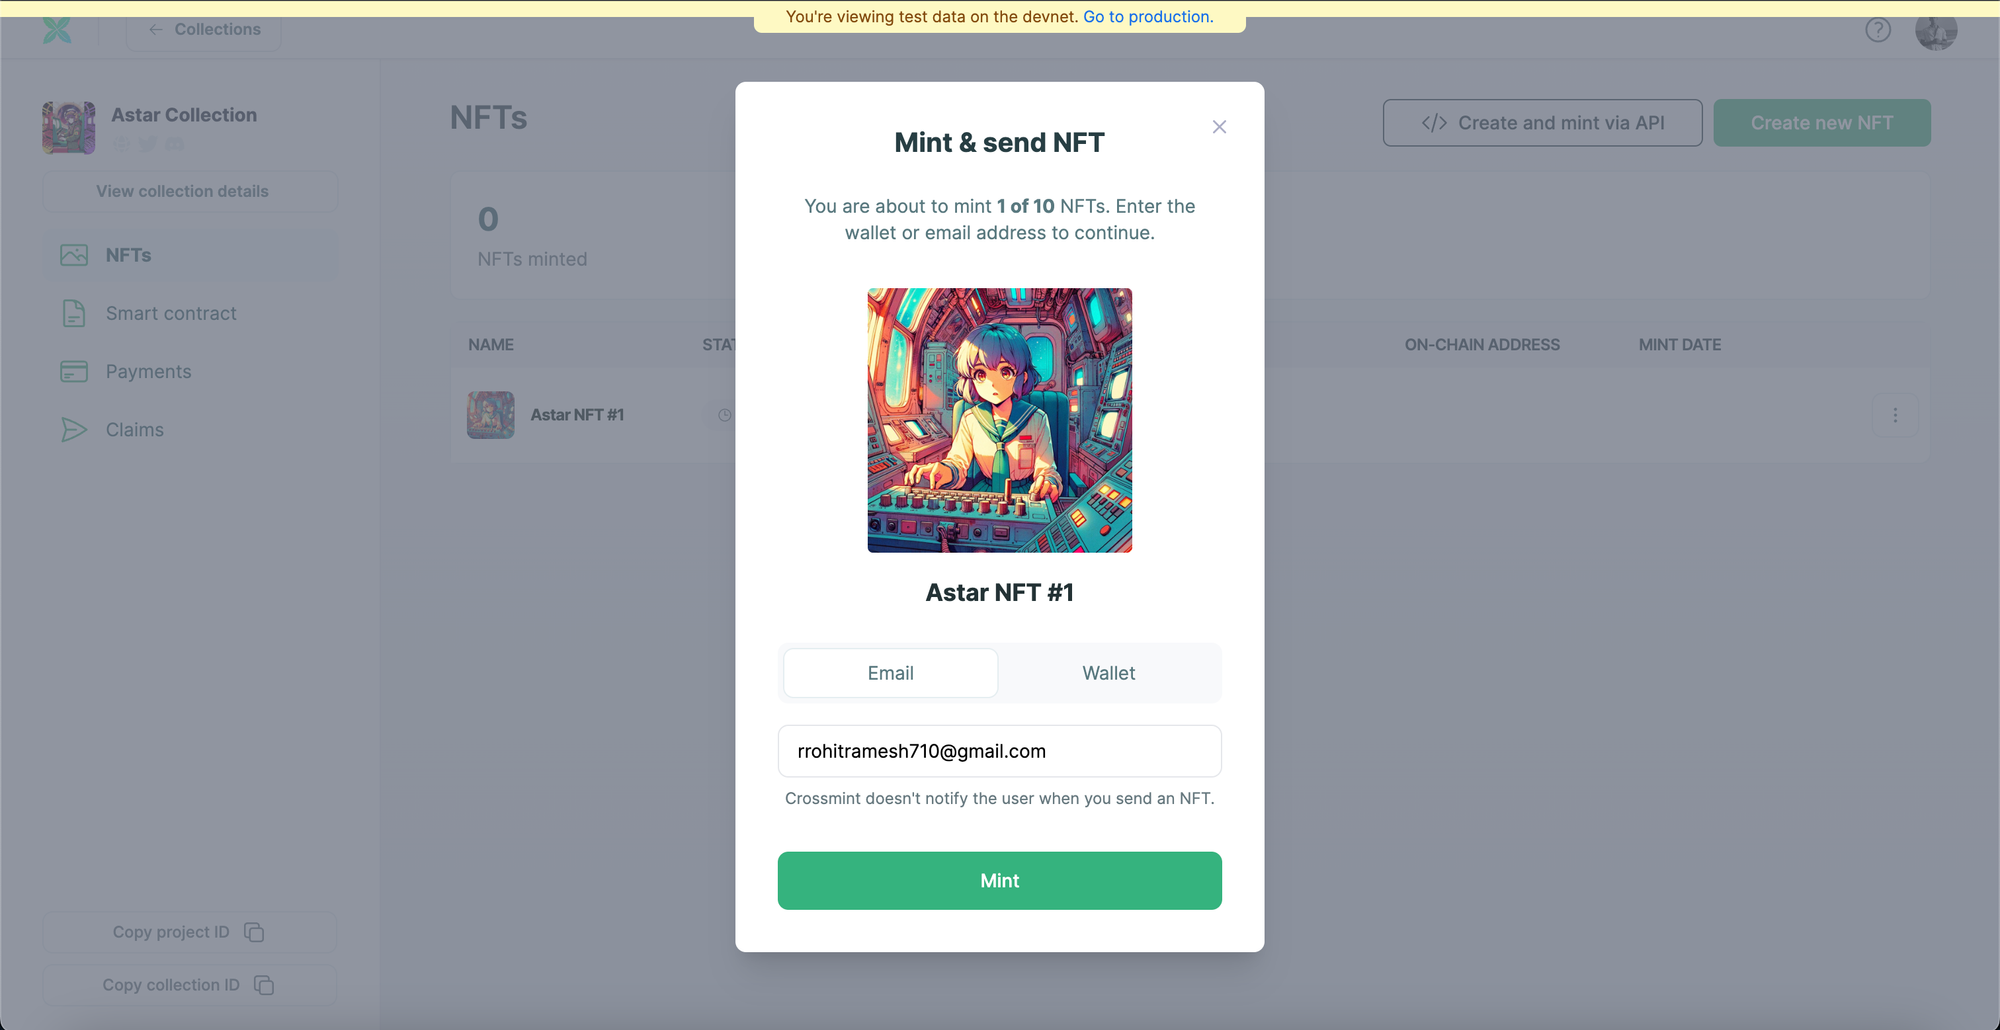
The recipient should then receive this NFT.
Create and Mint an NFT on Astar zkEVM using API
To mint an NFT within your collection on Crossmint, the Mint API serves as a versatile tool, enabling you to create, mint, and distribute NFTs swiftly—in less than 5 minutes.
Behind the scenes, Crossmint's Mint API
- Automatically deploys a smart contract for your NFT and establishes an NFT Collection if one doesn't already exist.
- Ensures your metadata is correct and uploads it to decentralized storage, such as IPFS, for permanence and accessibility.
- Allows the minting of NFTs on your choice of blockchain platforms, including Polygon, Ethereum, Arbitrum, Solana, Aptos and others, broadening your NFT's reach and compatibility.
- If you're minting an NFT to an email address, Crossmint creates a dedicated NFT wallet for the recipient. This wallet is accessible through Crossmint.com by logging in with the email provided, simplifying ownership and access for users new to NFTs.
- Seamlessly sends/mints the minted NFT to the specified wallet.
In order to mint an NFT inside your NFT Collection using the Mint API, use the code snippet below.
const options = {
  method: "POST",
  headers: {
    "X-API-KEY": "<api-key>",
    "Content-Type": "application/json",
  },
  body: '{"metadata":{"description":"NFT on Astar zkEVM","name":"Astar NFT #2","image":"https://solarplex-nft-frame.vercel.app/nft.png"},"recipient":"zkatana:0xCbE80A330F5221ac28392933BdeE65f1F2dAb834"}',
};

fetch(
  "https://staging.crossmint.com/api/2022-06-09/collections/{collectionId}/nfts",
  options
)
  .then((response) => response.json())
  .then((response) => console.log(response))
  .catch((err) => console.error(err));
- To mint an NFT within your NFT Collection utilizing Crossmint's Mint API, it's essential to replace the placeholder api-key in the provided code snippet with the actual API Key you obtained from the Developer Console.
- collectionId - This identifier is unique to your NFT Collection and can be found within your Developer Console. Refer to the attached screenshot below which will guide you in locating this value.
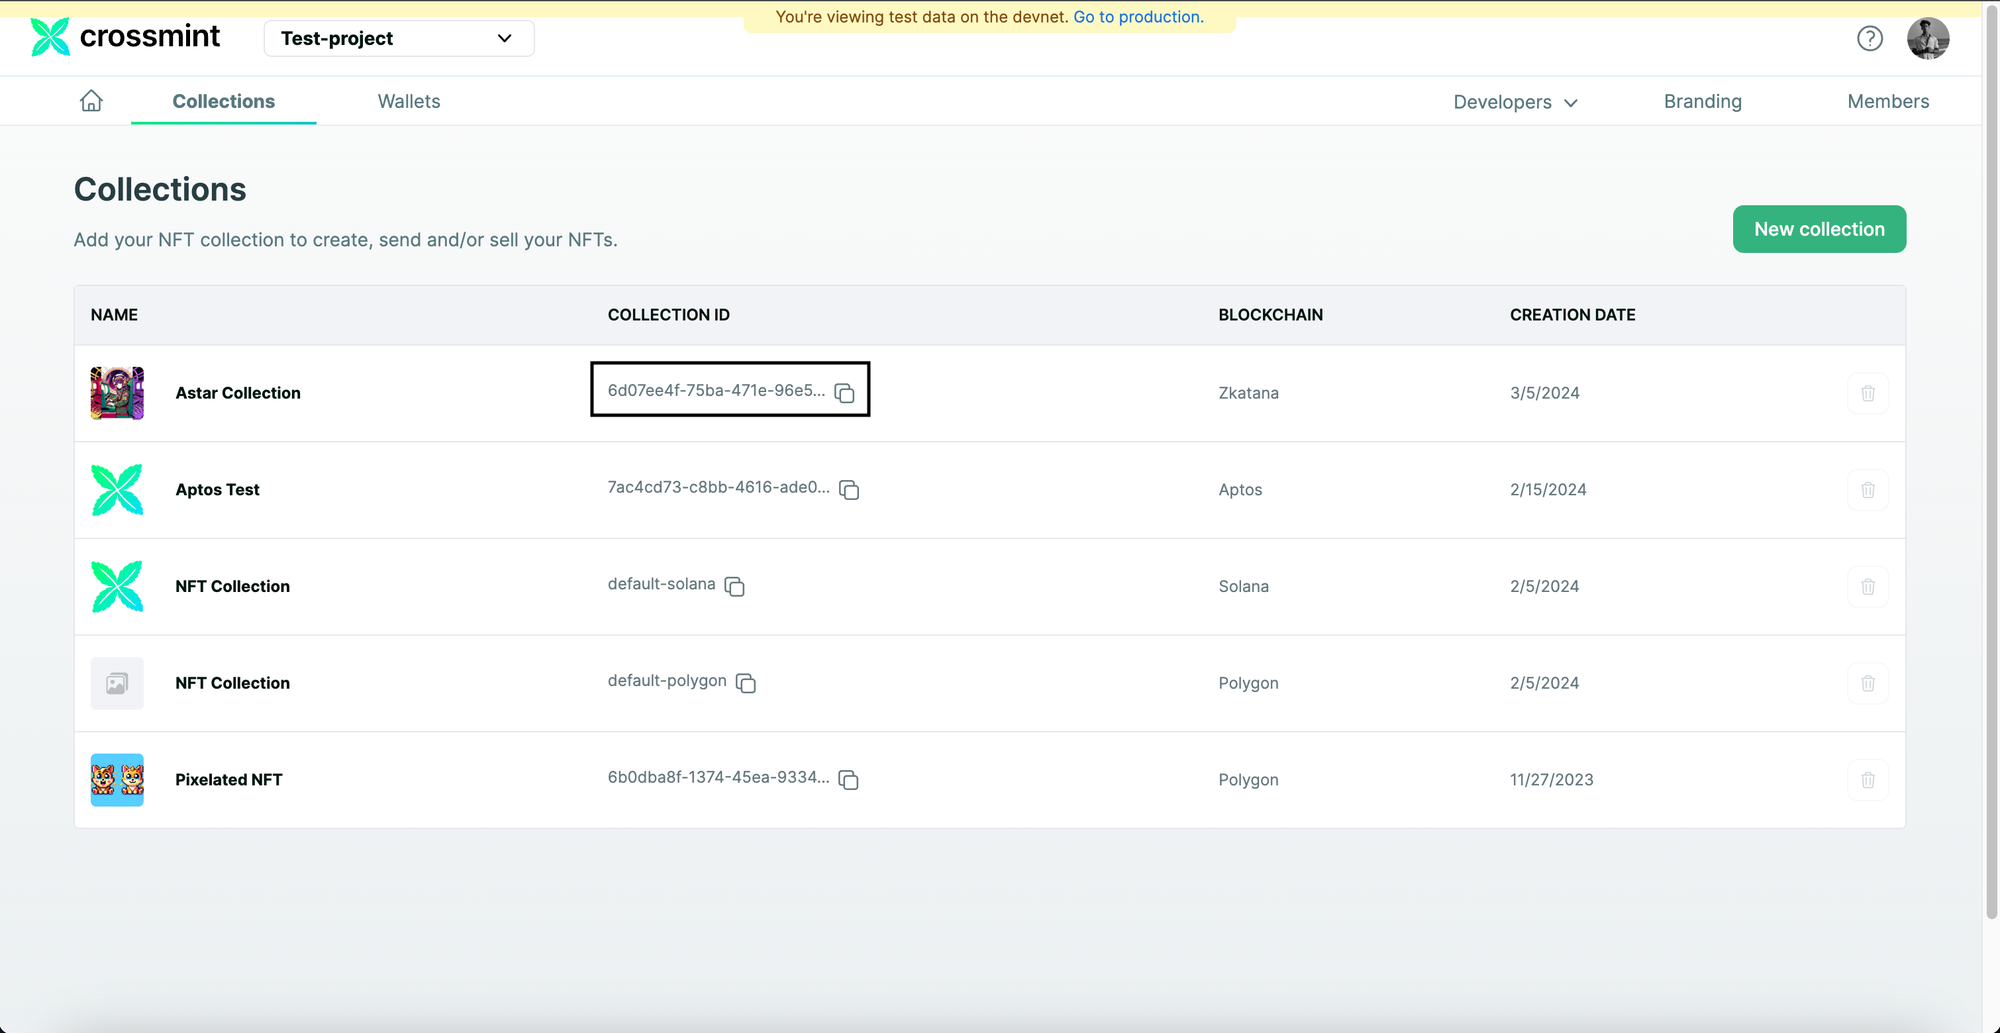
- Replace "{collectionId}" in the "url" with the value obtained from the Developer Console.
https://staging.crossmint.com/api/2022-06-09/collections/6d07ee4f-75ba-471e-96e5-bbb501822c97/nfts- description - A brief description of the NFT.
- image - Direct link to your NFT image. This is a URL.
- name - The name of your NFT.
- recipient - The EVM wallet address that the NFT should be sent to.
The recipient parameter needs to be formatted in this format, "<chain>:<address>" if you want to mint the NFT to a wallet address. If you want to mint the NFT to an email address, the recipient should be formatted as, "email:<email_address>:<chain>".
In my case, the value is "zkatana:0xCbE80A330F5221ac28392933BdeE65f1F2dAb834".
Once you've filled out all necessary fields and configured your code correctly, execute the snippet.
If the process is successful, you'll receive an output similar to the provided example below, confirming the successful creation of your NFT Collection on Astar zkEVM using Crossmint.
If you received an error or a different output, you can refer to our docs here to learn more about the Mint API and how to use it. You can also view the complete Mint API reference here.
{
  id: '756c81f4-7582-4f9b-a6ef-8d3140003f94',
  onChain: {
    status: 'pending',
    chain: 'zkatana',
    contractAddress: '0xA211B514A7d1AA51948db30bDe25e97e3E498602'
  },
  actionId: '756c81f4-7582-4f9b-a6ef-8d3140003f94'
}
Please note down the value of "actionId" returned. You can use this to check the status of the NFT creation and minting by using this API.
For example, in my case, the "actionId" returned was "756c81f4-7582-4f9b-a6ef-8d3140003f94".
View the Minted NFT
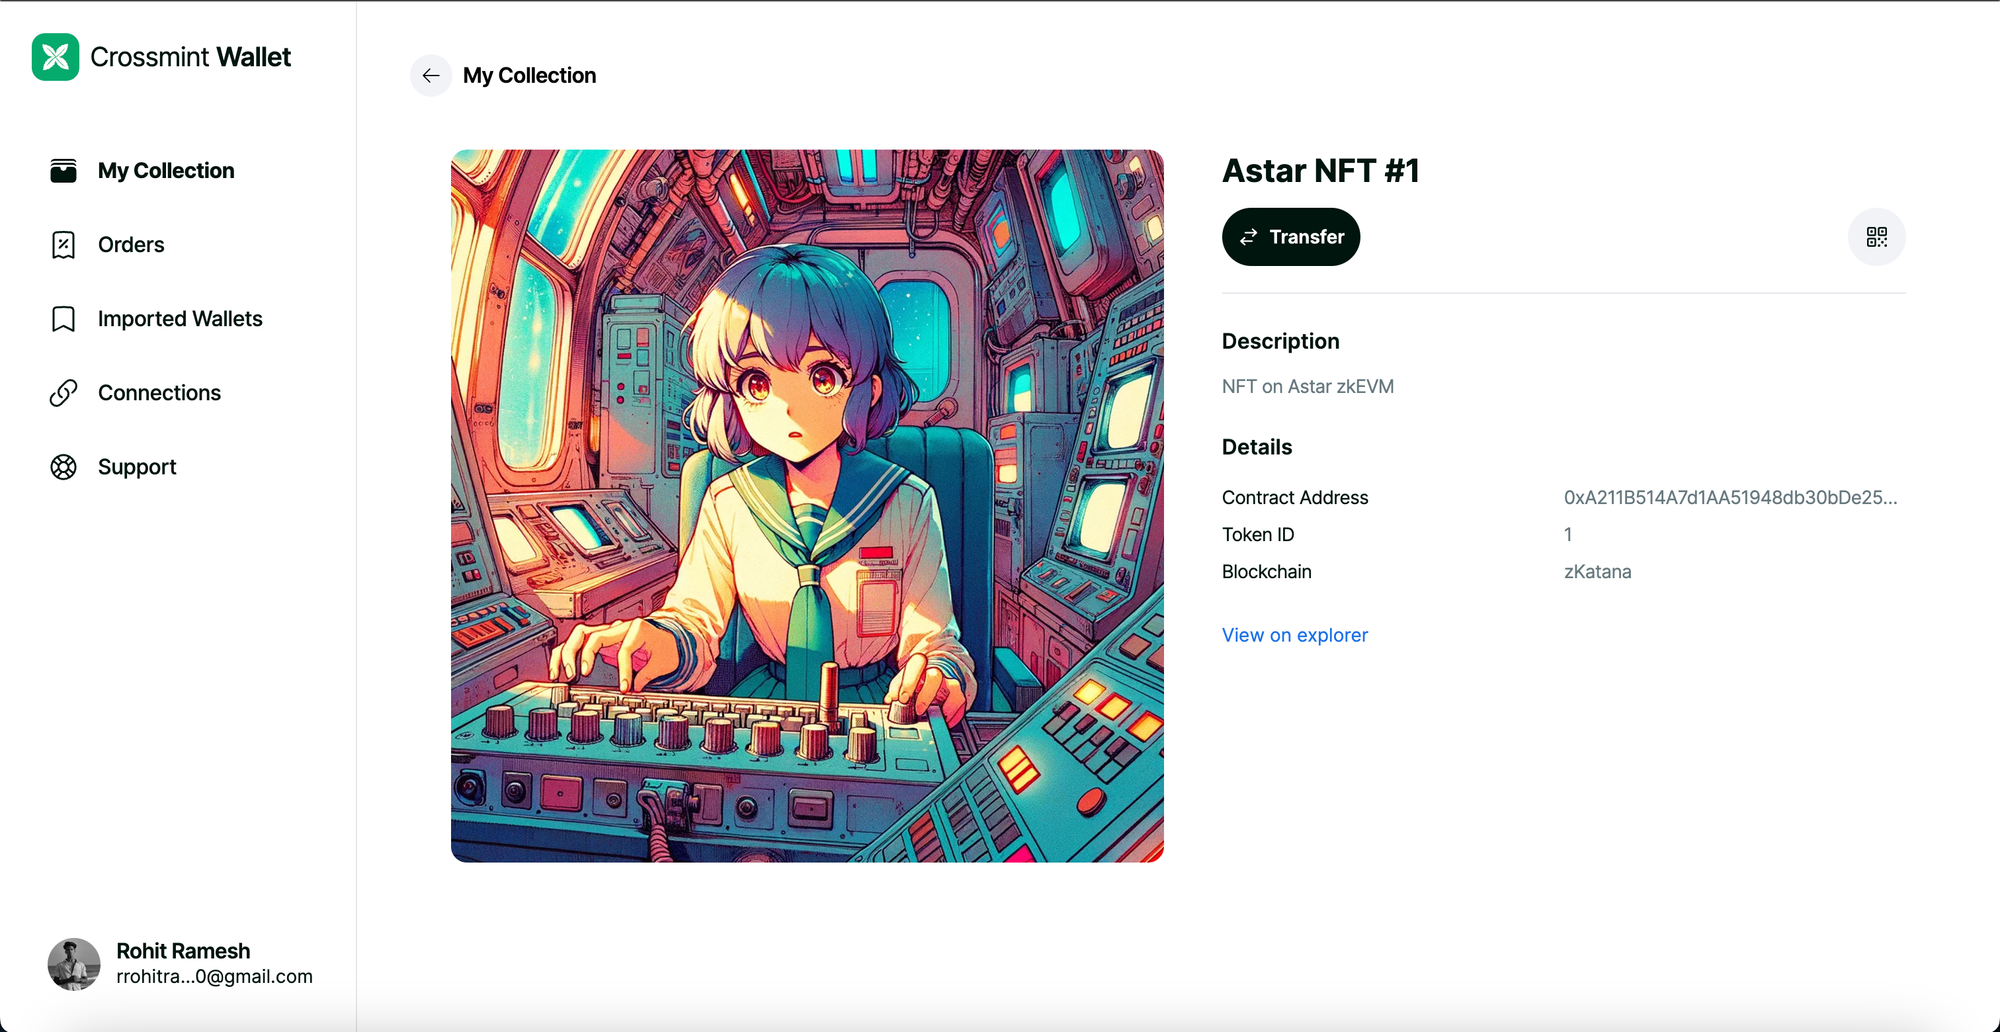
If you minted the NFT to an email address, please open Crossmint Wallet and login/sign up with the email address that you minted the NFT to.
Now, you will be able to find the NFT inside "My Collection".
If you minted the NFT to an EVM wallet address, you can use the Astar Block Explorer to view the NFT.
For Astar zkEVM (Mainnet), use this Block Explorer and for Astar zKatana (Testnet) use this.
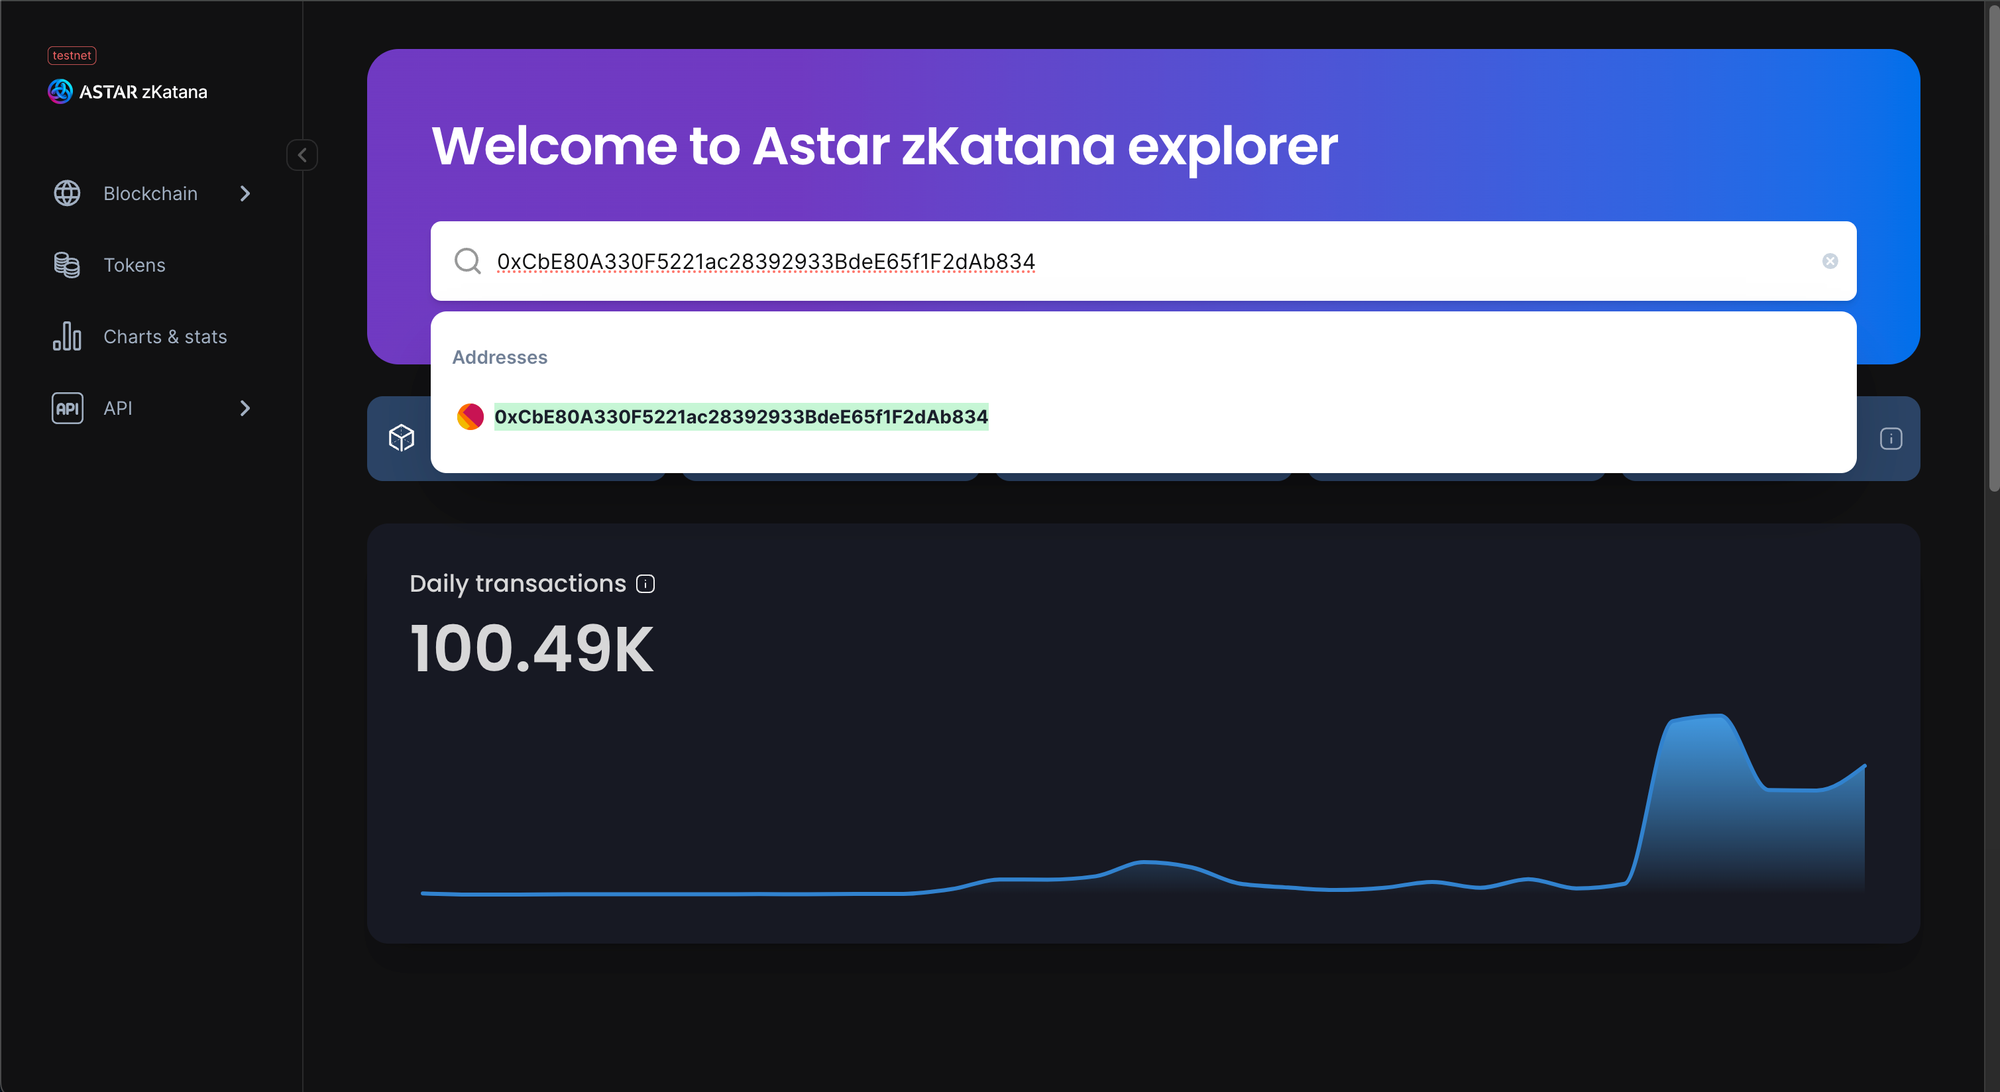
Since our deployed NFT Collection is on the Testnet, i.e., zKatana, we will use the Block explorer for zKatana. Click here to go to the Block Explorer.
Now, copy and paste your EVM wallet address that you minted the NFT to.
Click on the wallet address and you will be able to see more details about your address.
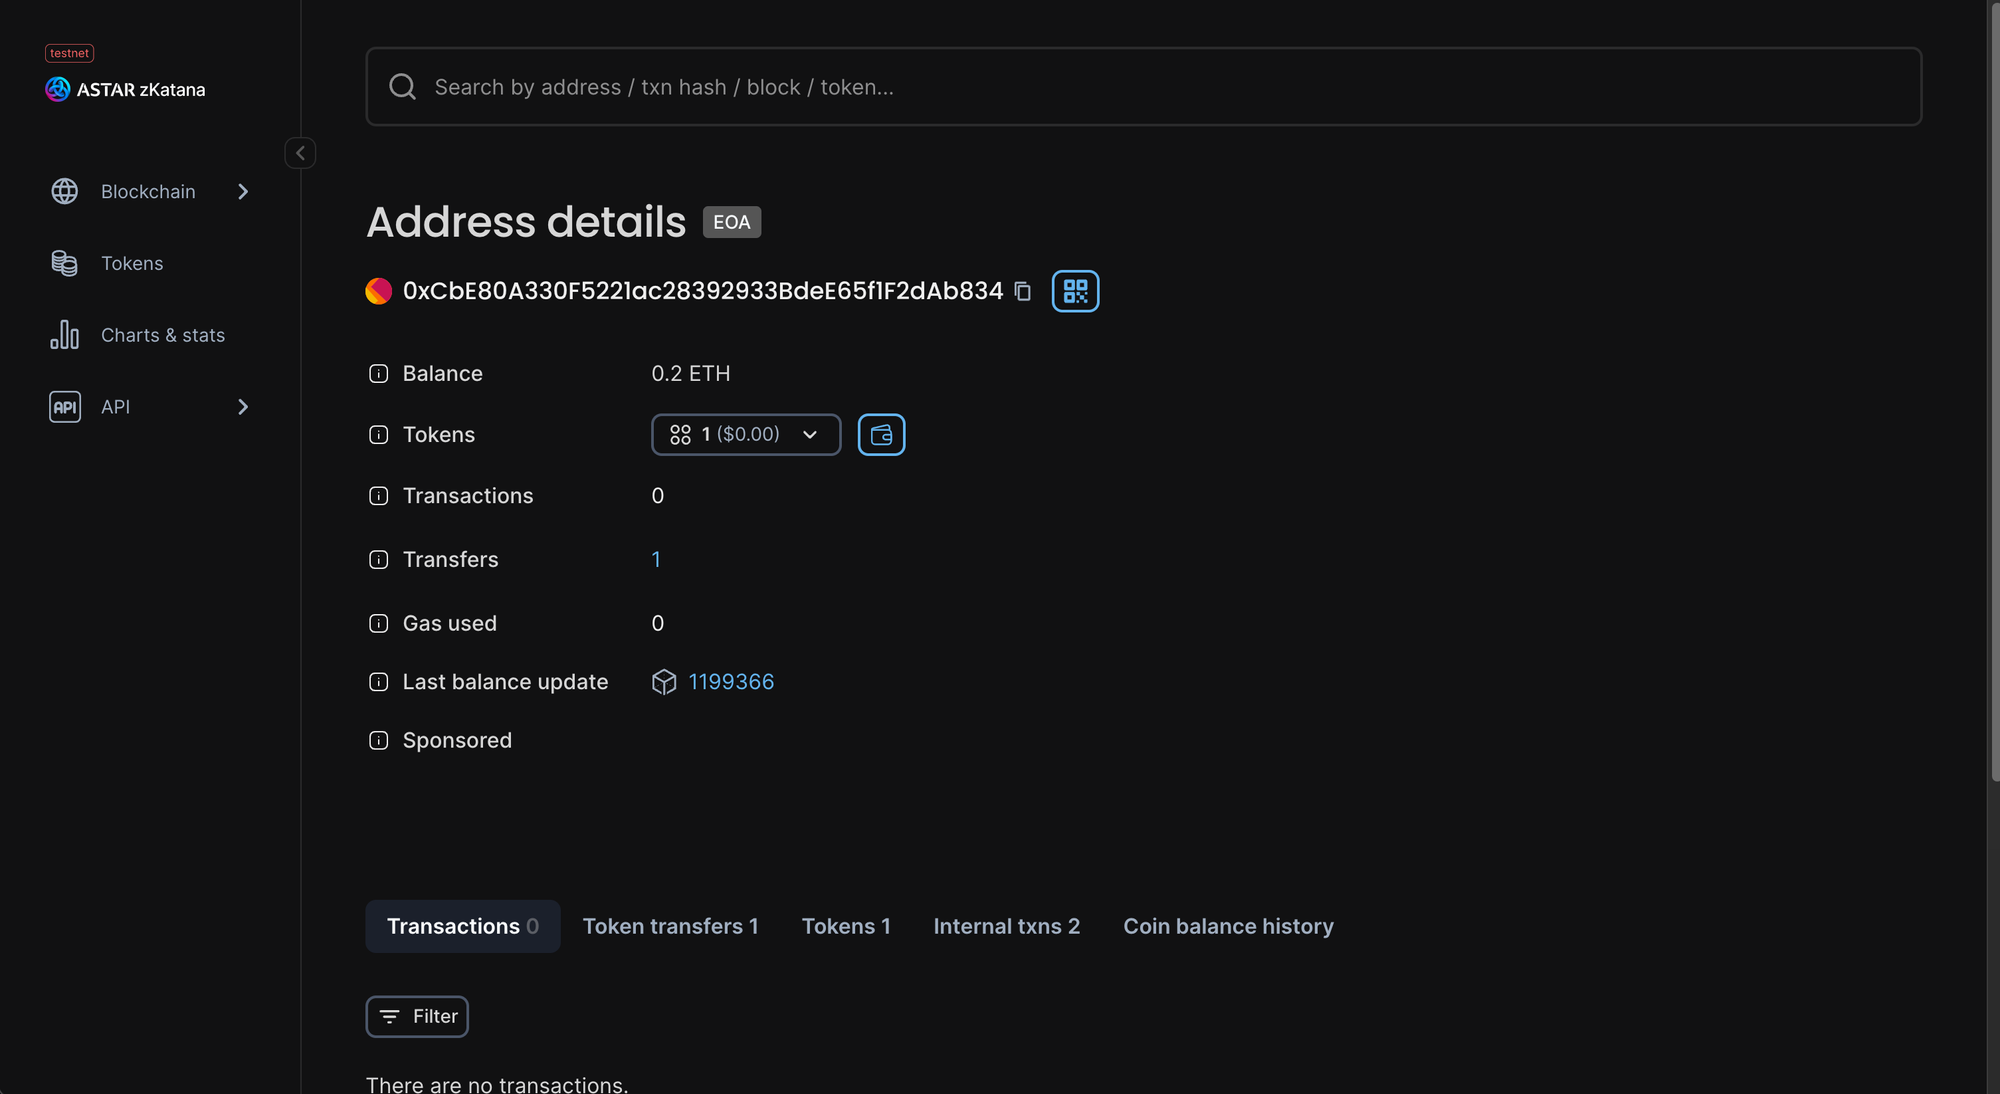
Click on "Tokens" and click on "ERC-721" to view all the ERC-721 tokens that your wallet owns.
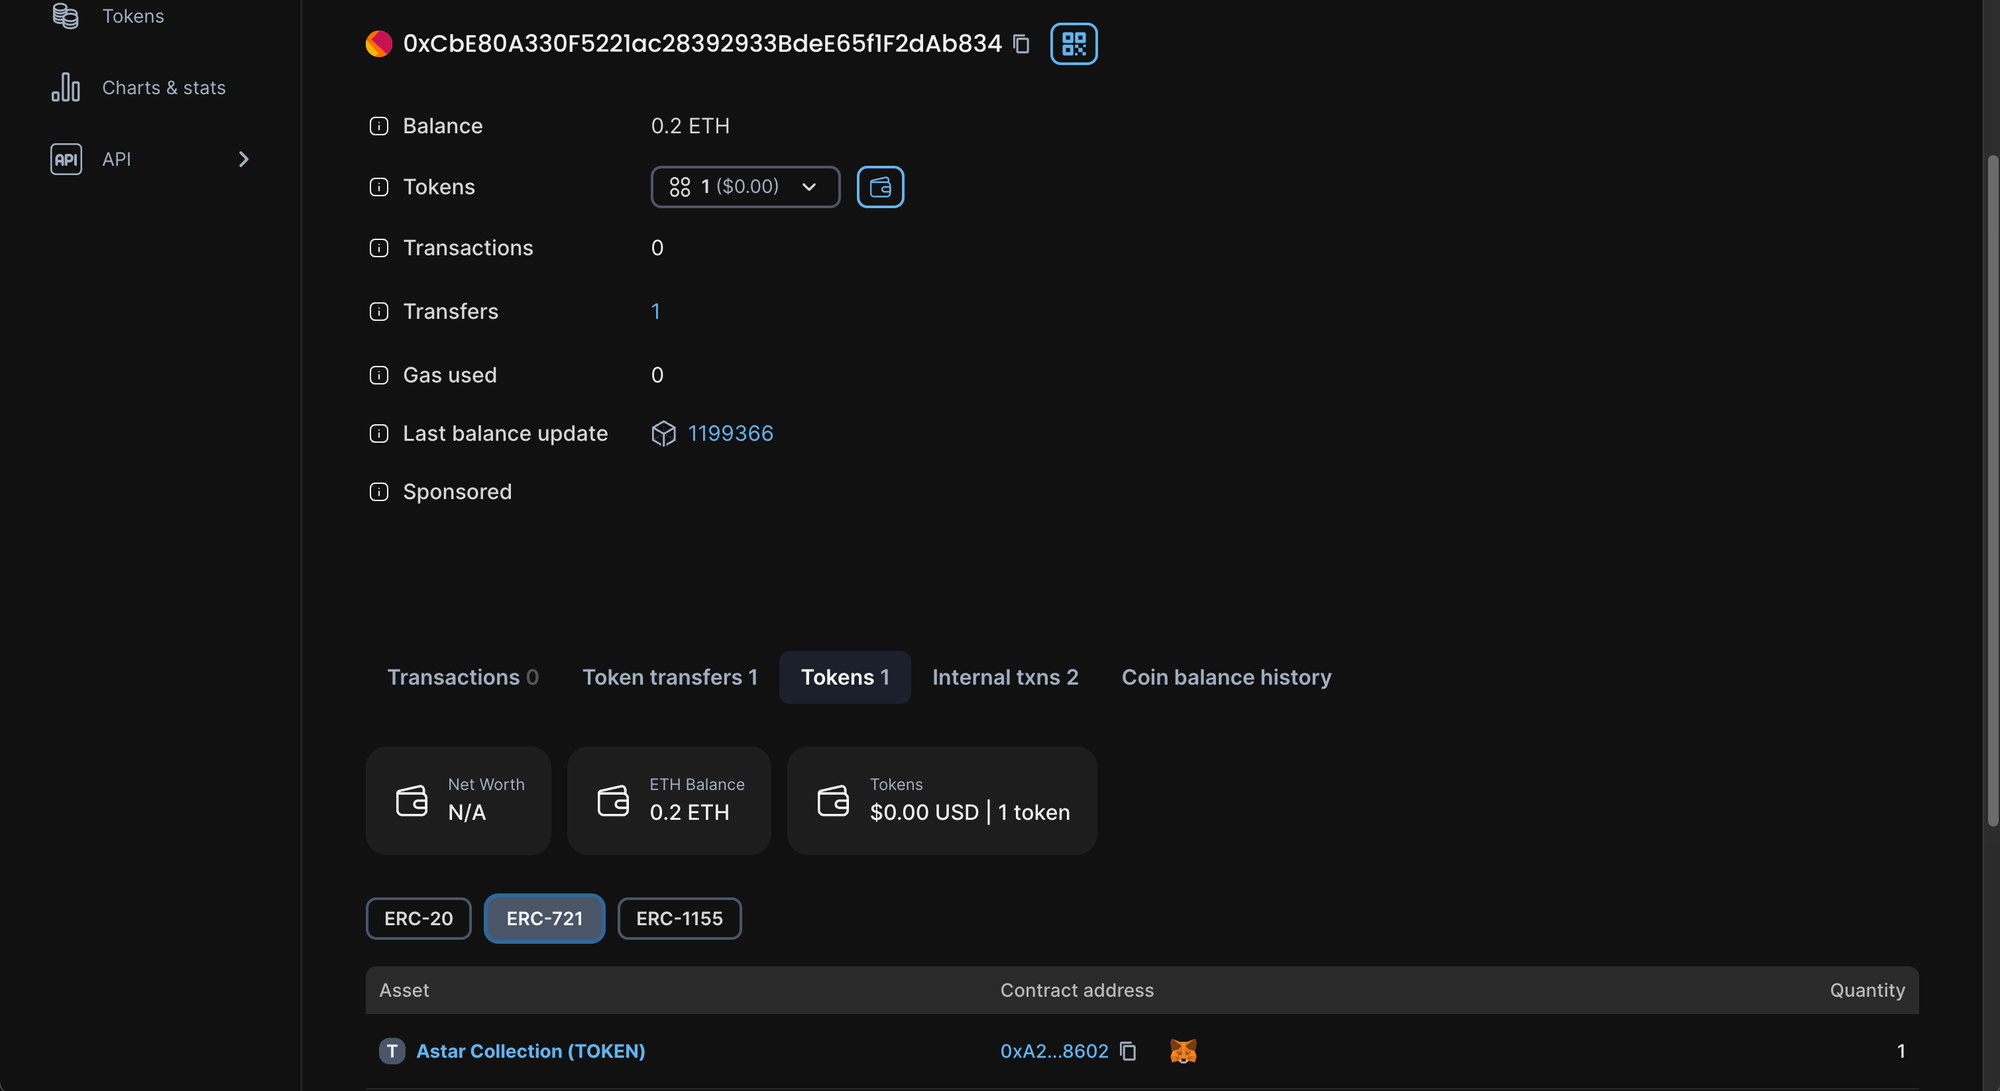
Click on the token to view more details. In this case, the Asset name is "Astar Collection".
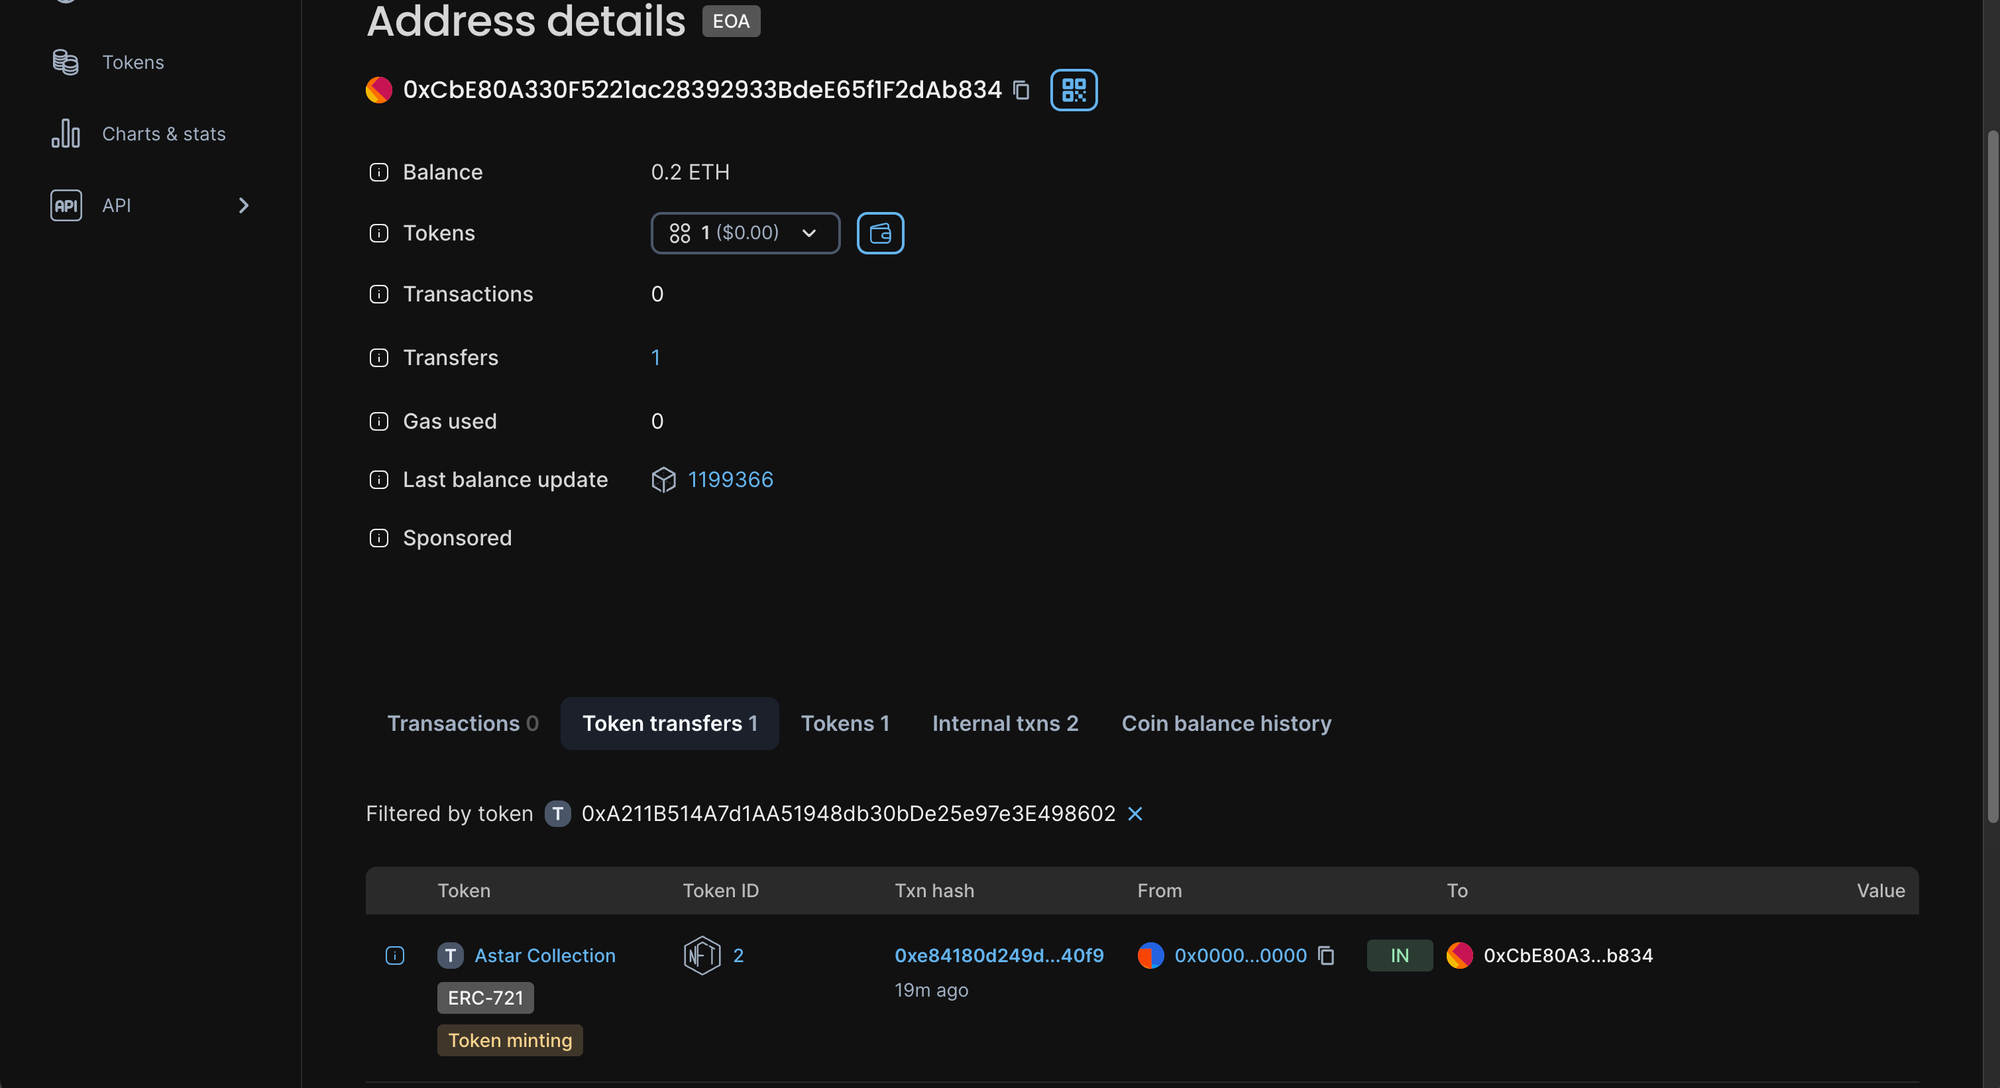
Now click on the Token Id. The Token Id of the NFT that I minted to this wallet is "2".
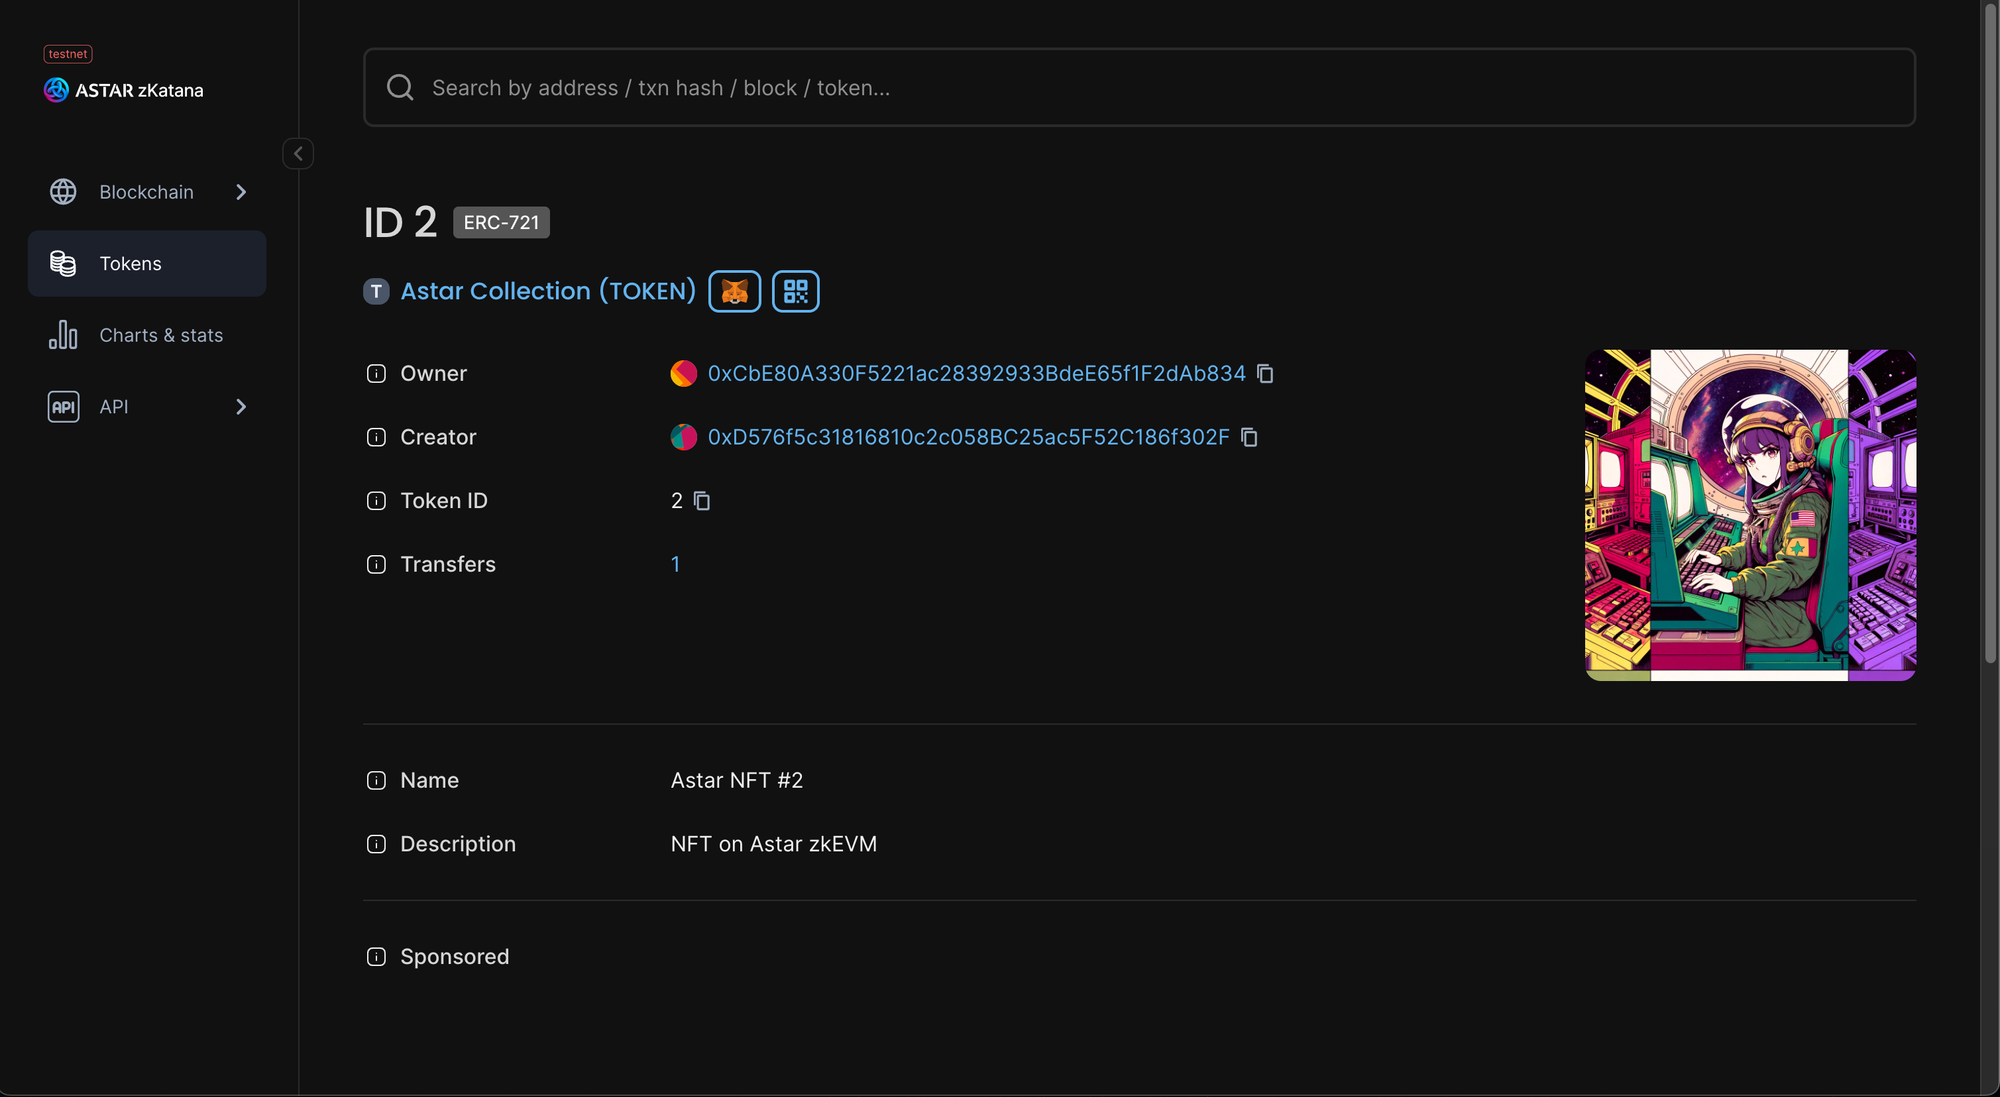
You can now view the minted NFT and its metadata.
And that's it! You have now successfully learned how to create an NFT Collection on Astar zkEVM. You also learned how to create, mint and deliver an NFT to your email address or wallet address.
What's Next?
If you are wondering how Crossmint has helped enterprises and brands by powering their NFT Drops, you can click on the link below to read all our Case Studies.


If you want to learn how to use the Crossmint to create Web 3 Wallets for your users using their Email Address, please watch the YouTube video below.
Need help?
For support, please join the official Crossmint Discord Server. You can also use Crossmint Help Page for the same.