Learn how to accept Credit Card and Cross-chain payments for your Highlight.xyz NFT Collection (25mins)
This guide will show you how to accept Credit Card and Cross-chain payments for your Highlight.xyz NFT Collection using Crossmint’s free-for-seller NFT checkouts.
By the end, you will learn how to deploy a contract on Polygon Mumbai network using Highlight, set it up to accept Credit Card payments, mint an NFT using your Credit Card. This guide will take you 25 minutes to complete (approximately). Let’s get started!
What is Highlight?
Highlight is a dedicated platform engineered for crafting and monetizing art and culture on the EVM blockchains. It offers a suite of robust tools enabling artists to create, showcase, and monetize their creative endeavors, simplifying the process of Non-Fungible Tokens (NFT) minting. This ease of NFT minting, paired with community-building features, enhances engagement between artists and collectors.
Create and deploy a smart contract on Highlight
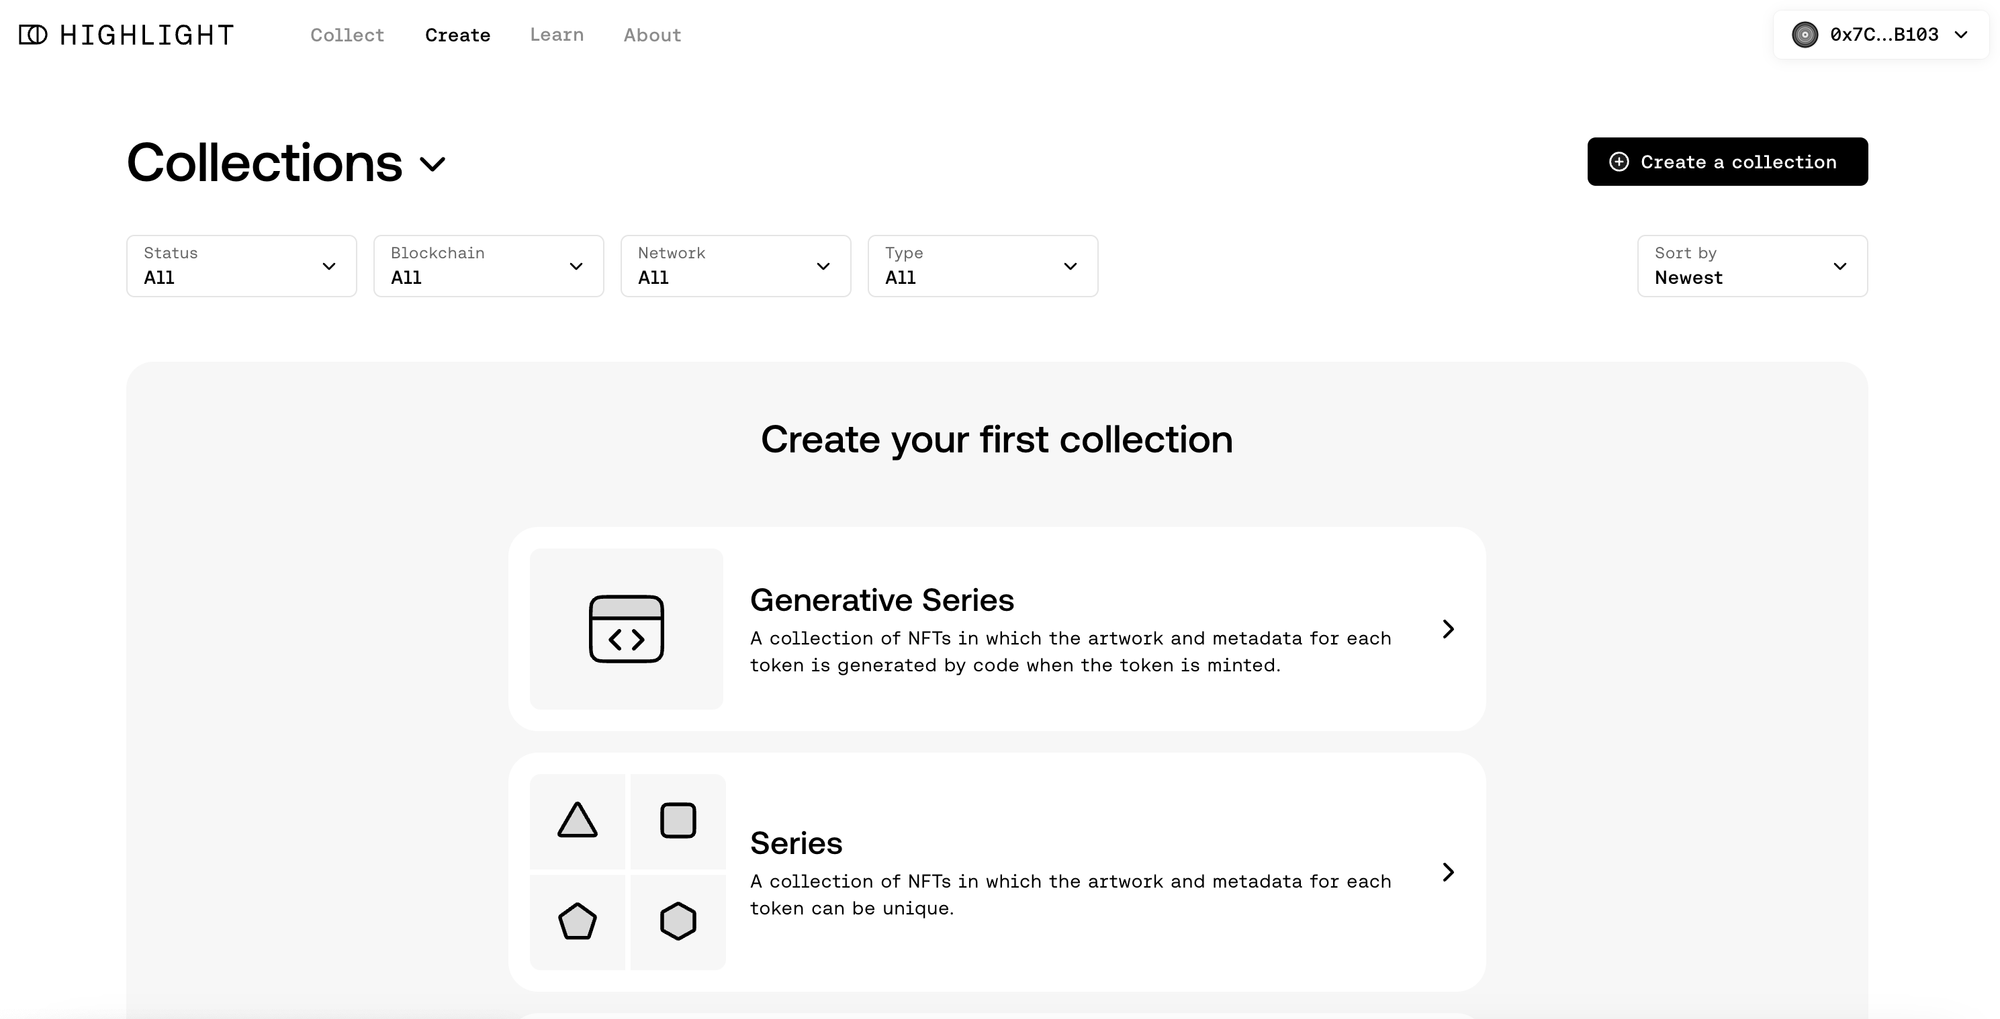
To begin, head over to the Highlight and click on “Create”. We will be deploying a Series collection, so select Series.
Note: We support both the Series and Generative series collections by Highlight.
Uploading series
You will be taken to the create page that will allow you to create the contract, upload your NFT media files and metadata, set claim and contract details, and deploy it in the end.
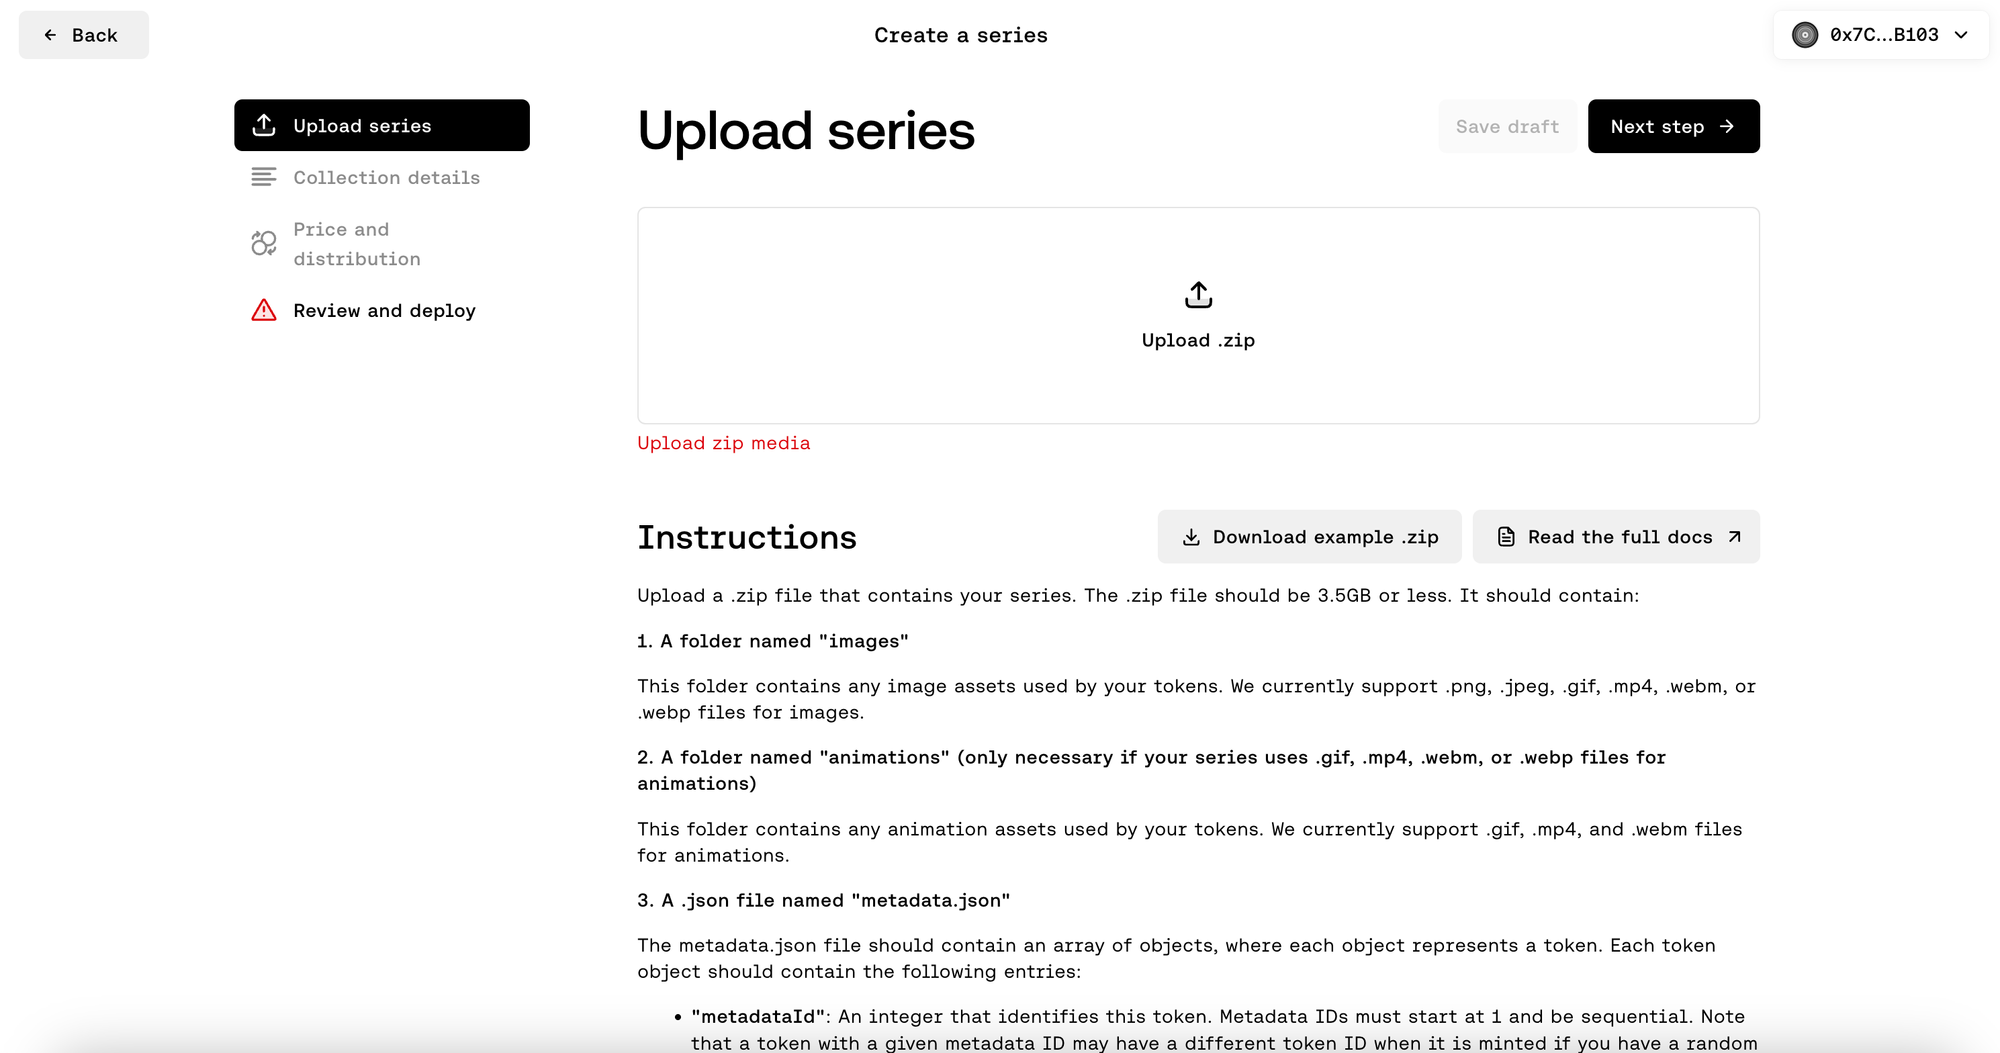
Note: Read the Instructions given carefully before you proceed with uploading your files in order to avoid errors, and ensure that your files upload properly. Your metadata.json file and Images folder need to be compressed in a .zip file first, the compressed file then needs to be uploaded.
For the sake of this tutorial, I will uploading five AI generated Samurai images along with their metadata in a .zip file. Once the upload is successfully completed, you will be able to see a preview of the NFTs that you uploaded and its metadata.
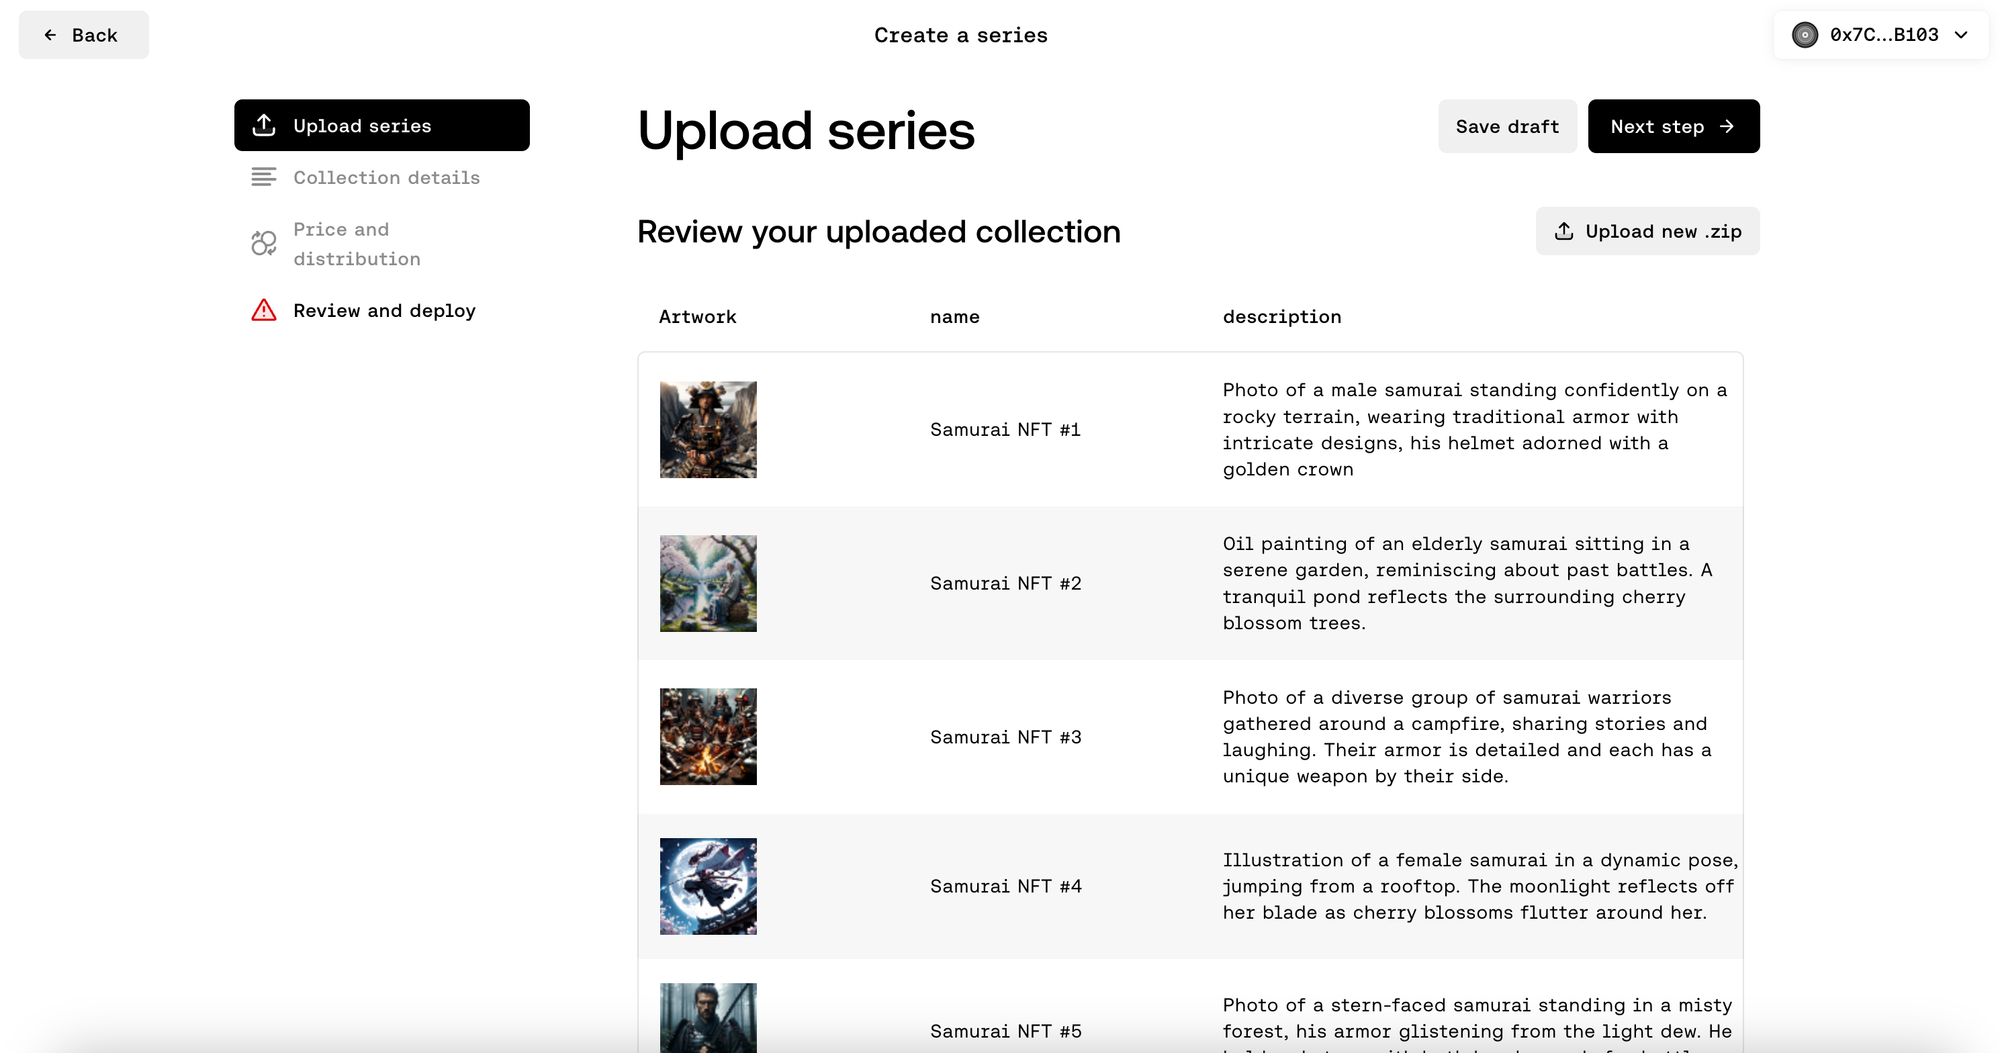
Review your uploaded collection and then click on “Next step →” to proceed.
Collection Details
Select the Blockchain you want your contract to be deployed on using the drop-down menu. In this tutorial, we will be using Polygon. You will also need to select the Network, we will be using Mumbai (testnet).
Note: We currently support all the Blockchains that Highlight let’s you deploy your contracts on, they are, Ethereum, Polygon, Base, Arbitrum One, Optimism, and Zora.
Enter your Collection Name, Description, Contract Name, Contract Symbol and upload the Collection logo image.
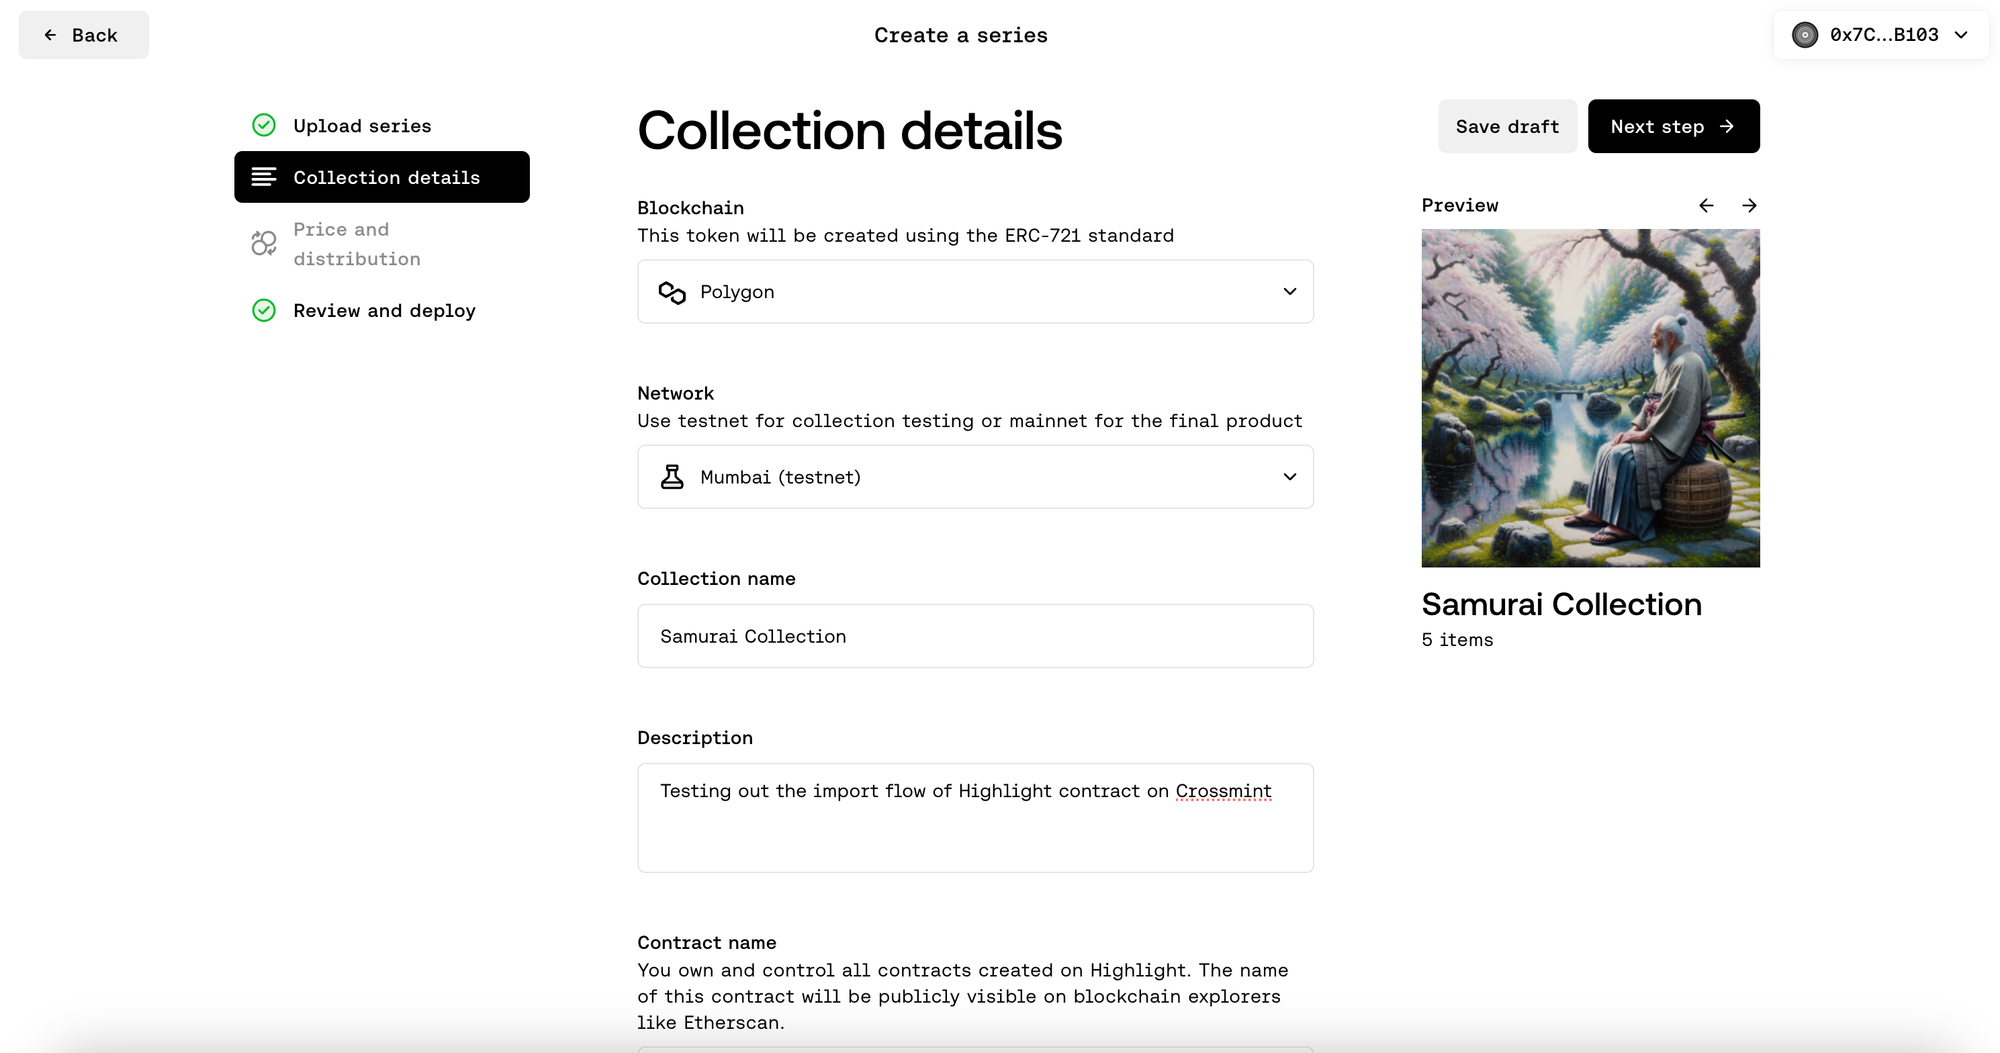
Note: The NFTs need to be set as transferable to ensure that it can be transferred to another wallet and traded on marketplaces. If you want to make your NFTs “Soulbound”, then you need to set it to non-transferable.
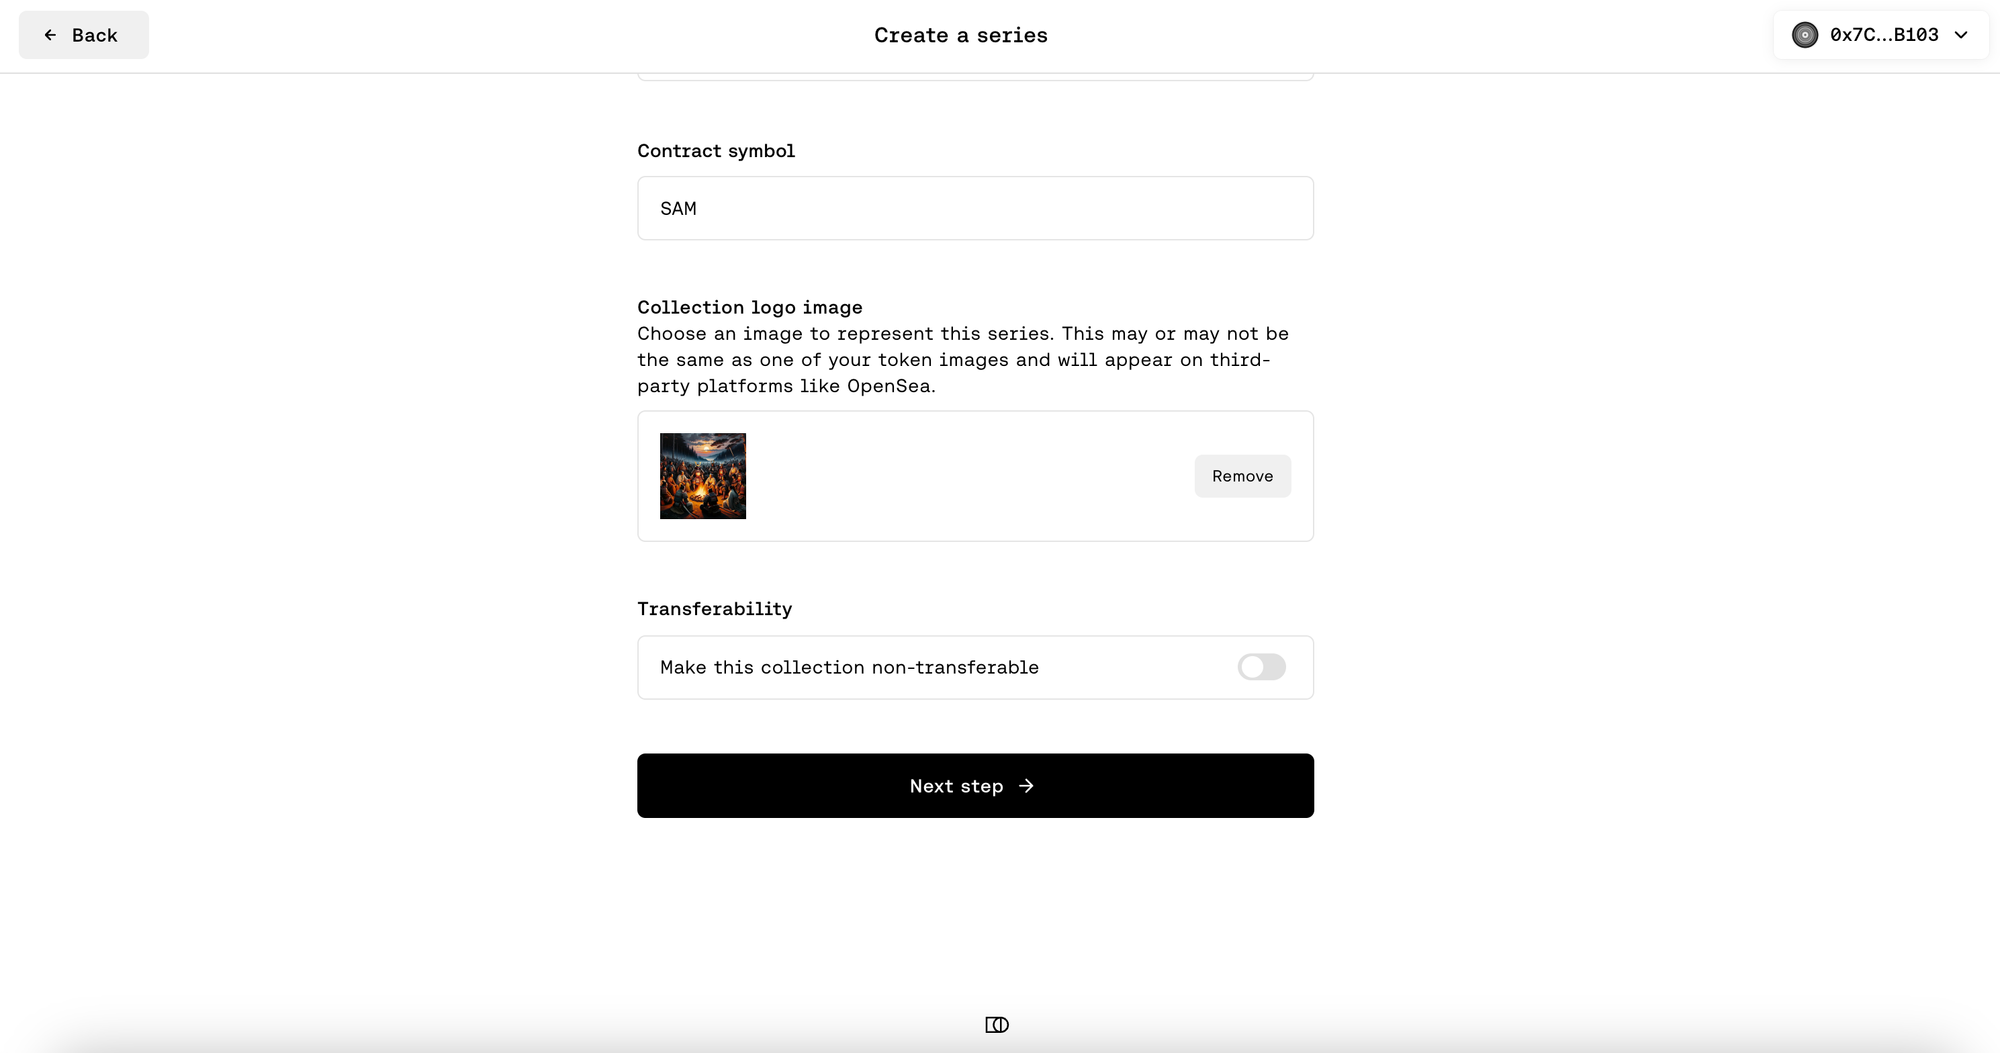
Review the information that you entered and then click on “Next step →” to proceed.
Price and Distribution
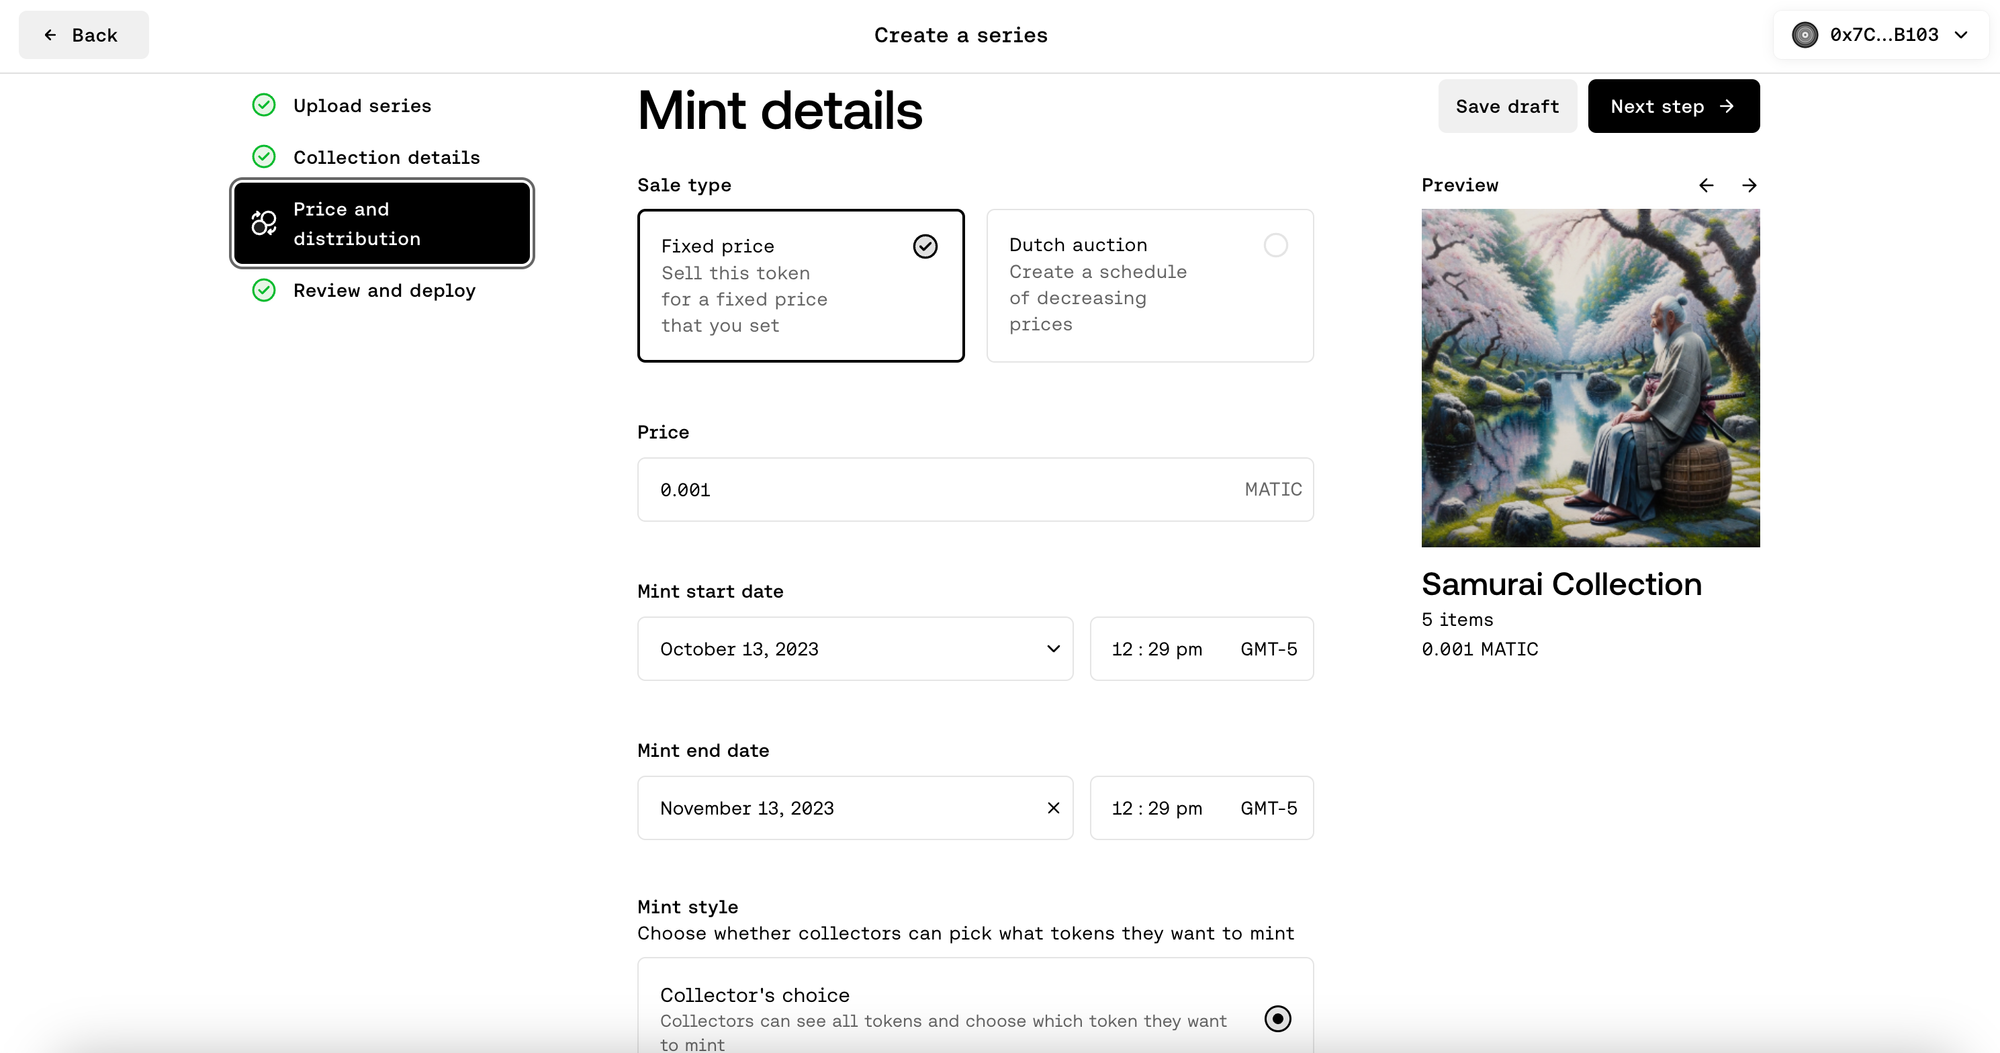
You now need to enter your Mint details. In this tutorial, the Sale type is set to “Fixed price”, you can select “Dutch auction” if you wish to do so. You will also have to enter the Price, Mint start date, Mint end date and select Mint style. In this tutorial, the Mint style is set to “Collector’s choice”.
Now, enter the Primary sales payout address, Royalty amount, Royalty payout address/ENS, Minting options. In this tutorial, we will not limit the number of mints per wallet and neither will we set a Gate.
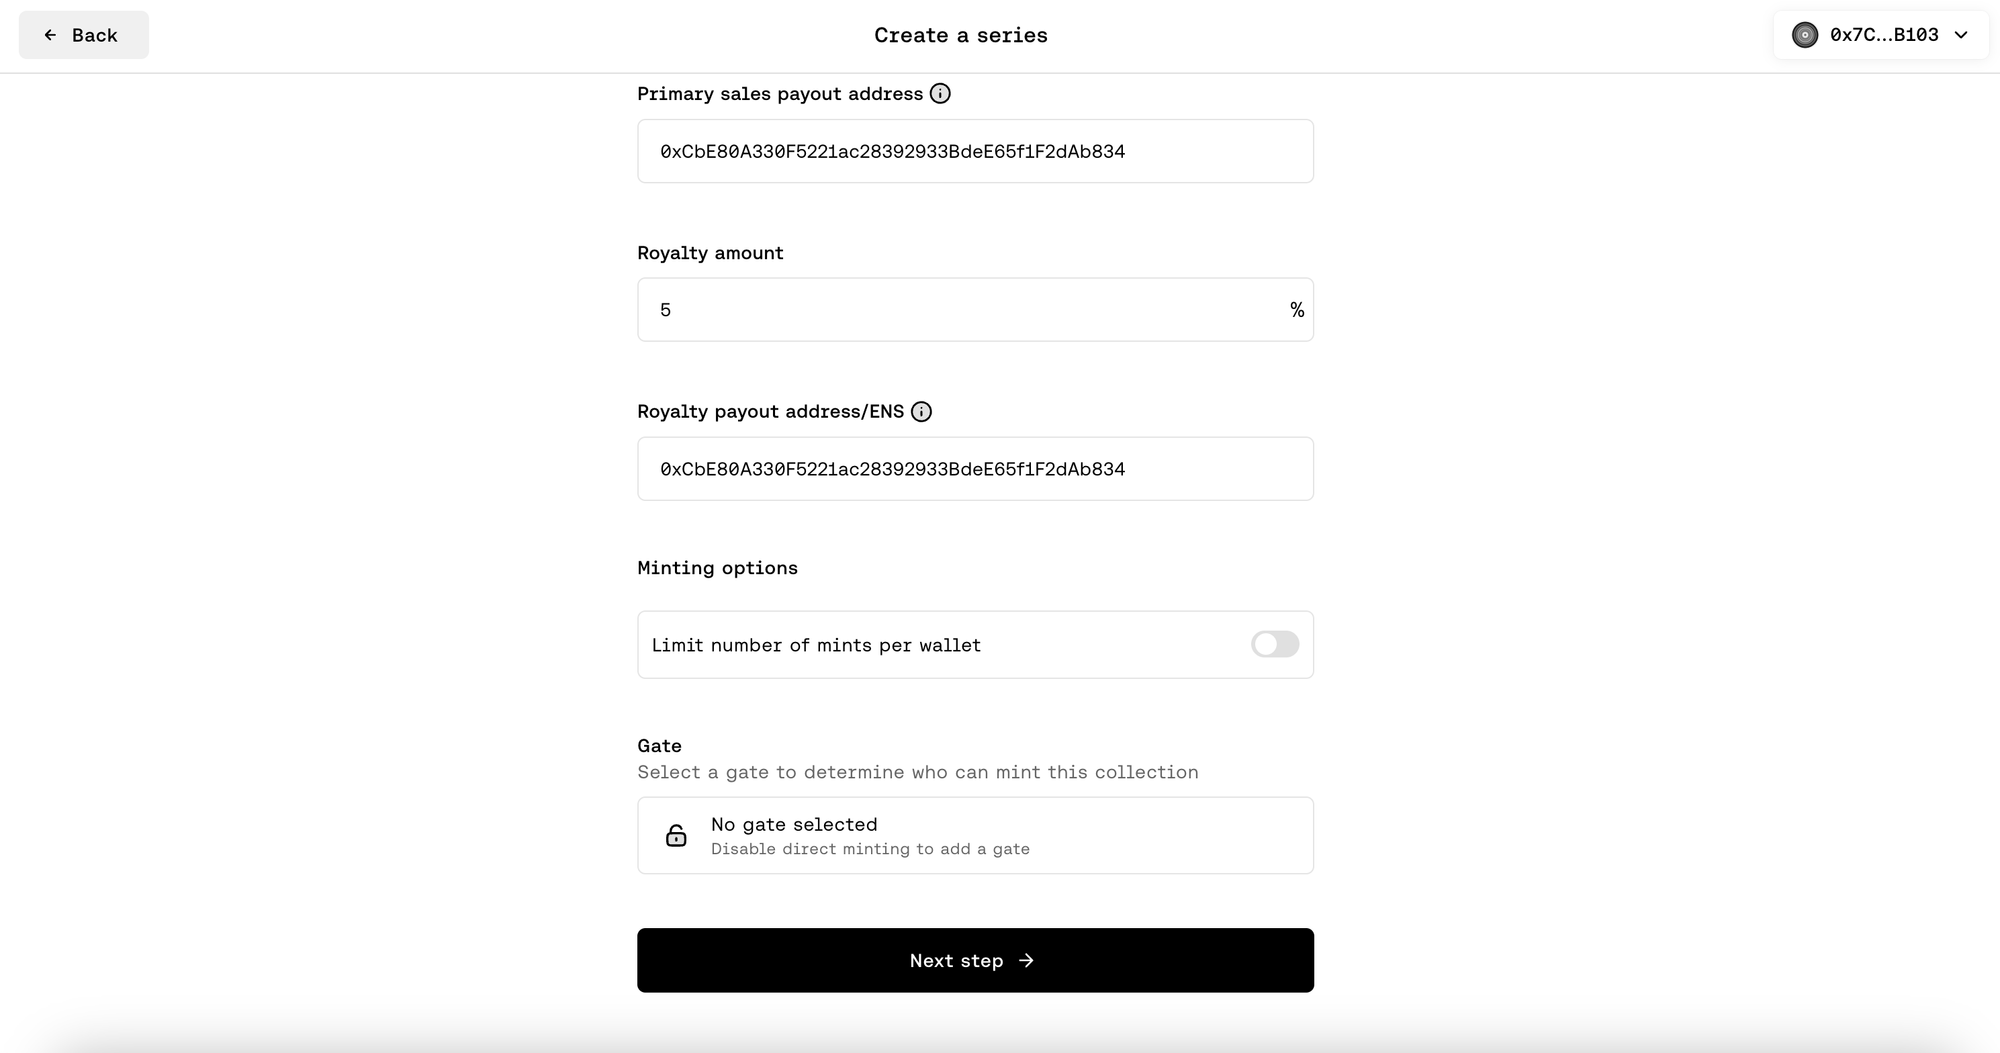
Review the information that you entered and then click on “Next step →” to proceed.
Review and deploy
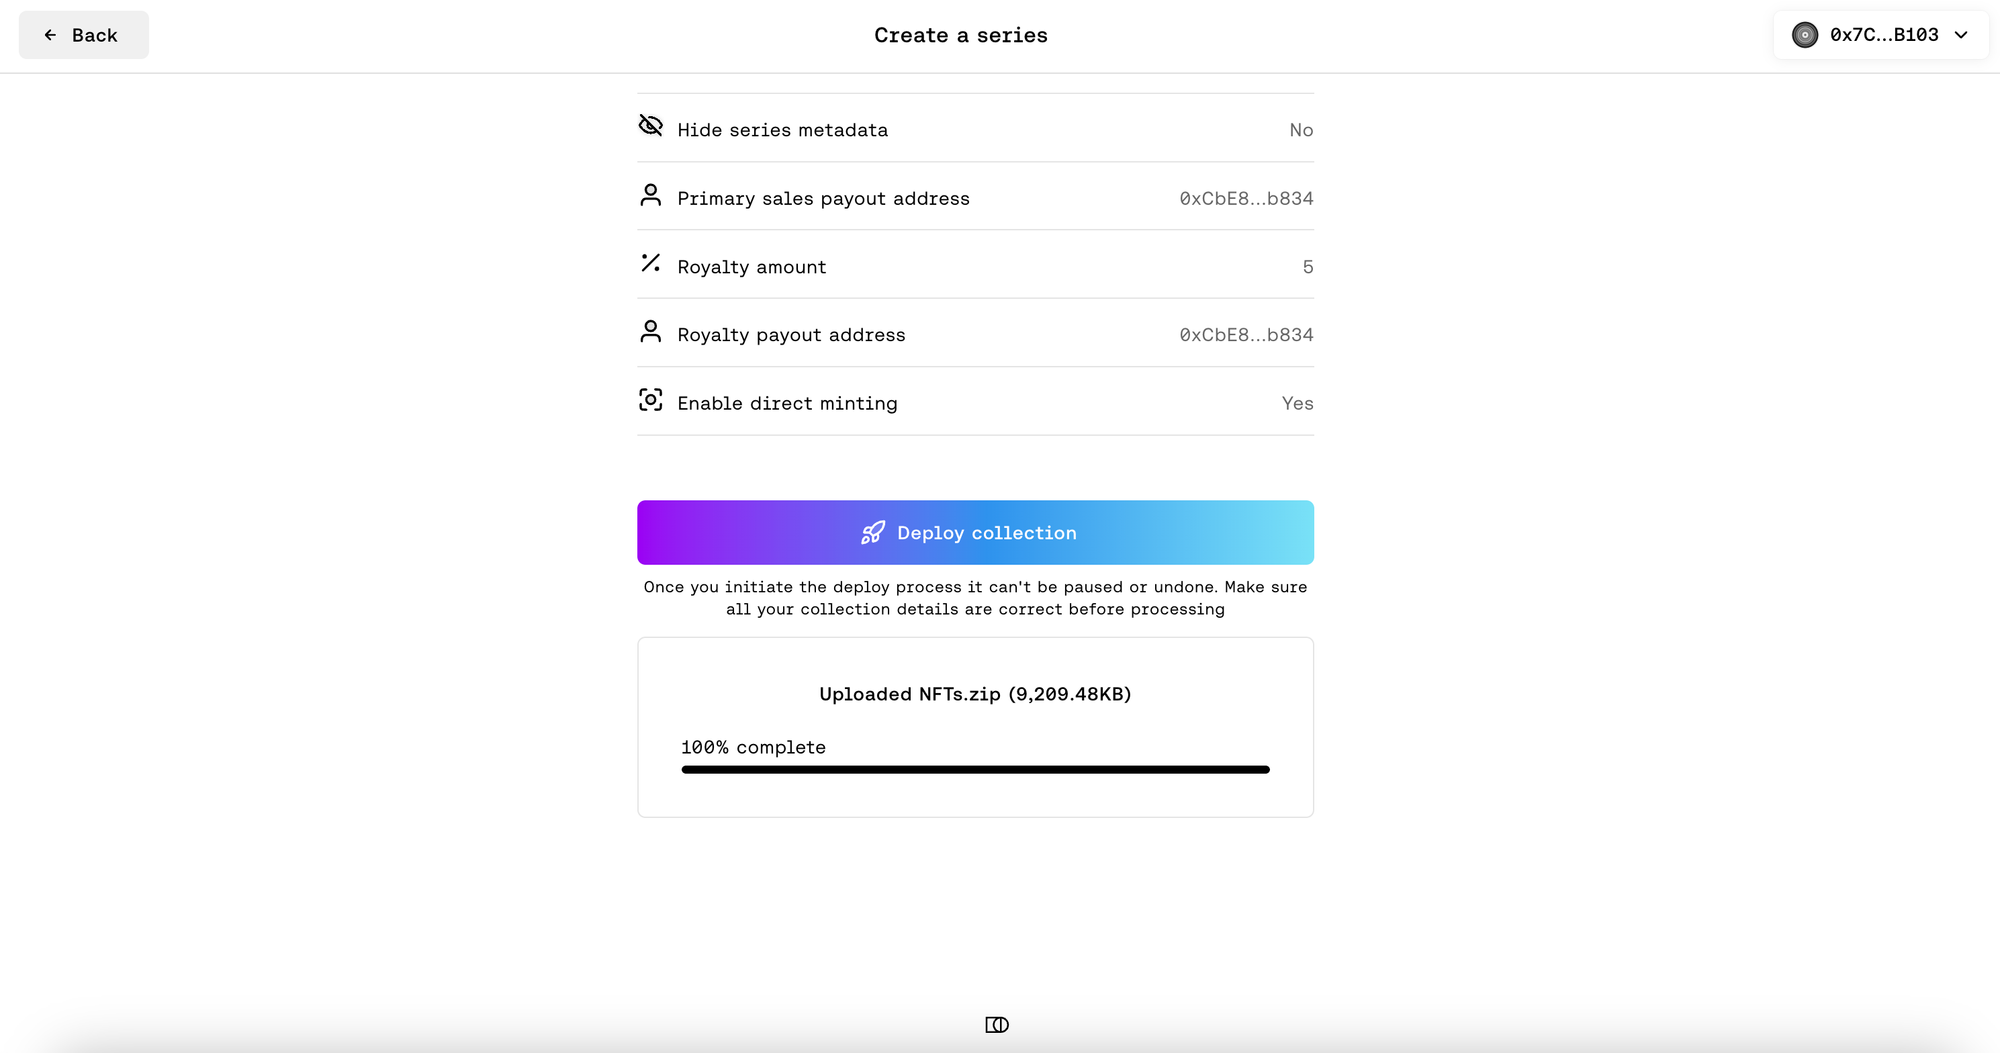
Review your collection details and click on “Deploy collection”.
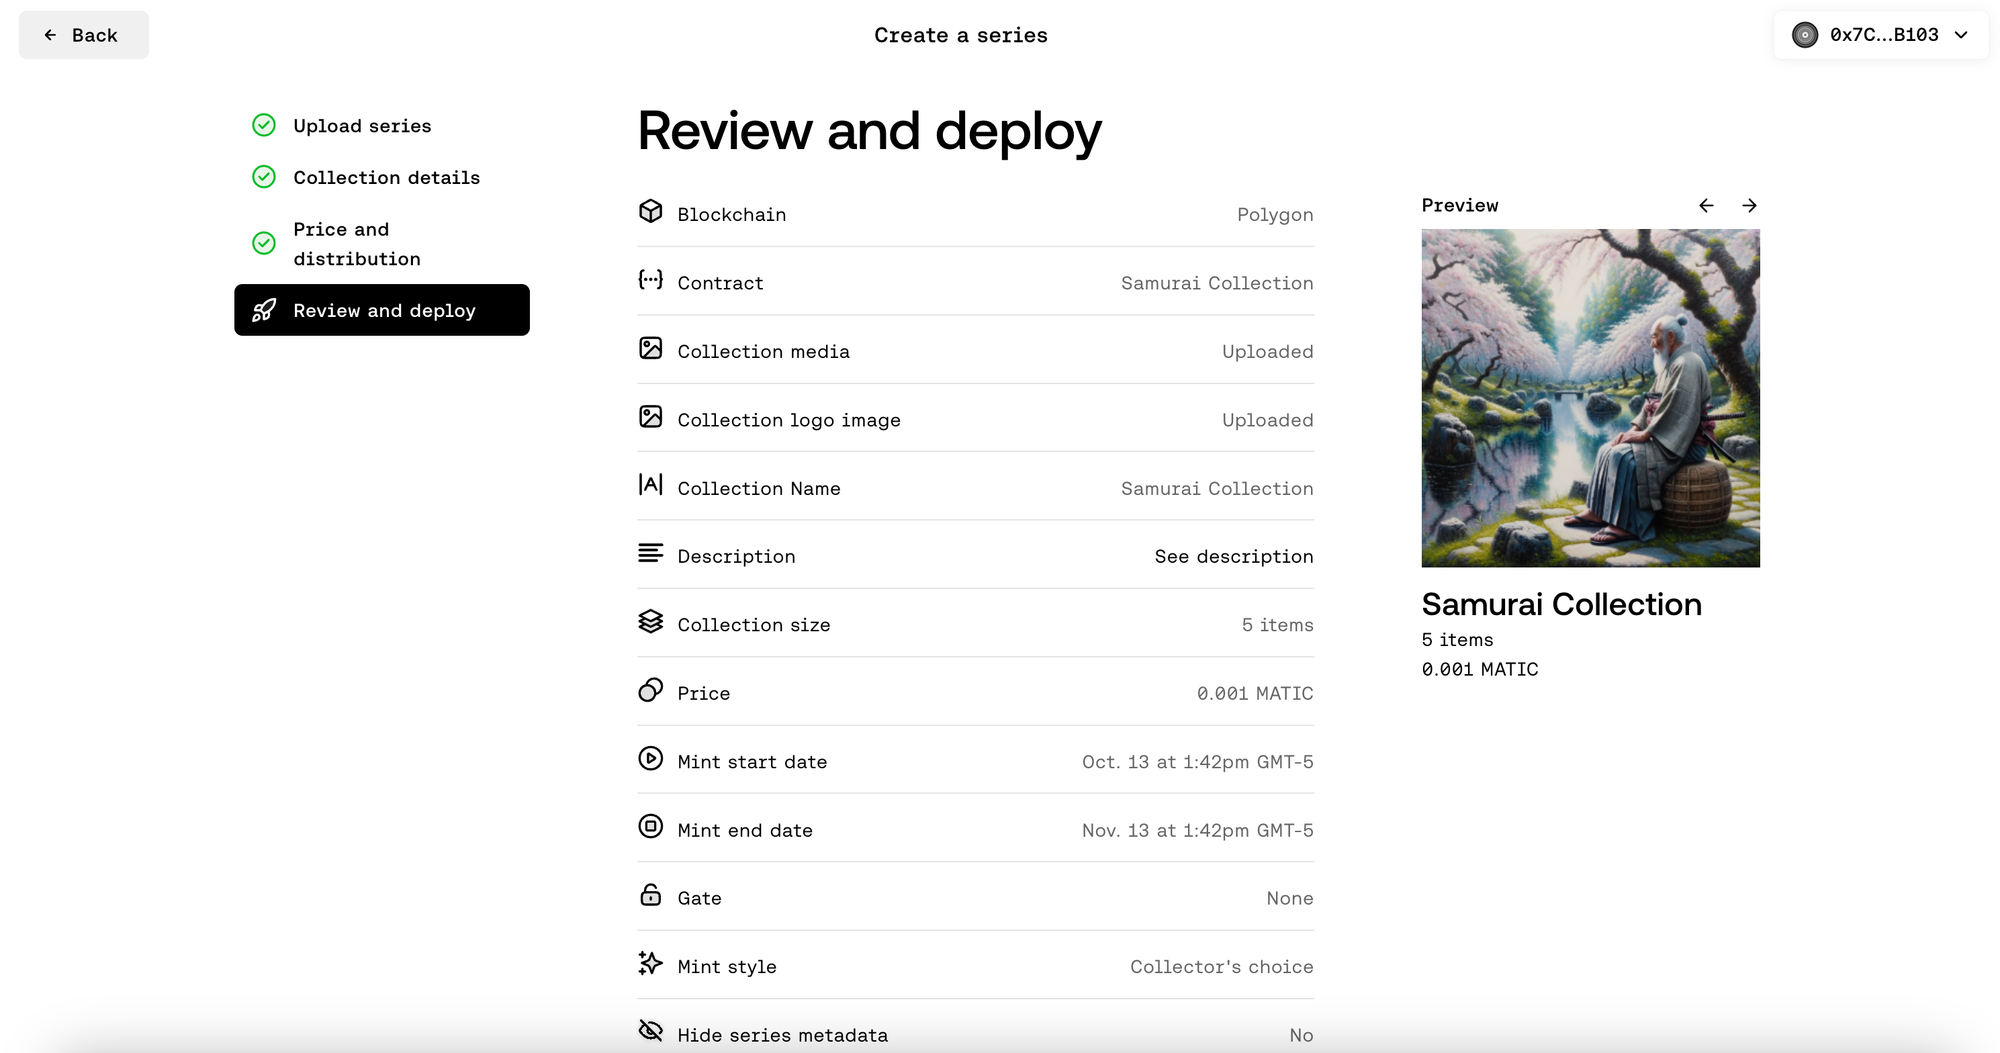
Note: Once you click on deploy and approve the transaction, you may not be able to edit some of the contract preferences you selected and details that you entered.
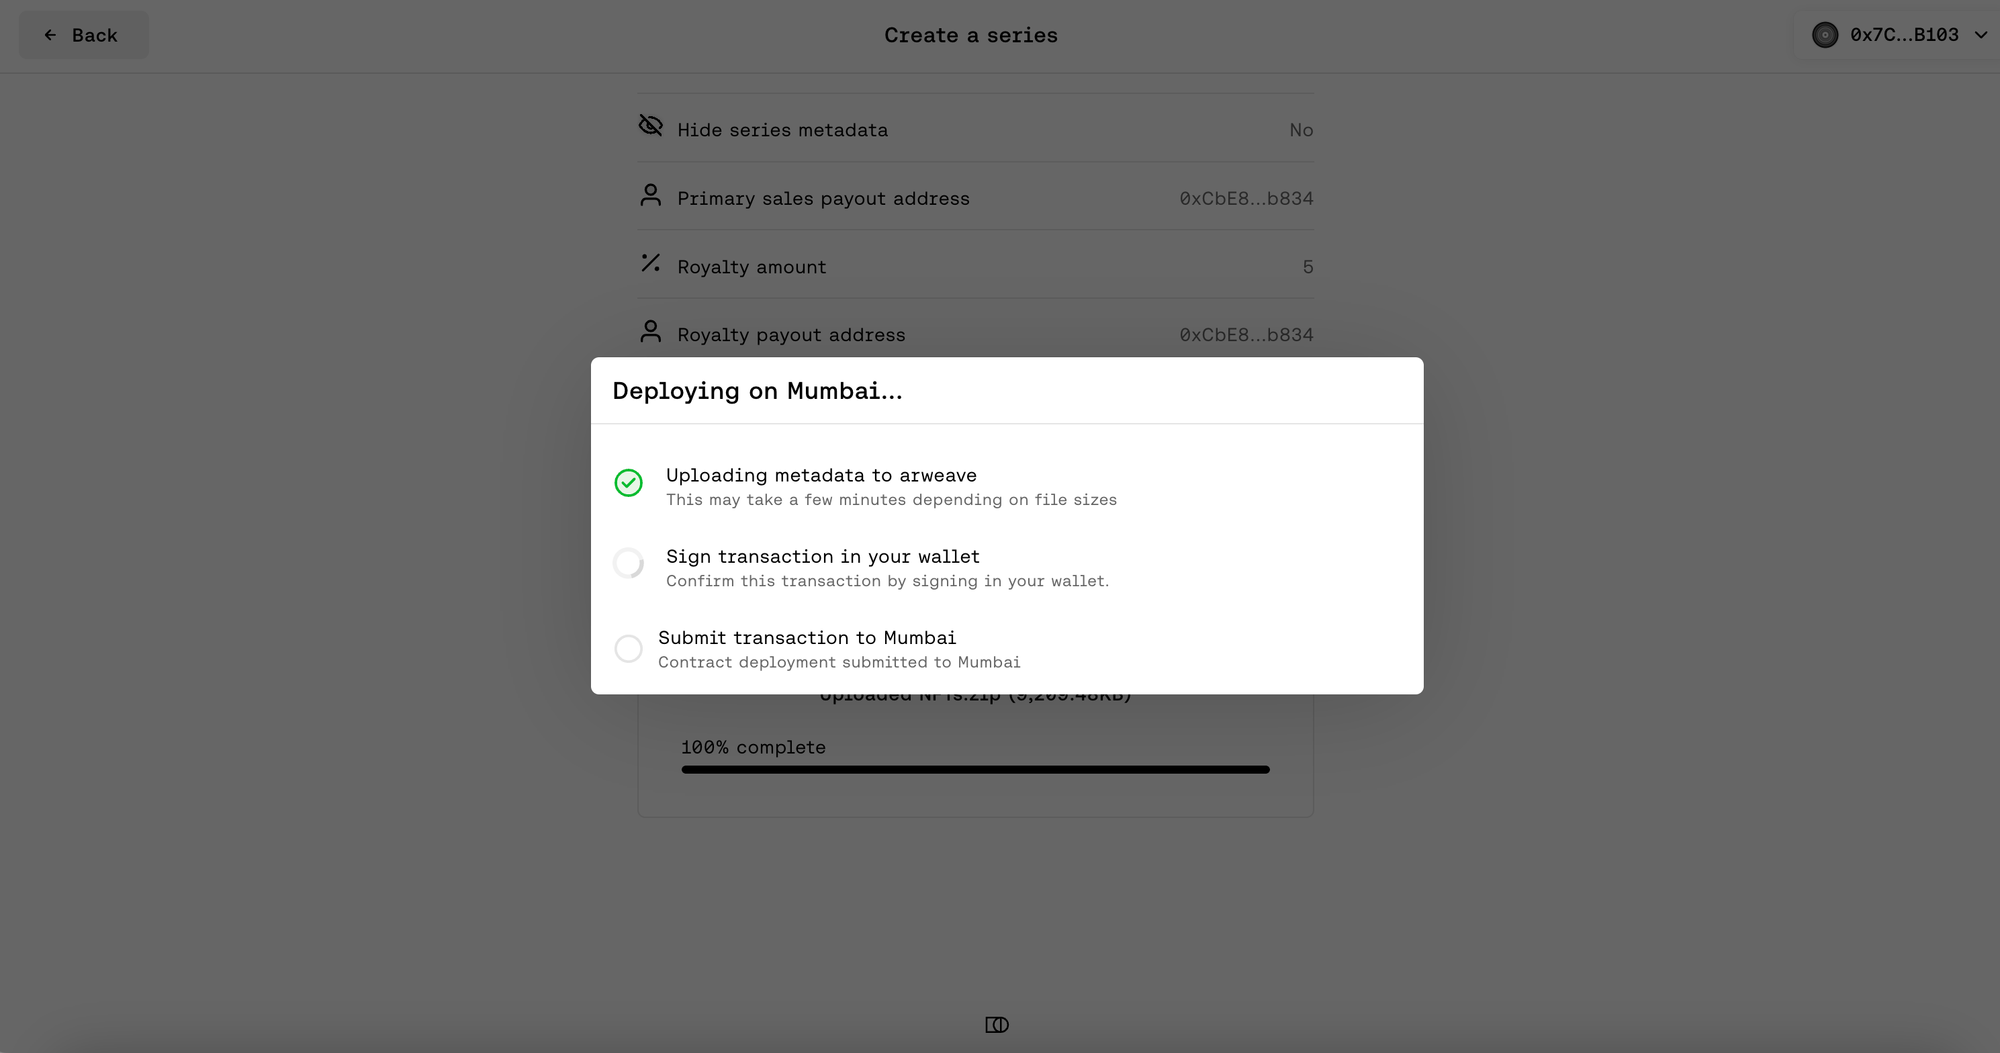
It may take a minute for your metadata to finish the upload on Arweave. Once this is completed, you will see a pop up on your connected wallet asking for your approval.
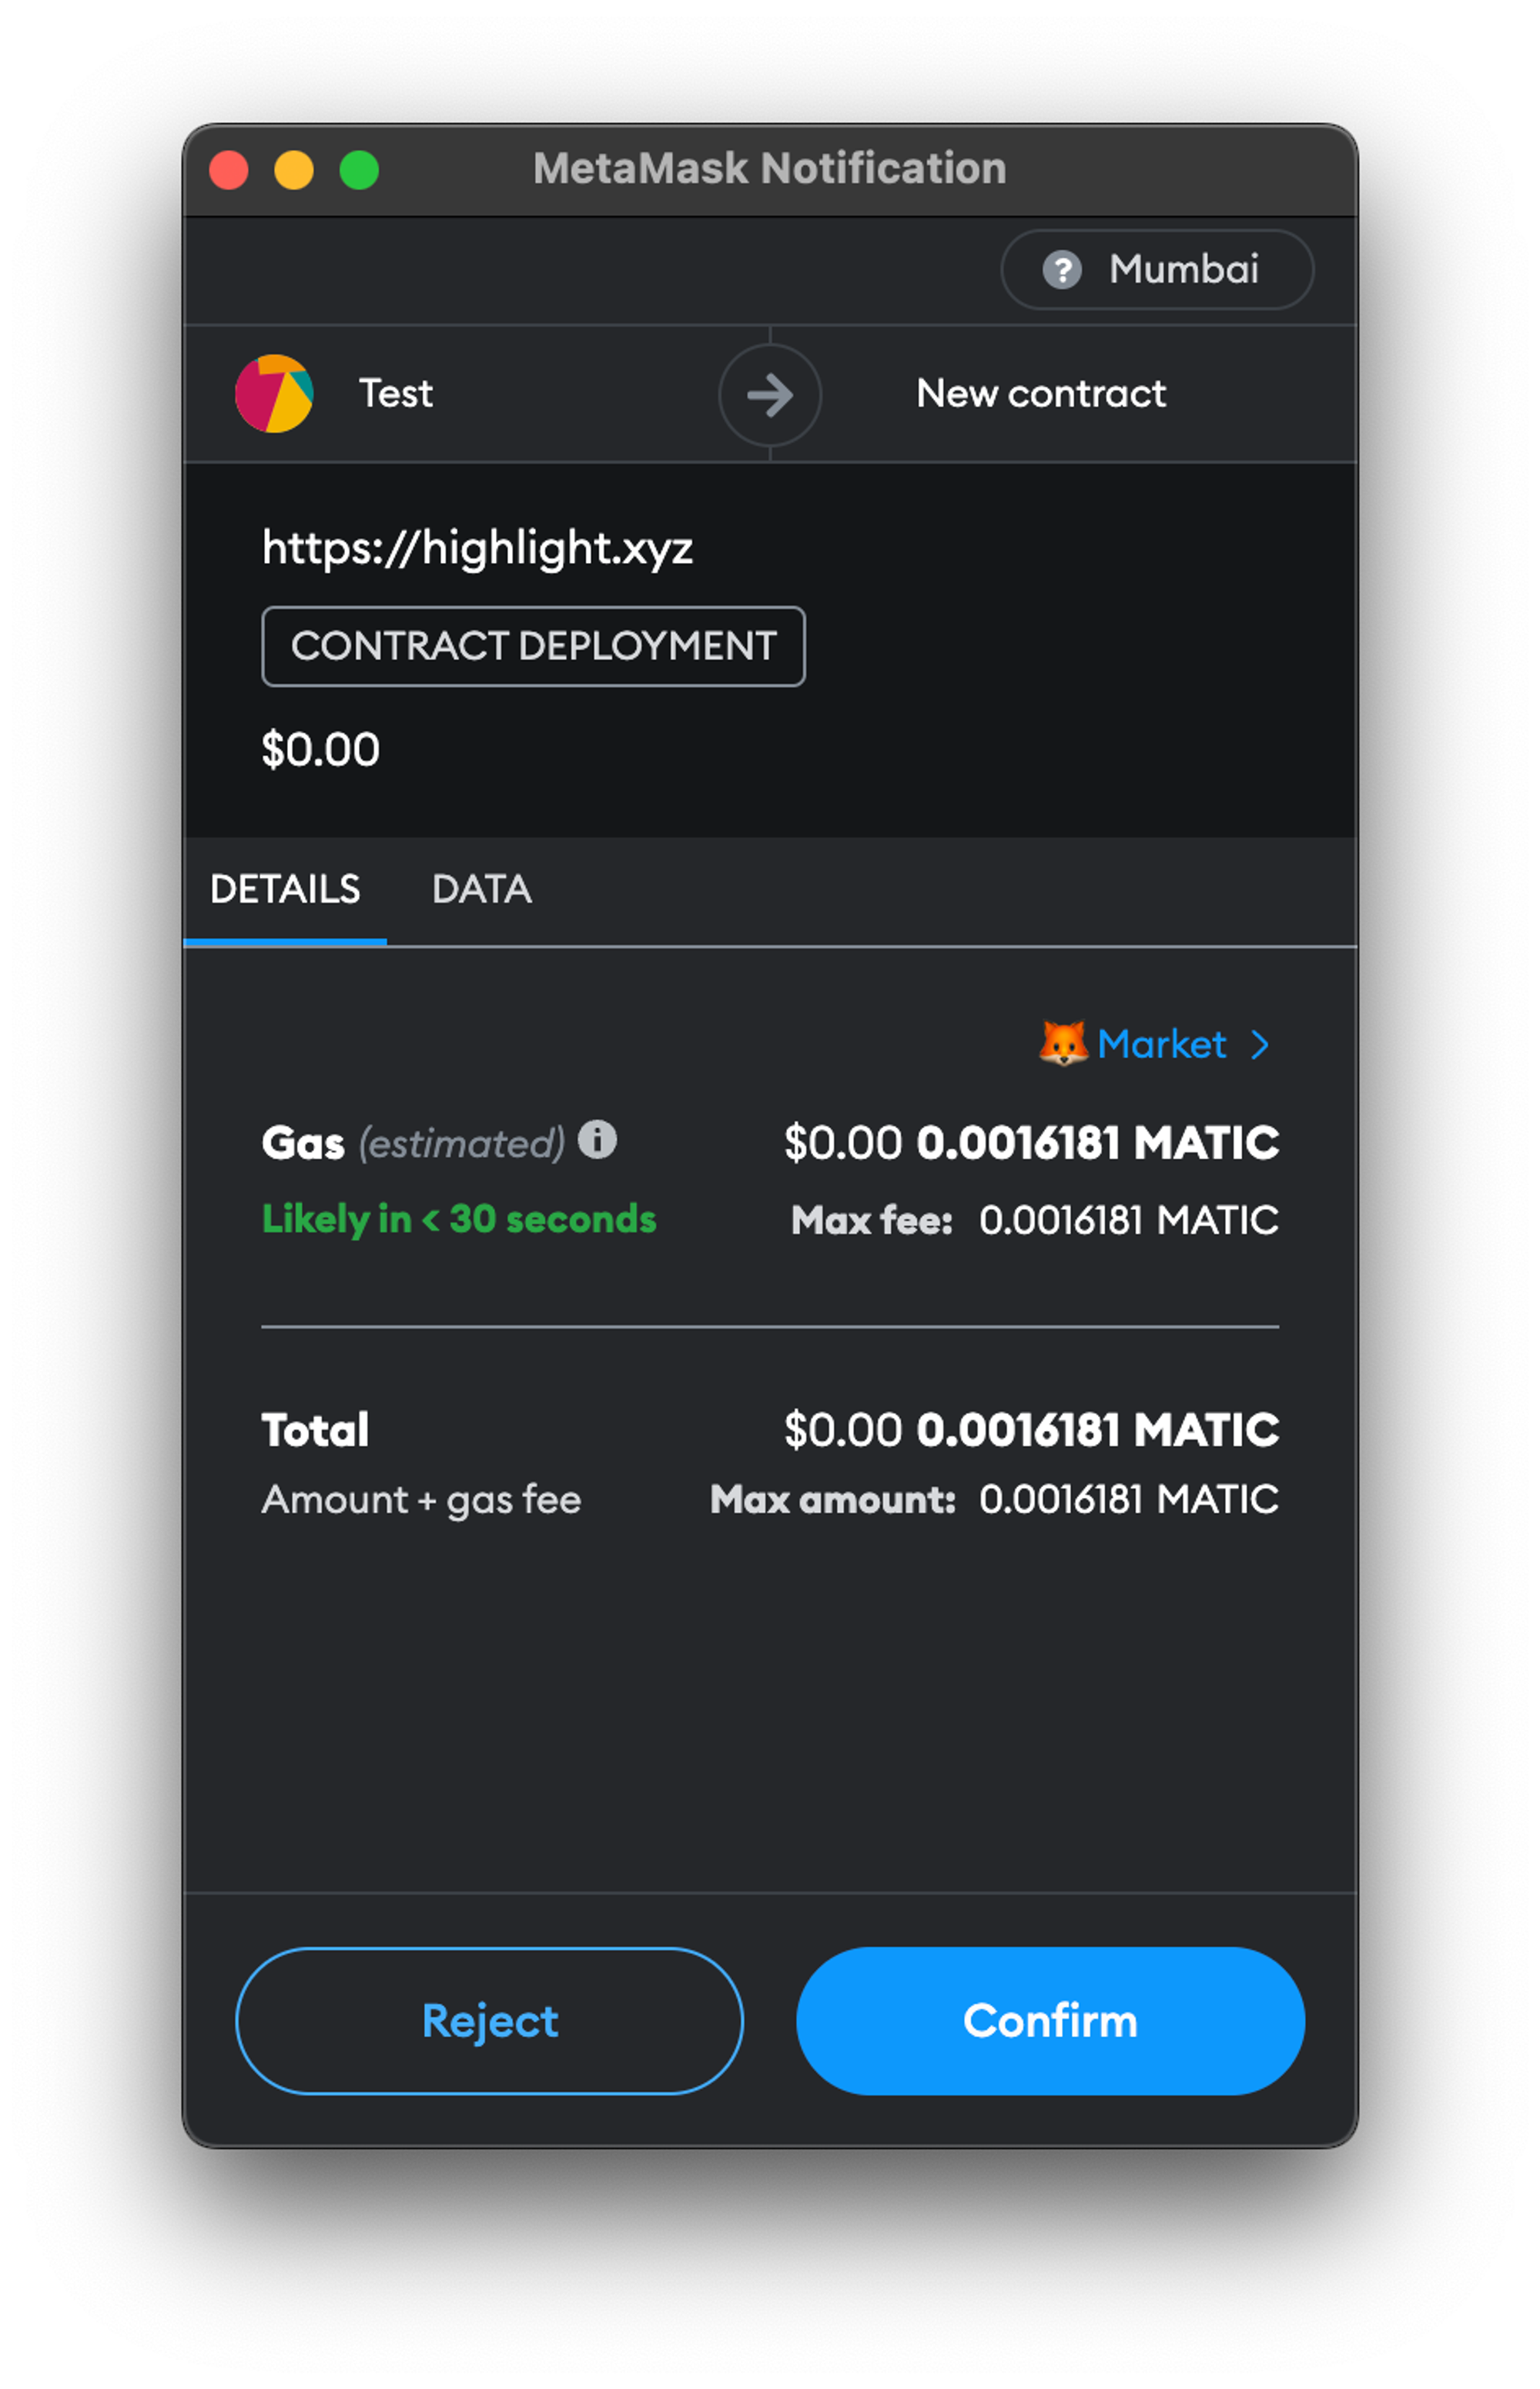
Click on “Confirm” to approve the transaction. The transaction will then be submitted to Mumbai network. Once this is done, you will be able to view your Collection on the Blockchain and on Highlight.
Highlight Collection Page
Once the contract is successfully deployed, you will be redirected to the Collection page. You will be able to view the contract details and edit it (if required).
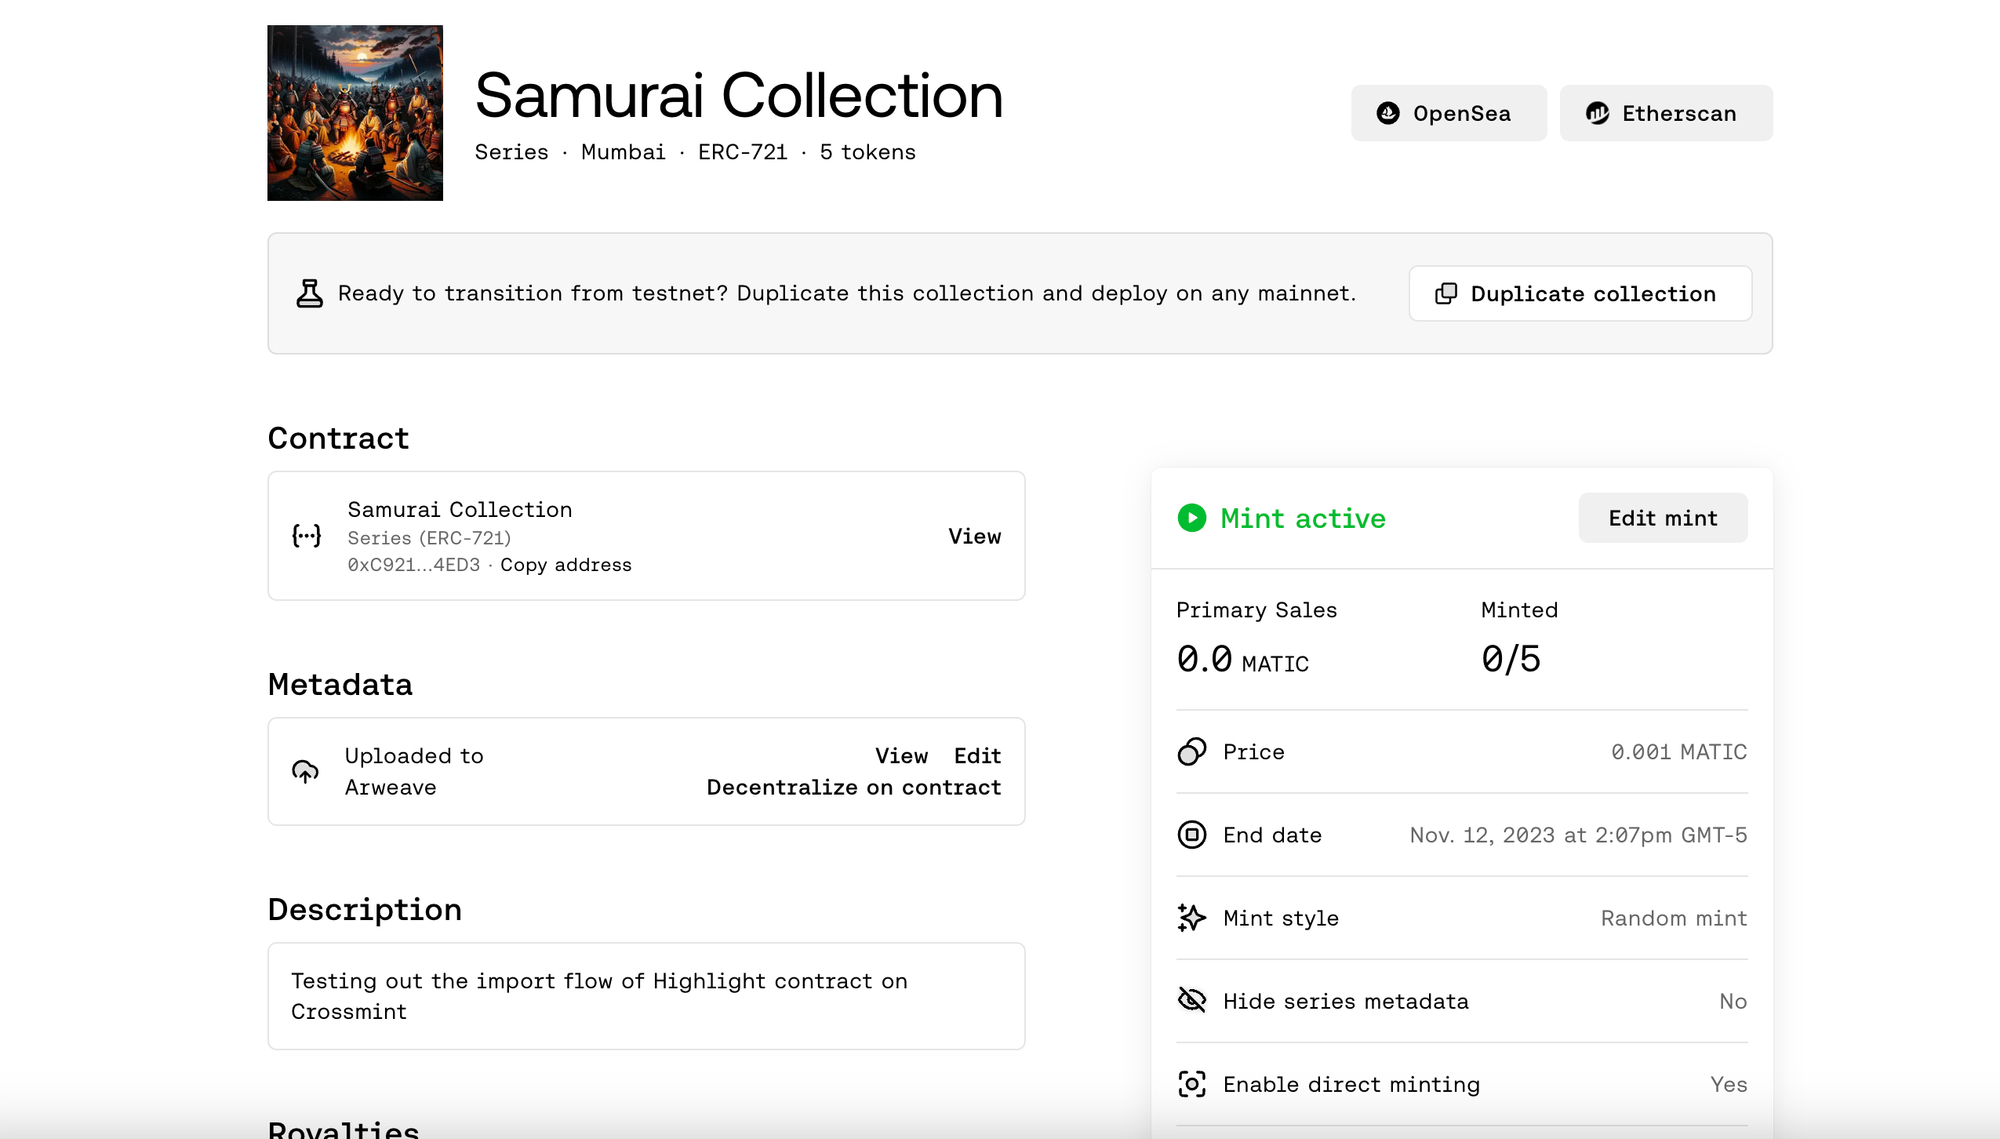
Copy the contract address from the Collection page. This is required for us to proceed to the next step of the tutorial, i.e., importing your collection on Crossmint.
Import the Collection on Crossmint
Head over to Crossmint’s developer console to get started. Since our contract was deployed on the Mumbai testnet, we will be using Crossmint Staging Console. Click here to head to the Staging Console.
Note: If you do not have an account created on Crossmint, you will first need to create your account before you proceed with the rest of this tutorial.
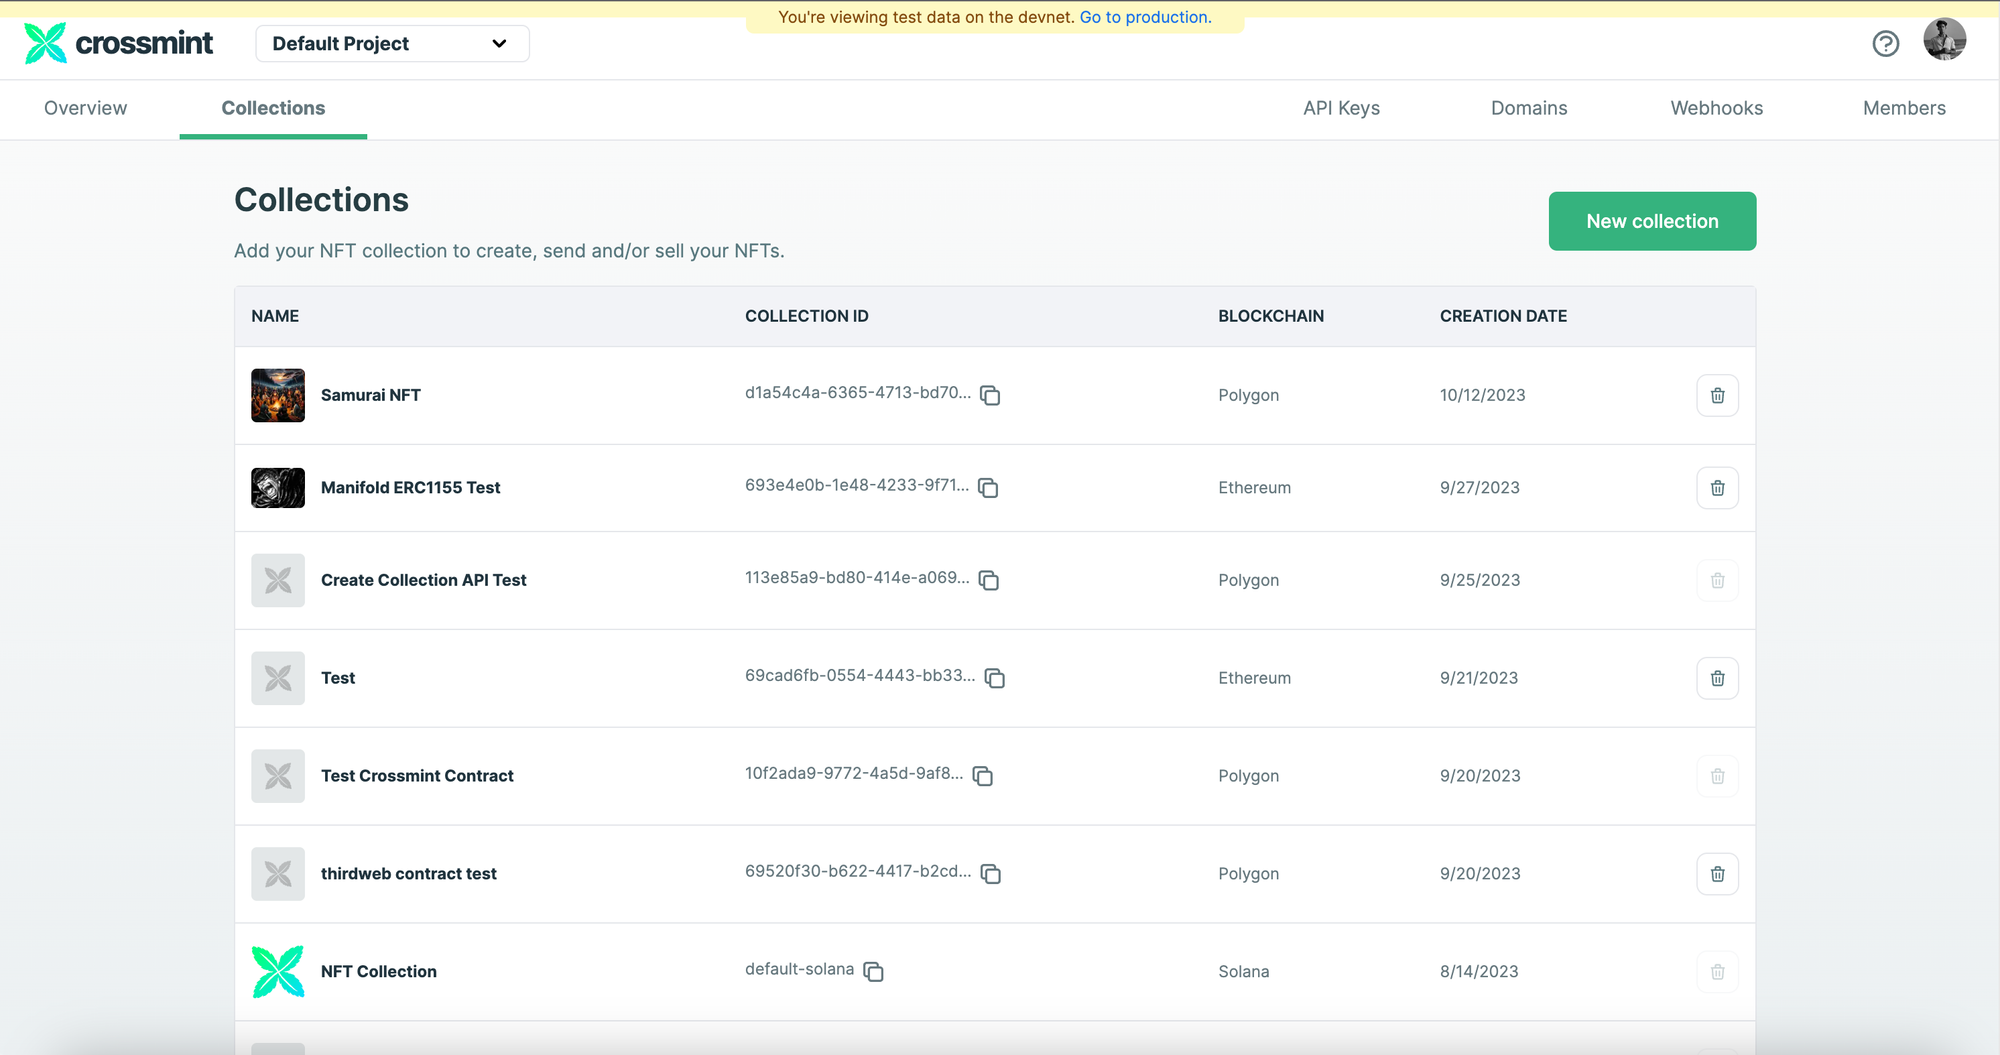
Click on “Collections” and then click on “New collection” to create a new collection on Crossmint.
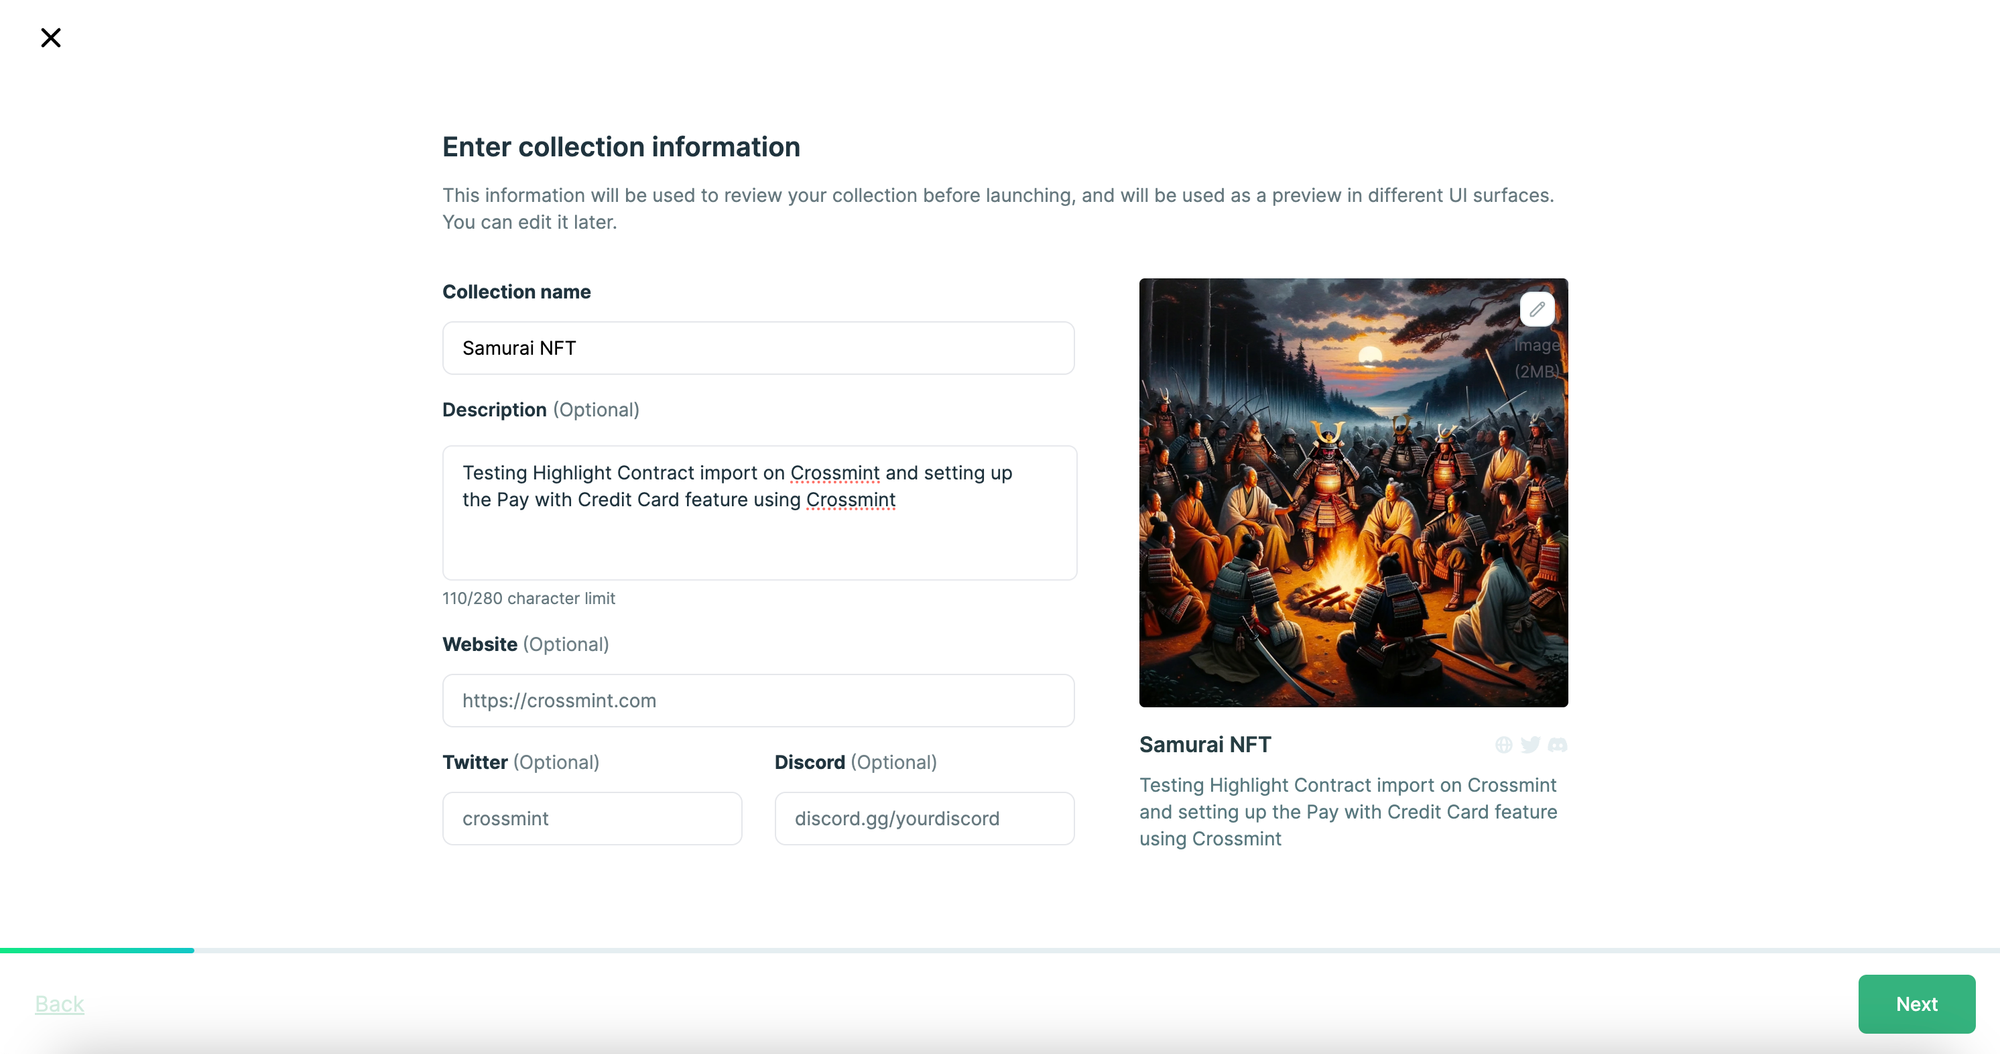
Enter your Collection name and Description. Then, upload your Collection’s cover image. You can also enter your Website, Twitter, and Discord if you wish to do so. Click on “Next” to proceed.
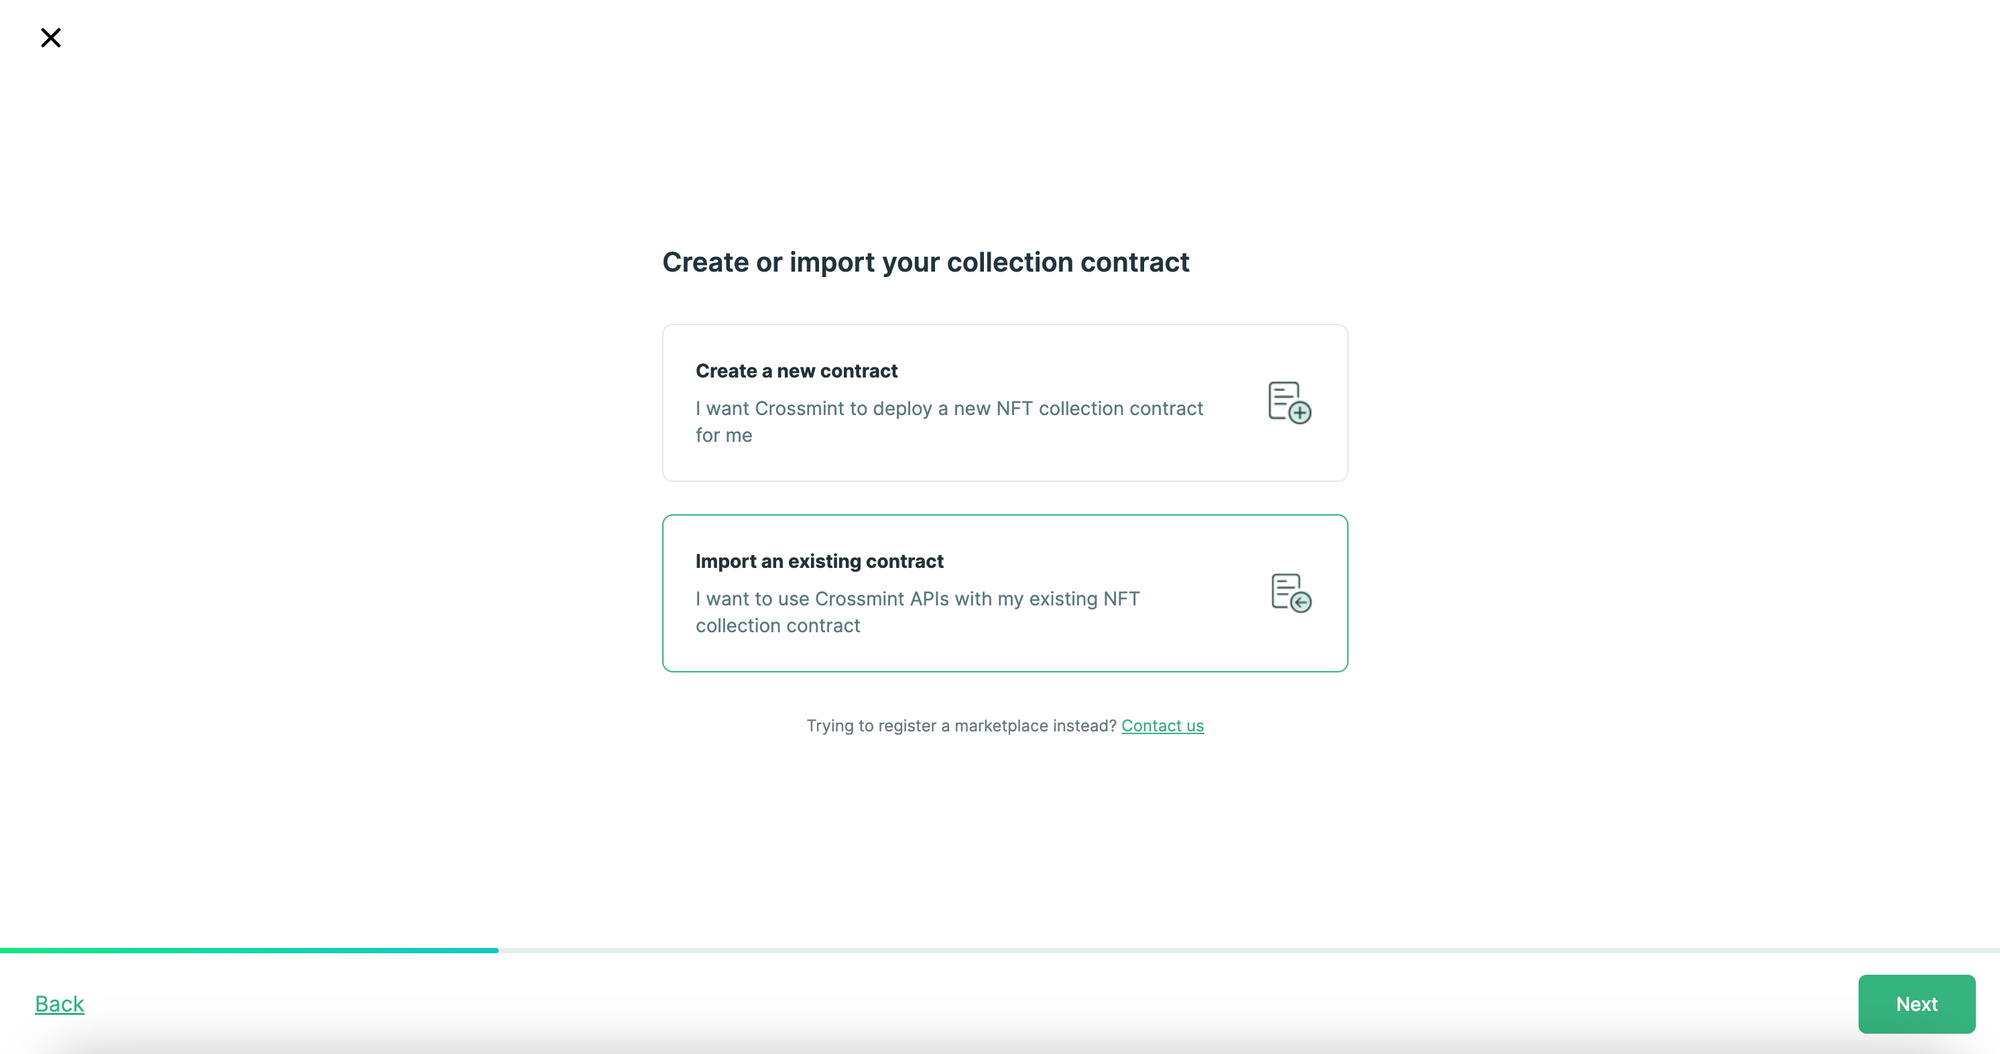
Since you have already deployed your contract via Highlight, you need to click on “Import an existing contract”. After you have selected the option, click on “Next”.
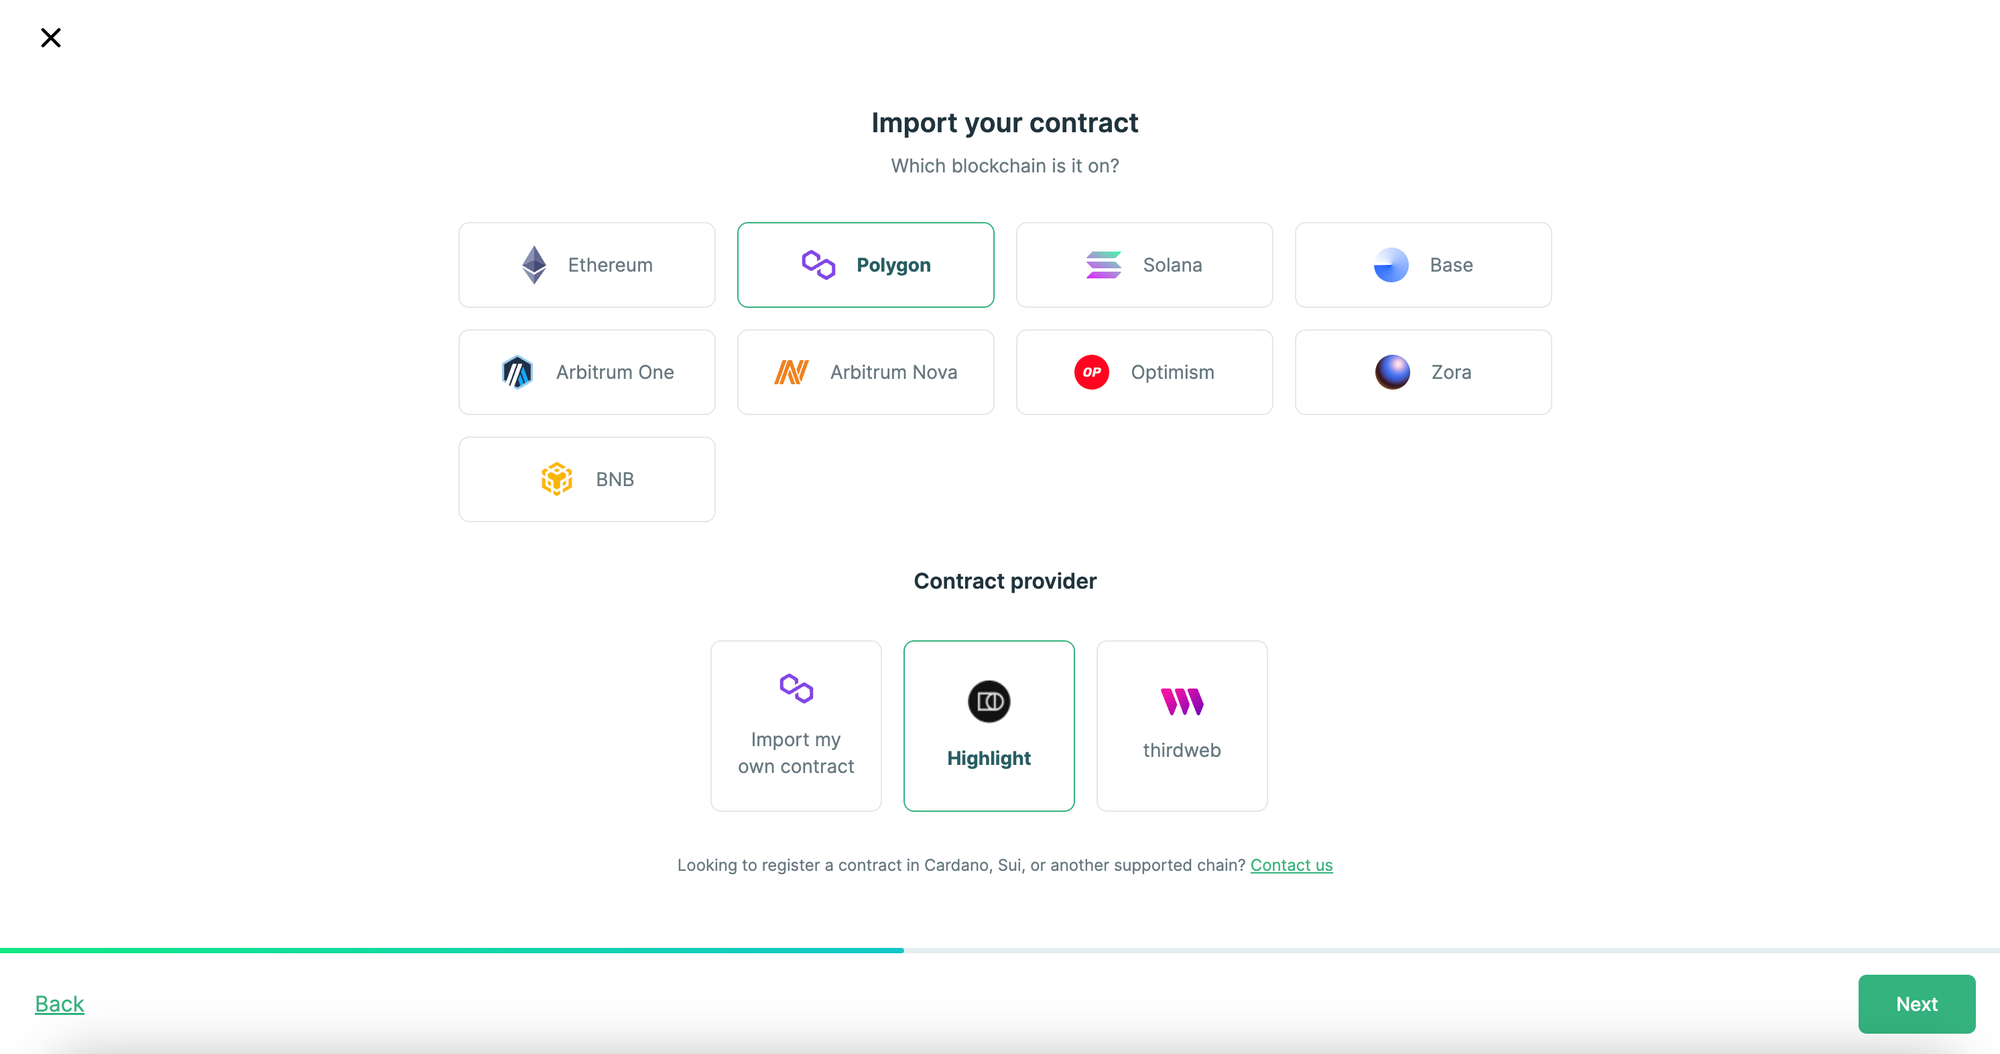
Select the Blockchain you deployed your contract on, in our case, it is Polygon. You then need to select the Contract provider as Highlight. Click on “Next” to proceed.
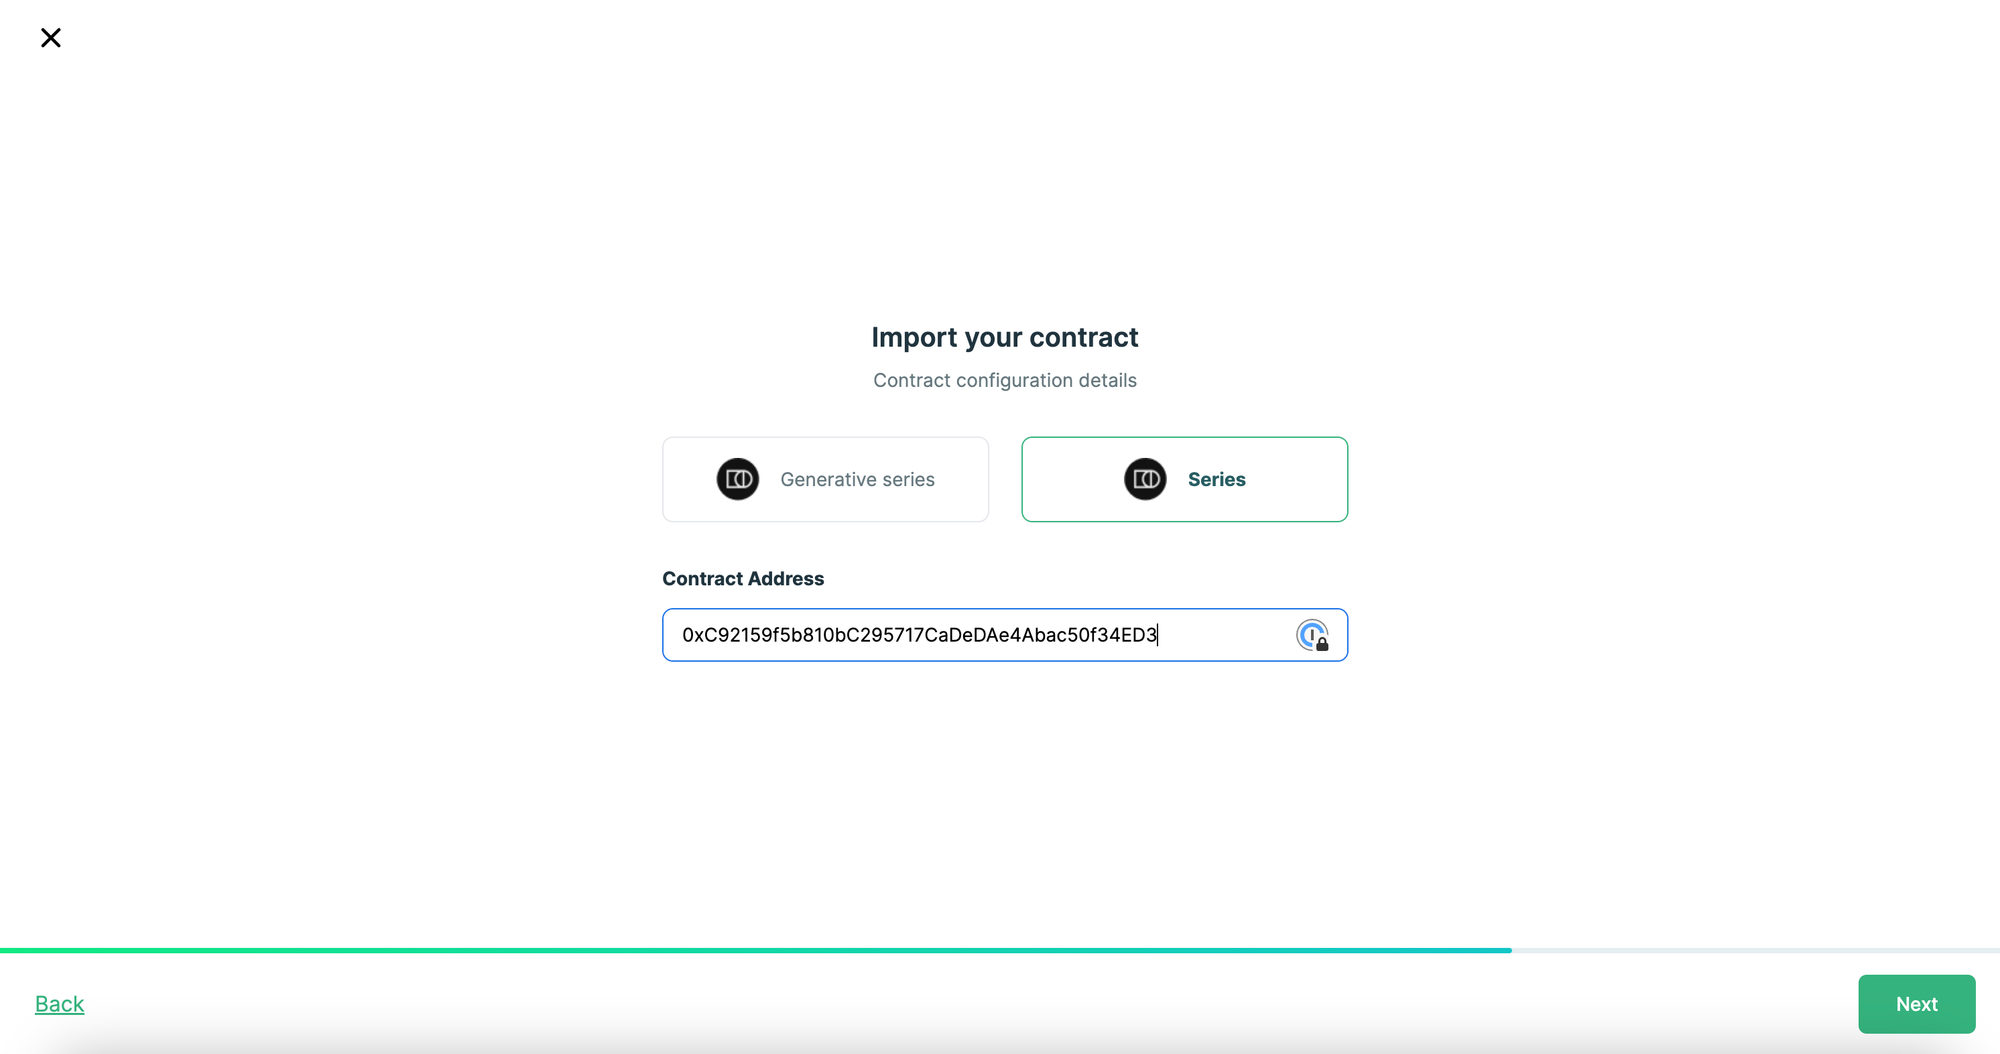
The contract deployed was a Series contract, so click on “Series”. You now need to enter your contract address of the collection that you deployed on Highlight. After you have pasted the contract address, click on “Next” to proceed.
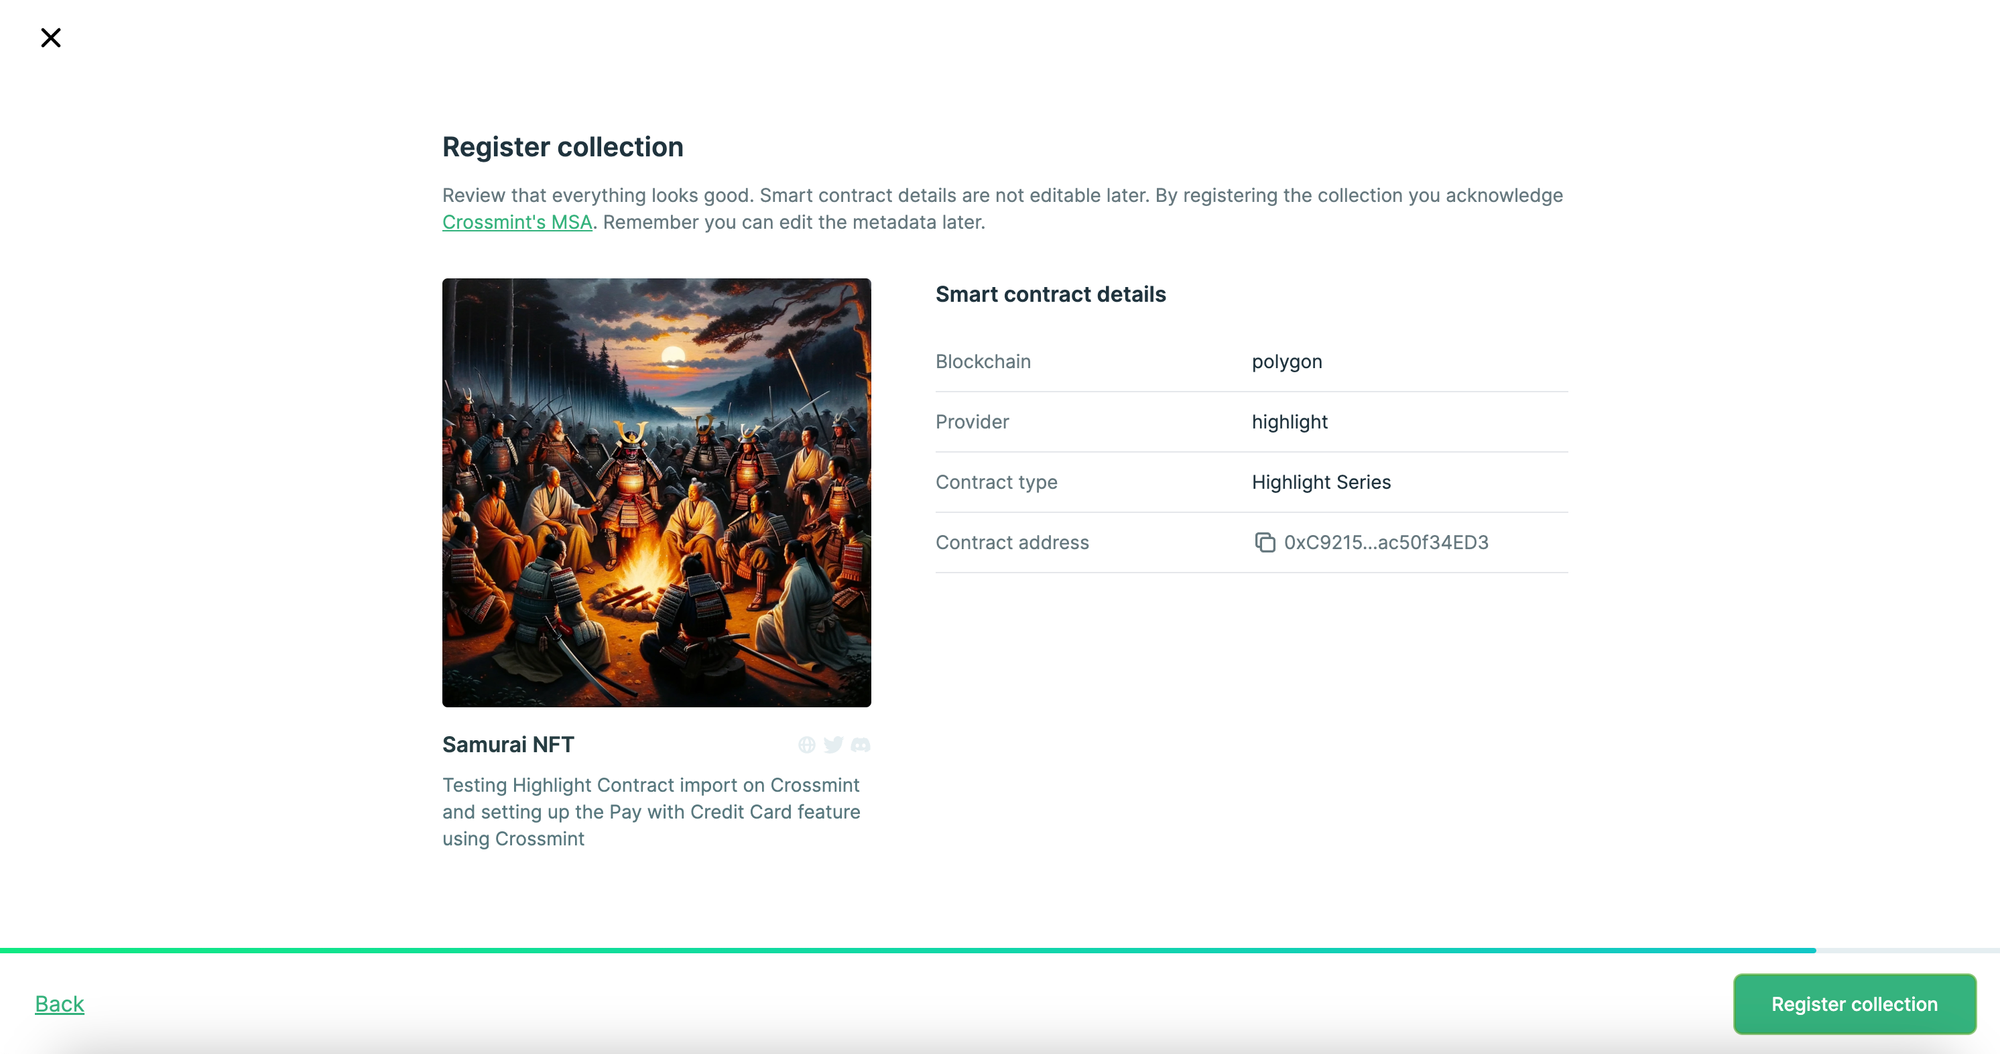
Review the details that you entered and click on “Register Collection”.
You will now be able to see your import collection on Crossmint. You can now setup the <CrossmintPayButton> inside your website to let your users be able to mint your NFT using a Credit Card.
Note: You can also use the Embedded Checkout feature by Crossmint to build your own checkout UI natively integrated into your website, without pop-ups or redirects and with custom branding. Crossmint handles payments, fraud, minting and even creating wallets for users who don't have one.
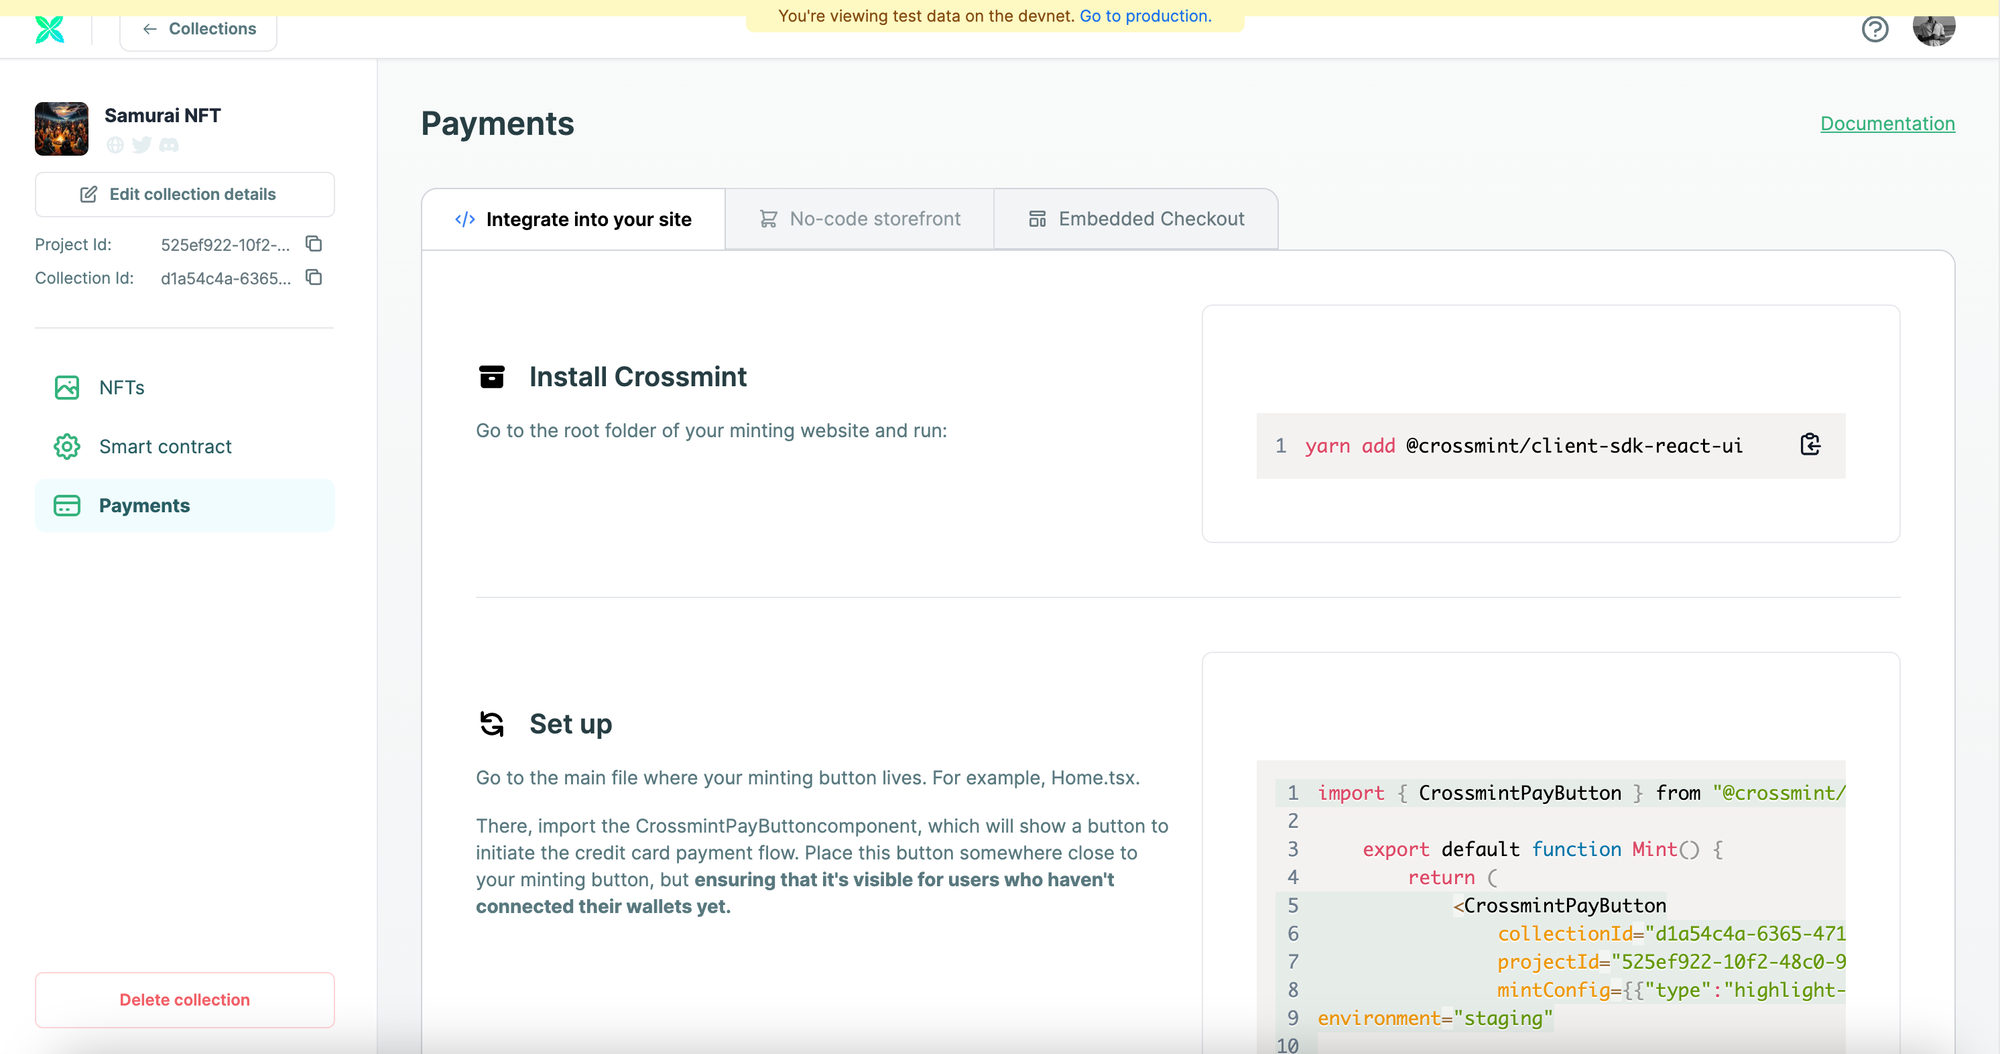
Before you proceed to the next section, make a note of the Project Id and Collection Id on the top left corner of your collection on Crossmint. You will need to use these values to configure the <CrossmintPayButton>.
Credit Card payments using Crossmint SDK
In order to setup your Collection to accept Credit Card payments to mint NFTs, you need to configure your Website or Mint page with the code shared below.
As a pre-requisite, you need to install the Crossmint React SDK. Run the command below inside the root directory of your project to install it.
Note: You need to have Node.js, npm and yarn installed on your computer before you proceed.
yarn add @crossmint/client-sdk-react-uiThe <CrossmintPayButton> requires you to pass the following parameters:
1. collectionId - this is the Collection Id of your Collection on Crossmint. This can be found on your imported collection on Crossmint’s Developer Console.
2. projectId - this is the projectId of your Collection on Crossmint. This can be found on your imported collection on Crossmint’s Developer Console.
3. type - this is the type of underlying contract that you are using. In this case, it is highlight-series
4. numTokensToMint - this defines how many NFTs should be minted on the current checkout transaction.
5. totalPrice - this equals the total price of the purchase. That is, the price per NFT multiplied by the number of NFTs. In our case, we are selling 1 NFT with the unit price of 0.001 Matic, so the totalPrice.
Note: there is a restriction set on totalPrice with the Buy with Credit Card feature, that is, the totalPrice needs to be greater than 0.5$ in value. Hence, we will set the totalPrice as 0.01 Matic.
6. vectorId - you can find your mint vector Id on your collection page on Highlight.
7. environment - this can either be set to staging or production , in this case, it should be set to staging
import { CrossmintPayButton } from "@crossmint/client-sdk-react-ui";
function App() {
 return (
   <CrossmintPayButton
               collectionId="d1a54c4a-6365-4713-bd70-308a8a4488e8"
               projectId="525ef922-10f2-48c0-9b68-009ac9f0bf11"
               mintConfig={{
                 "type": "highlight-series",
                 "numTokensToMint": "1",
                 "totalPrice": "0.01", //Price per NFT
                 "vectorId": "enter your vectorId" //replace it with your vectorId that can be found on Highlight
               }}
               environment="staging"
   />
 );
}
export default App;
Run the above React file on your terminal using the command npm start. You will be able to see the Buy with credit card button on your localhost.
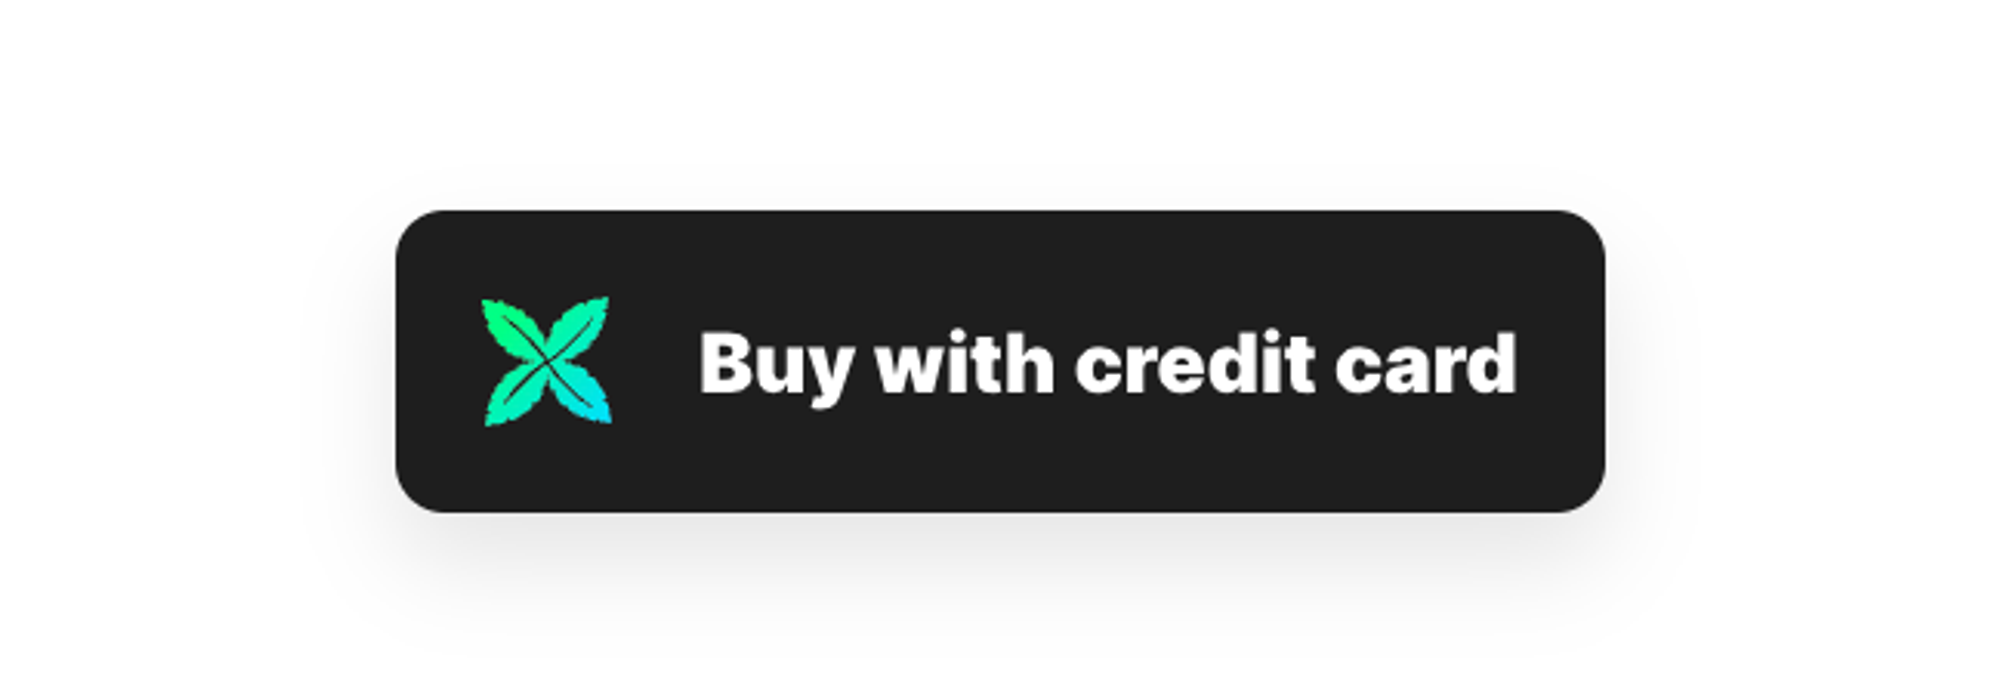
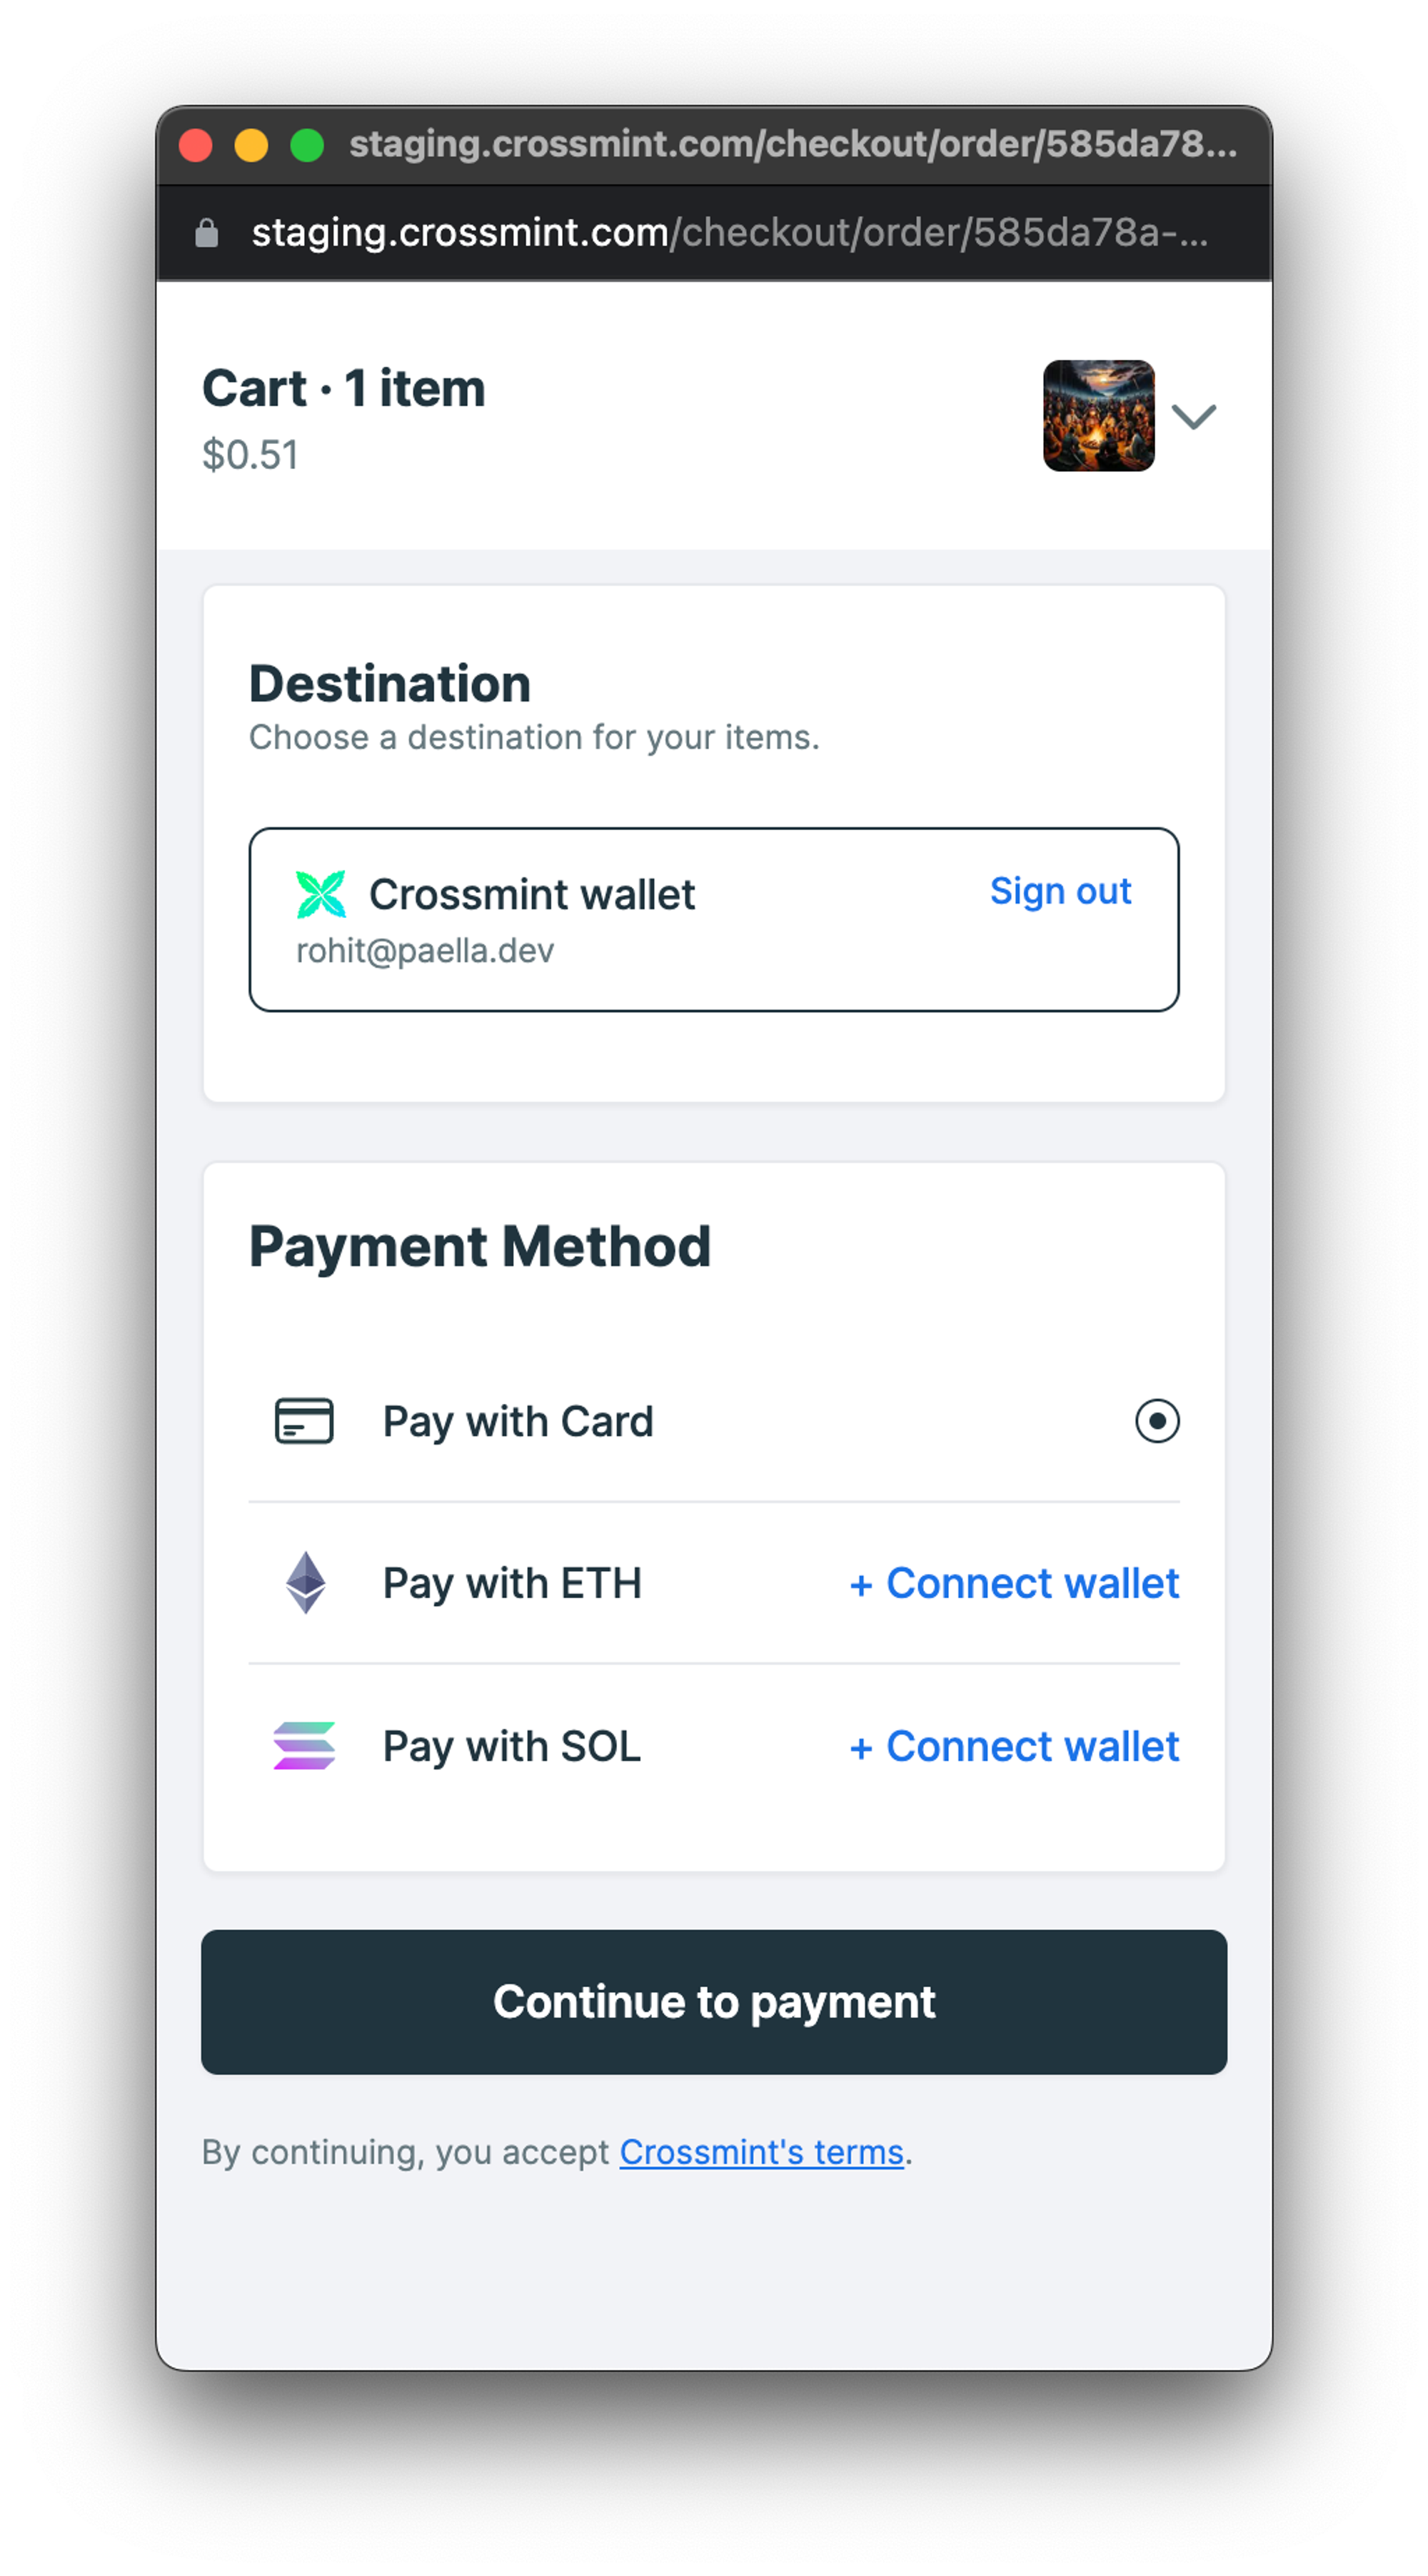
Click on the button to purchase the NFT with your Credit Card. You now need to enter the email Id that you want to mint it to. After that, you need to select the “Pay with Card” option and click on “Continue to payment”. You can choose to pay with Card, Ethereum, or Solana.
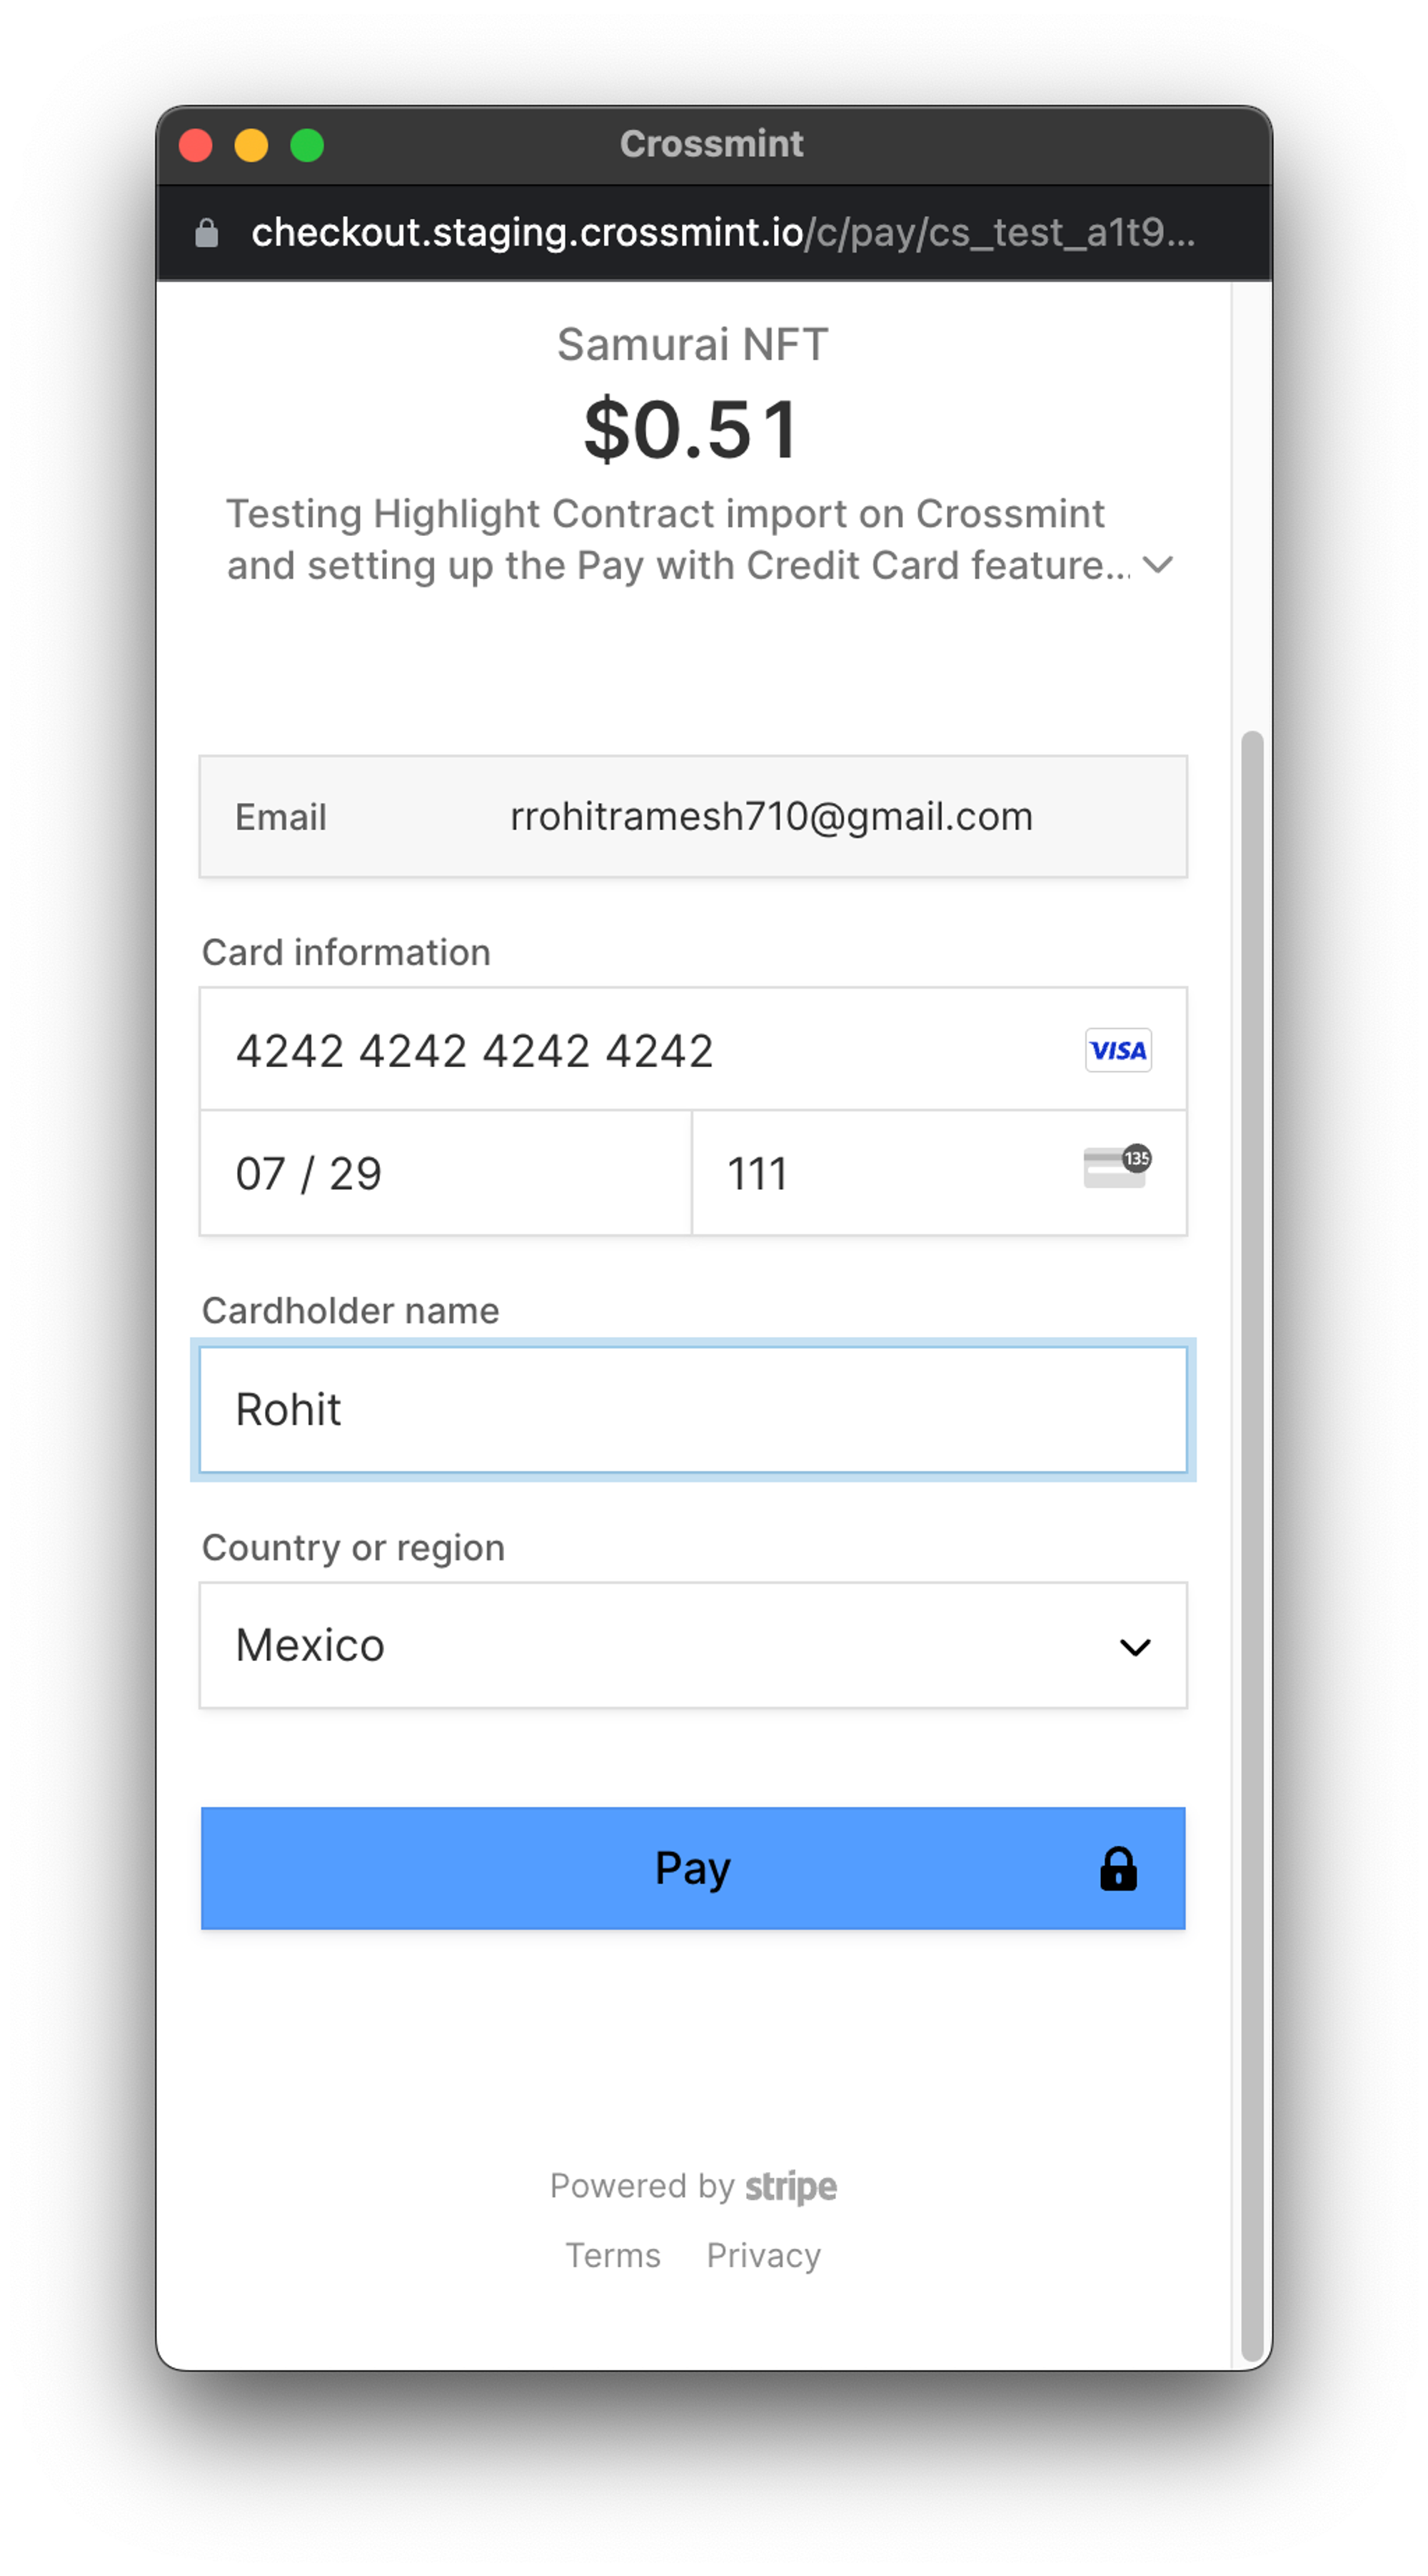
Since the contract you deployed is on the testnet, you can use this 4242 4242 4242 4242 as your Card Number (this is a dummy card number) and fill the rest of the details out with random or dummy values. After filling everything out, click on the “Pay” button.
It may take a few seconds for the payment to go through and the mint to be completed. After your payment is successful, you will be able to see that an NFT has been claimed from your collection.
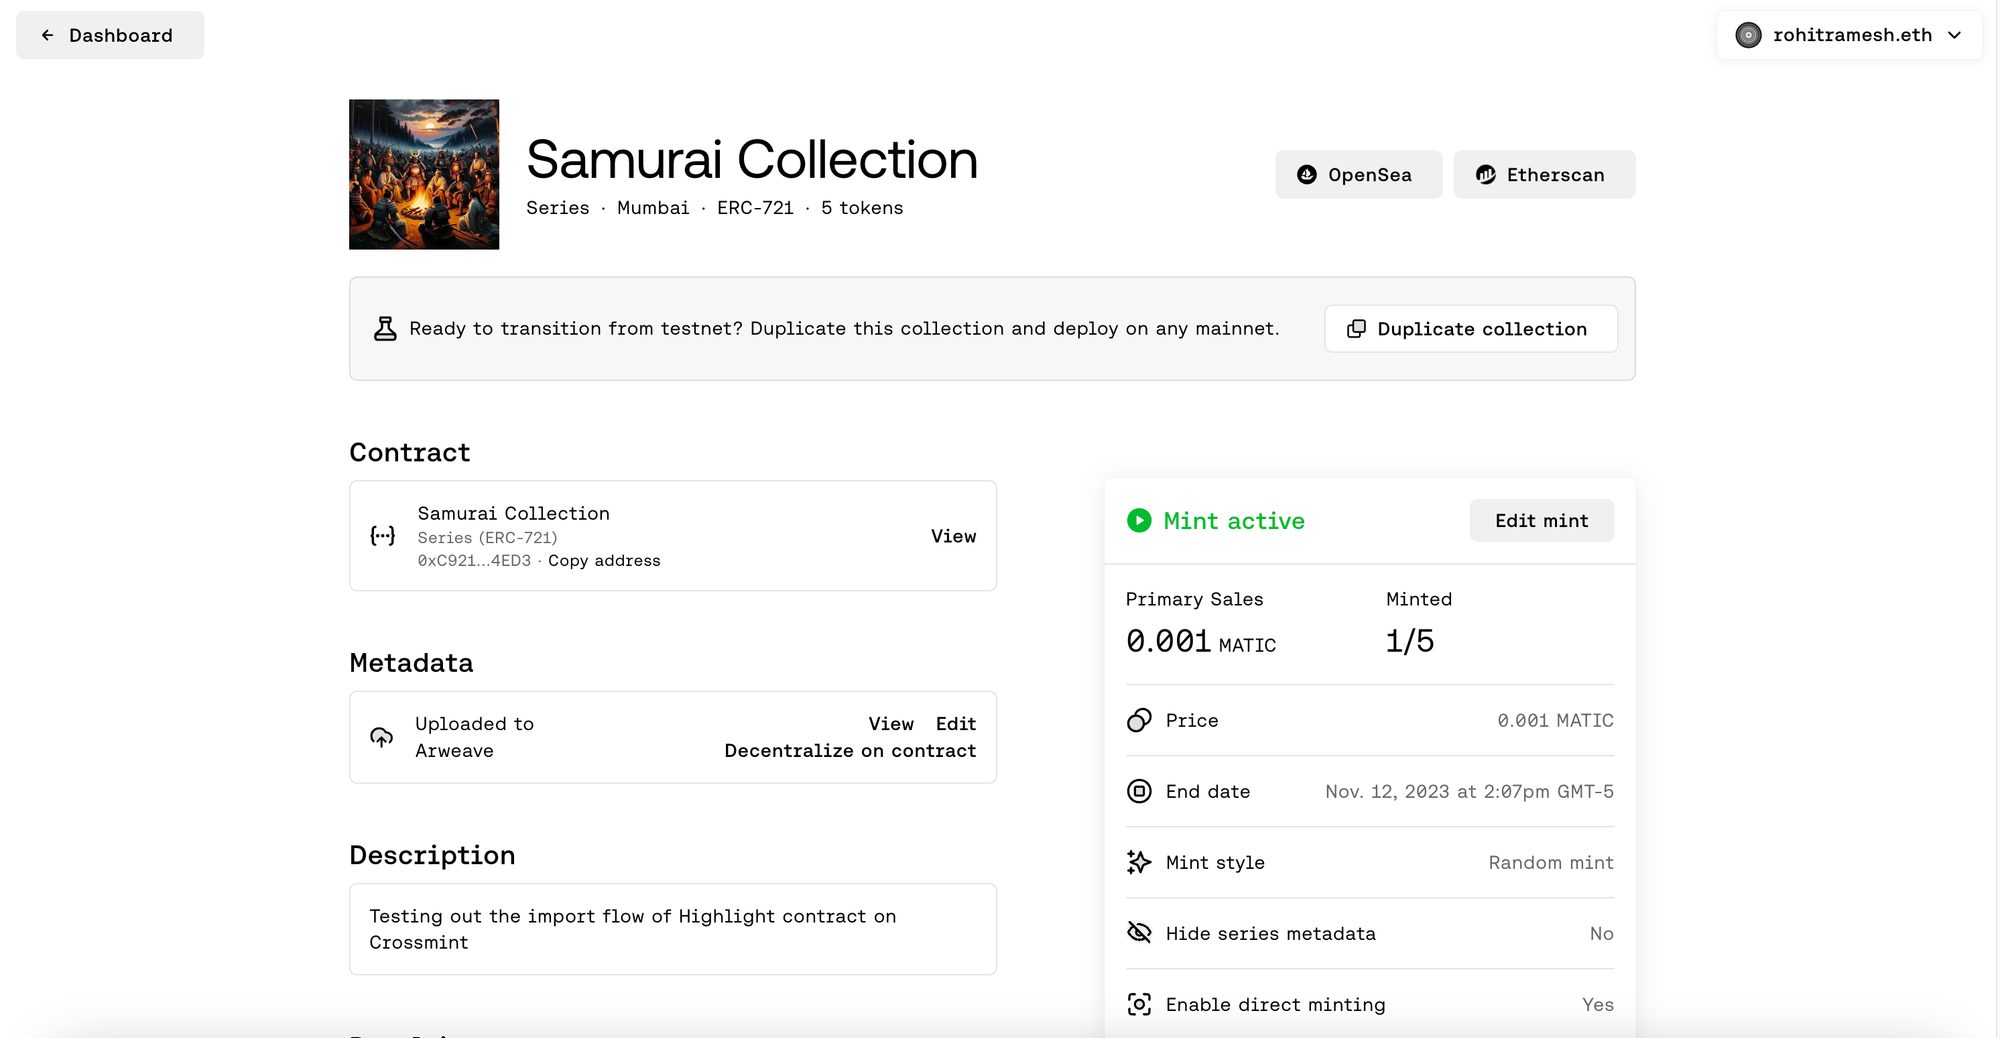
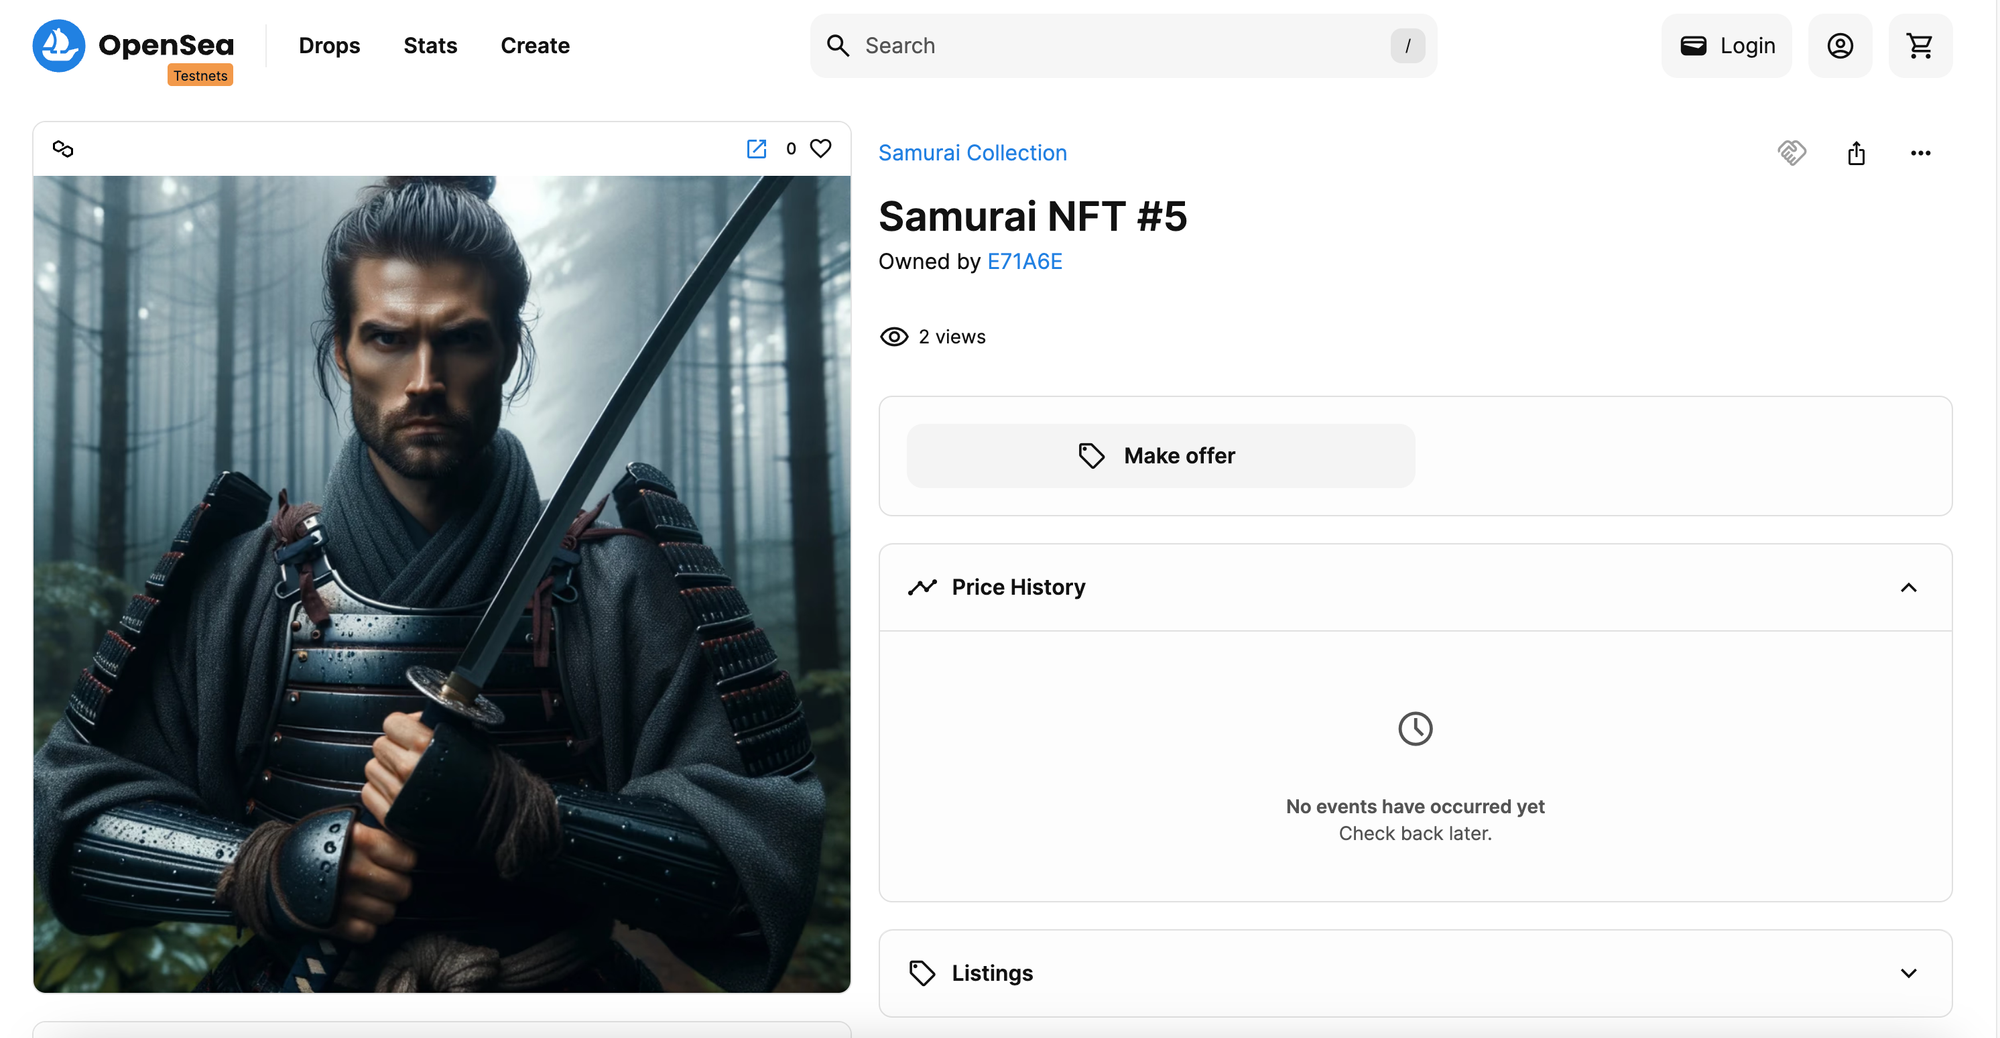
You can also view the NFT that you purchased on OpenSea.
Note: Since you used your email Id to purchase the NFT, the NFT will be minted to your Crossmint Custodial Wallet tied to the email Id that you used. You can transfer this NFT from your Crossmint Custodial Wallet to your personal wallet address at any point of time for free.
How to migrate from Staging to Production?
- You will need to deploy the Highlight Series contract on a Mainnet instead of a Testnet.
- You will need to use our Production Console instead of our Staging Console. Click here to be redirected to the Production Console and get started.
- You will then need to import the contract you deployed on a Mainnet on Crossmint’s Production Console.
- After you import your Highlight contract, you will need to verify that you are the project owner and also verify your collection. You can learn more about this proceed in detail here.
- You need to change the value passed for the parameter environment="staging" to environment="production" inside your React code, i.e., app.js in this tutorial.
What’s next?
Now that you have successfully setup Credit Card payments on your Highlight NFT Collection using Crossmint, you can learn how to build a custom UI for your collection using Crossmint’s Embedded Checkouts feature.
You can also learn how to mint an NFT using a single API call.
Need help?
For support, please join the official Crossmint Discord Server. You can also use Crossmint Help Page for the same.


