


Are you interested in building a Custom GPT that can create NFT collections, and mint NFTs? By the end of this step guide your Custom GPT will be able to seamlessly interact with Crossmint's powerful APIs, opening up a world of possibilities!
Let’s get started!
Pre-Requisites
Before you proceed, make sure that you have an account created on Crossmint's Console. If not, then please sign up - Crossmint Console.
You will also require a ChatGPT Plus subscription, only then you will be able to use GPT playground to build custom GPTs.
Setting up your Crossmint account
Let’s start by generating an API key for your Crossmint account first.
It is recommended that you start with the Staging Console when building and testing with Crossmint since it’s free.
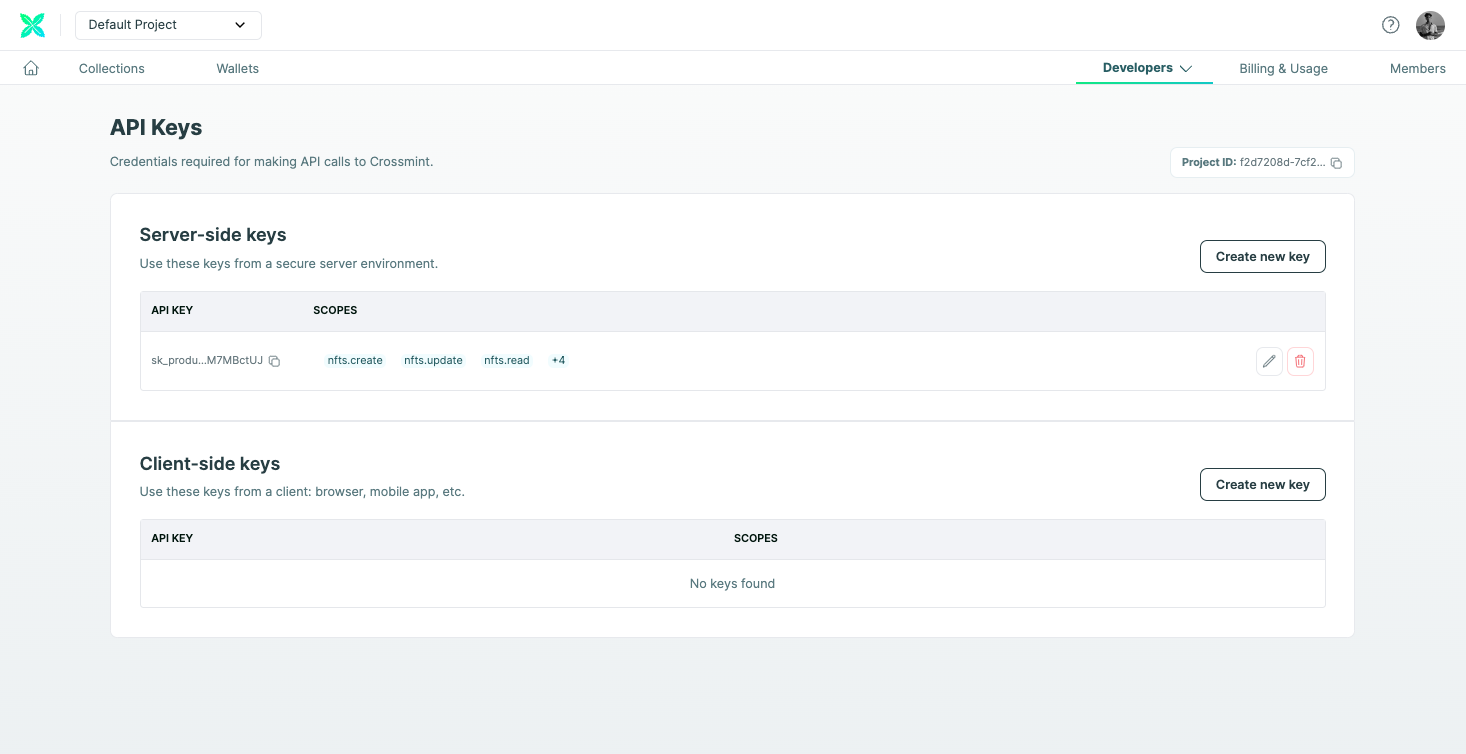
- Navigate to the Crossmint's Console and click on API Keys.
- In the Server-side keys section, click on New API Key.
- Create an API key with the required enabled scopes. For this guide, we suggest enabling the "nfts.create" and "nfts.read" scopes. You can add more scopes depending on what you wish to use the Crossmint API for.

Save the API Key in a secure location. You will need it soon.
Creating a Custom GPT
Now, navigate to chatgpt.com/gpts and click on "Create".

This will open the GPT Builder, where you can build your own GPT by engaging in a conversation with the builder.
At this stage, simply provide the necessary instructions. For example, create a GPT that mints NFTs and the builder will automatically generate a name, image, and customized instructions for your GPT.
You can interact with the preview panel to fine-tune your GPT and make any further adjustments if needed, or return later to make edits.
Integrating Crossmint's Mint API
Custom GPTs allow us to expand the capabilities of our GPT beyond ChatGPT by allowing us to make API calls to external endpoints. This opens up a wide range of possibilities.
Click on "Configure" and you will be able to customize the current configuration of your custom GPT. To enable your GPT to call Crossmint's API, we will utilize the "Actions" feature provided by the GPT Builder (scroll down under "Configure" section).

Below are the steps to add an Action to the GPT:
- You will now need to add an authentication type to your GPT to call Crossmint APIs.
- To enable authentication for interacting with the Crossmint API, navigate to the Actions Panel and select "Authentication".
- For authentication type, select "API Key" as the Authentication Type. Now, copy and paste the Crossmint API Key that you created using the Crossmint Console (as shown in the previous section of this guide).
- Then, select "Custom" as the Auth Type and enter "X-CLIENT-SECRET" or "X-API-KEY" as the Custom Header Name.
- Save the changes. Your GPT is now ready to interact with Crossmint APIs.

- Now, in the Add actions panel, you need to include a valid Open API YAML schema for Crossmint's API.
- To simplify the process, we have created a simple Open API YAML file containing the APIs required to mint NFTs using Crossmint.
https://gpt-minter.vercel.app/openapi.yaml - Copy the link of the Crossmint's Open API Spec file given above. Then, click on the Import from URL button and paste the link into the Import from URL panel. This will automatically update the actions within your GPT.

- Now, on the top right corner of the GPT playground, you will have an option to save or update the GPT (or create, if you have not created it). Ensure you save/update it before you proceed.
Giving Instructions to GPT Builder
On the GPT builder, you can set specific instructions for the bot's actions and behavior. Feel free to experiment and customize it according to your needs.
Your instructions can be as simple as "Create a bot that generates unique images of tiny rooms and turns them into NFTs using Crossmint's API" or more complex instructions like designing a treasure hunt game that mints an NFT after completing each quest.
To make sure your GPT always knows which endpoints to call(we recommend mentioning the OperationID), you can add the following text to your GPT’s instructions on the Configure Panel after the rest of the instructions.
Required_Actions:
- MintNFT - Use this operation to mint an NFT.
- Recipient address should always be in the format of <chain>:<address> or email:<email_address>:<chain>.
- Always ask the user if they want to create a collection first, if no collection is specified, use "default" as the collectionId.

By providing these instructions to custom GPT, we can easily tell it what actions to perform and how to perform them.
But what is OperationID?
OperationID is a crucial element in your instructions when adding actions. It serves as a unique identifier for a specific API operation within the API. By including the OperationID in your instructions, you make it easier for your GPT to understand which API to call as it is specified in the YAML file.
To illustrate, let's say you want your Custom GPT to mint an NFT using Crossmint's API. In the YAML file, there will be an OperationID associated with the "MintNFT" action. By mentioning the OperationID, you explicitly tell your GPT which API operation to trigger, ensuring accuracy in its actions.
Currently for the scope of this tutorial we have only mentioned the MintNFT for Crossmint operation. However, if there are more operations available in your YAML file, we suggest you to go through the list of different operations available in the Crossmint YAML file and play with different operations.
For example, you can instruct your GPT to first call the CreateCollection operation to first create a collection and only then mint an NFT from the created collection or provide specific instructions for different NFT traits when using the MintNFT operation.
💡 The more precise your instructions are regarding when to call an Operation and what parameters it should have, the better your GPT will be able to perform tasks according to your desired outcomes.
Testing your Custom GPT
Finally, you need to test everything. You can do this by instructing your bot to call the MintNFT action and mint an NFT to a specific wallet address or email address. The preview tab allows you to easily view the API calls that your GPT makes externally, which is useful for debugging purposes.

If everything works properly, you will have successfully added Crossmint APIs to your GPT. If any errors occur, click on the [debug] accordion option to view the calls made from your GPT and the corresponding response for further debugging.
Conclusion
Your GPT should now be able to Mint NFTs, Create Collections on different chains and with this ability, you can now enhance your GPTs and enable them to perform more interesting tasks. For the next steps, consider adding additional custom instructions and expanding the capabilities of your bot. To read more about writing better prompts, you can check out this guide by Open AI.
We are excited to see what you create! If you need any help or support, please reach out to us on Discord or Twitter.
What's Next?
If you are wondering how Crossmint has helped enterprises and brands by powering their NFT Drops, you can click on the link below to read all our Case Studies.

If you want to learn how to use the Crossmint to create Web 3 Wallets for your users using their Email Address, please watch the YouTube video below.
Need help?
For support, please join the official Crossmint Discord Server. You can also use Crossmint Help Page for the same.
 Danny Mulvihill
 Rohit Ramesh