


This guide will show you how to create Dynamic NFTs using Crossmint.
By the end, you will have learned how to deploy smart contracts (no-code), create NFT Collections via API, and create dynamic NFTs. You will also have learned how to use Crossmint's Edit API.
This guide will take you 10 mins to complete (approximately).
Let's get started!
What is a Dynamic NFT?
In the world of Web3 and Blockchain, Non-Fungible Tokens (NFTs) have emerged as unique digital assets, collectibles, tickets, memorabilia, etc. Due to the immutable nature of most blockchains (EVM and non-EVM), changing or evolving traditional NFTs over time, based on user interactions or other inputs is a challenge.
Unlike traditional NFTs, Dynamic NFTs can be programmed to update their metadata in response to external actions or triggers. This is a means to create more engaging and gamified user experiences with NFTs.
What can Dynamic NFTs be used for?
Imagine a piece of digital art that changes with the viewer's interactions, or a virtual pet that grows and evolves based on its care—Dynamic NFTs make this possible. They leverage smart contracts that are designed to be mutable under certain conditions, allowing for real-time updates based on external data feeds, user interactions, or predefined rules.
This capability to evolve post-creation sets Dynamic NFTs apart. While traditional NFTs represent a fixed piece of data, Dynamic NFTs offers a token that can change and evolve over time. This allows creators and developers to engage with their audience, allowing digital assets to reflect changes over time, react to events, or personalise experiences based on user actions.
While traditional NFTs are immutable digital certificates of ownership and authenticity, Dynamic NFTs introduce a layer of interactivity and mutability, bridging the gap between digital assets and the ever-changing dynamics of the real world. This takes NFTs from plain ownership to an experience that varies with interaction and with time.

How to create Dynamic NFTs using Crossmint?
Create an NFT Collection using Crossmint
If you are wondering how you can create and deploy an NFT Collection without writing any code, please follow the tutorial below to learn how you can do so with Crossmint.
Alternative, you can also read this Blog post below. The first half of the blog, shows you how to create NFT Collections using Crossmint.
 Rohit Ramesh
You can also create collections using Crossmint's APIs. Click here to learn more.
Before you begin, please ensure that you have a Developer Account created on Crossmint. If not, please head over to Crossmint Console and create an account.
Note: We will be using Crossmint's Staging Console for this tutorial. It's recommended that you familiarize yourself with this tutorial on Staging before you work with Crossmint's Production Console. Click here to the Staging Console.
Now that we have the collection creation process out of the way, let's learn how to create Dynamic NFTs.
Minting an NFT
We first need to mint an NFT inside our NFT Collection using Crossmint. In order to do so, we will be using Crossmint's NFT mint API.
The Mint API lets you create, mint and deliver NFTs in under 5 minutes.
Behind the scenes, Crossmint's Mint API
- Deploys a smart contract for your NFT and creates an NFT Collection, if you don’t have one.
- Validates and uploads your metadata to decentralized storage (IPFS).
- Mints an NFT on a blockchain of your choice (Polygon, Ethereum, Arbitrum, Solana, etc)
- If you are minting to an email address, it creates a NFT wallet for the user, accessible from crossmint.com by logging in with the same email; i.e., lets you mint NFTs to email addresses.
- Sends the NFT to that wallet.
In order to mint an NFT inside your NFT Collection using the Mint API, use the code snippet below.
curl --request POST \
  --url https://staging.crossmint.com/api/2022-06-09/collections/{collectionId}/nfts \
  --header 'Content-Type: application/json' \
  --header 'X-API-KEY: <api-key>' \
  --data '{
  "metadata": {
    "description": "My NFT created via the mint API!",
    "image": "https://www.crossmint.com/assets/crossmint/logo.png",
    "name": "Crossmint Example NFT"
  },
  "recipient": "email:testy@crossmint.io:polygon",
  "reuploadLinkedFiles": true
}'- X-API-KEY - Obtained in the Crossmint Developer Console
replace "<api-key>" with the API Key obtained from your Developer Console.
For example:
'X-API-KEY: sk_staging_247o7LZej21ZDW1cnL9STtLEiAtgBYmK6JaT3raAyphQBnPQK1se3isoNa'Note: Please do not expose your API Keys or projectId and collectionId. Exposing these values may lead to security breach. Anyone with your Production API Key can use them and bill you for it. Anyone with your Production projectId and collectionId can modify your NFT Collection. These values are being displayed on this tutorial for educational purpose, however, this is not the best practice to follow when you are working on Production.
- collectionId - The collectionId for your created NFT Collection can be found on your Developer Console. In the screenshot attached below, you can learn where you can obtain this value from.
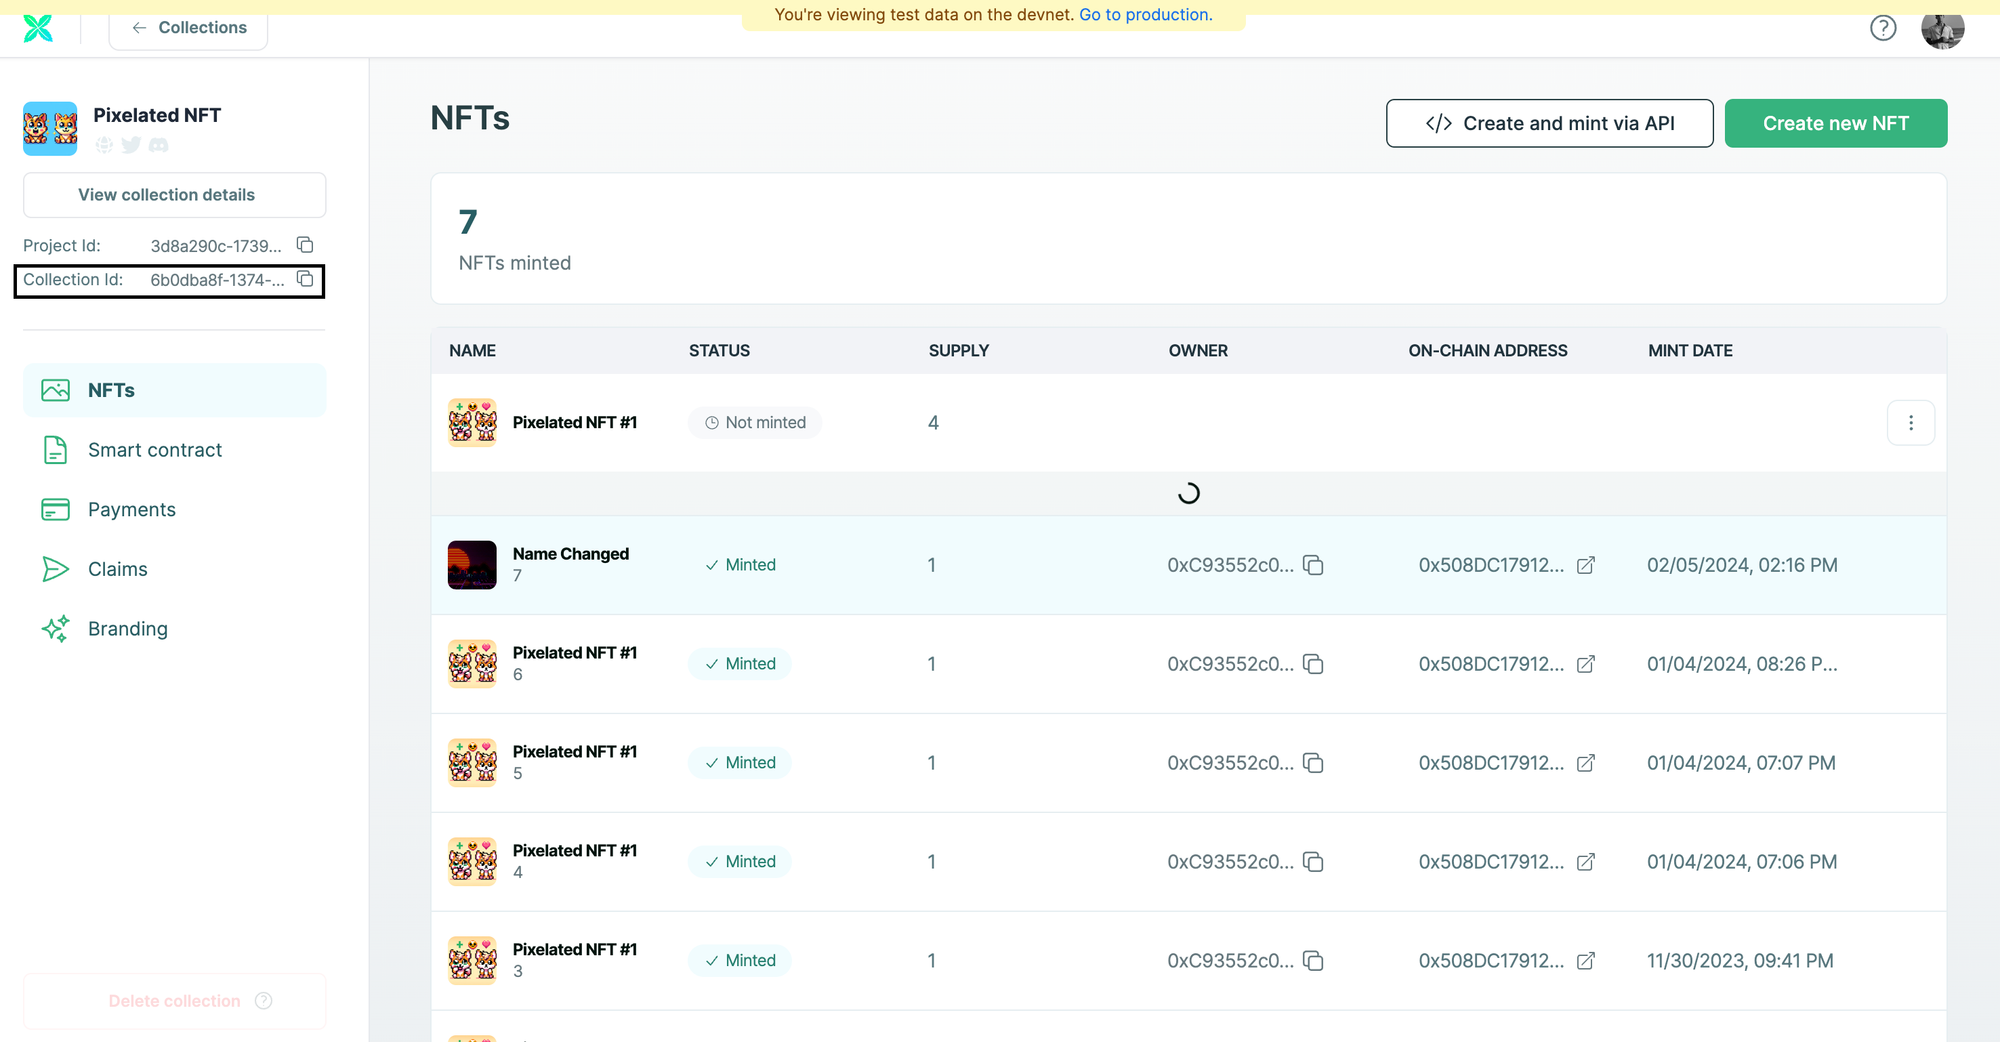
Replace "{collectionId}" in the "url" with the value obtained from the Developer Console.
For example:
url https://staging.crossmint.com/api/2022-06-09/collections/6b0dba8f-1374-45ea-9334-296c/nfts- description - A brief description of the NFT.
- image - Direct link to your NFT image. This is a URL.
- name - The name of your NFT.
- recipient - The wallet or email address that the NFT should be sent to.
- reuploadLinkedFiles - Set this parameter to "true" if you want to allow this NFT's metadata to be edited post creation.
Once you run this code, it will return an output that looks similar to the output below. If your output looks similar, it means that the code you ran was successful. If you received an error or a different output, you can refer to our docs here to learn more about the Mint API and how to use it. You can also view the complete Mint API reference here.
{
  "id":"3b288516-b82b-460a-9247-76e6a2efb09d",
  "onChain": {
    "status":"pending",
    "chain":"polygon",
    "contractAddress":"0x508DC17912c8A956941a37196848aEcAD7216Cd0"
  },
  "actionId":"3b288516-b82b-460a-9247-76e6a2efb09d"
}
Please note down the value of "id" returned. This is crucial for us to proceed to the next step of editing our minted NFT's Metadata.
For example, in my case, the "id" returned was "3b288516-b82b-460a-9247-76e6a2efb09d".
After the NFT gets minted, you can login into your Crossmint Wallet with the email address that you minted the NFT to and view what the minted NFT looks like.
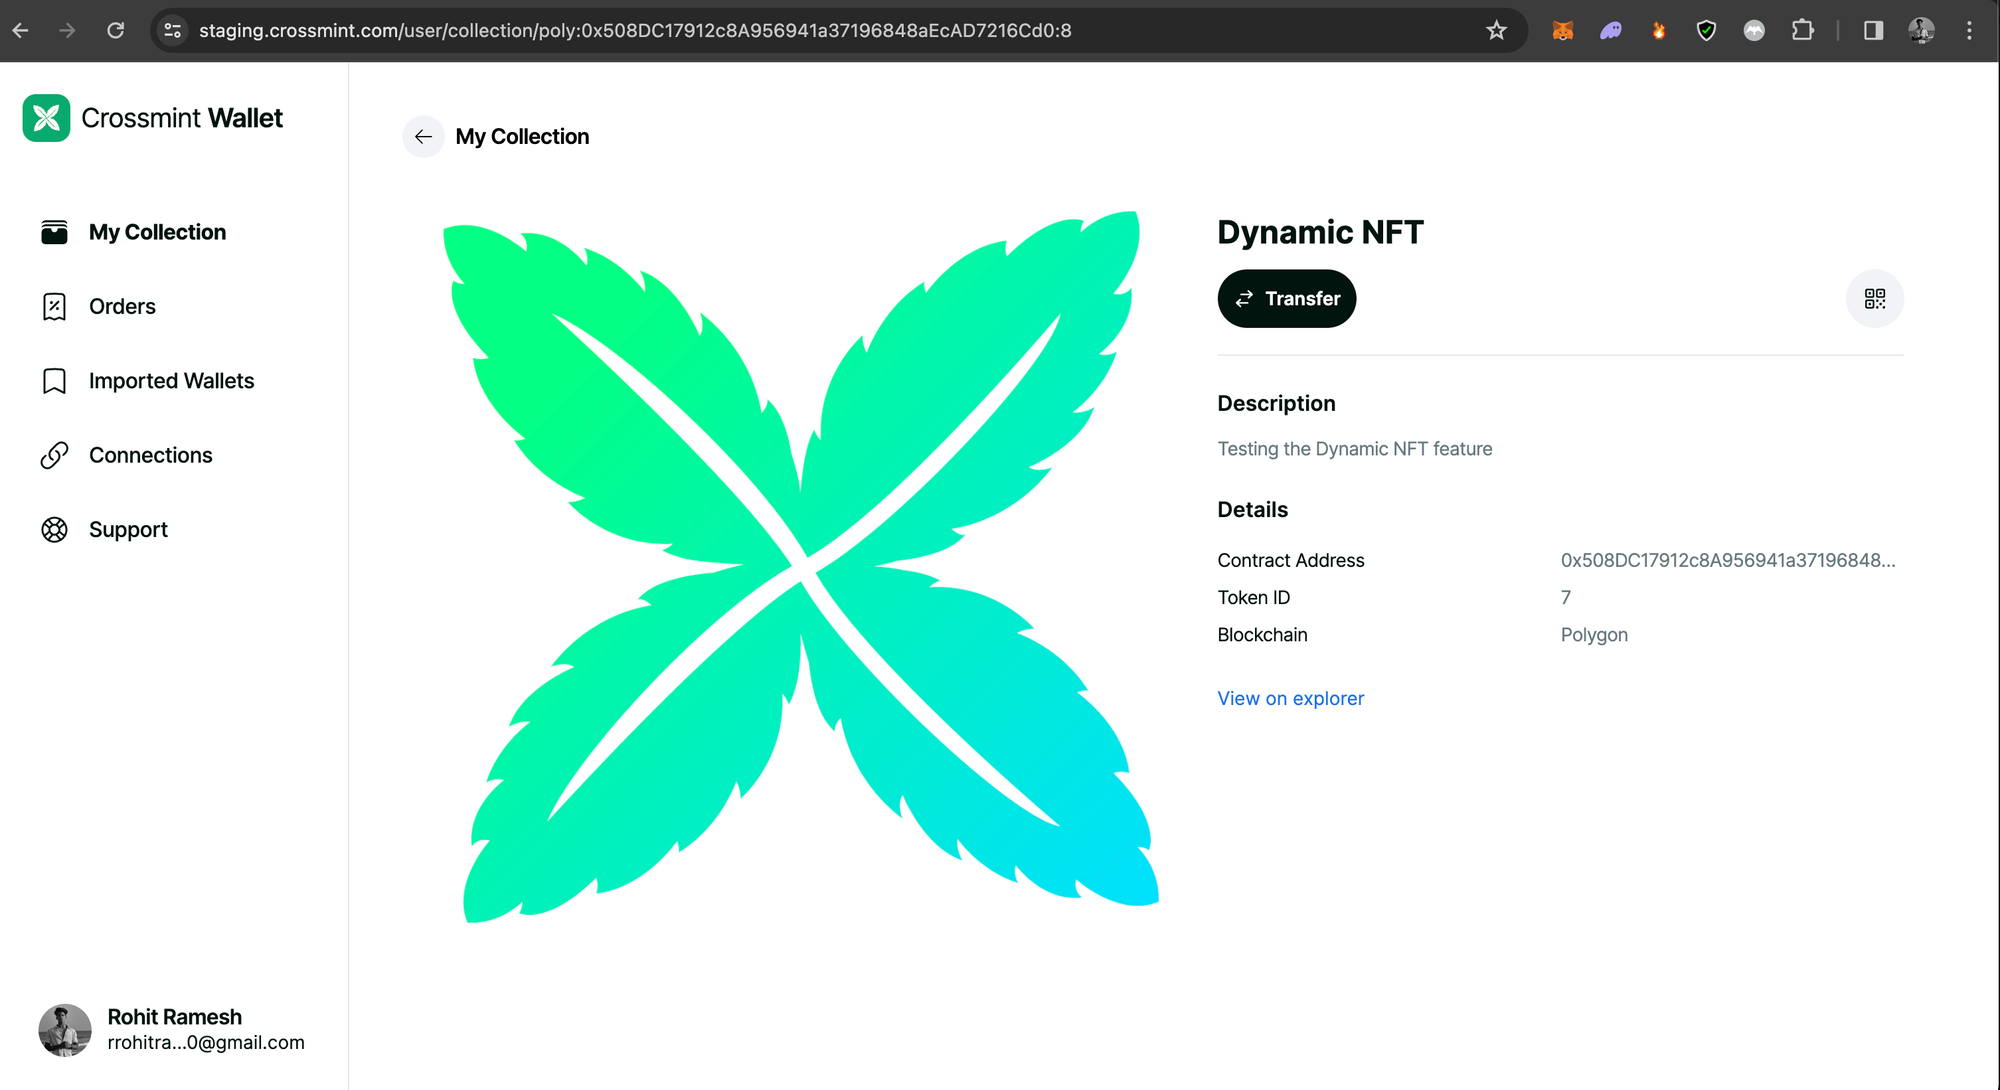
You can notice that the NFT that I minted has the name "Dynamic NFT", and the description "Testing the Dynamic NFT feature" and the image is set to an image of Crossmint's logo. Now let's try to edit the NFT Metadata to update the name, description and NFT's image.
Editing the minted NFT to create Dynamic NFT
In order to edit the Metadata of the minted NFT, you need to use Crossmint's Edit NFT API.
Refer to the cURL code given below to call the Edit NFT API.
curl --request PATCH \
  --url https://staging.crossmint.com/api/2022-06-09/collections/{collectionId}/nfts/{id} \
  --header 'Content-Type: application/json' \
  --header 'X-API-KEY: <api-key>' \
  --data '{
  "metadata": {
    "description": "The NFT'\''s description has now been changed",
    "image": "https://wallpapercave.com/wp/wp9637250.jpg",
    "name": "Name Changed"
  },
  "reuploadLinkedFiles": true
}'- The values for collectionId and api-key need to be changed with the respective values obtained from the Developer Console. Refer to the section above to see how to obtain these values and substitute them into your code.
- id - You need to pass the value of id that we noted down from the output that was returned when we called the Mint API to mint an NFT.
Replace "{id}" with the actual value of id returned. In my case the value for "id" is "3b288516-b82b-460a-9247-76e6a2efb09d"
For example,
url https://staging.crossmint.com/api/2022-06-09/collections/6b0dba8f-1374-45ea-9334-296ce/nfts/3b288516-b82b-460a-9247-76e6a2efb09d- Set the metadata values such as description, image, and name with the updated values/details.
Once you run this code, it will return an output that looks similar to the output below. If your output looks similar, it means that the code you ran was successful. If you received an error or a different output, you can refer to our docs here to learn more about the Edit API and how to use it. You can also view the complete Edit API reference here.
{
  "actionId":"efcedb69-0c0c-4972-928b-6b80ed7f7ca2",
  "action":"nfts.update",
  "status":"pending",
  "data":{
    "chain":"polygon",
    "collection":
    {
      "id":"6b0dba8f-1374-45ea-9334-296cec8760fa",
        "contractAddress":"0x508DC17912c8A956941a37196848aEcAD7216Cd0"
    },
    "token":{
      "id":"3b288516-b82b-460a-9247-76e6a2efb09d",
      "owner":{
      "walletAddress":"0xC93552c0A8043ED6420cfF5eFF0D56d616aeea5a"
      },
    "tokenId":"7"
    },
    "changes":["metadata"]
  },
  "startedAt":"2024-02-05T08:46:58.000Z",
  "resource":"https://staging.crossmint.com/api/2022-06- 09/collections/6b0dba8f-1374-45ea-9334-296ce/nfts/efcedb69-0c0c-4972-928b-6b80ed7f7ca2"
}
After the Edit NFT API call has been successfully executed. Go back to your Crossmint Wallet and login with the email address that you first minted the NFT to. Now, you can view what the edited NFT looks like.
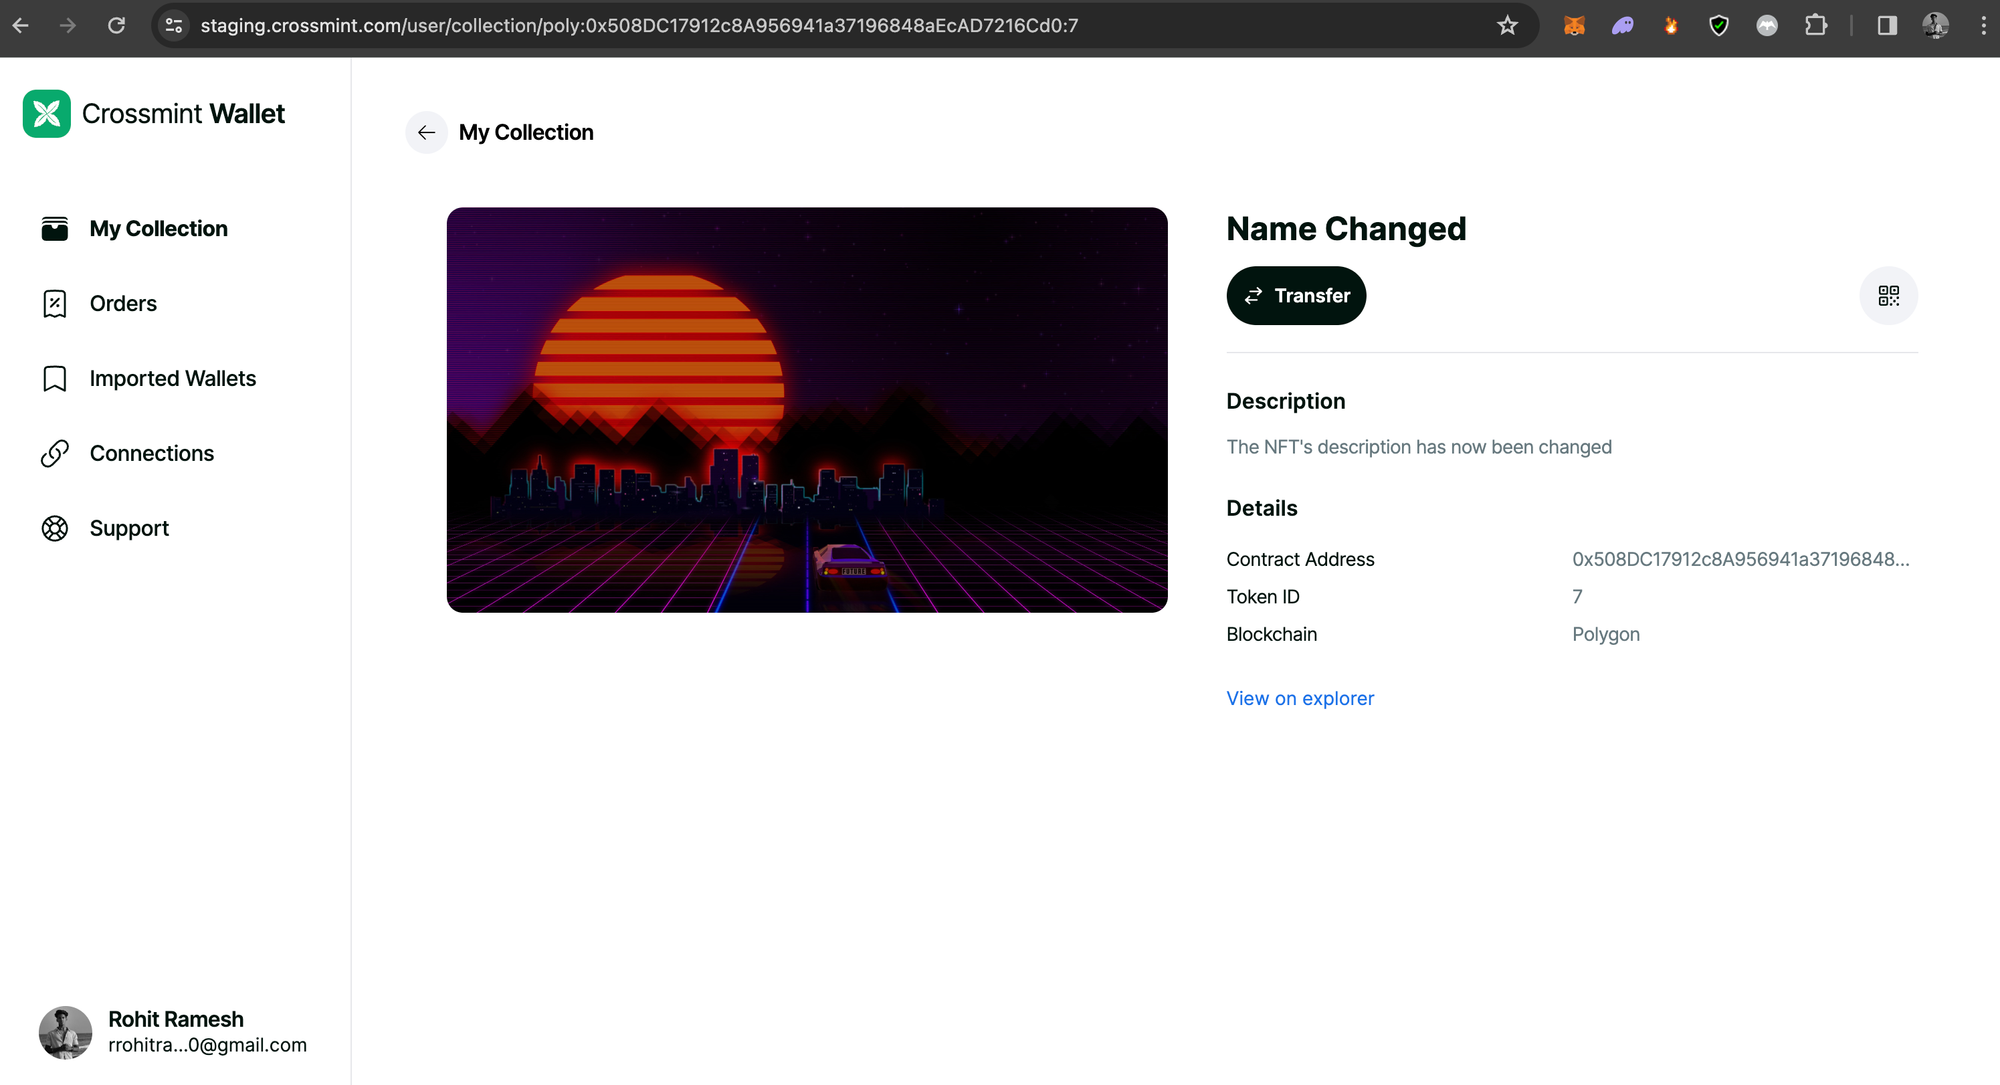
You can notice that the name has been changed to "Name Changed", and the description "The NFT's description has now been changed" and the image is set to an image of cyberpunk image of a sunset.
This brings us to the end of the Dynamic NFT guide.
Note: The changes may take a couple of minutes to be reflected on your Crossmint Wallet. If you are unable to see the changes right away after calling the Edit NFT API, please wait for a few minutes and reload the page to see the changes.
Alternate way to create Dynamic NFTs
The alternate way to create Dynamic NFTs would be to upload and store NFT Metadata on a centralized database/server/storage, which would then be references as the "baseURL" of the NFT within the smart contract.
When you need to change or update the NFT, you can simply update the metadata stored on the centralized storage and it will be reflected on the NFT.
You can learn more about this here.
Examples of Dynamic NFTs powered by Crossmint
Crossmint powered Coinbase's Onchain Summer initiative with the Mint API and Edit API to create Upgradeable NFTs or Dynamic NFTs that evolve over time based on user interaction and participation.
You can read more about this activation in the article below.
Jean Jacques
If you would like to learn more about how Crossmint can help you power this, reach out to Crossmint's Sales Team.
What's Next?
If you are wondering how Crossmint has helped enterprises and brands by powering their NFT Drops, you can click on the link below to read all our Case Studies.


If you want to learn how to use the Crossmint Console to the best of its capacity, please watch the videos in the YouTube Playlist below.
Need help?
For support, please join the official Crossmint Discord Server. You can also use Crossmint Help Page for the same.