


This guide will show you how to create NFT Collections, create and mint NFTs using Crossmint with no-code.
By the end, you will learn how to create NFTs and mint them to your wallet address or airdrop it to your users.
This guide will take you 10 mins to complete (approximately).
Let's get started!
Table of Contents:
- Create a Developer Account on Crossmint Console
- Create an NFT Collection
- Create and Upload NFTs
- Mint NFTs with 0 code
- How to Sell your NFTs
- What's Next?
- Need Help?
Create a Developer Account on Crossmint Console
Before we begin, please ensure that you have a Developer Account created on Crossmint. If not, please head over to Crossmint Console and create an account.
Note: We will be using Crossmint's Staging Console for this tutorial. It's recommended that you familiarize yourself with this tutorial on Staging before you work with Crossmint's Production Console. Click here to go to the Staging Console.
Let's begin!
Create an NFT Collection
Now head over to the Staging Console and click on "Collections". Click on "New Collection" and you will be asked to enter your collection information. Please enter the "Collection name", "Description", and upload a cover image for your NFT Collection. The rest of the details such as "Website", "Twitter", and "Discord" are all optional.
Once you have filled out the information, click on "Next" to proceed.

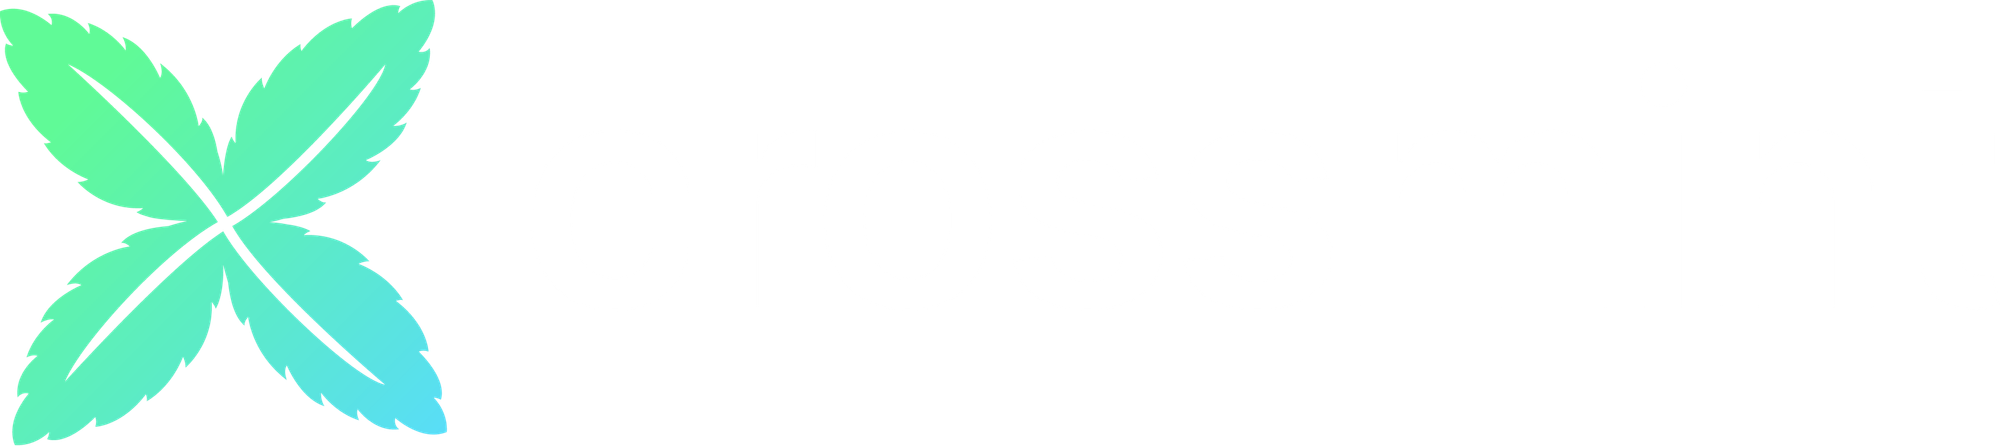
Select "Create a new contract". This will let you deploy a smart contract for your NFT Collection with no-code. If you are confused, don't worry; in simple words, Crossmint deploys a new smart contract for your NFT Collection on your behalf.
Click on "Next" to proceed.
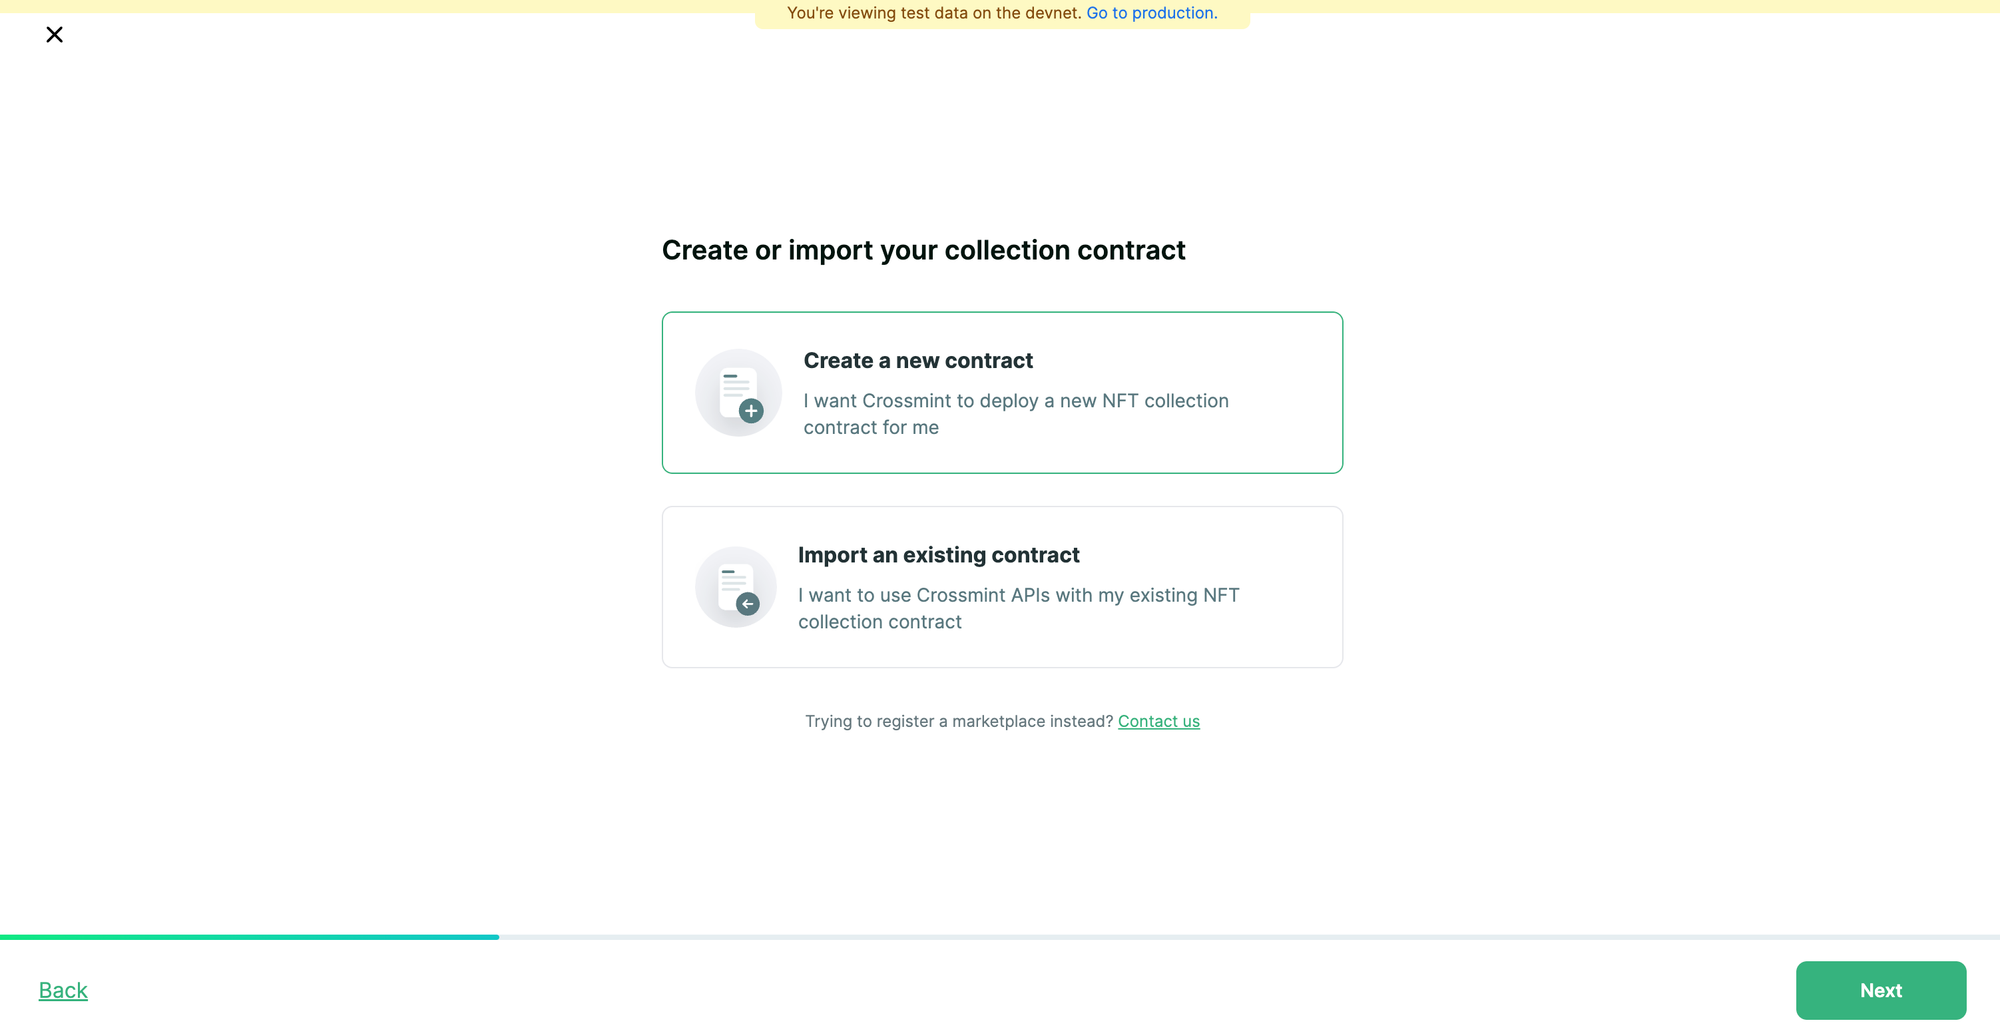
Now, you will need to select what you wish to do with the NFT Collection that you are trying to create.
Select "Airdrop NFTs" if you wish to airdrop (deliver) NFTs to a list of wallet addresses or email addresses. Select "Sell NFTs" if you wish to enable payments and allow your users to purchase your NFTs with credit card or cross-chain crypto tokens like Solana and Ethereum.
For the sake of this tutorial, I am going to select both of the above options. If you wish to change this, you can always do it later. Click on "Next" to proceed.
Now, you will need to select the Blockchain that you want to deploy the smart contract on. In other words, the Blockchain on which you wish to create the NFT Collection.
For the sake of this tutorial, I will be selecting "Polygon Amoy". Click on "Next" to proceed.

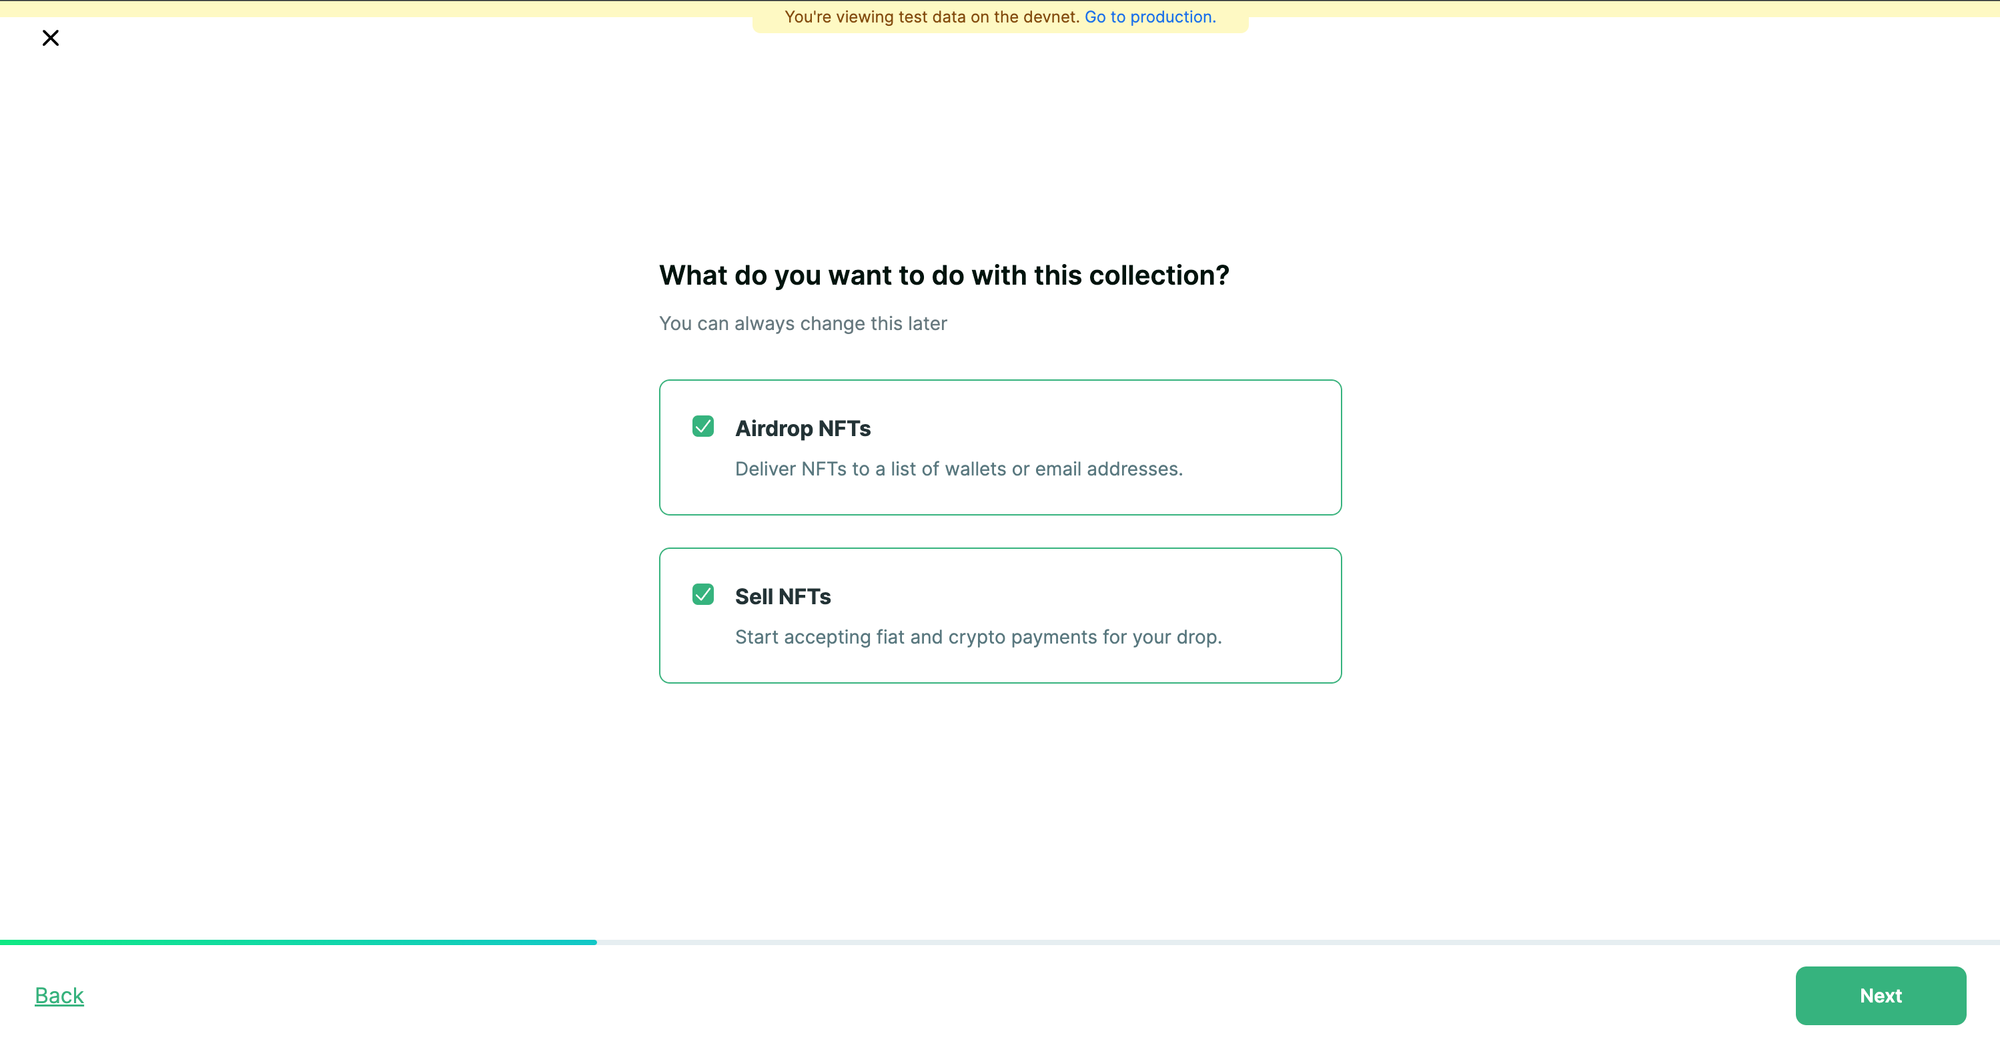
You will now be asked to configure the payment settings for your NFT Collection (only if you selected "Sell NFTs" previously). You need to enter the price per NFT and the recipient wallet address (the wallet that will receive the revenue from the sales of the NFTs). You will always be able to configure this when you wish to enable payments for your NFT Collection and sell your NFTs.
Click on "Next" to proceed.
You will now be asked to review your collection details. When you have finished reviewing this, please accept the content policy by clicking on the check-box.
Click on "Create Collection" to create the NFT Collection.

In a few seconds, the collection will be created for you. On the backend, Crossmint deploys a smart contract for your NFT Collection.
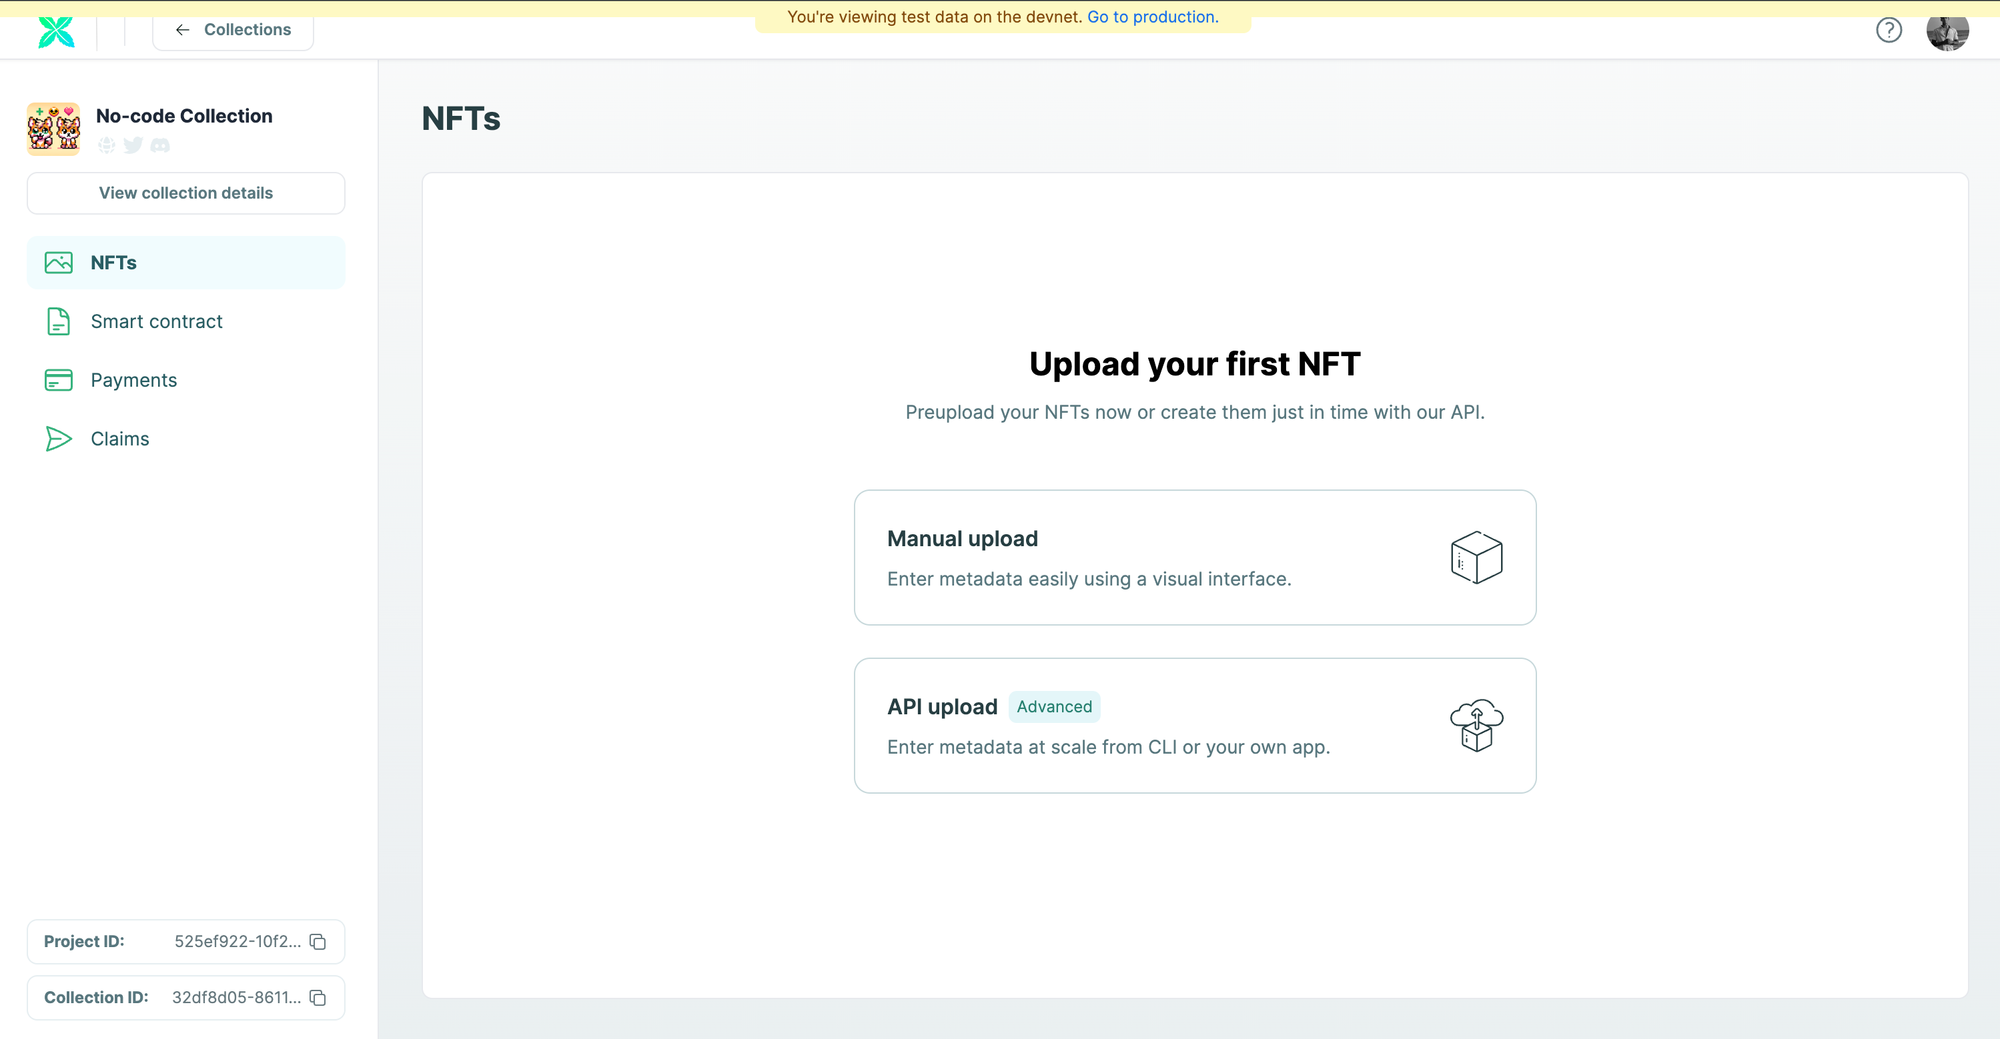
Create and Upload NFTs
Now click on "Manual upload" to upload your NFTs. You can also use Crossmint's API to upload the NFTs but for this tutorial, we will be using the manual upload option.
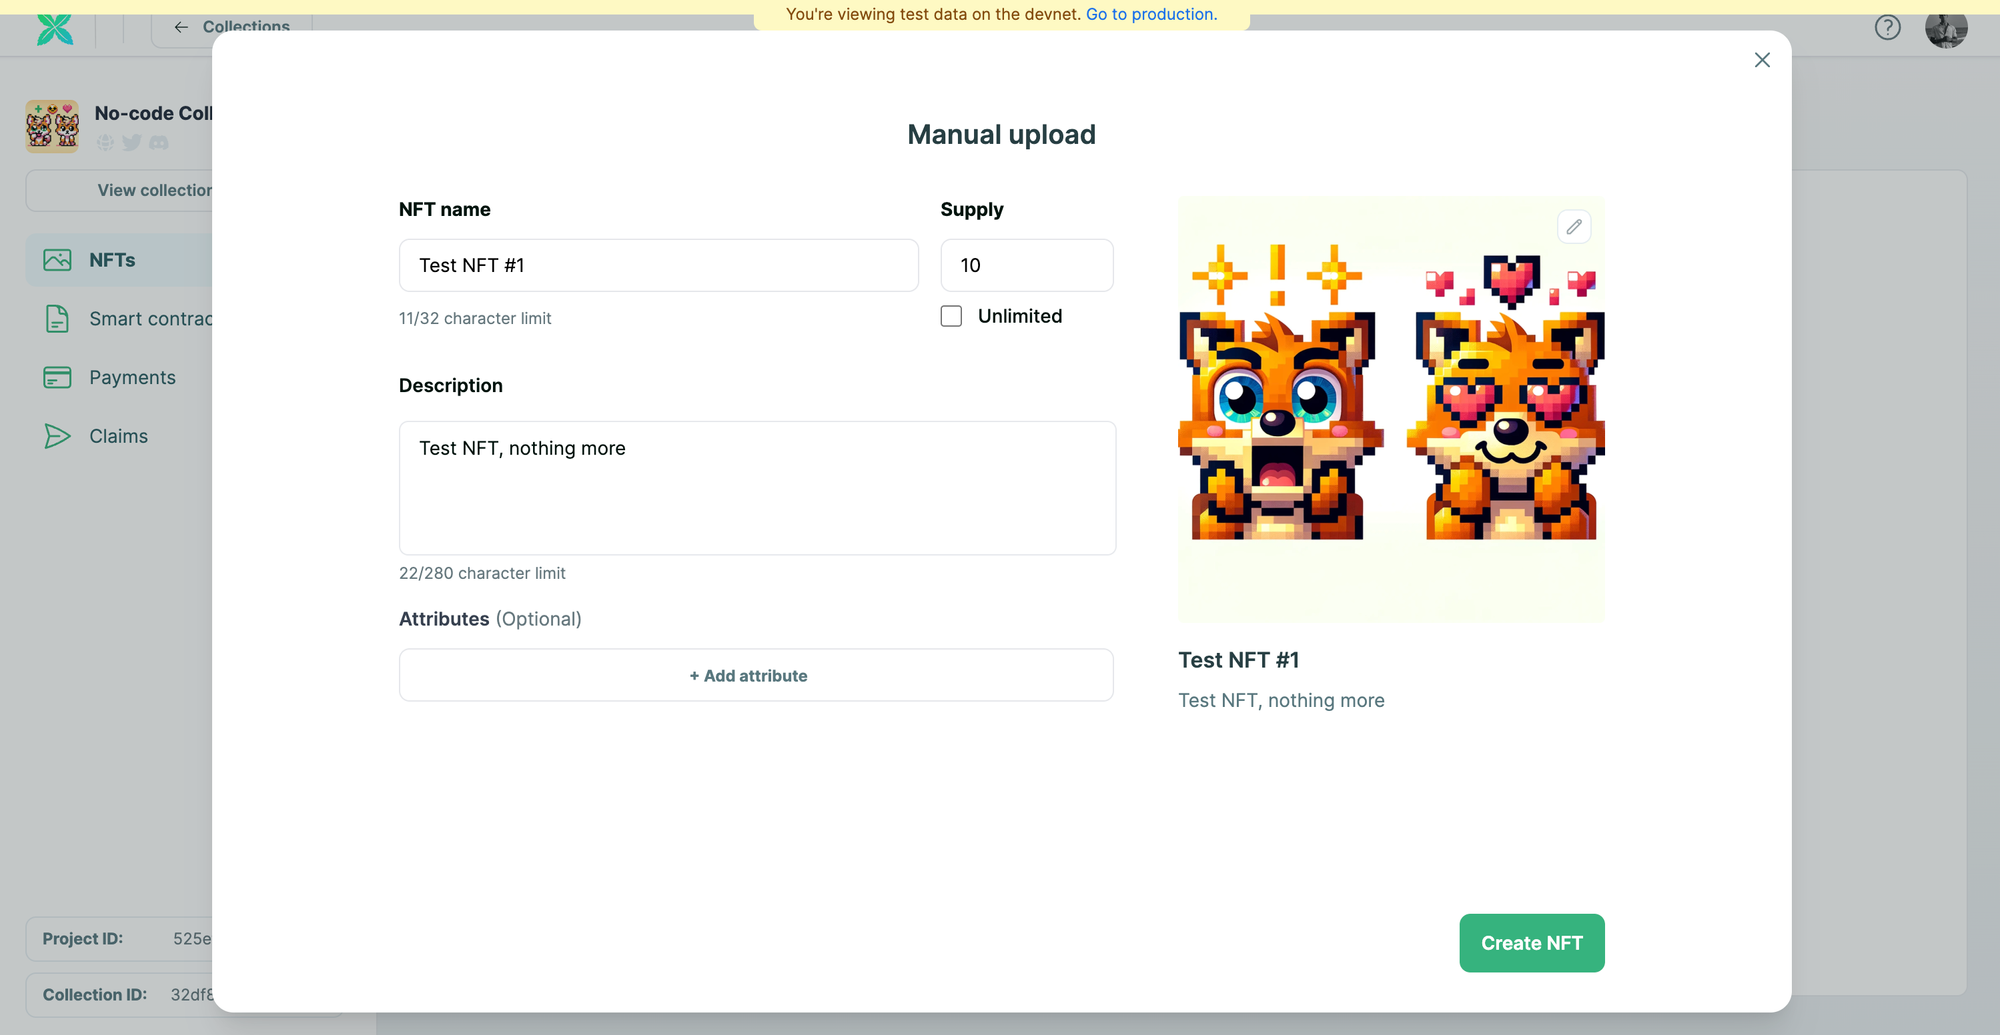
You will now have to enter the NFT's information (Metadata). Please enter the "NFT name", "Supply", and "Description". Then upload the media file for the NFT (image or video).
Click on "Create NFT" to create the NFT on the NFT collection.
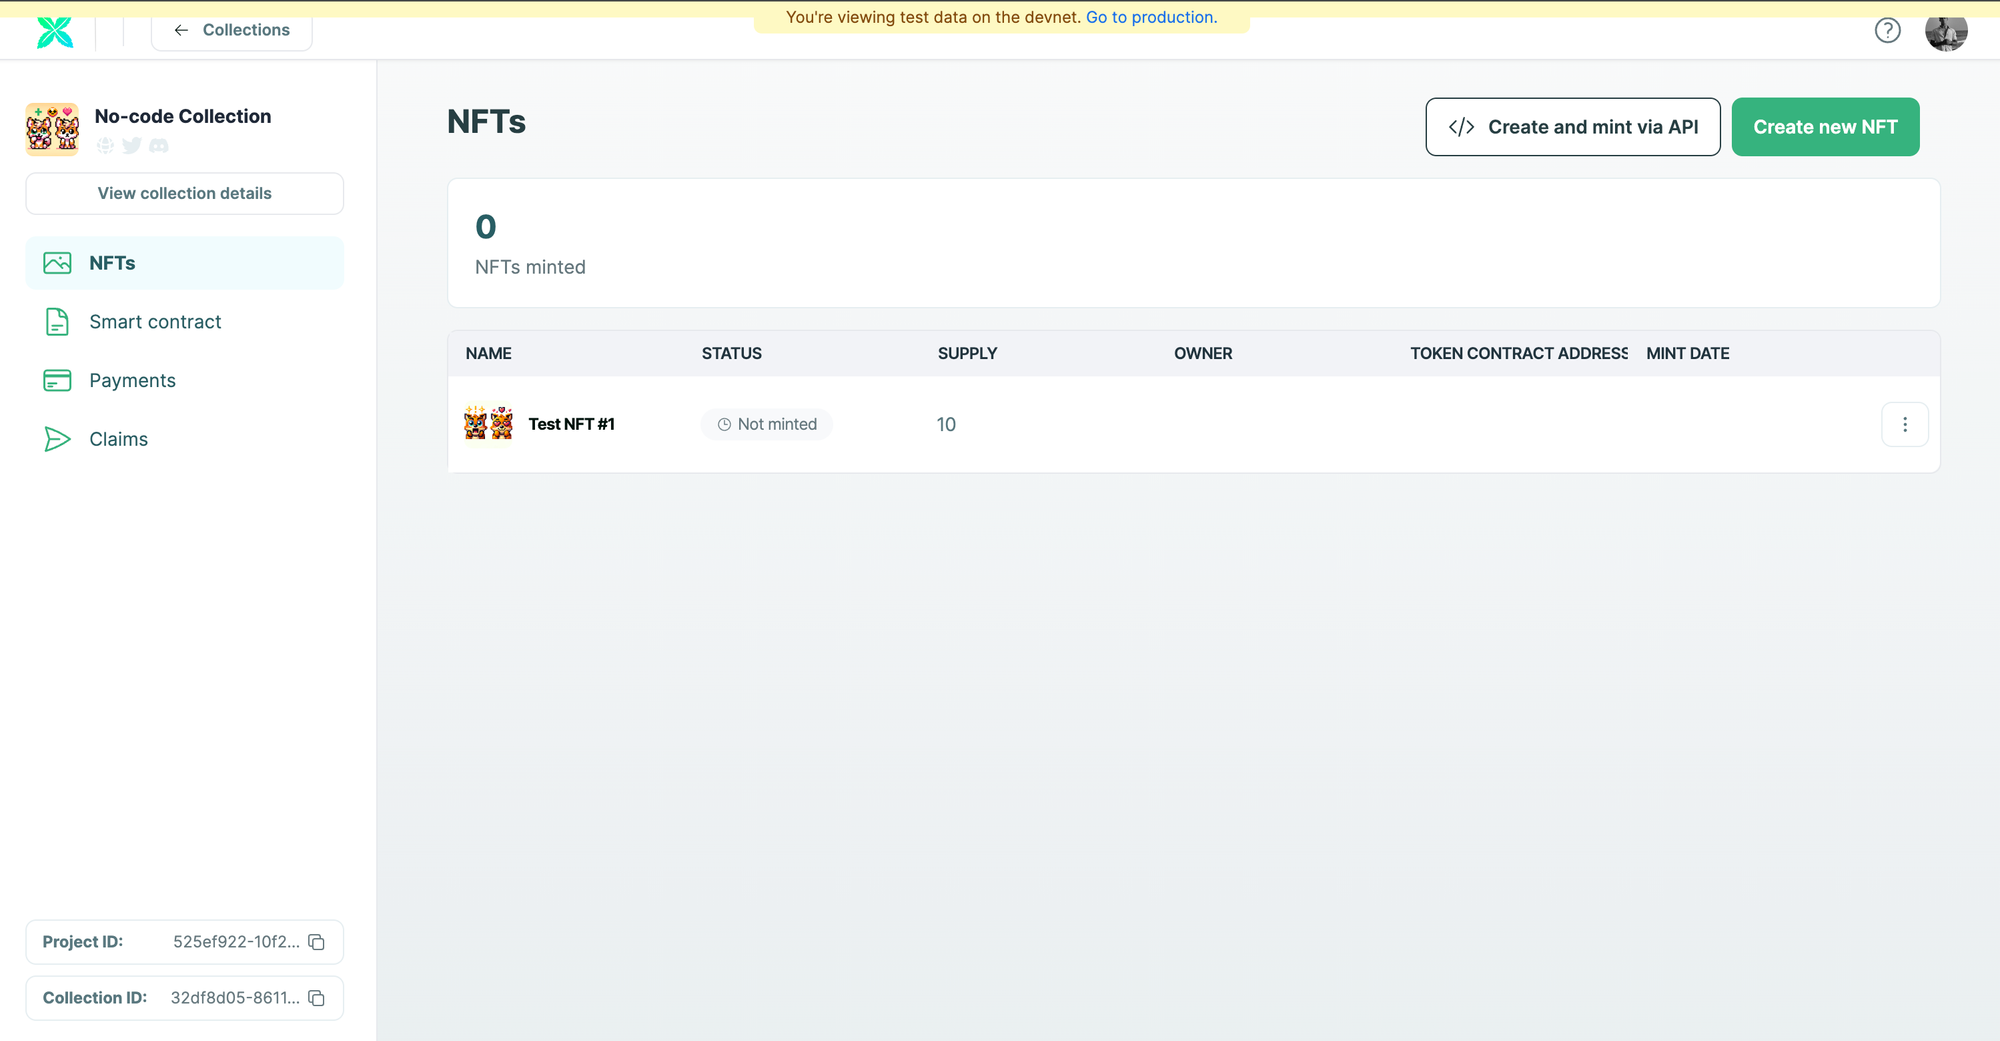
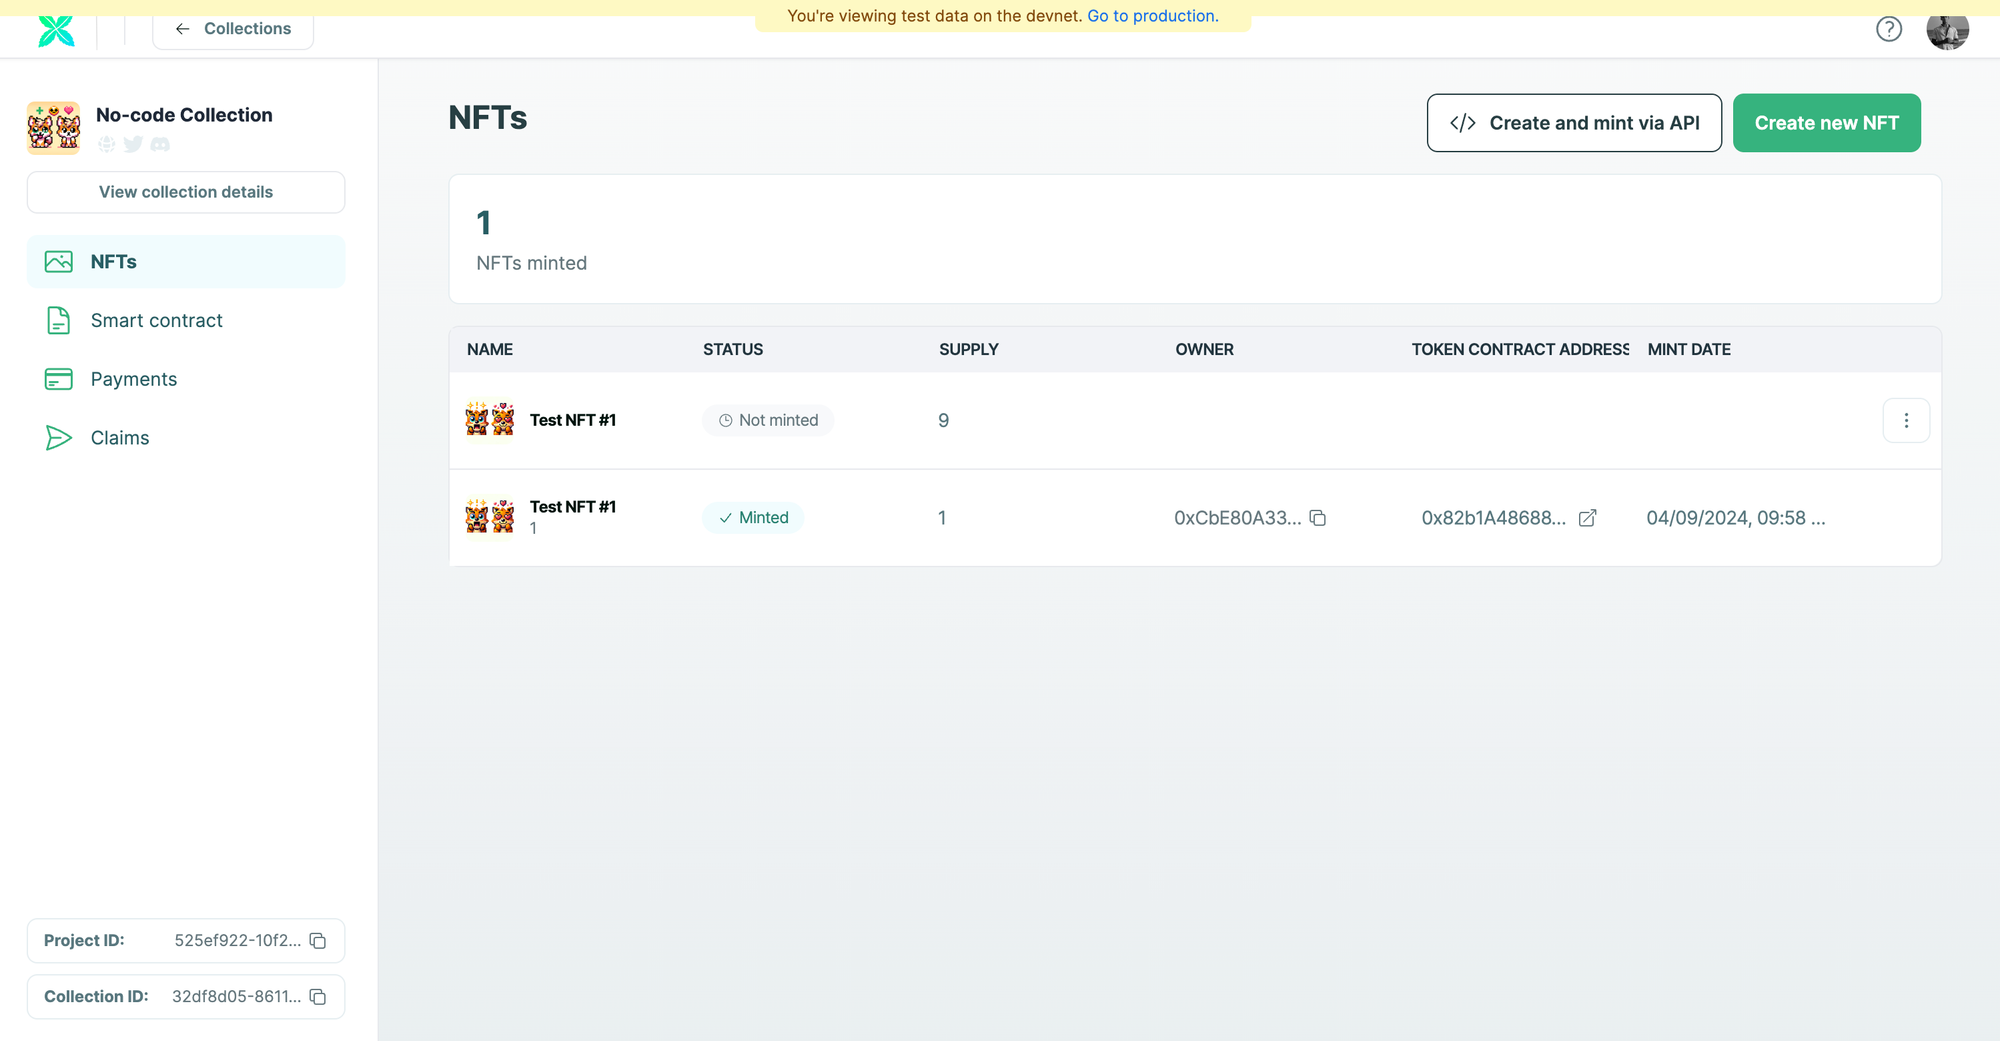
You will be able to see the created NFTs in a few seconds (as shown below).
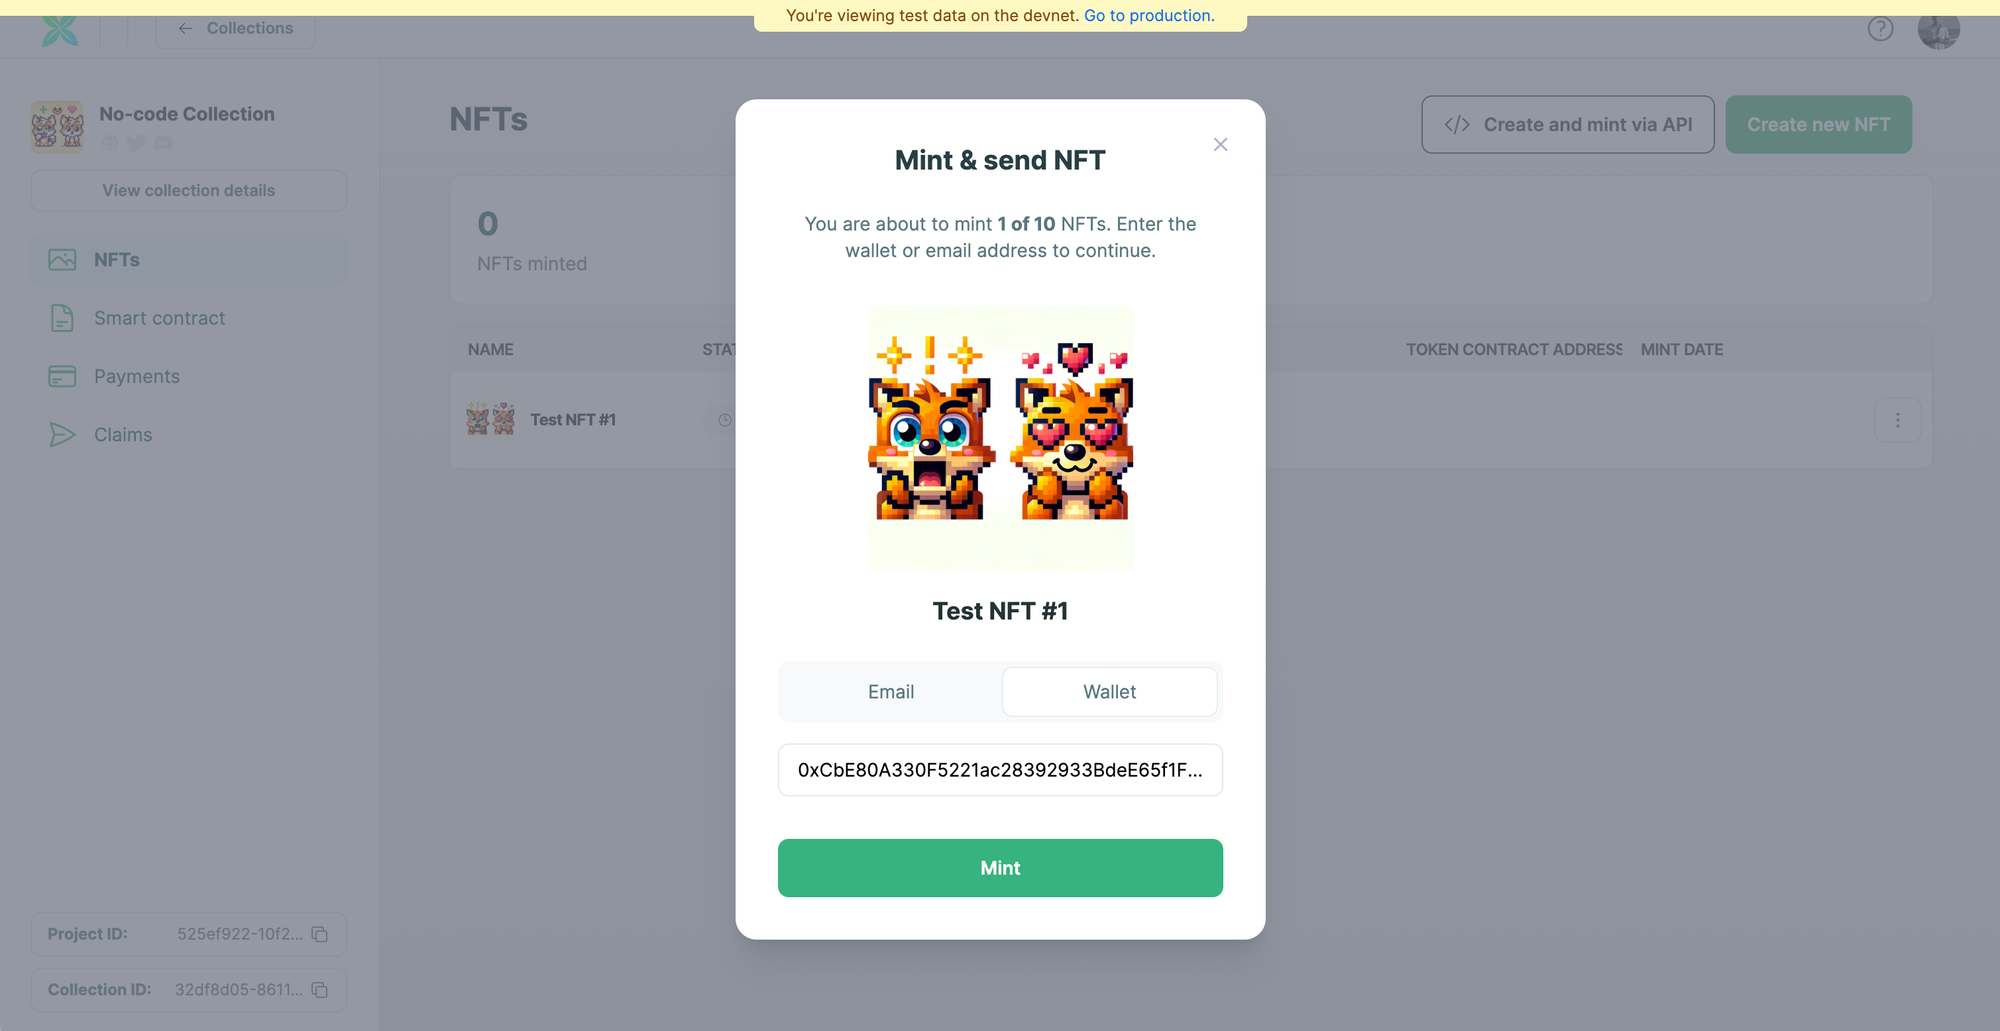
Mint NFTs with 0 code
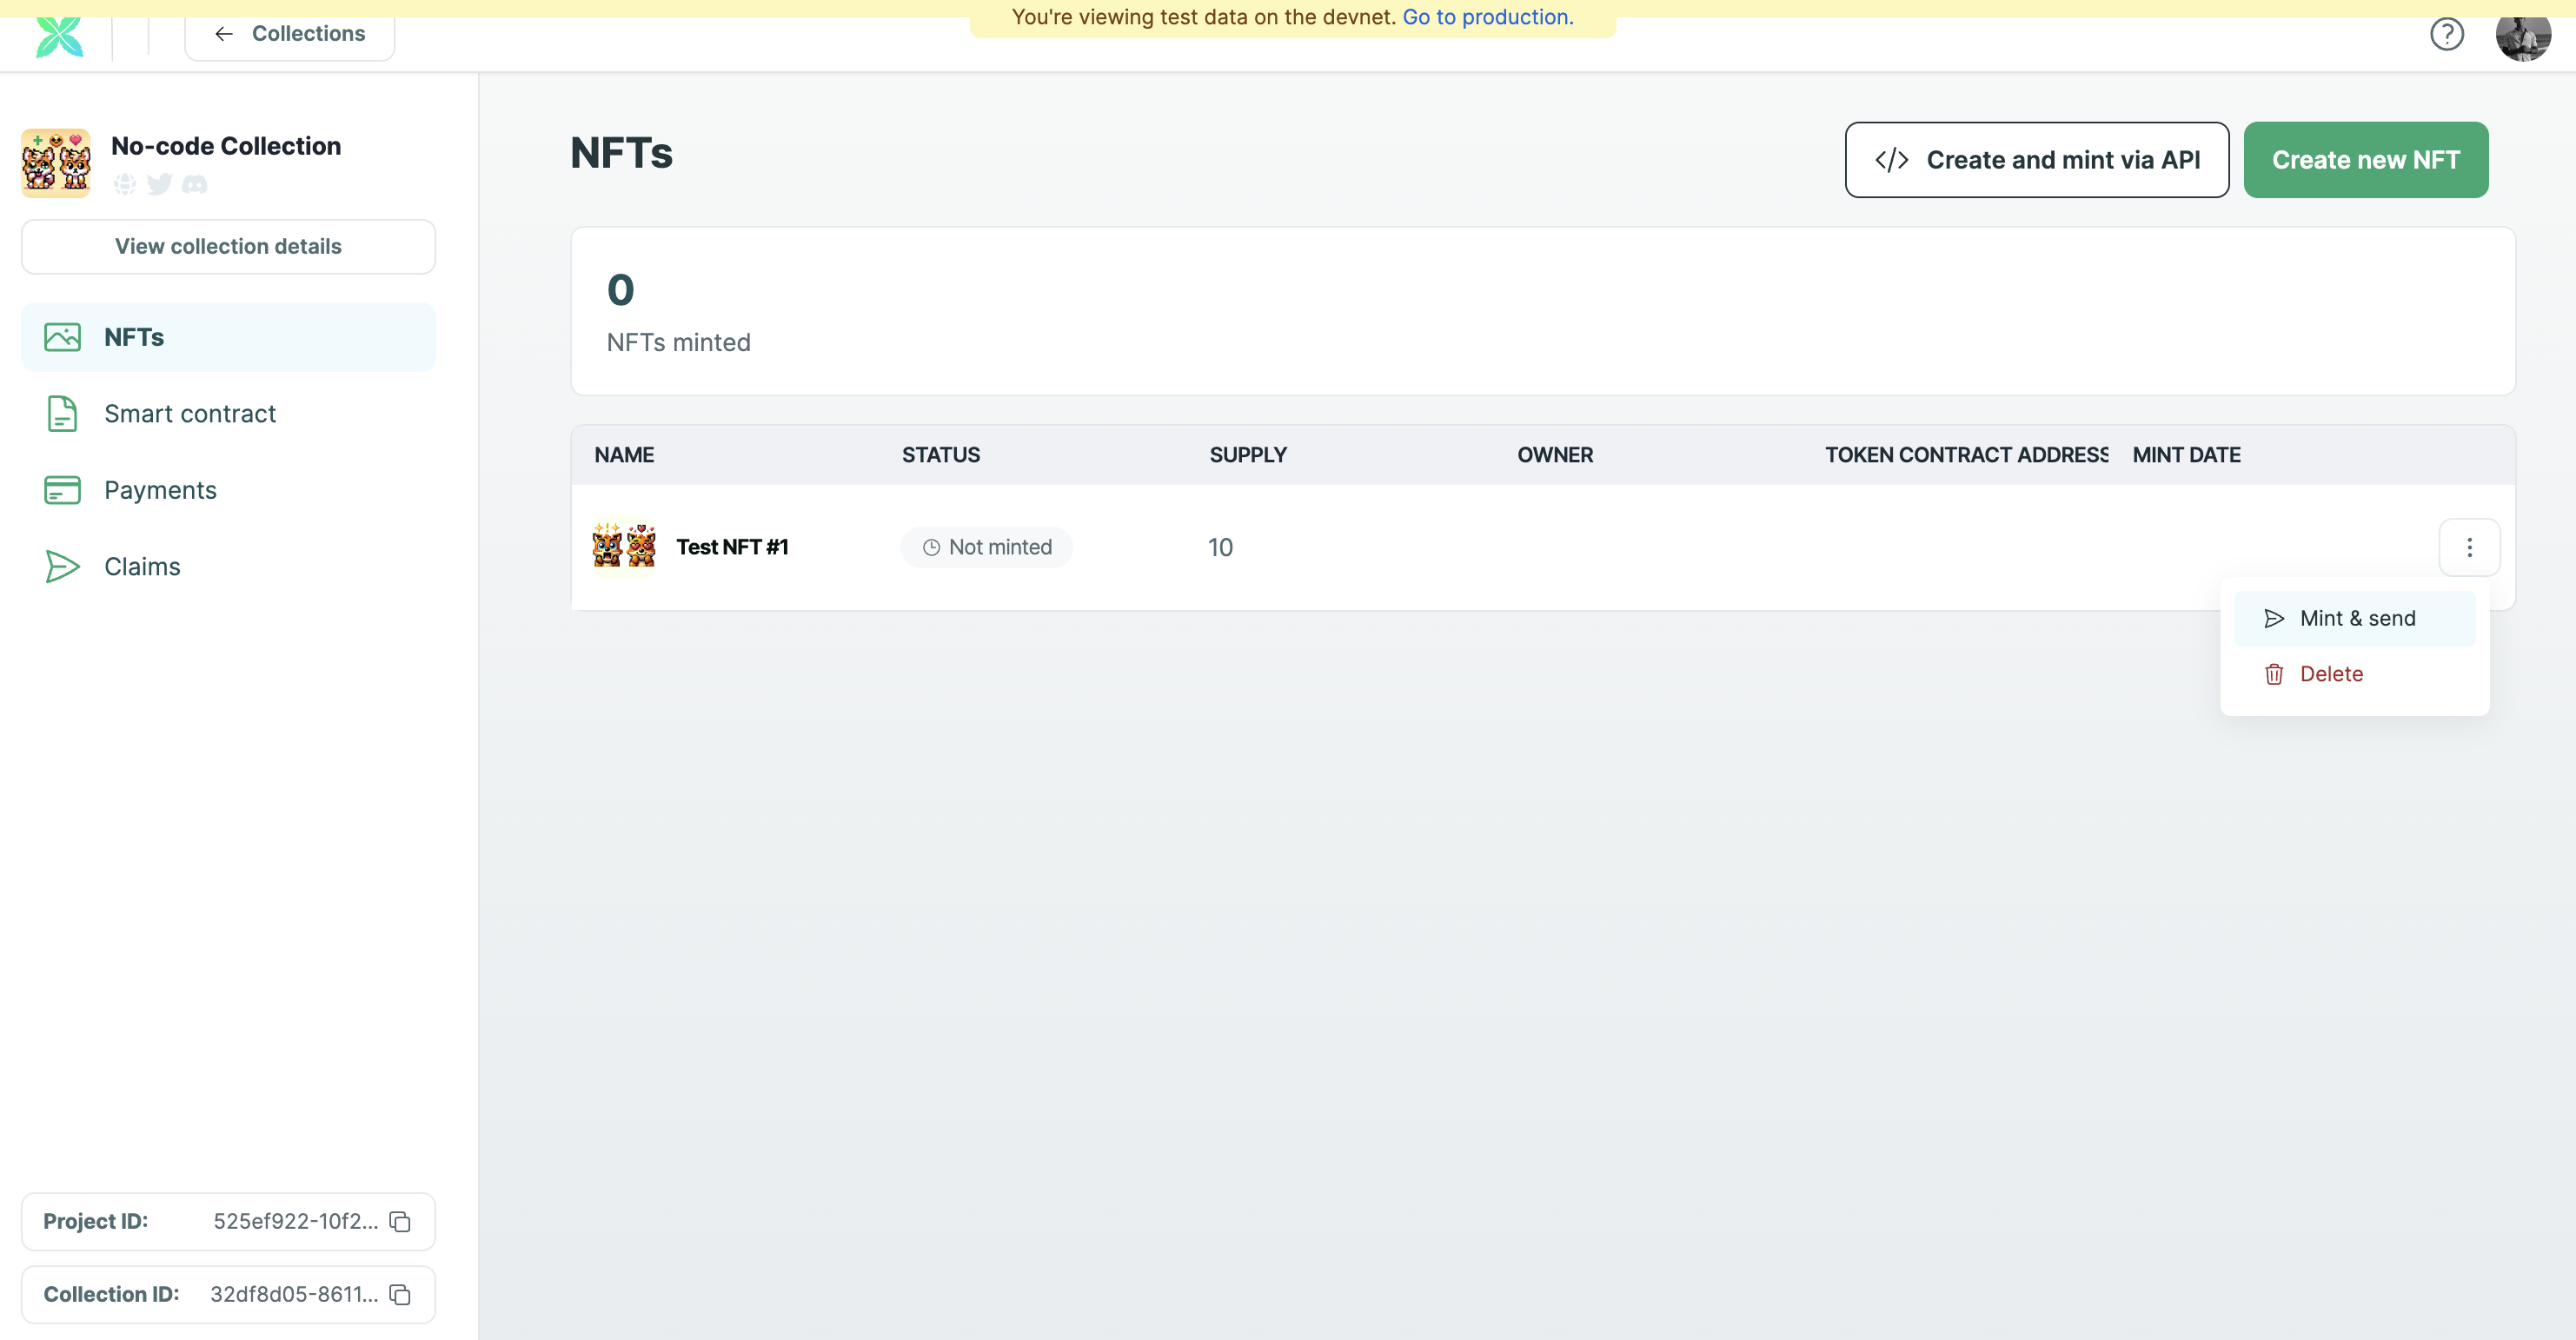
Click on the three dots in the same row as the NFT created. You will see an option to mint and send NFTs. Click on "Mint and send".
Now, you can either mint and send the NFT to an email address or a wallet address.
If you select "Email" and send the NFT to an email address, Crossmint creates a custodial wallet for that email address. After minting, you can use the same email address to login to Crossmint Wallet and you will be able to find your NFT there. Learn more about our custodial wallets as a service.
If you select "Wallet", you will be able to find it in your wallet after minting. You can use any marketplace like OpenSea or Rarible to view it.
Click on "Mint" to proceed.
You can see that the NFT was minted to the wallet address.
How to Sell your NFTs
If you wish to enable payments for your NFT collection and sell your NFTs, you can do so using the Console with No-code.
You can enable payments to accept credit-card and cross-chain crypto payments from your users by enabling NFT checkout.
Please read the step-by-step guide linked below to learn how to do this.
 Rohit Ramesh
And that's it! You have now learned how to use Crossmint's Console to create and mint NFTs.
What's Next?
If you are wondering how Crossmint has helped enterprises and brands by powering their NFT Drops, you can click on the link below to read all of our Case Studies.

If you want to learn how to use the Crossmint to enable Cross-chain Payments for your NFT Collection, please watch the YouTube video below.
Need help?
For support, please join the official Crossmint Discord Server. You can also use Crossmint Help Page for the same.