


Crossmint now supports Astar zkEVM on both Production and Staging. This guide will teach you how to enable credit card and cross-chain payments for your NFT Collection on Astar zkEVM. With this, your users can purchase your NFTs on Astar zkEVM using Fiat or cross-chain crypto tokens.
By the end, you will learn how to:
- Deploy or Import an NFT Collection on Astar zkEVM.
- Upload and Create NFTs.
- Generate a No-code Storefront for your NFT Collection.
- Enable credit card and cross-chain payments for your NFTs on Astar zkEVM.
This guide will take you 10 mins to complete (approximately).
Table of Contents:
- What is Astar zkEVM?
- Enable Fiat and Cross-chain payments for NFTs on Astar zkEVM
- What's Next?
- Need Help?
What is Astar zkEVM?
Astar zkEVM is the gateway for projects across enterprises, entertainment & gaming in Japan and beyond, driving global adoption and delivering web3 to billions. It leverages a cross-virtual machine powered by Polygon to offer customizable blockchain solutions that accelerate web3 adoption. With zk-powered Ethereum L2 Scaling (zkEVM) and a cutting-edge ecosystem, Astar delivers robust, secure, and interoperable web3 technology. Astar zkEVM is the Layer-2 solution to scale a web3 experience on Ethereum with zero knowledge (ZK) technology. Astar Network connects you to Web 3.
Enable Fiat and Cross-chain payments for NFTs on Astar zkEVM
Crossmint allows you to create and deploy NFT Collections on Astar zkEVM. If you already have an NFT Collection contract deployed on Astar zkEVM, you can simply import them on Crossmint using the Console.
Once your NFT Collection is set up on Crossmint, you can then upload and create your NFTs (if you created the NFT Collection using Crossmint) and then enable credit card and cross-chain payments for your NFTs on Astar zkEVM.
Your users can buy the NFTs on Astar zkEVM using their credit card or using crypto tokens like ETH and SOL.
Create an NFT Collection on Astar zkEVM
There are essentially two different approaches that you can take to set up your NFT Collection on Astar zkEVM.
Crossmint has a pre-audited library of smart contracts that serve most use cases. You can simply deploy these NFT smart contracts with little to no-code. You don't need to code in Solidity or Rust or Move, you can simply use the Create Collection API or use the Console to deploy an NFT Collection using no-code (only available for selected chains).
Please refer to the guide below for a step-by-step tutorial linked below to learn how to Create an NFT Collection on Astar zkEVM using Crossmint. Using this you can create and deploy an NFT Collection on Astar zkEVM.
 Rohit Ramesh
Import your NFT Collection on Astar zkEVM
If you have custom needs and you have already deployed the NFT Collection contract on Astar zkEVM, you can simply import this on Crossmint using the Console.
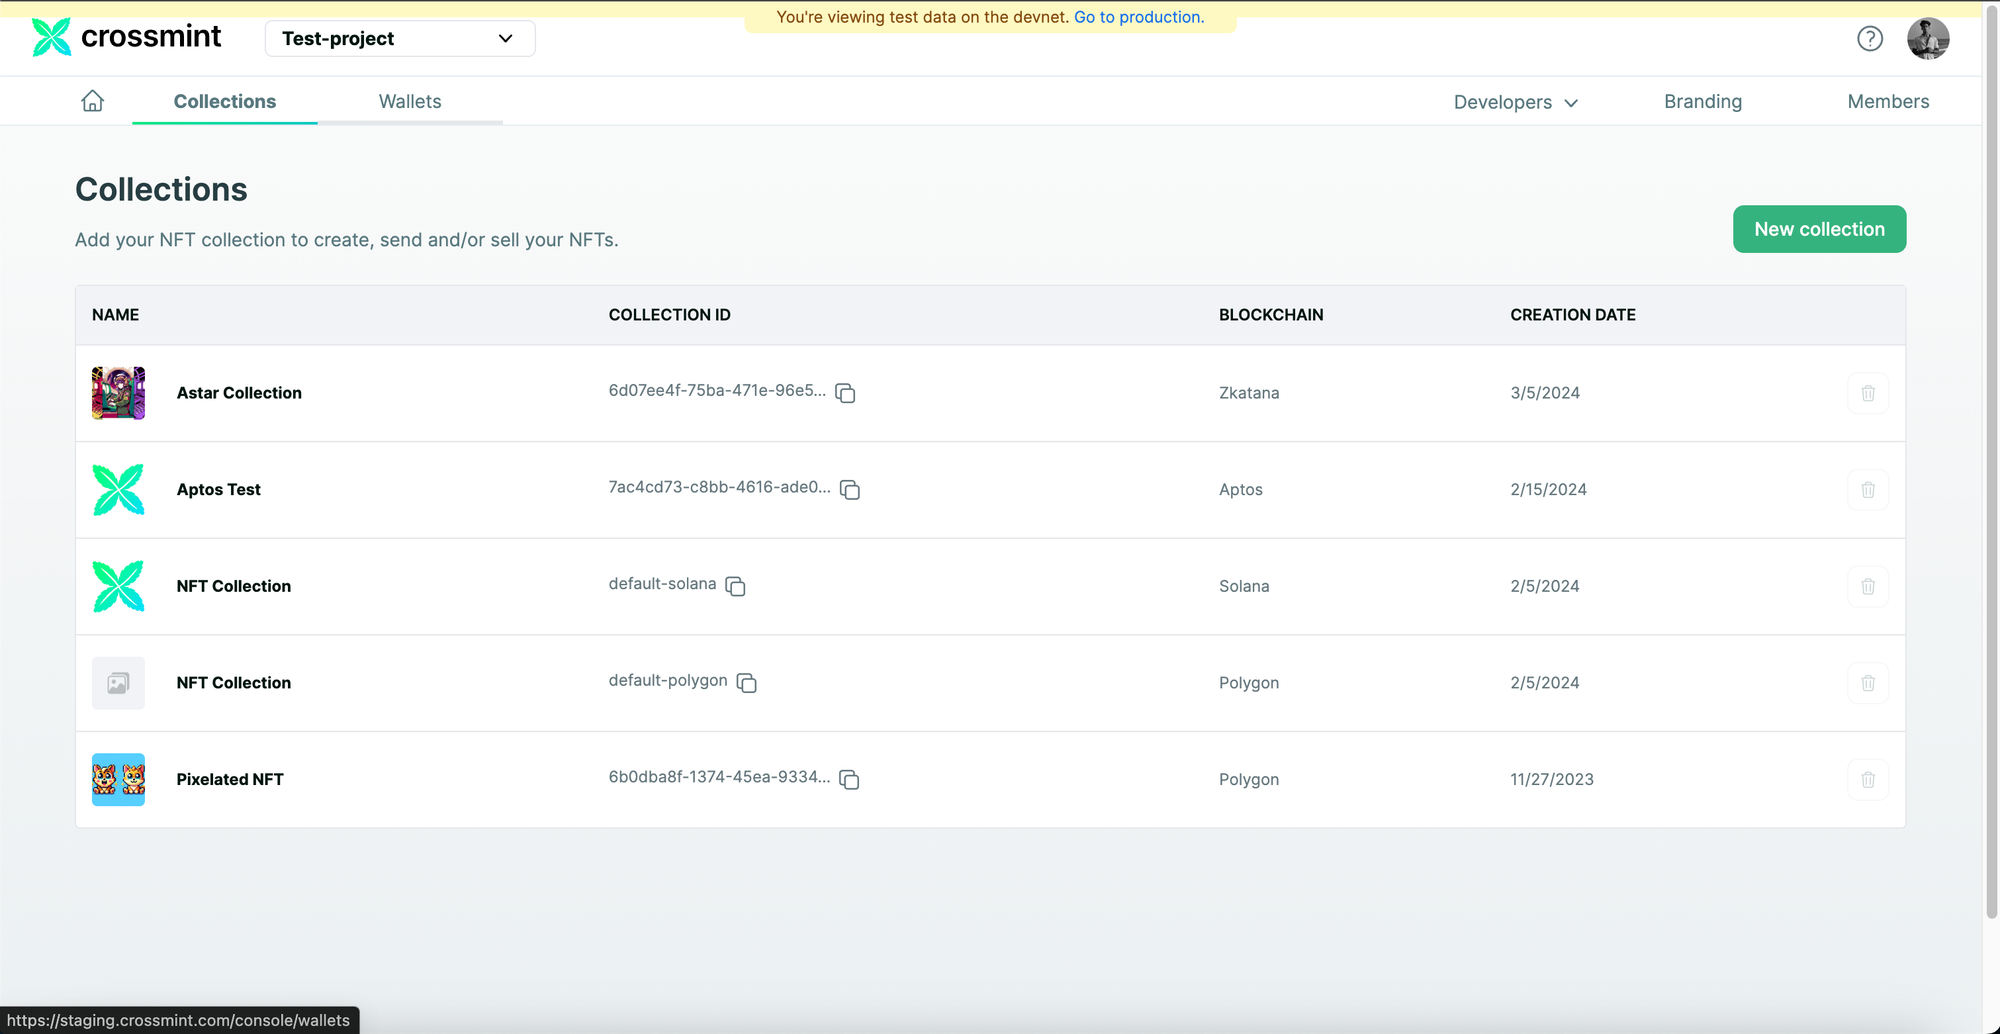
Click on "Collections" from the Crossmint Console and then click on "New collection".
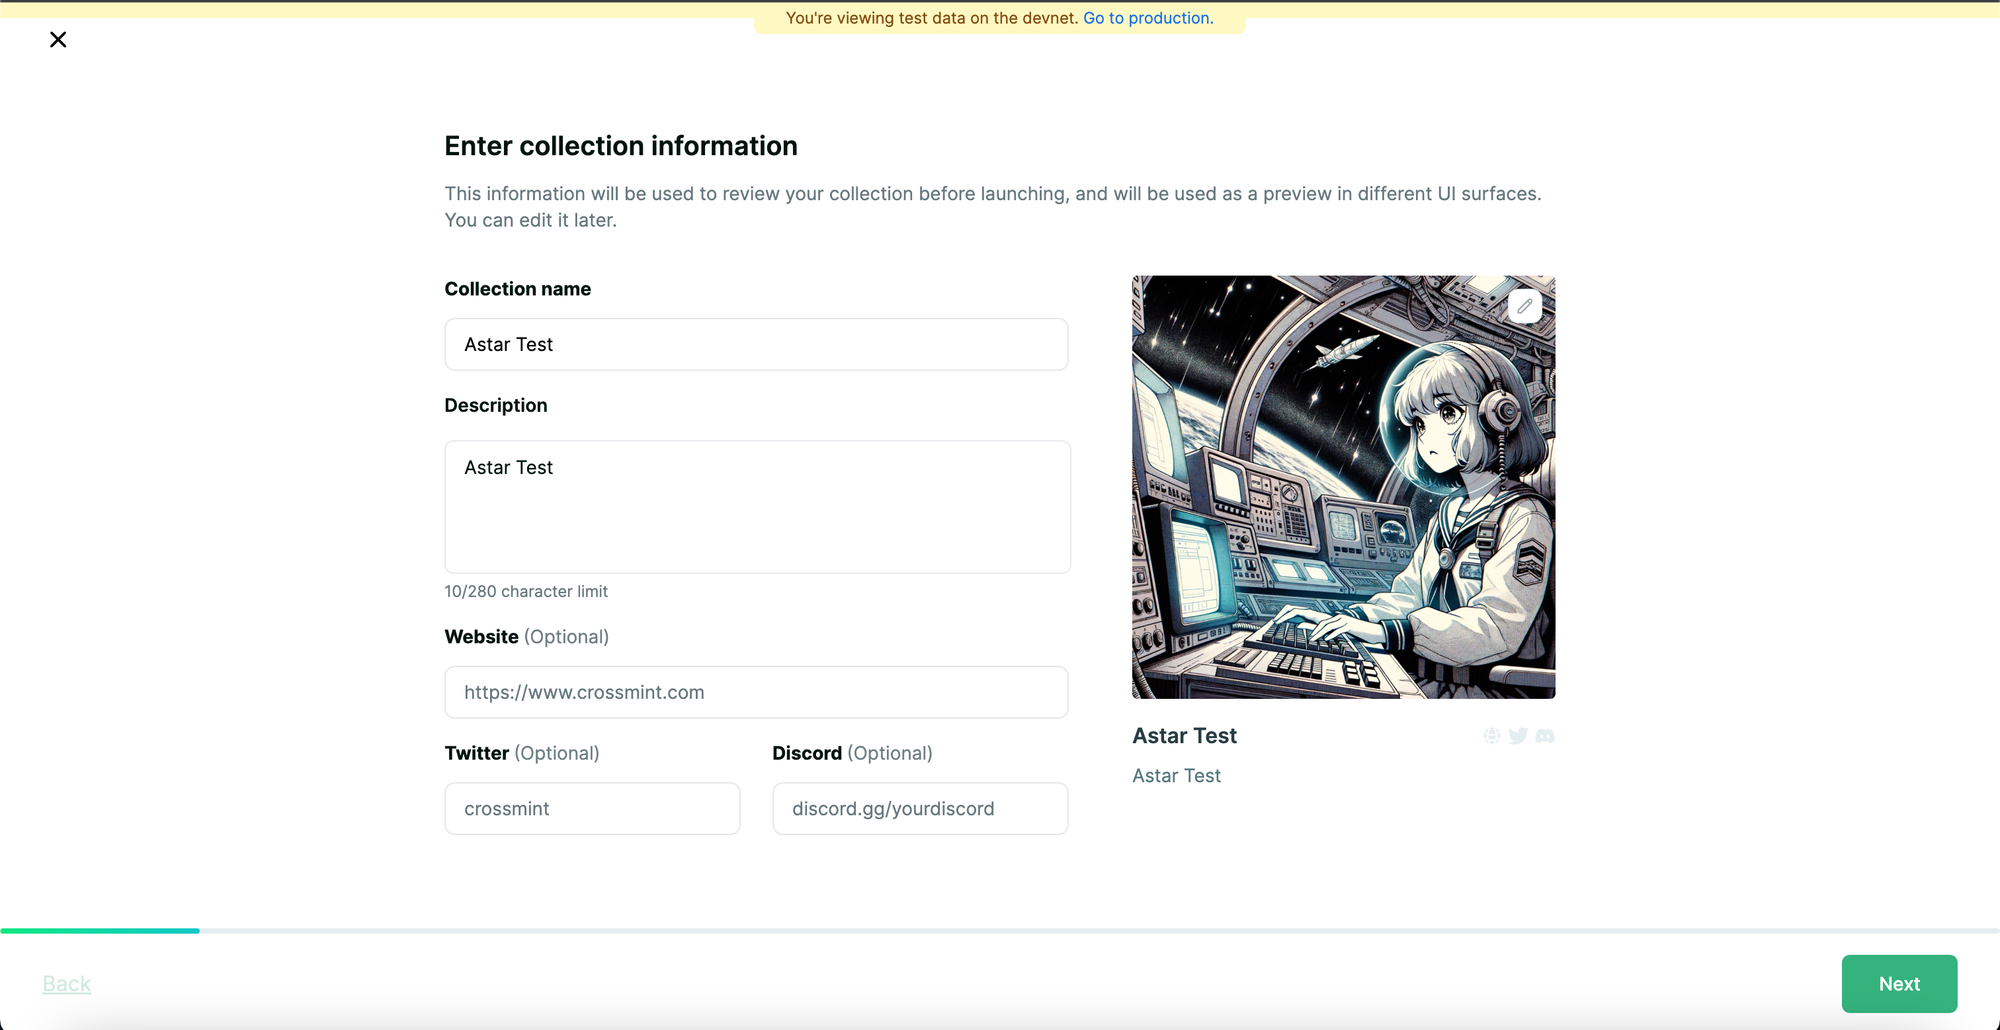
Enter your collection's information such as the Collection name, Description, etc and also upload the Collection's cover image. Once you have filled this out, click on "Next".
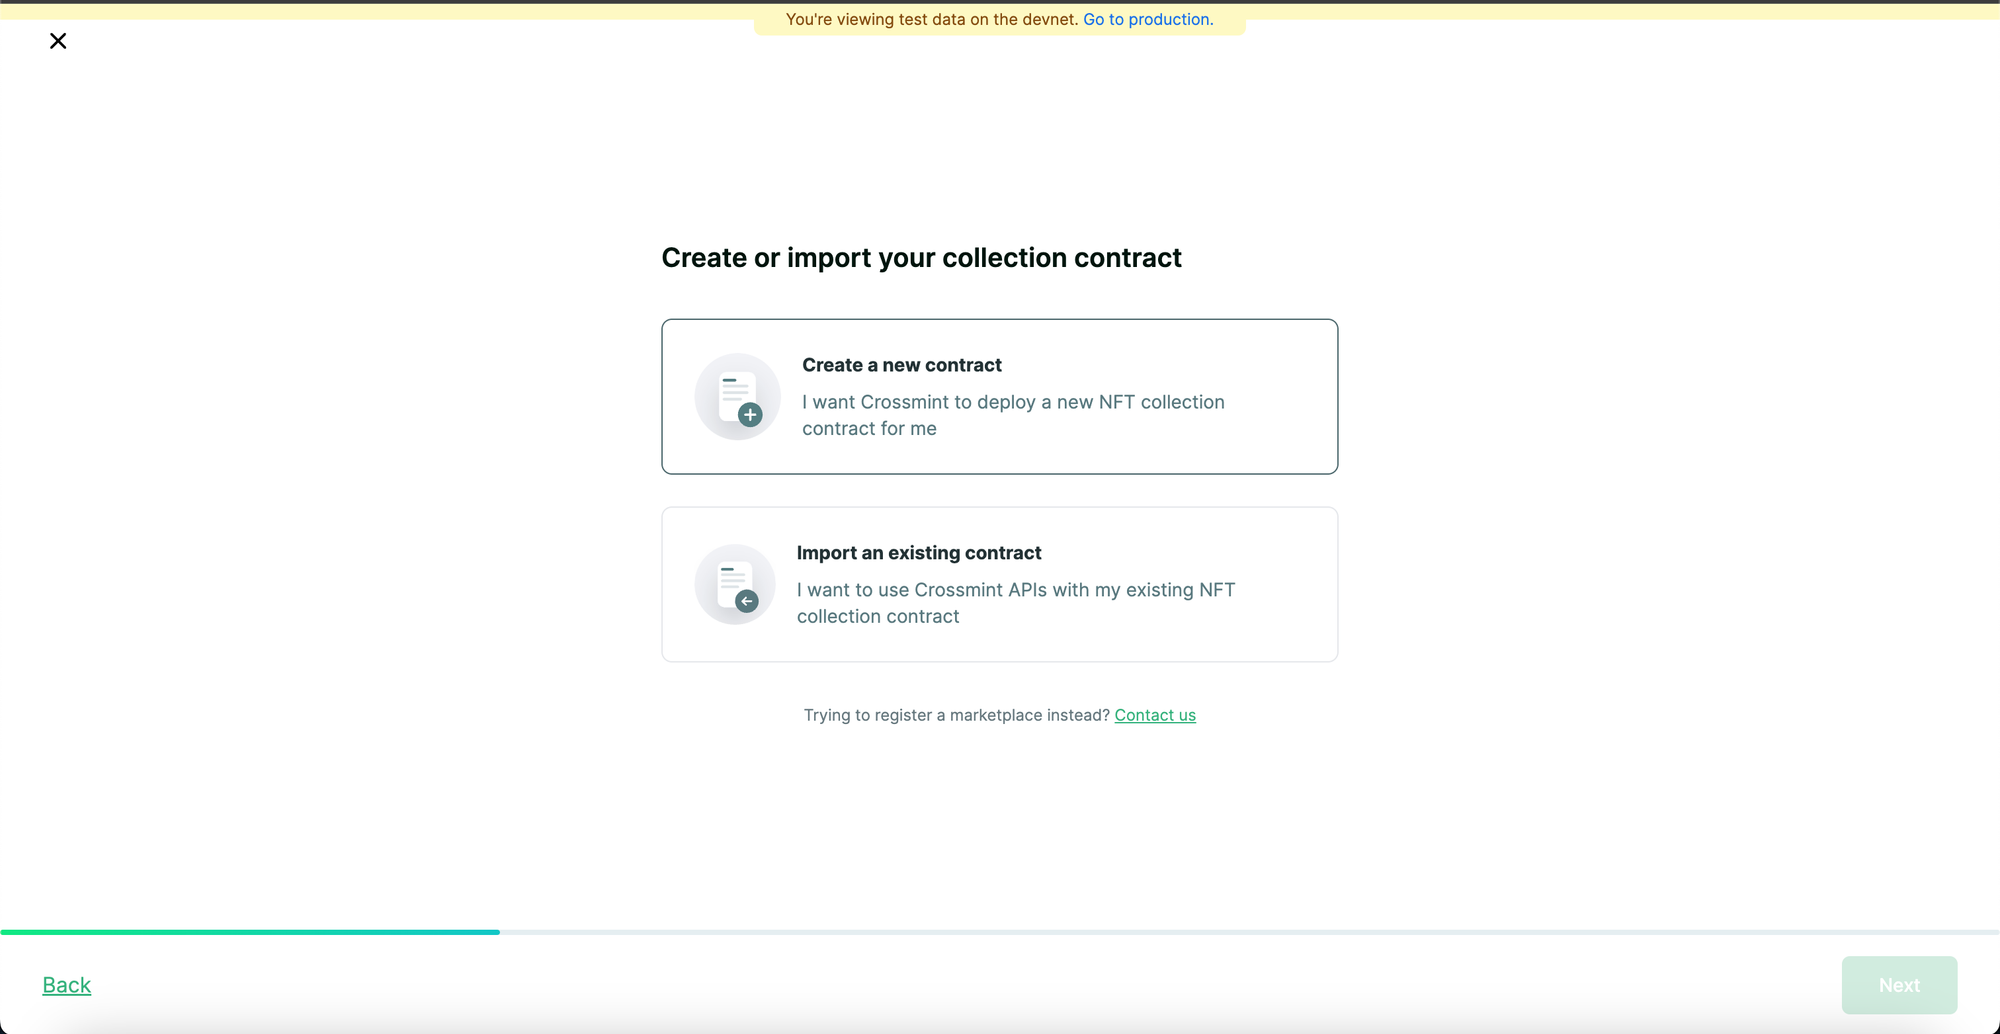
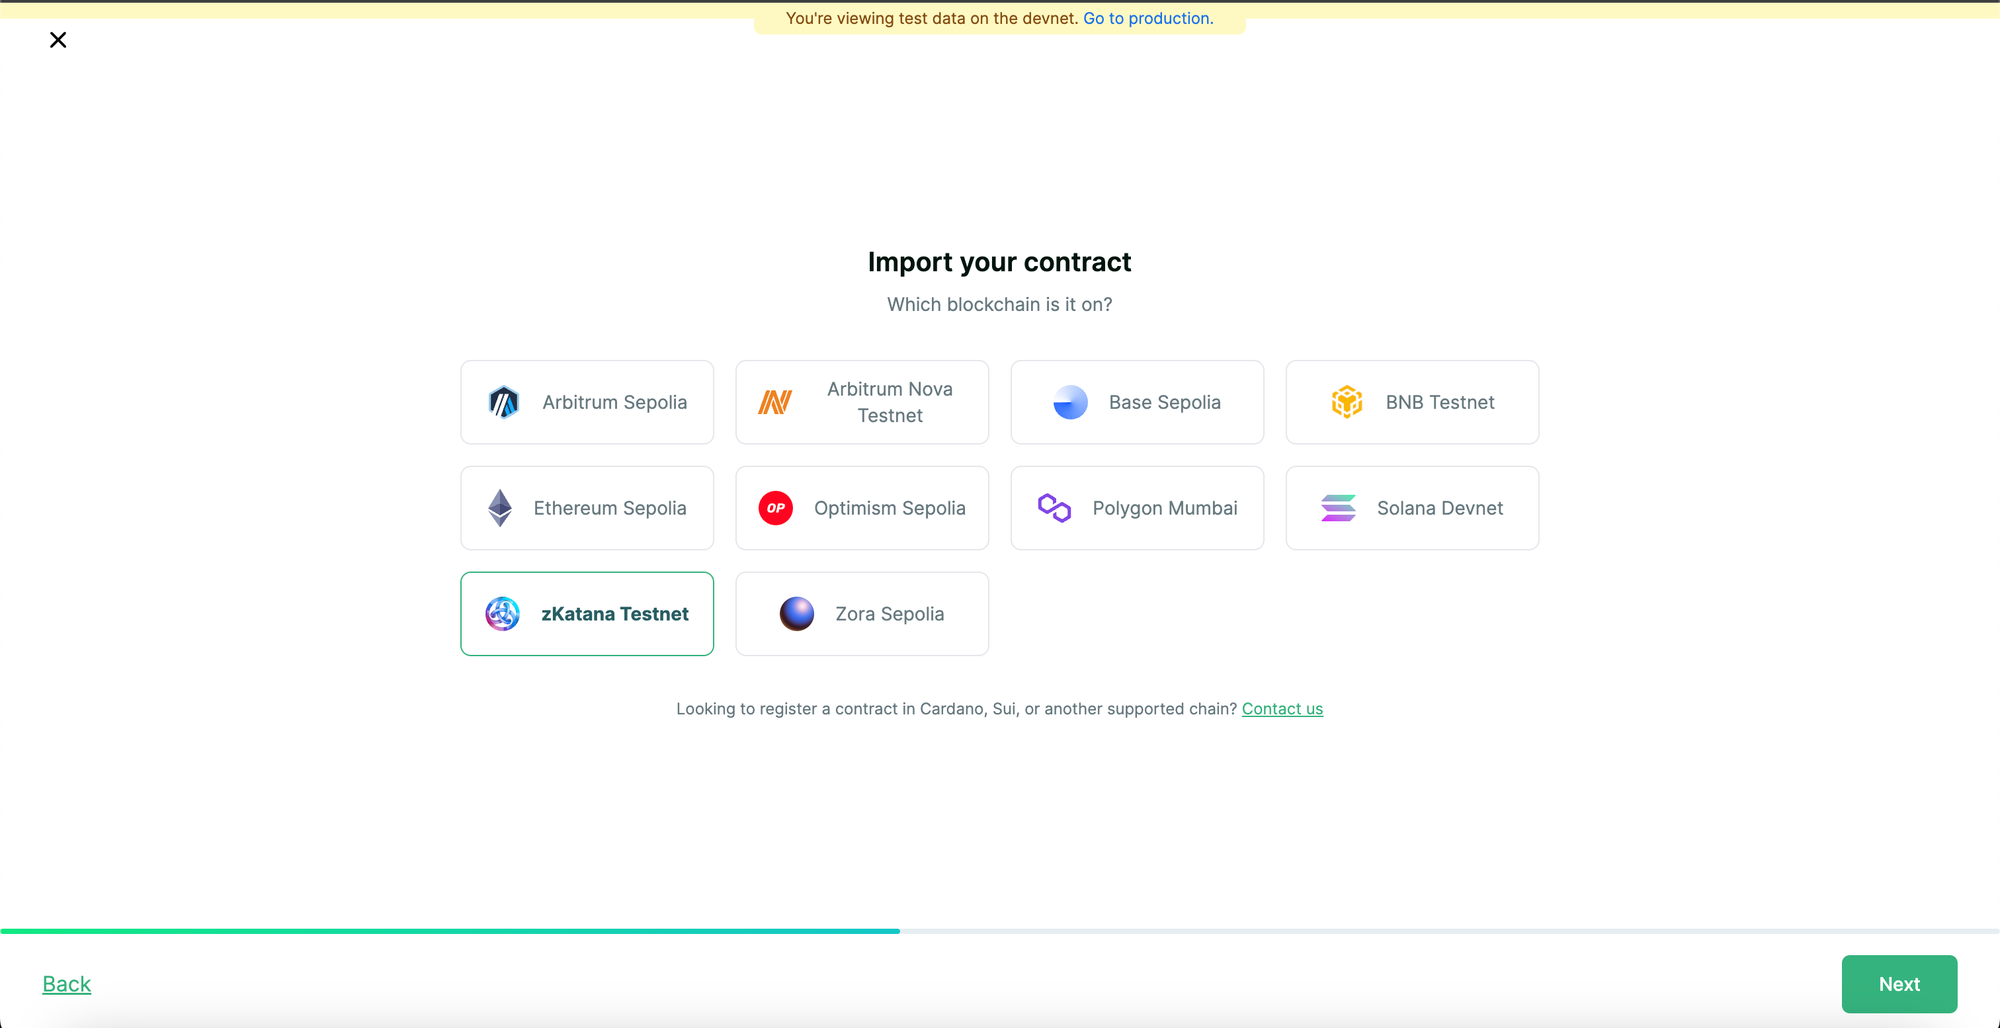
Select "Import an existing contract" and click on "Next" to proceed.
Select the blockchain as "zKatana Testnet" and click on "Next".
Note: This flow was captured on Crossmint's Staging Console. This may differ if you are using the Production Console. Select Astar zkEVM and proceed.
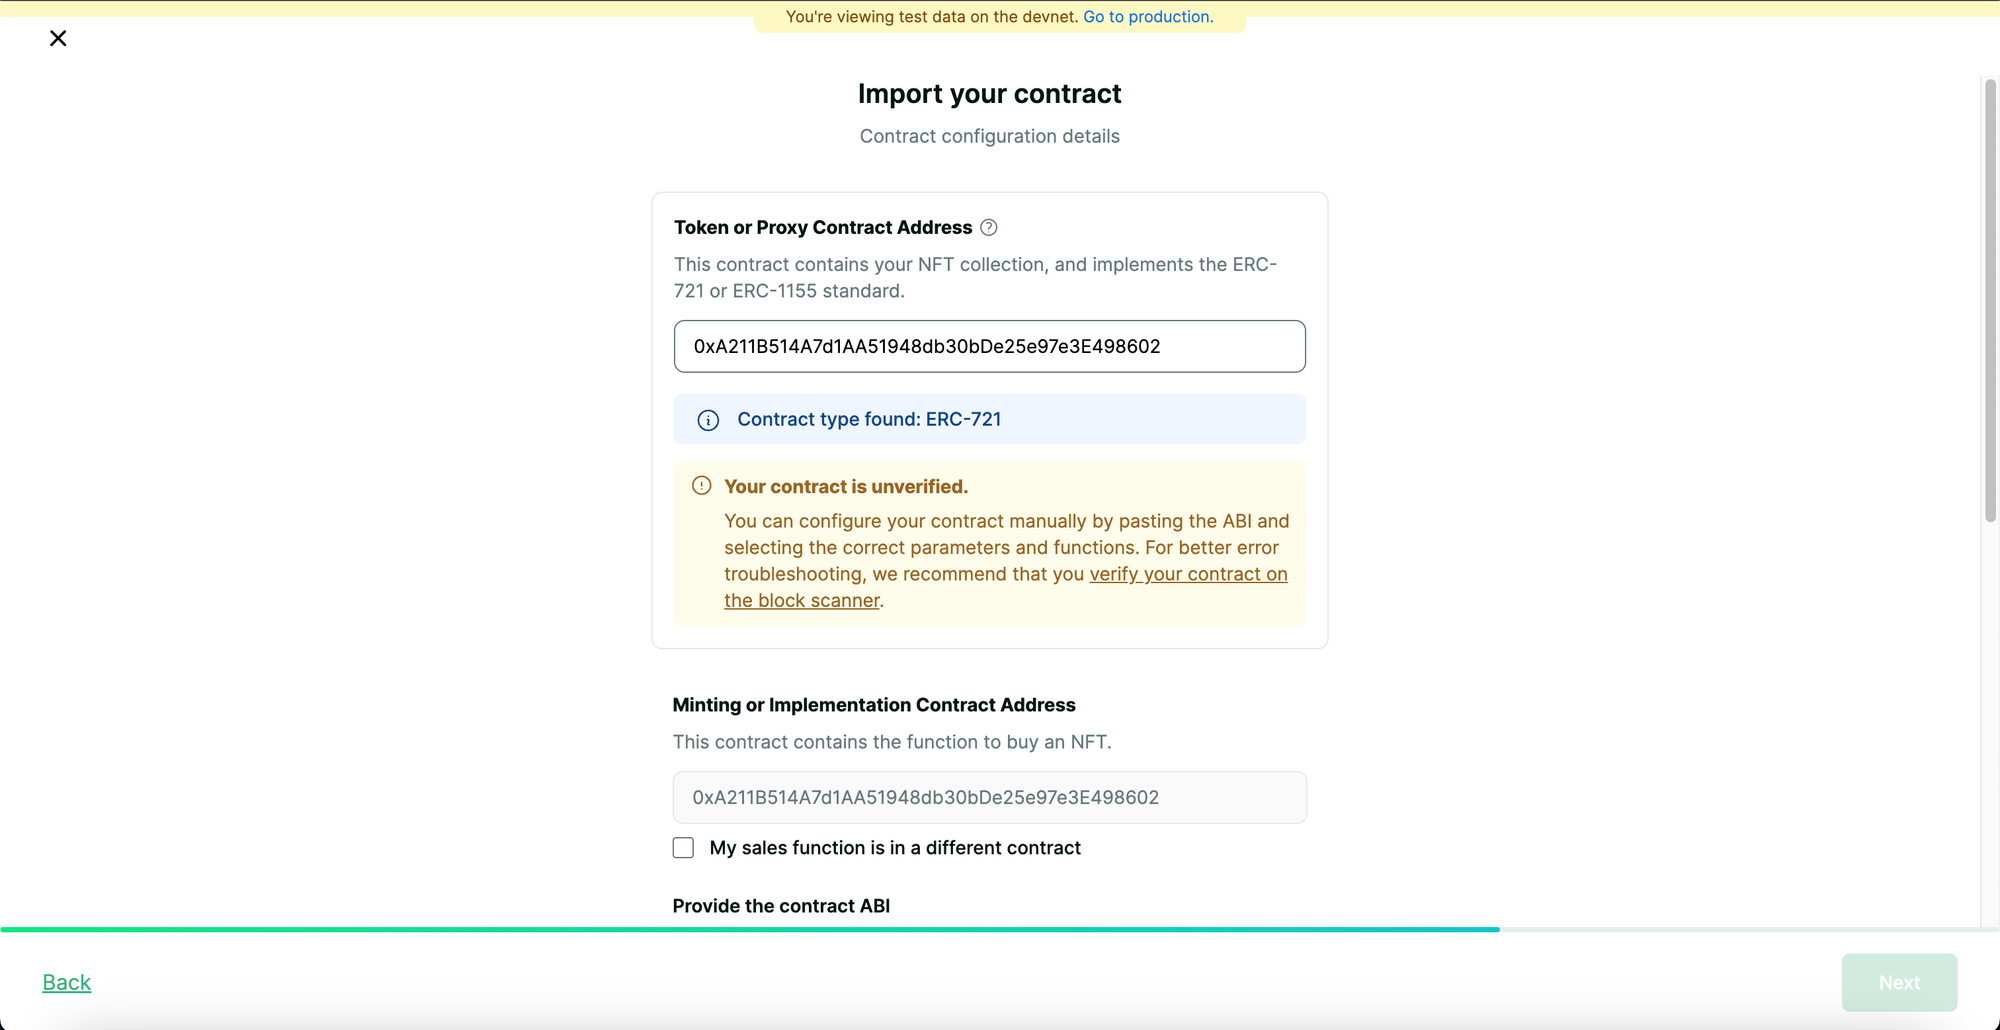
Enter your contract address. If your contract is unverified, you will need to provide the contract ABI along with some other information. Please fill it out and click on "Next" to proceed.
After this, you will see an option to register the collection. Click on "Register Collection" and proceed.
Enable Credit Card and Cross-chain payments
Now that we have learned how to create an NFT Collection using Crossmint or import an existing contract, we can proceed and learn how to enable payments for the NFT Collection. Learn more about the NFT checkout features.
For the sake of this tutorial, I will be using the NFT Collection that I created using Crossmint. You can notice that there are 9 editions of Astar NFT #1 token that are in supply.
Note: This tutorial will be using Crossmint's Staging Console. It is strongly advised to practice and become comfortable with the operations on the Staging Console before proceeding in the Production environment. You can access the Production Console here
If you do not have any NFTs created on the contract, ensure that you upload and create the NFTs before you proceed with the rest of the tutorial. Refer to the guide below to learn how to do this.
Rohit Ramesh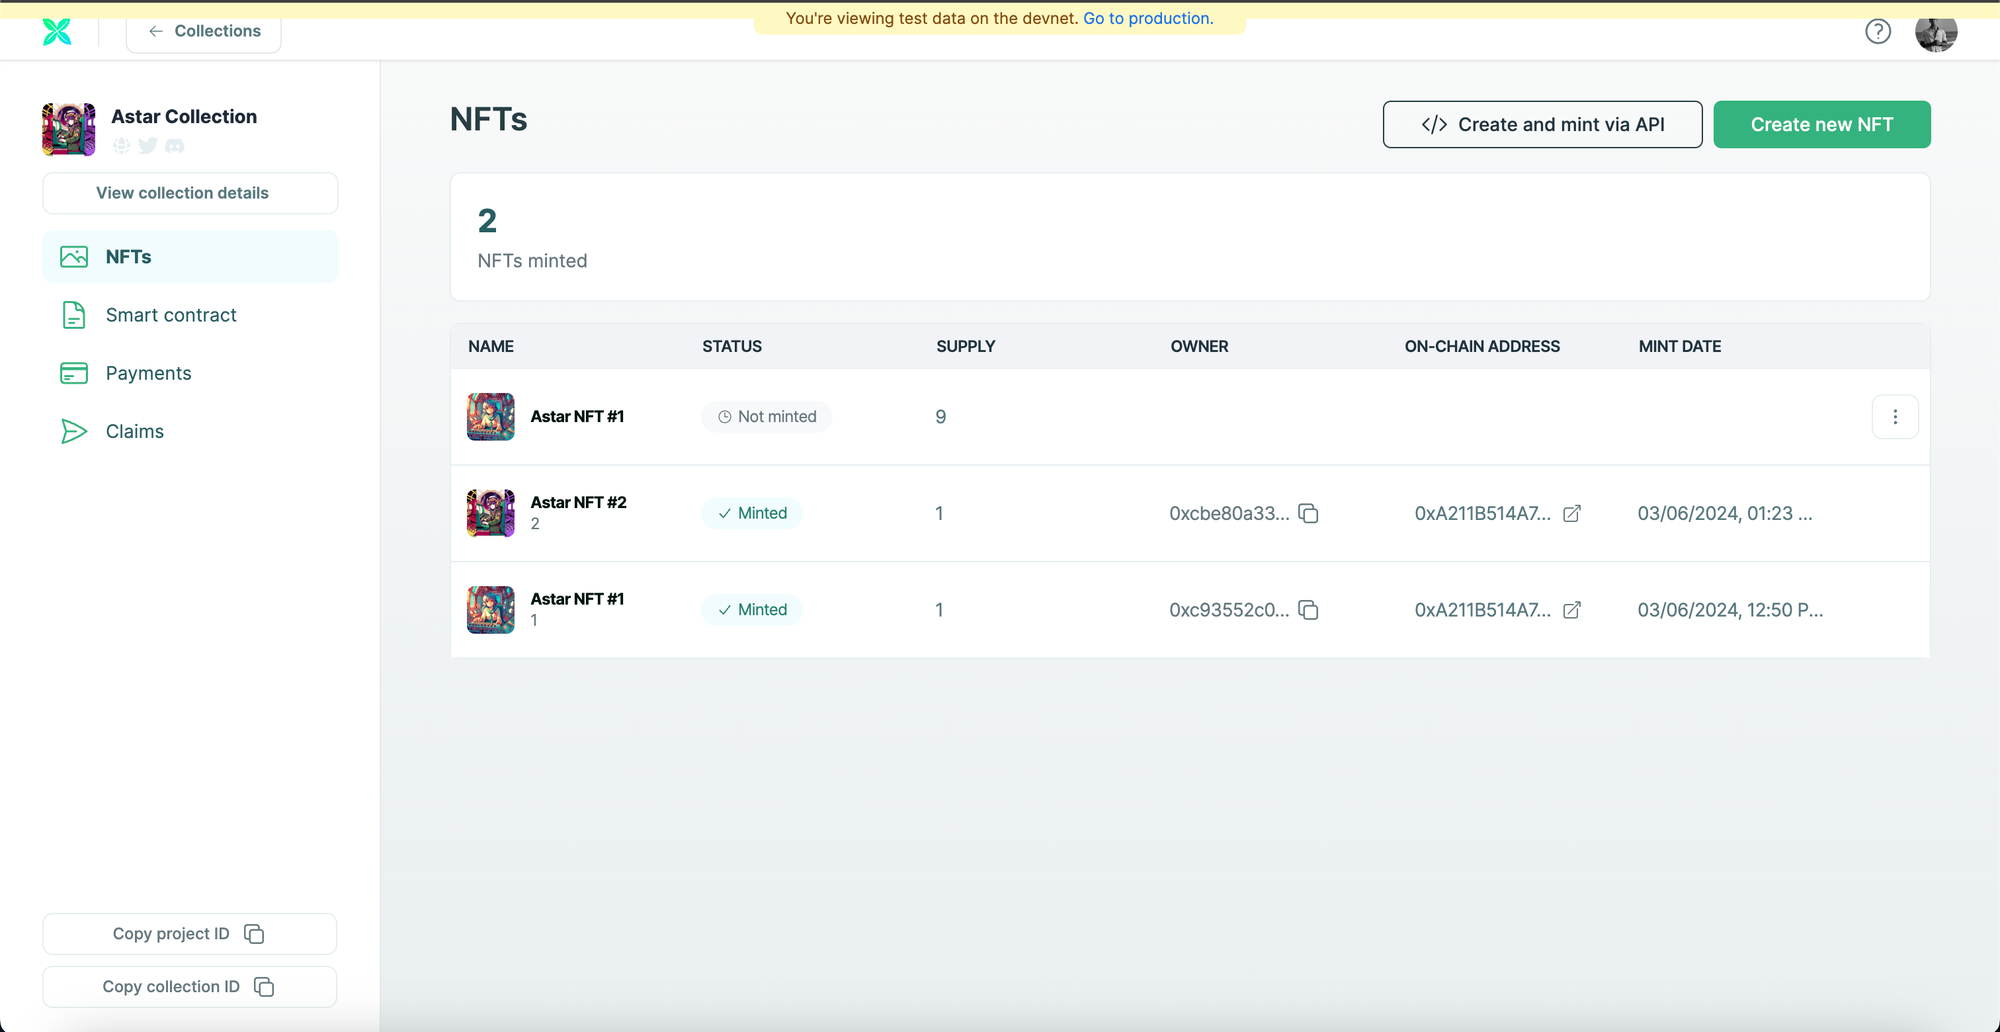
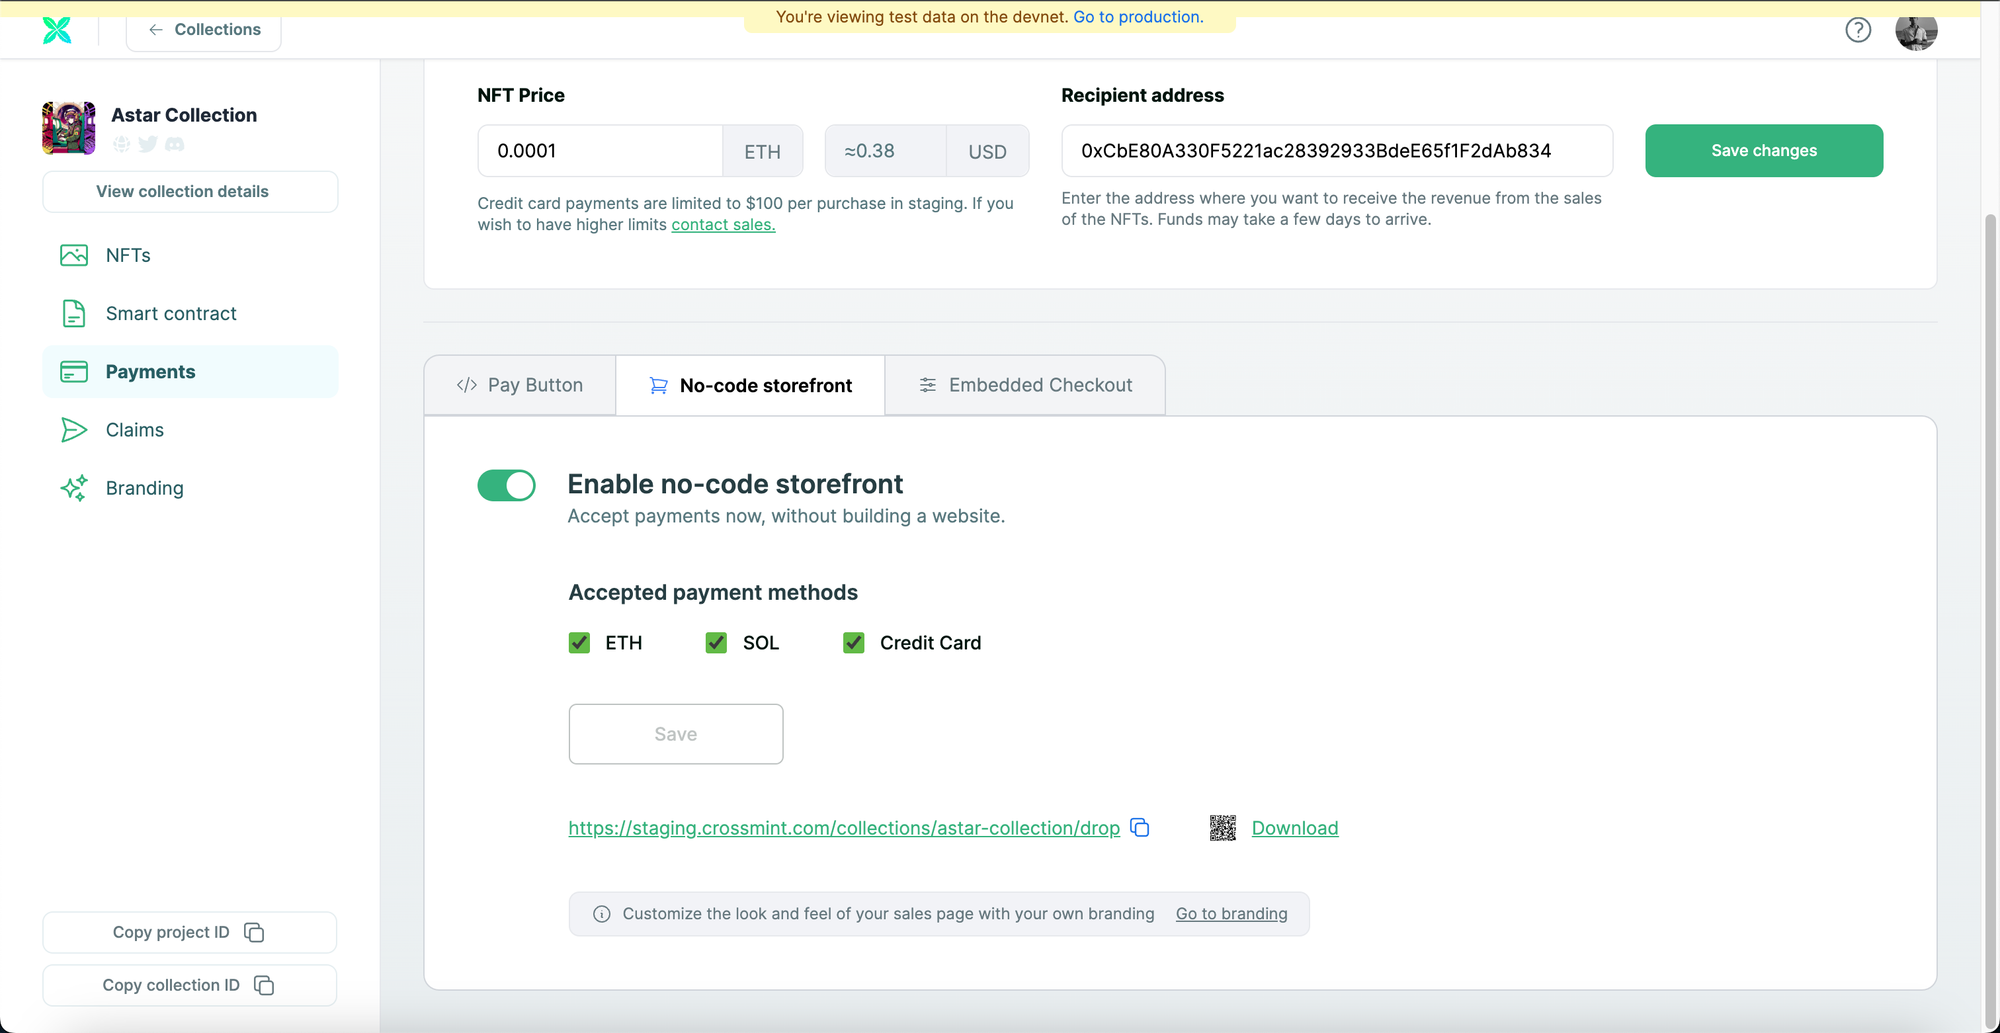
Now, click on "Payments" and click on "No-code storefront". Click on the toggle switch to enable the no-code storefront. Select the preferred payment methods that you want your storefront to accept. For the sake of this tutorial, I am going to enable of the available payment methods. Now, click on "Save" and this should generate a No-code storefront for your NFT Collection on Astar zkEVM which will accept credit card and cross-chain crypto payments.
Now copy the URL below the "Save" button and open it in a new tab to see what the No-code Storefront looks like.
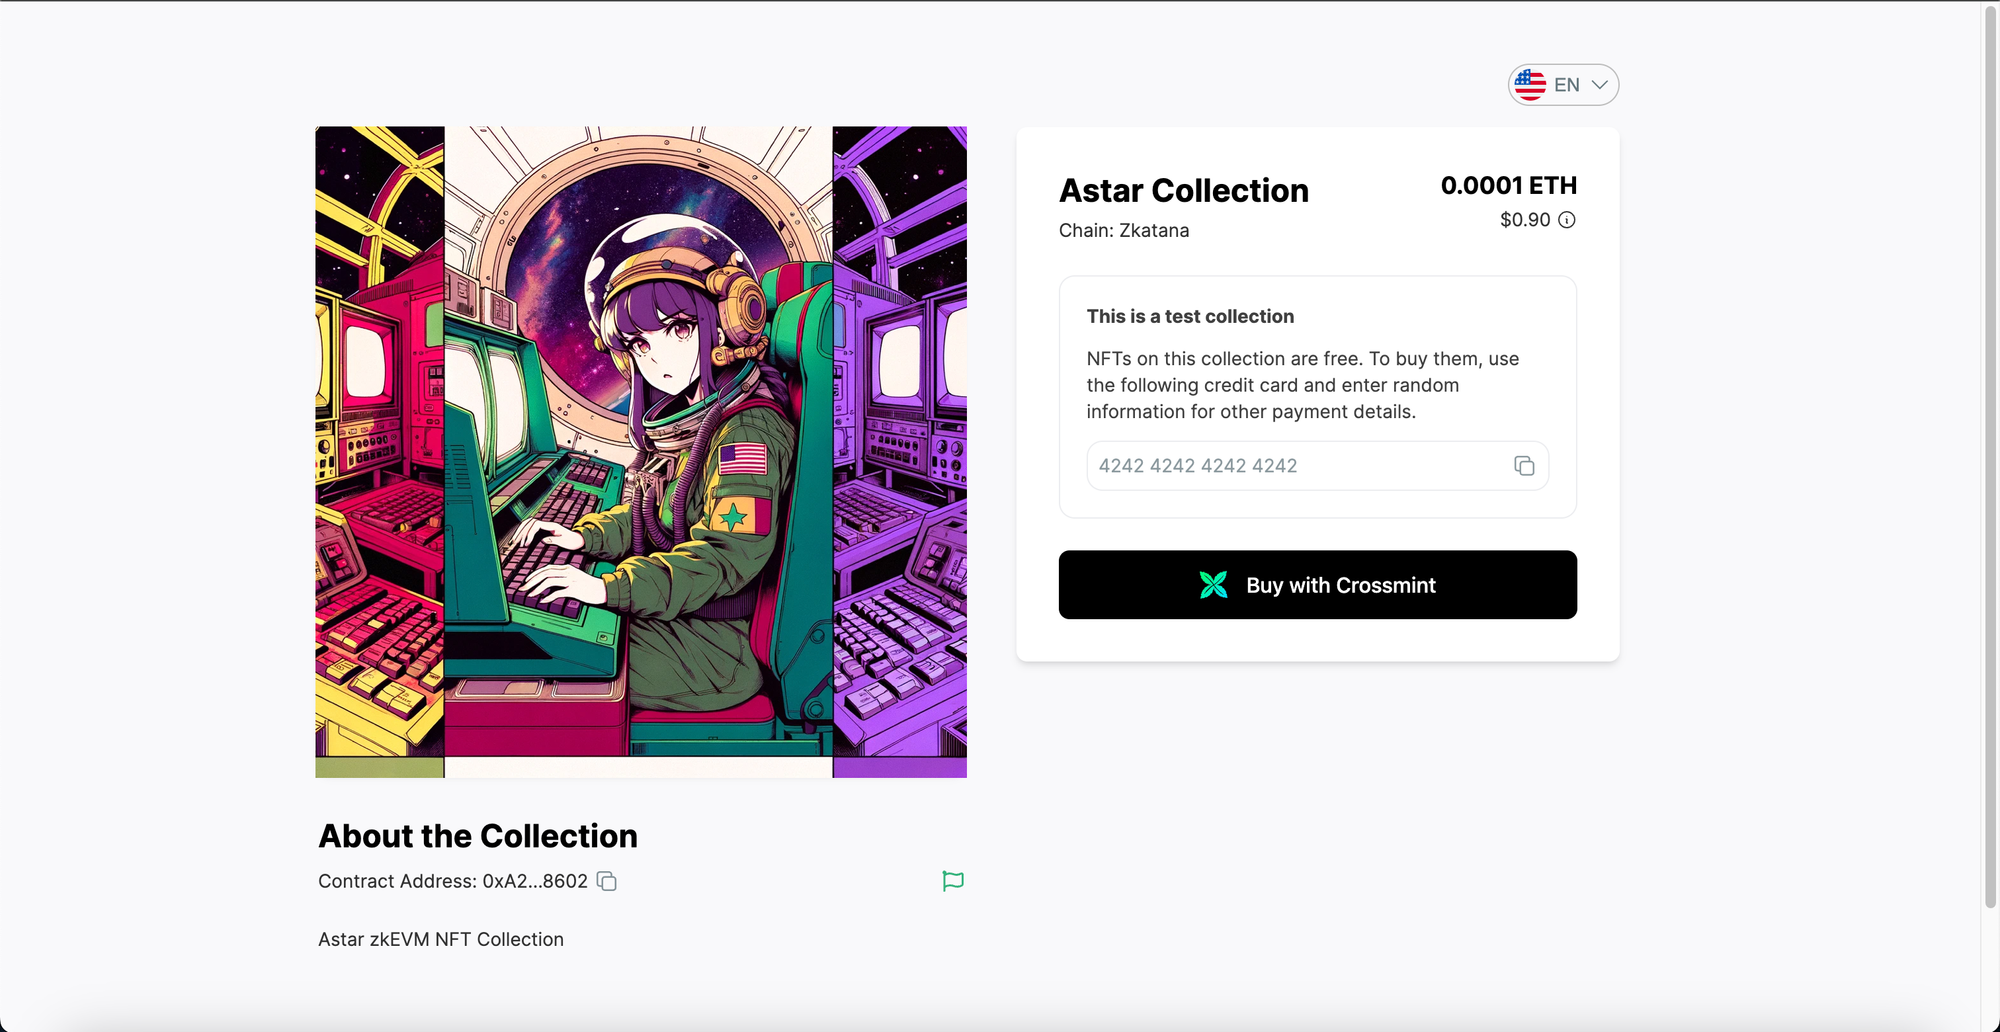
This is what your No-code storefront will look like. You can share this URL with your customers or users and they can purchase your NFTs directly from this page.
How to Purchase the NFTs?
In order to purchase the NFT, click on "Buy with Crossmint".
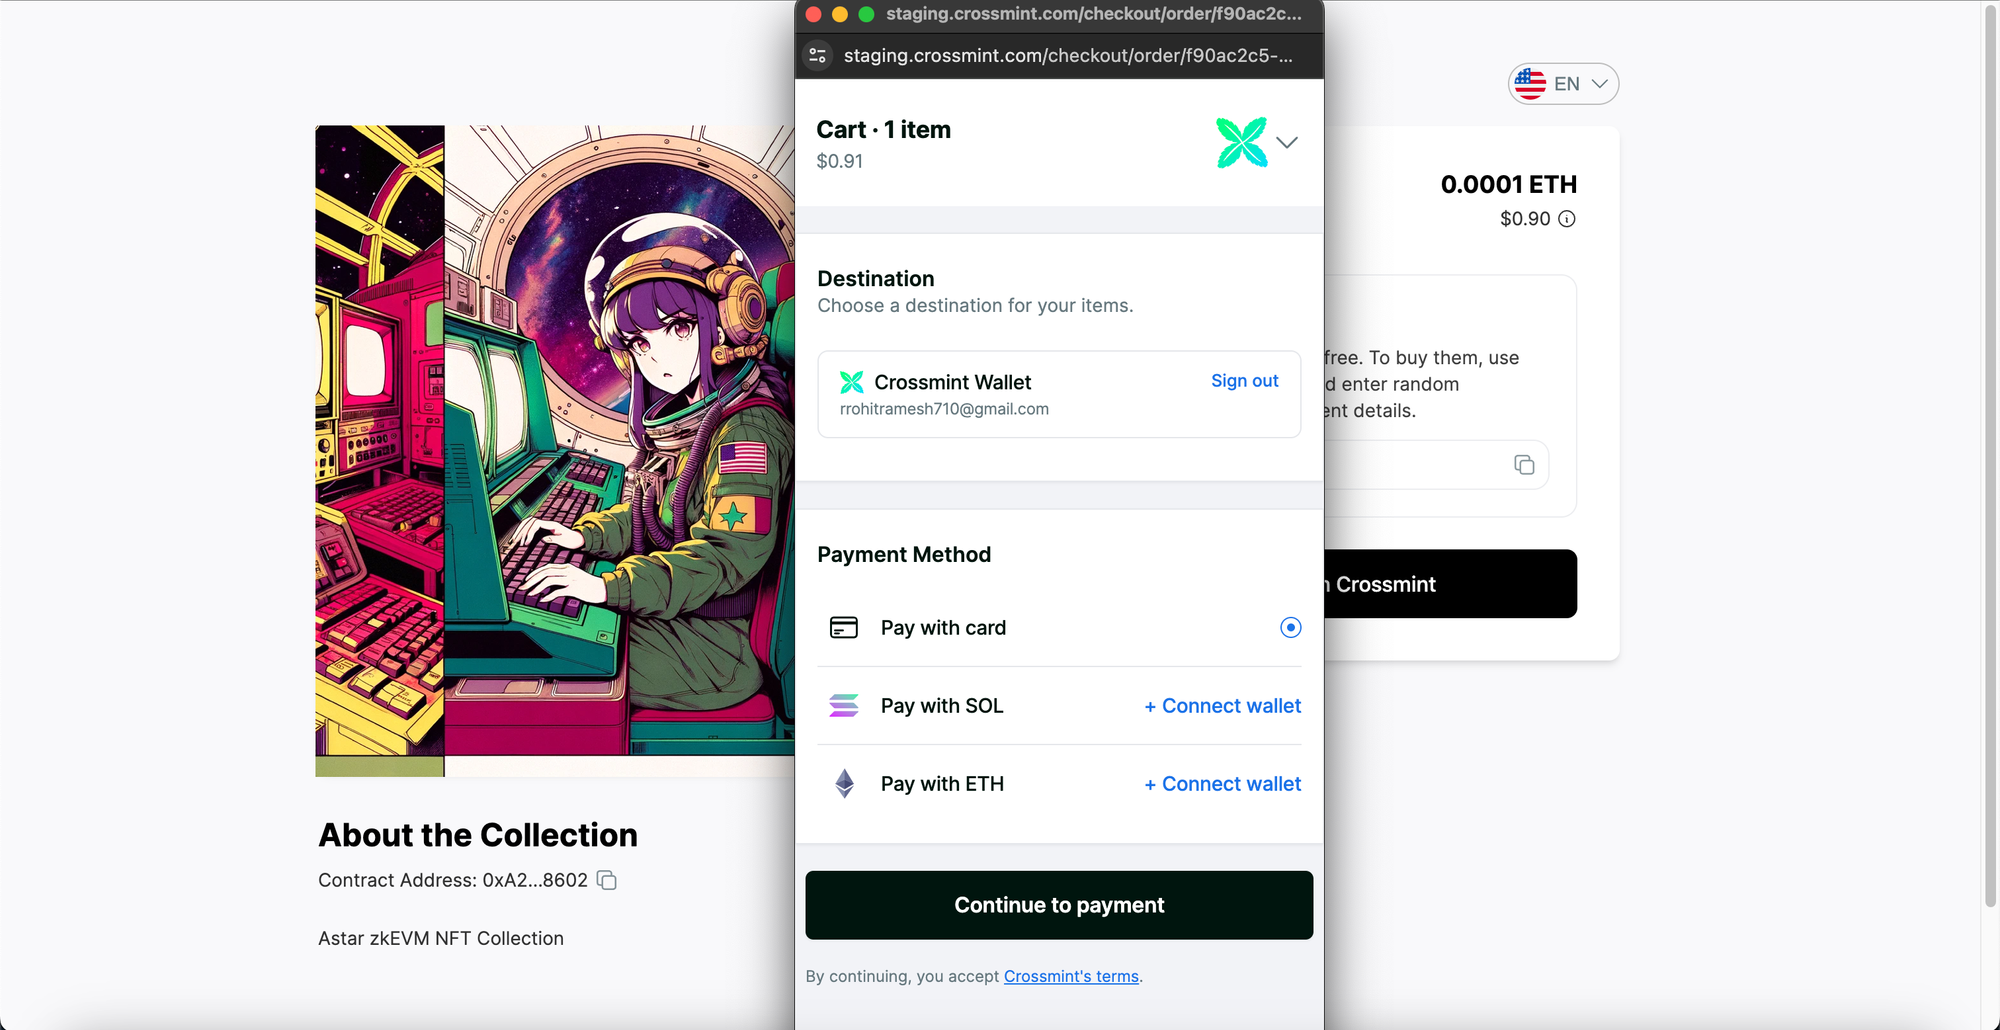
Now, select your preferred payment method. For this tutorial, I will be using the "Pay with card" option. Once you have selected your payment method, click on "Continue to payment".
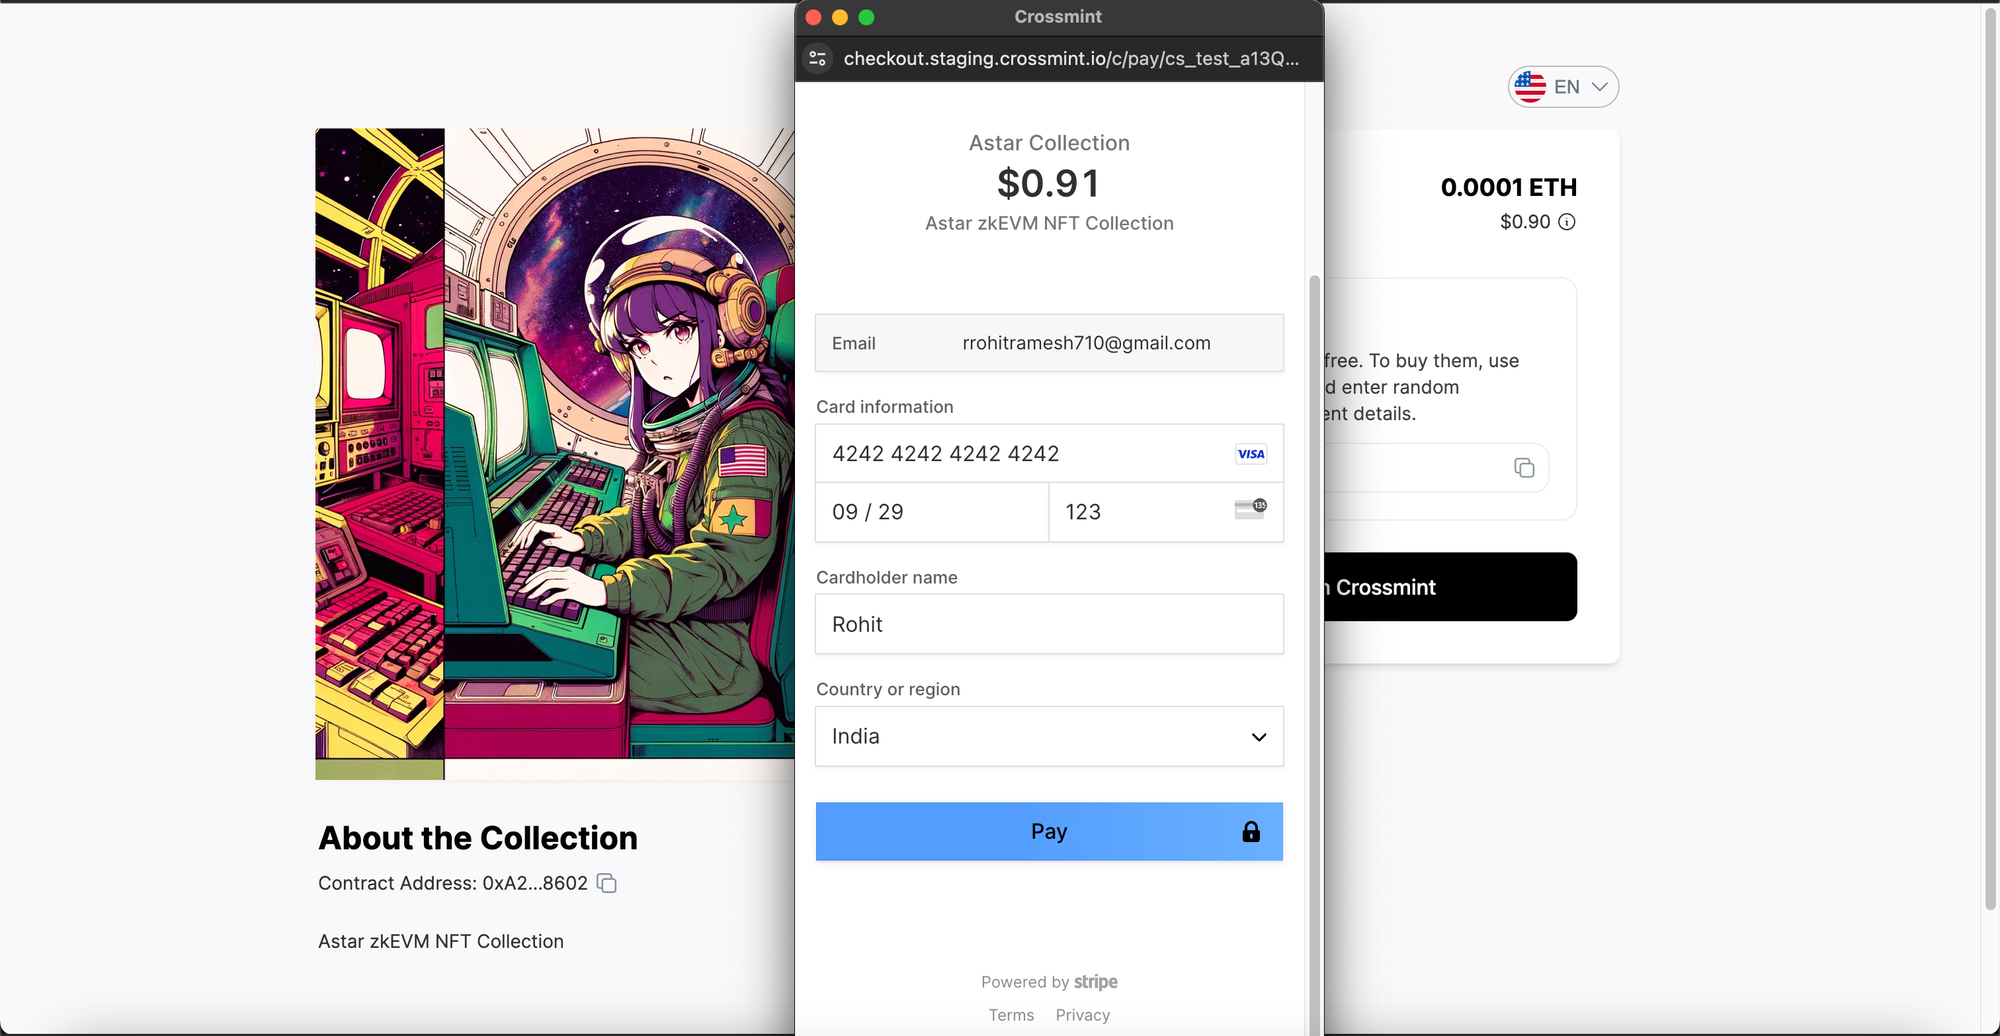
Enter your card information. Since this NFT Collection is on Staging (zKatana Testnet), you can simply use any Stripe approved credit card number for testing.
You can use "4242 4242 4242 4242", for example. You can set any future date for "MM/YY" and any random number for "CVV". Then enter any name as the Cardholder name and click on "Pay".
After the payment goes through, you will be able to see that the NFT is being delivered to the wallet. In this case, it will be delivered to my email address.
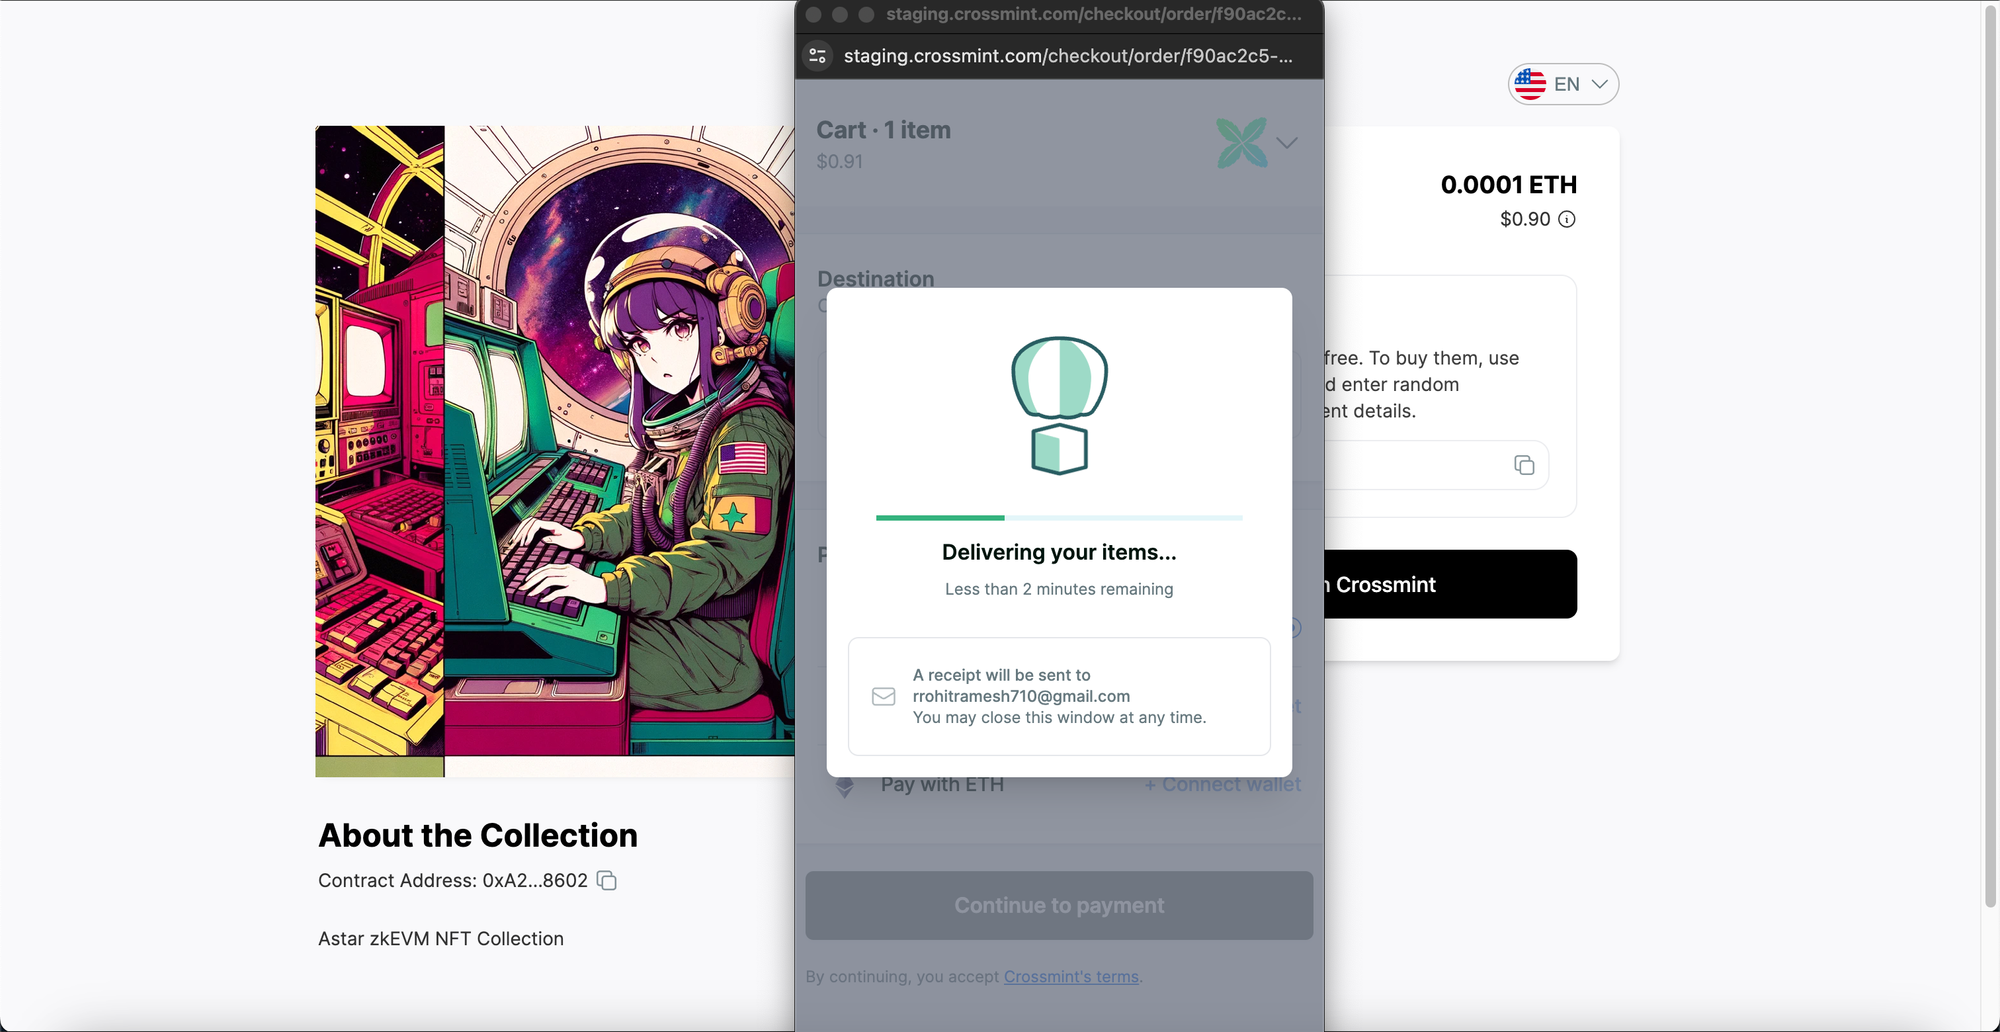
The NFT will be delivered to your wallet in a few minutes.
View the Minted NFT
Please open Crossmint Wallet and login/sign up with the email address that you purchased the NFT with. You will be now able to see the NFT on your wallet.
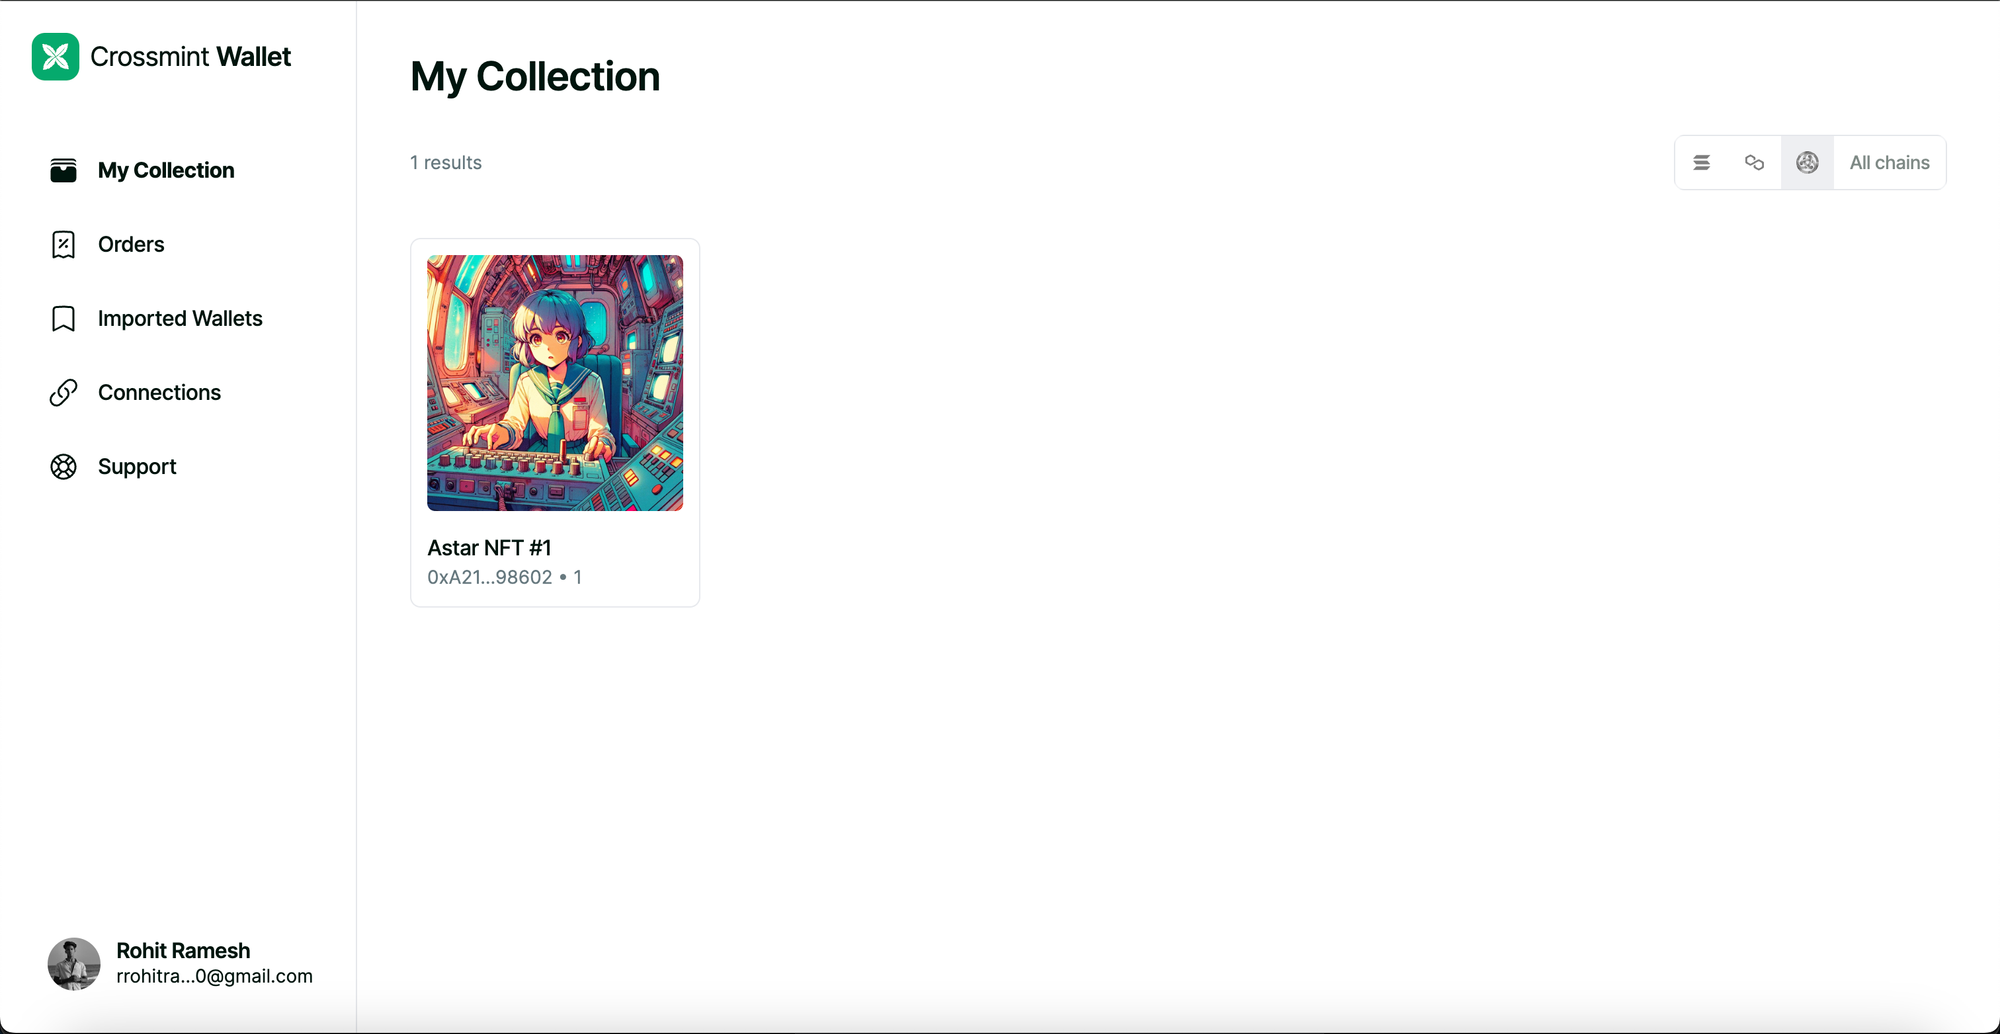
Click on the NFT to view more details about the NFT.

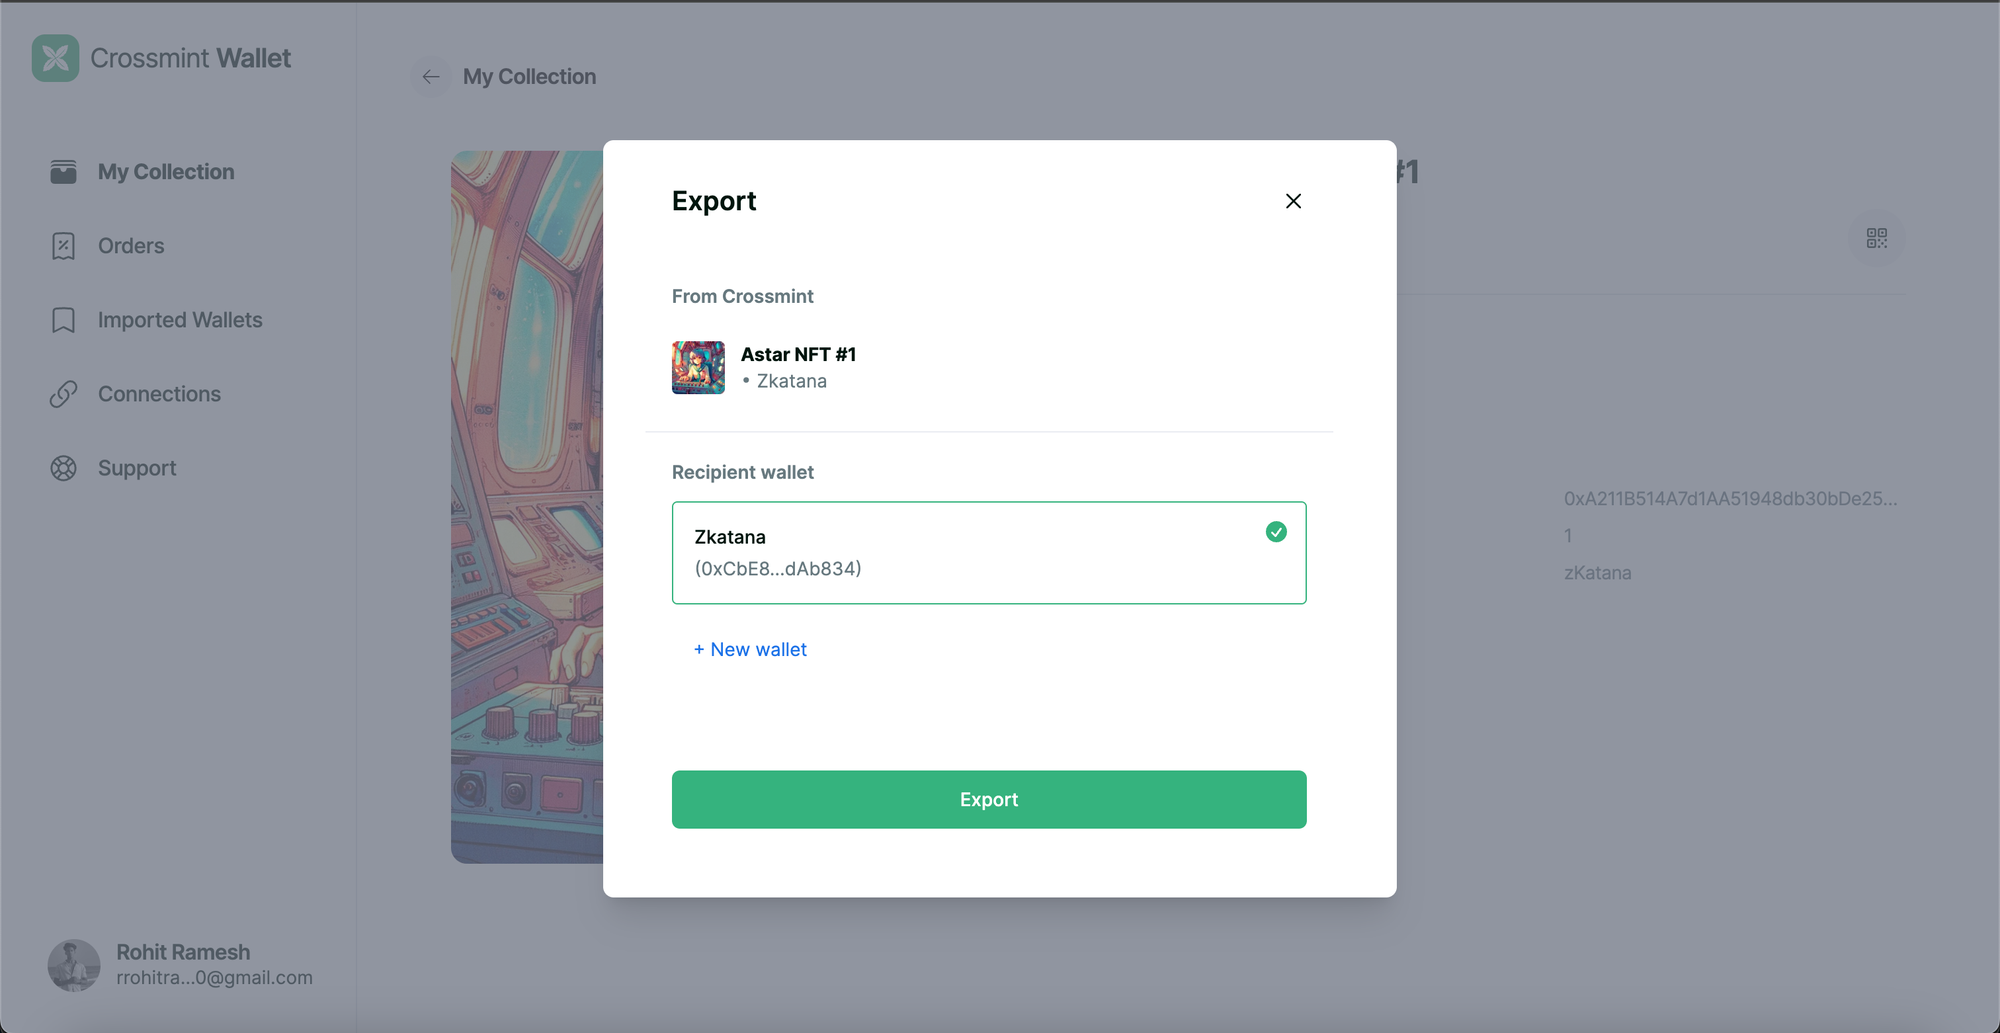
Crossmint also provides a way for you to transfer any NFTs that you purchase. Click on "Transfer".
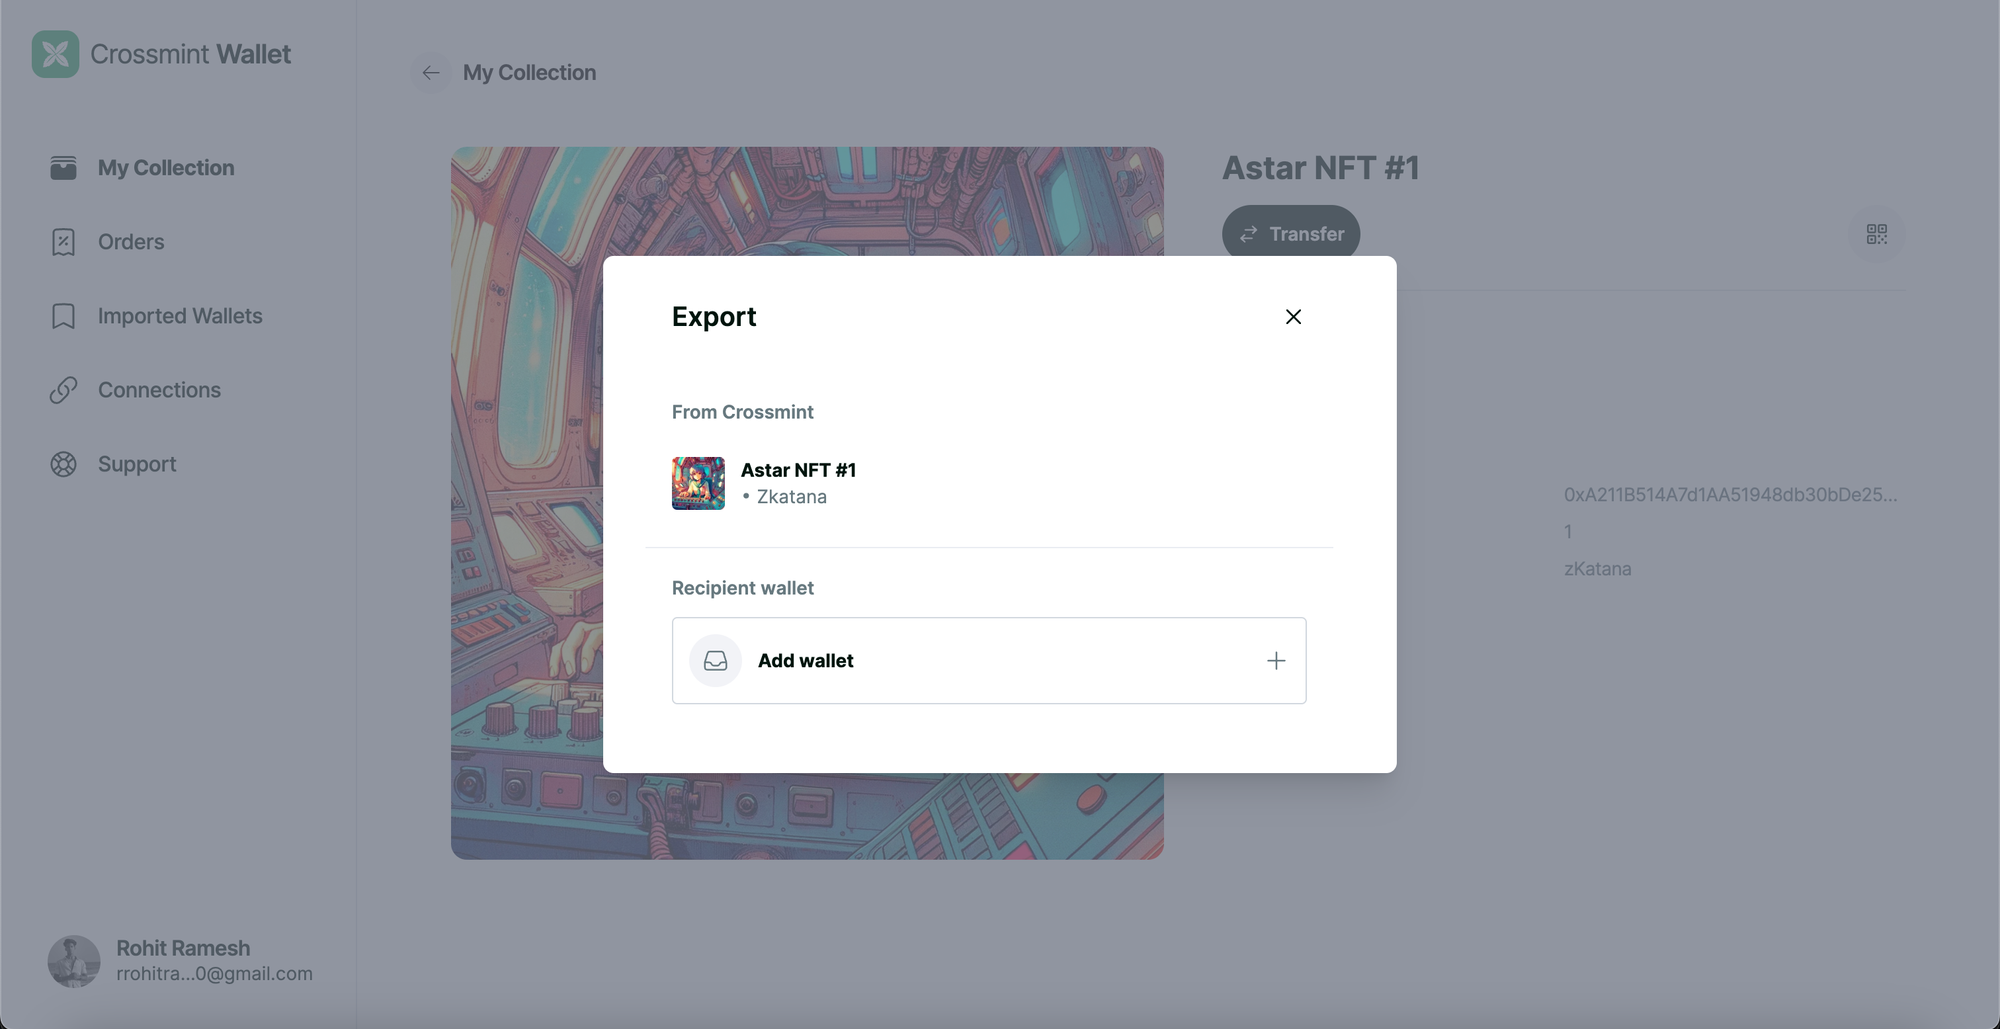
Now simply add your wallet address by clicking on "Add wallet". Click on "Export" to transfer the NFT to your wallet address.
And that's it! You have now successfully learned how to enable credit card and cross-chain payments for your NFT Collection on Astar zkEVM.
What's Next?
You can create powerful Farcaster Frames to mint NFTs cross-chain using Crossmint. Please read the step-by-step guide below to learn how to do this.
Rohit Ramesh
If you want to learn how to use the Crossmint to create Web 3 Wallets for your users using their Email Address, please watch the YouTube video below.
Need help?
For support, please join the official Crossmint Discord Server. You can also use Crossmint Help Page for the same.