


Base's Onchain Summer is back for Season 2! Last year, Crossmint powered Loyalty Passes for Onchain Summer and enabled credit card payments for Coca-Cola and Atari. These loyalty passes, minted on the Base chain, are Dynamic NFTs that evolved over time based on a user's interactions with Onchain Summer.
For each campaign a user participated in during Onchain Summer (i.e., minting NFTs), they earned XP. This XP determined the user's level in Onchain Summer. Owners of these loyalty passes had the chance to win a trip to the Permissionless Conference, creator boxes from Marshmello, and more!
This year, Onchain Summer will kick off with a month-long hackathon hosted by Base in July. In August, Coinbase will feature daily experiences that make coming onchain easier than ever. Consequently, we want to teach you how to build Dynamic NFTs on Base for Onchain Summer using Crossmint.
In this guide, you will learn how to:
- Create an NFT Collection on Base.
- Mint Dynamic NFTs on Base.
This guide will take you approximately 20 minutes to complete.
Let's get started!
Table of Contents:
- Create an Account on Crossmint
- Create an NFT Collection on Base
- Create and Mint NFTs on Base
- Edit the NFT
- What's Next?
- Need Help?
Create an Account on Crossmint
Before you proceed with creating an NFT Collection on Crossmint, you need to create an account on Crossmint.
Please proceed to the Crossmint Console and sign up.
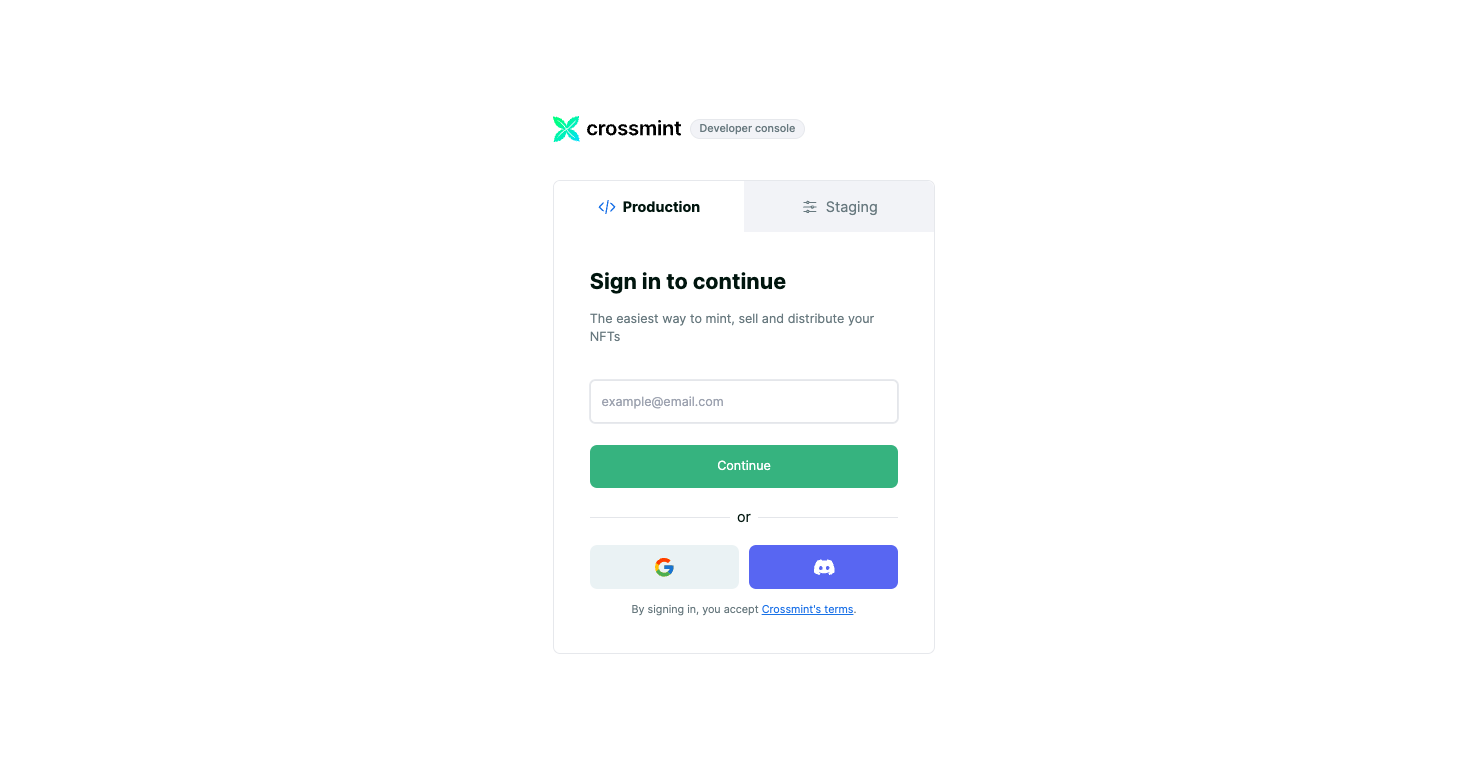
Crossmint has two different environments, they are Staging and Production. The Staging environment works with testnets (for example, Ethereum Sepolia, Polygon Amoy, Base Sepolia, etc.), whereas the Production environment works with mainnets (for example, Ethereum Mainnet, Polygon, Base, etc).
Note: We will be using Crossmint's Staging Console for this tutorial. It's recommended that you familiarize yourself with this tutorial on Staging before you work with Crossmint's Production Console. Click here to the Staging Console.
Create an NFT Collection on Base
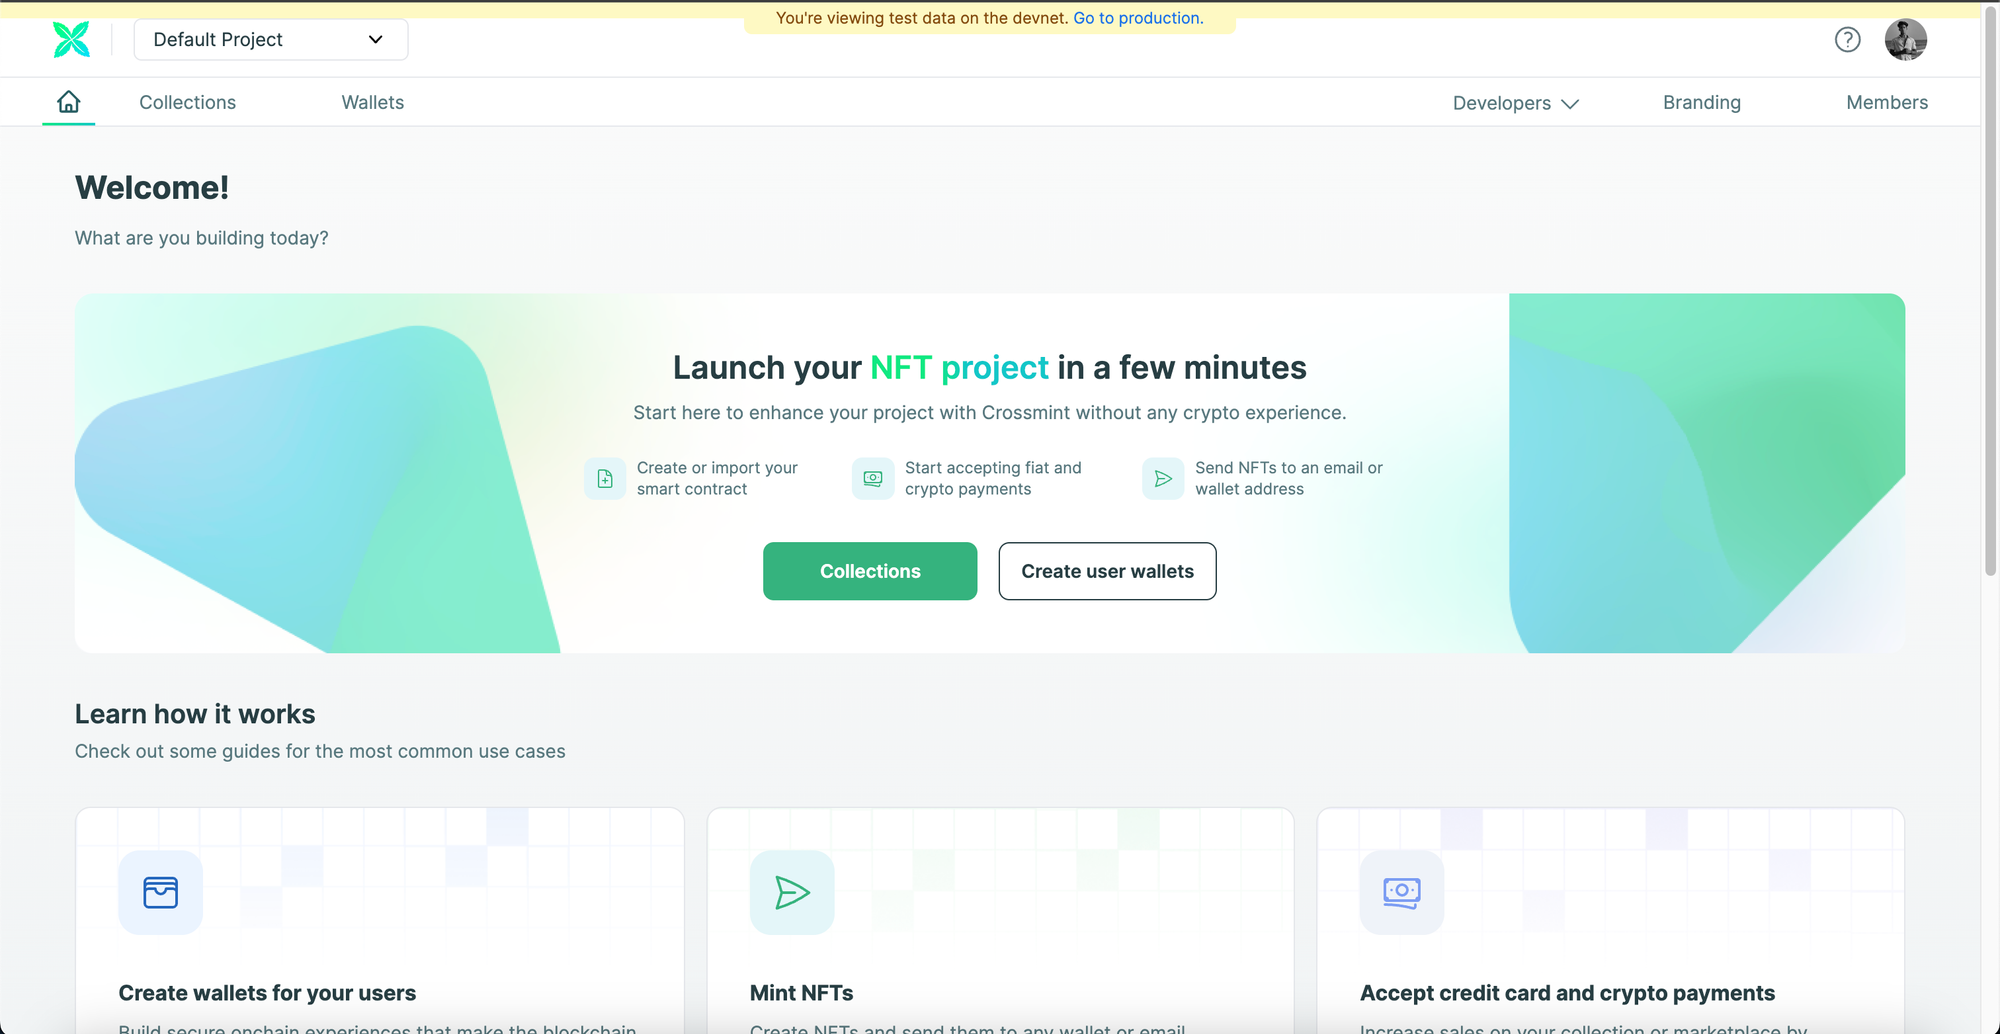
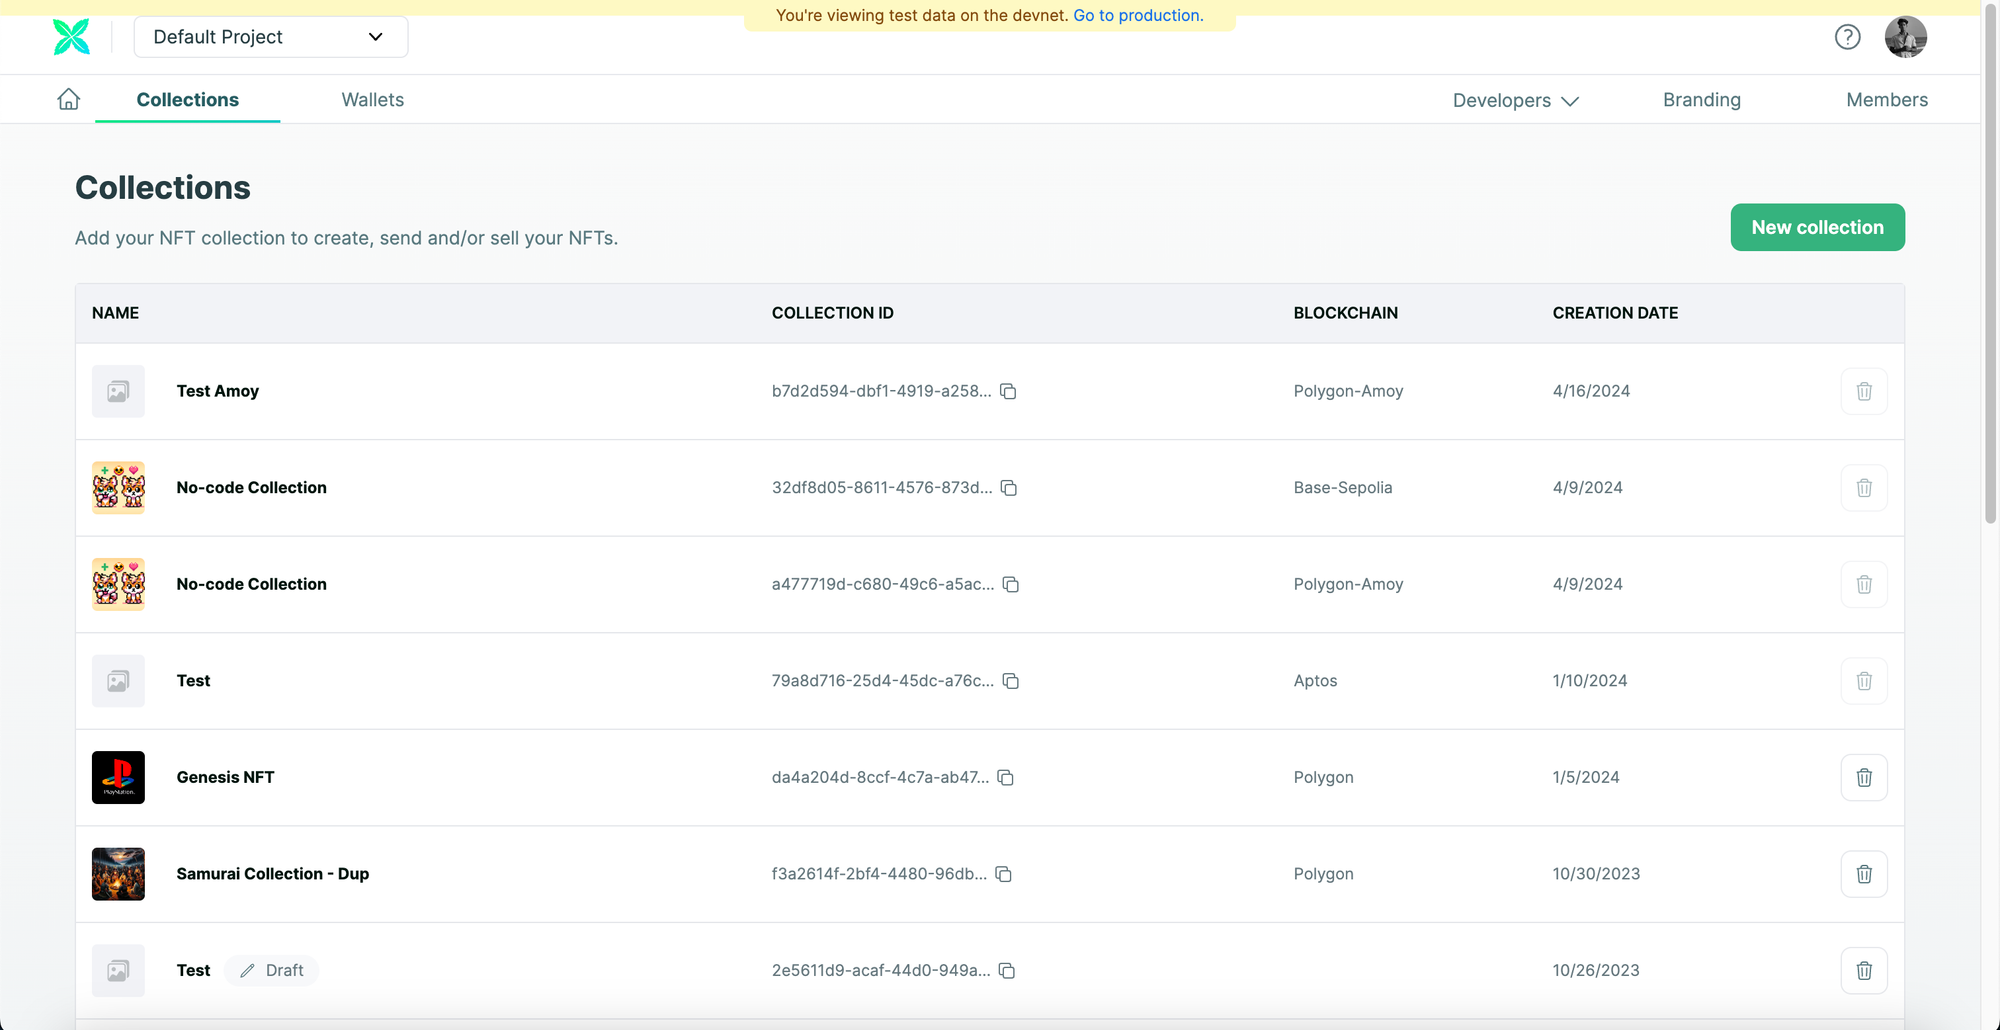
After you have signed up or signed in into the Crossmint Console, navigate to "Collections".
Now, click on "New collection" to create a new NFT Collection.
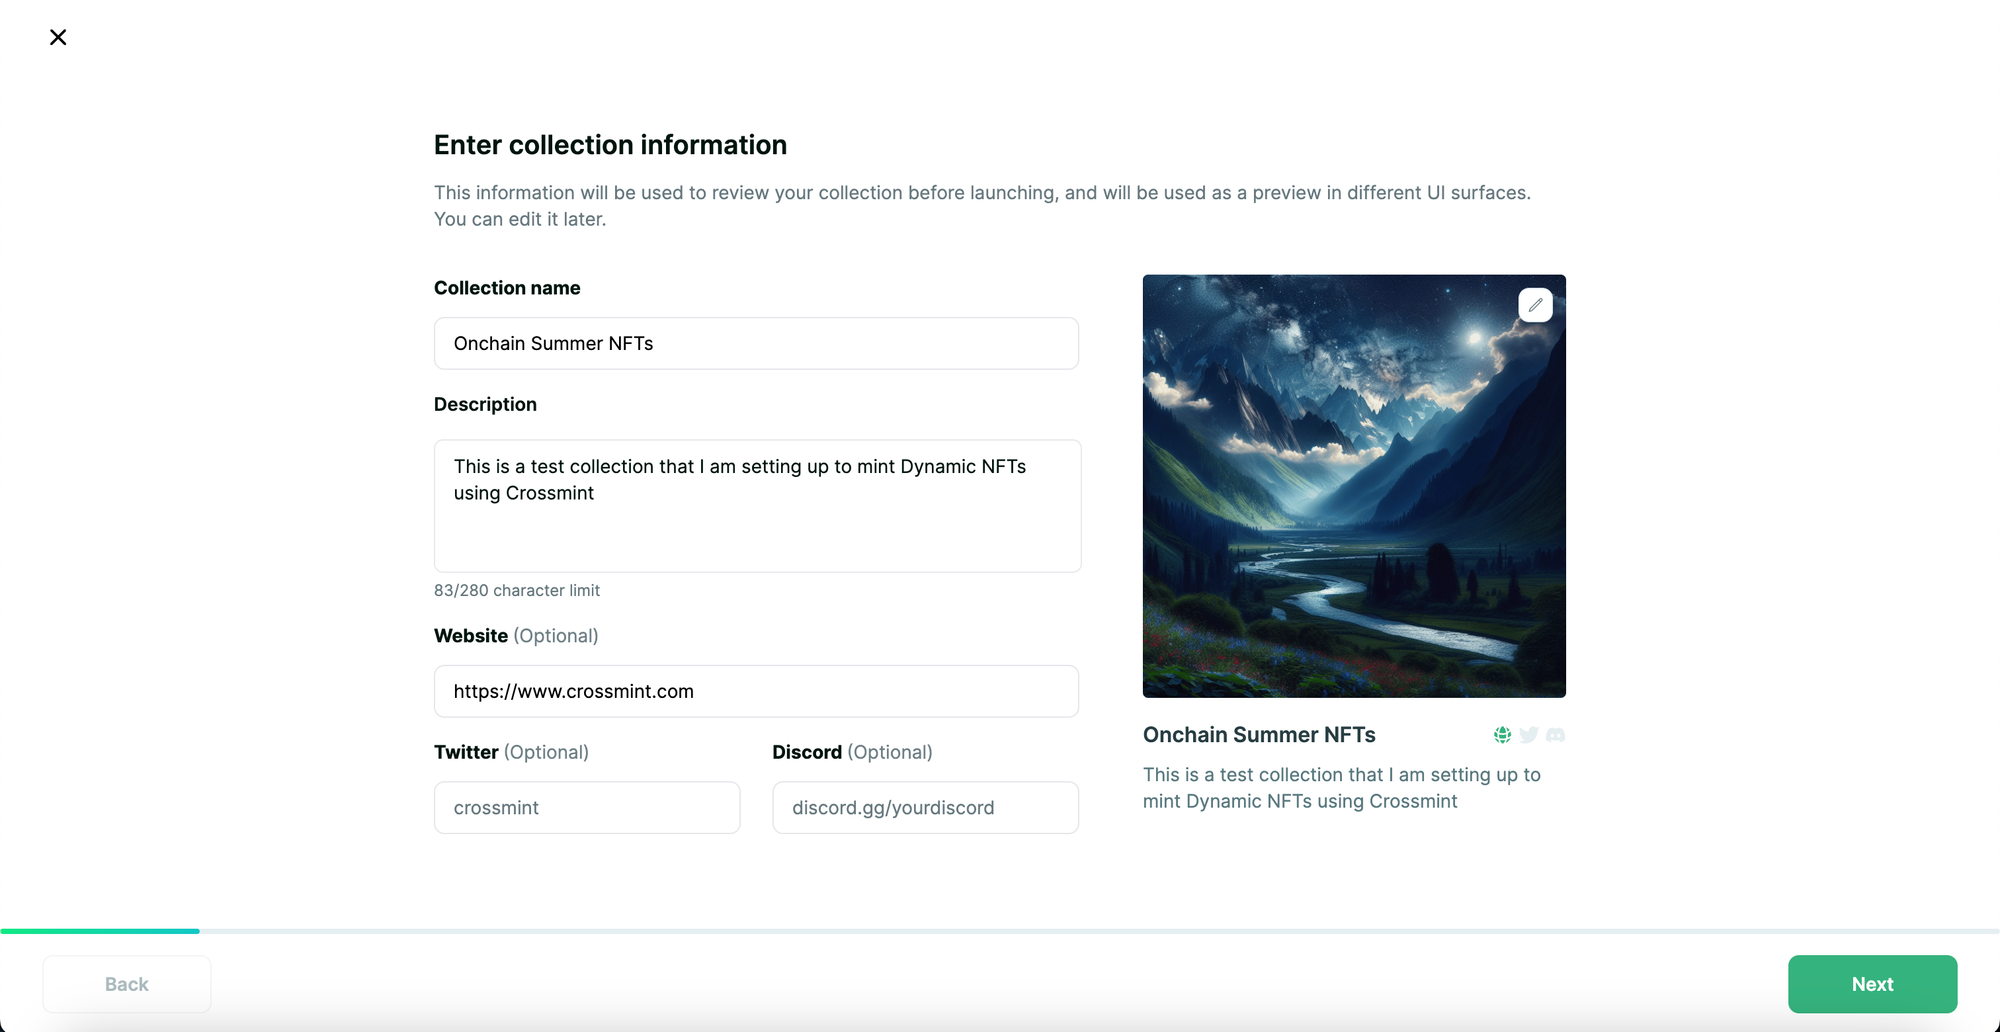
Configure the NFT Collection
You will be asked to enter your collections's information. This is your NFT Collection's metadata, so please enter the "Collection name", "Description", and upload a cover image for your NFT Collection. You can also enter also enter the URL of your website, your twitter username and your discord server link (all of them are optional parameters).
Once you have completed filling out the collection information, click on "Next" to proceed.
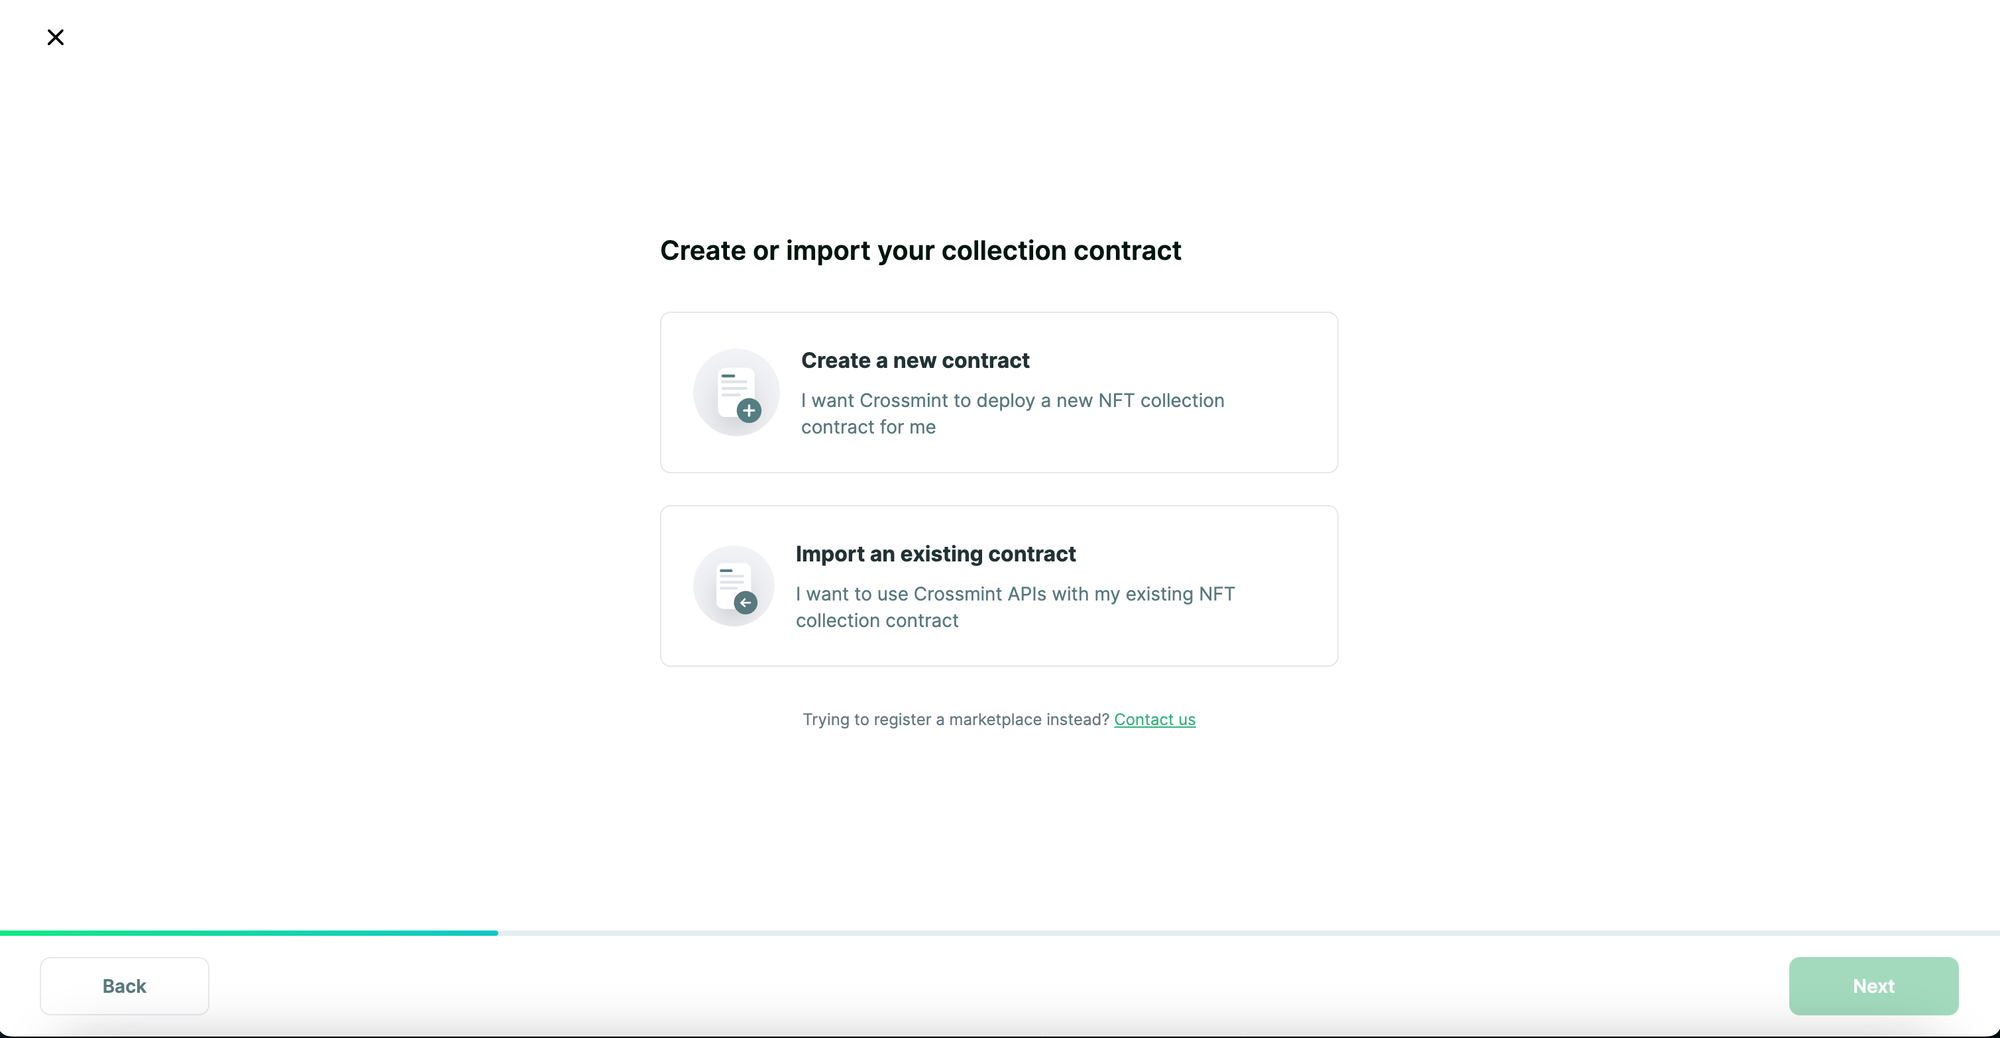
You can click on "Create a new contract" to deploy a new NFT Collection. If you select this, Crossmint will deploy the a smart contract on your behalf for your NFT Collection. However, if you already have a deployed smart contract (NFT Collection), you can select "Import an existing contract".
For the sake of simplicity, this guide will use Crossmint to create a new contract. So select "Create a new contract" and click on "Next".
Now you have to select what you wish to do with your NFT Collection. The available options are:
- Airdrop NFTs - this lets you airdrop NFTs to a list of wallet or email addresses.
- Sell NFTs - this lets you enable credit card and cross-chain payments for your NFT Collection.
Select both of the options for now and click on "Next" (You can always change this setting later).

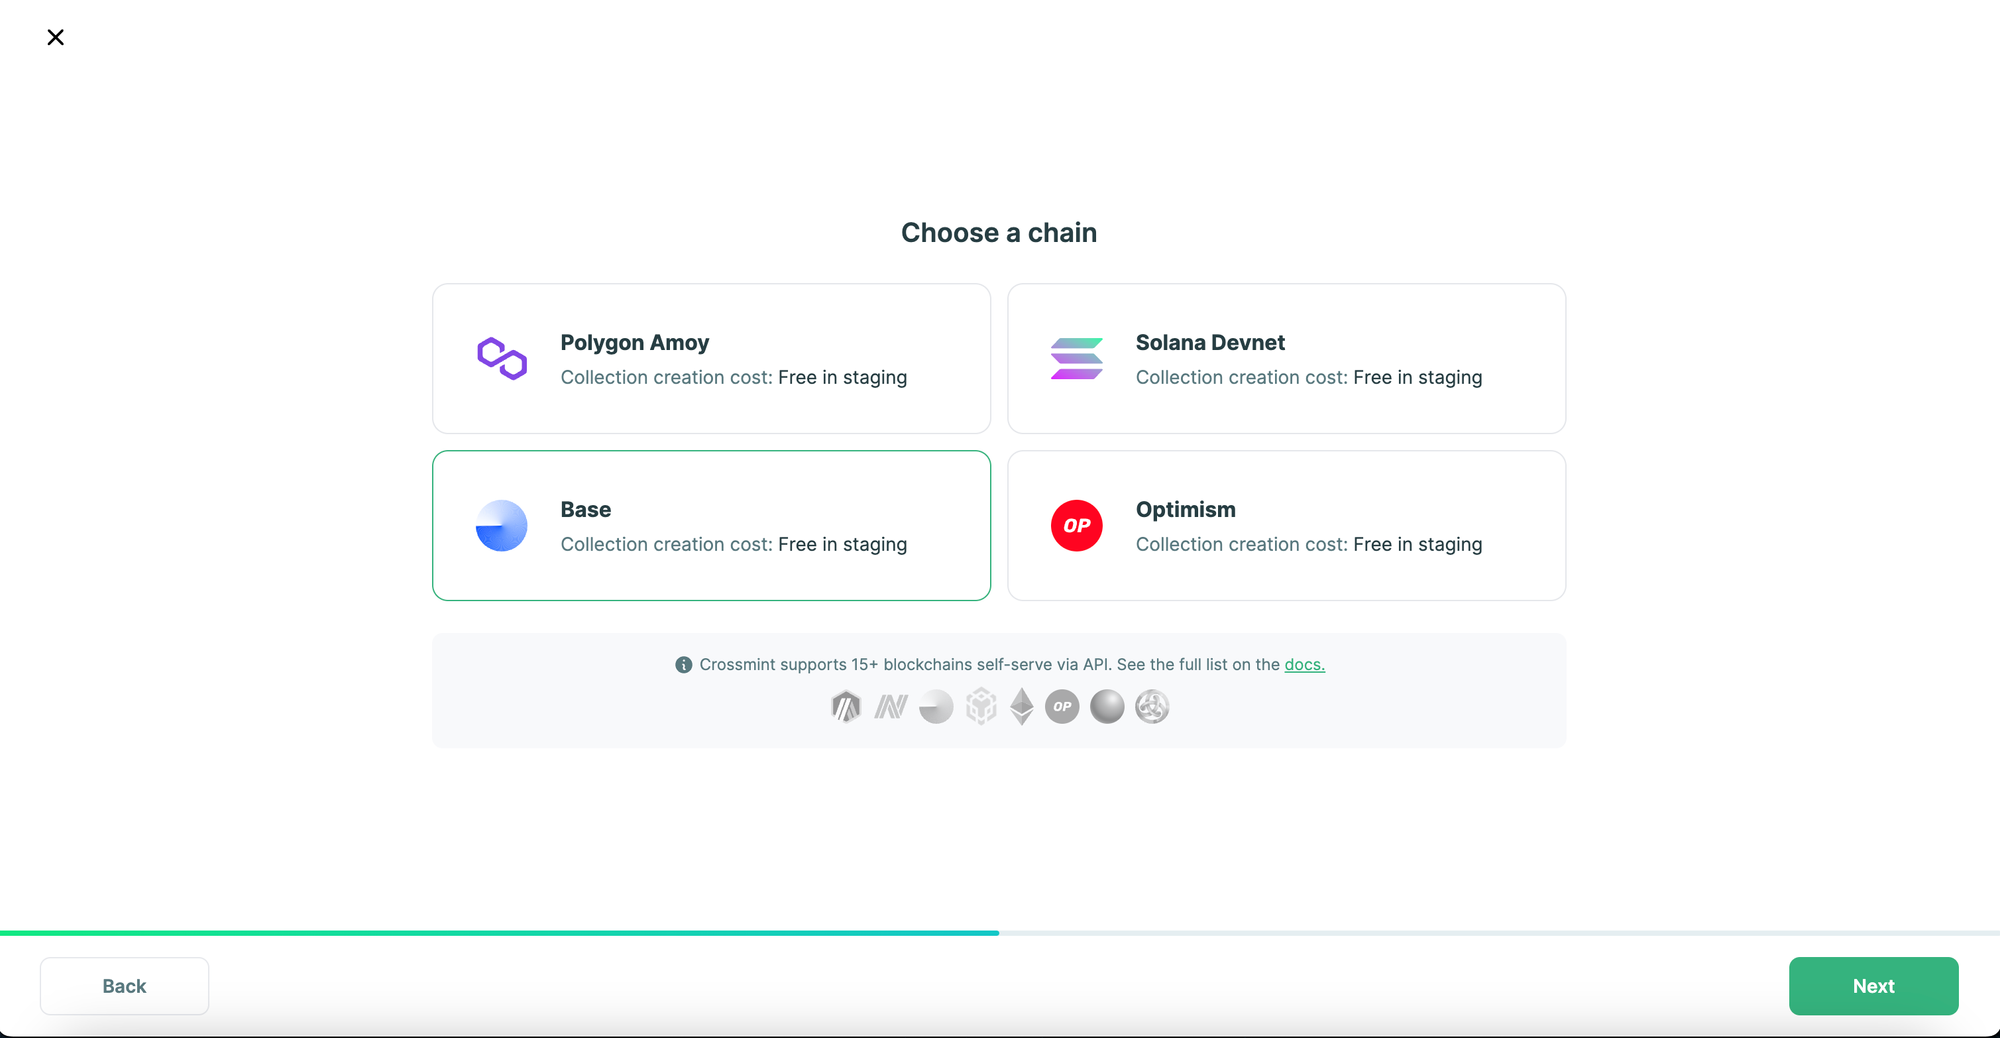
Now you need to select the Blockchain to create your NFT Collection on. Select "Base" and click on "Next" to proceed.
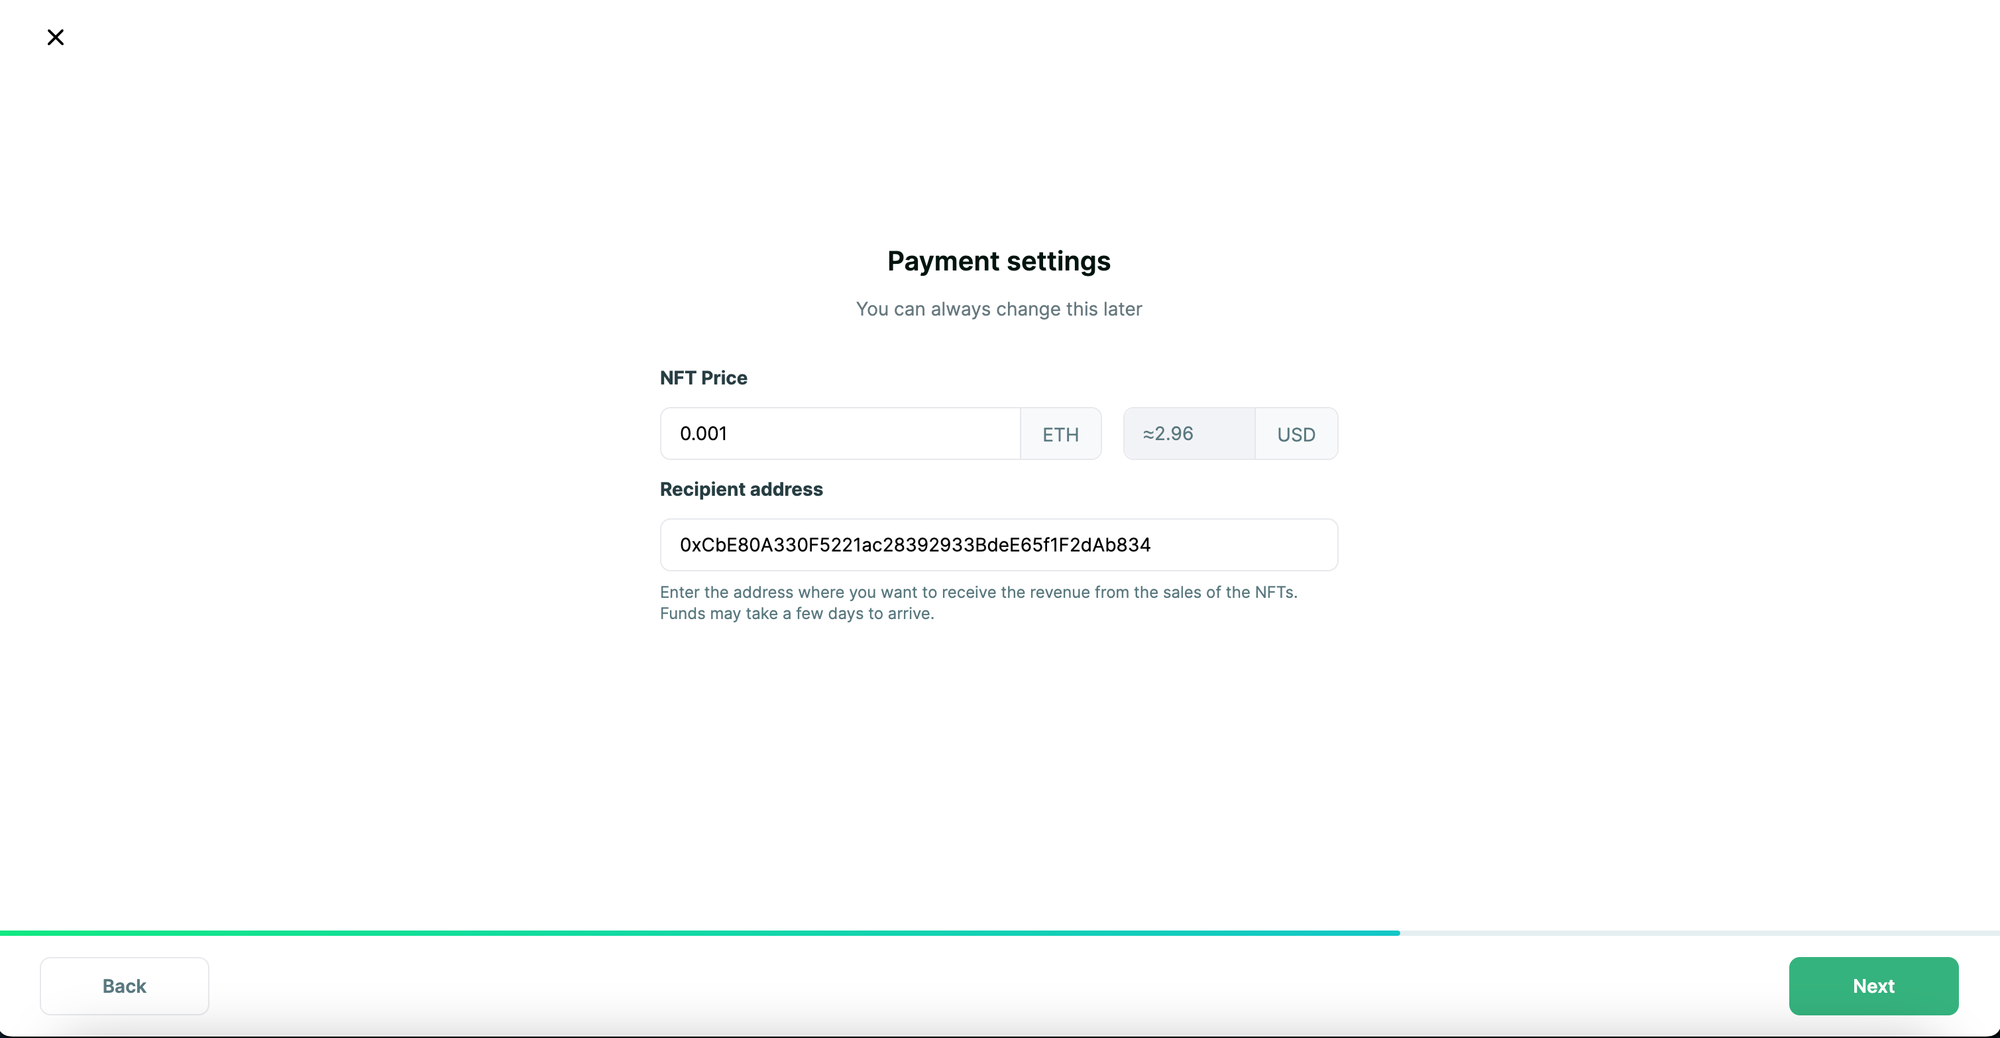
You will now be asked to configure the payment settings for your collection. Set the price per NFT and the recipient address that will receive the funds from the sales of your NFTs. These settings can be changed later.
After you have filled it out, click on "Next" to proceed.
Deploy the NFT Collection
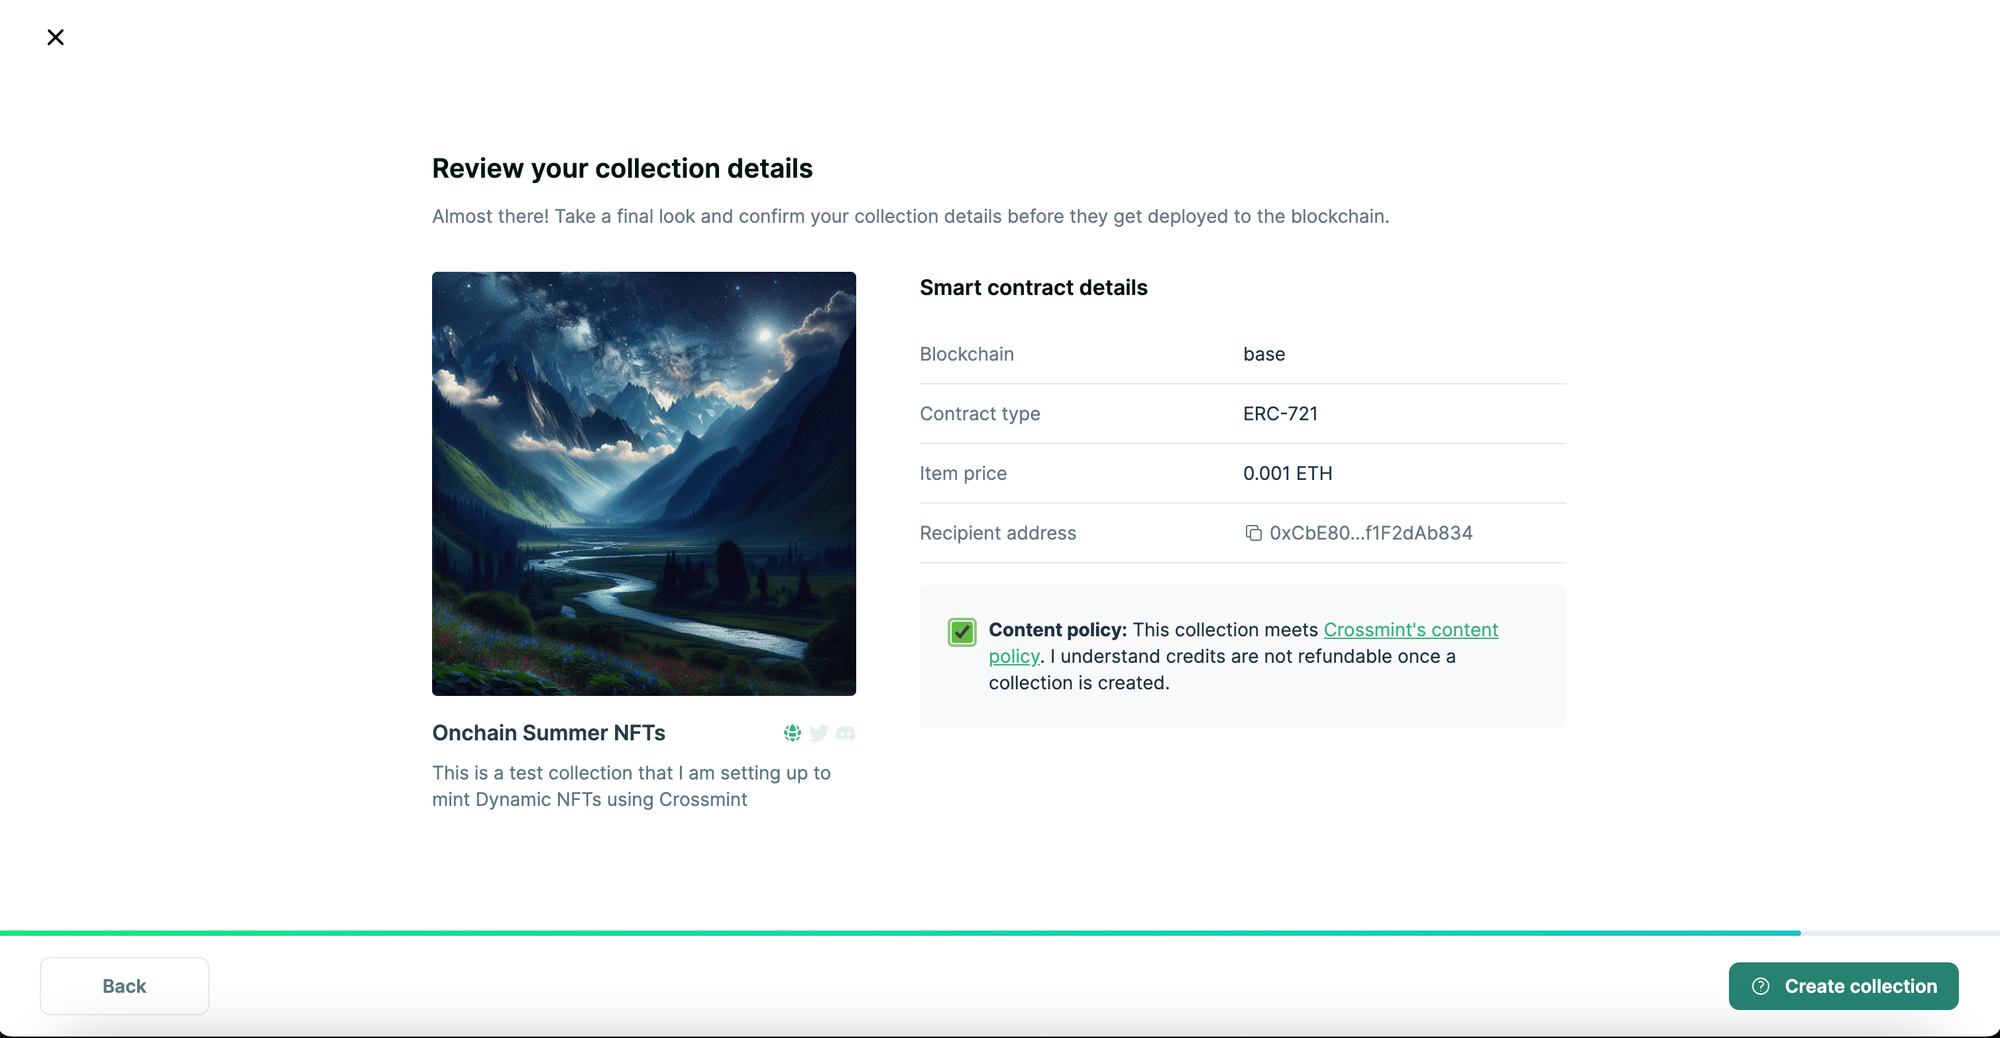
You will now be asked to review your collection details. If everything looks apt, please accept the content policy by click on the checkbox.
Now click on "Create collection" and your NFT Collection will be created on Base.
Your NFT Collection should be created in a few seconds. You can now create your NFT.
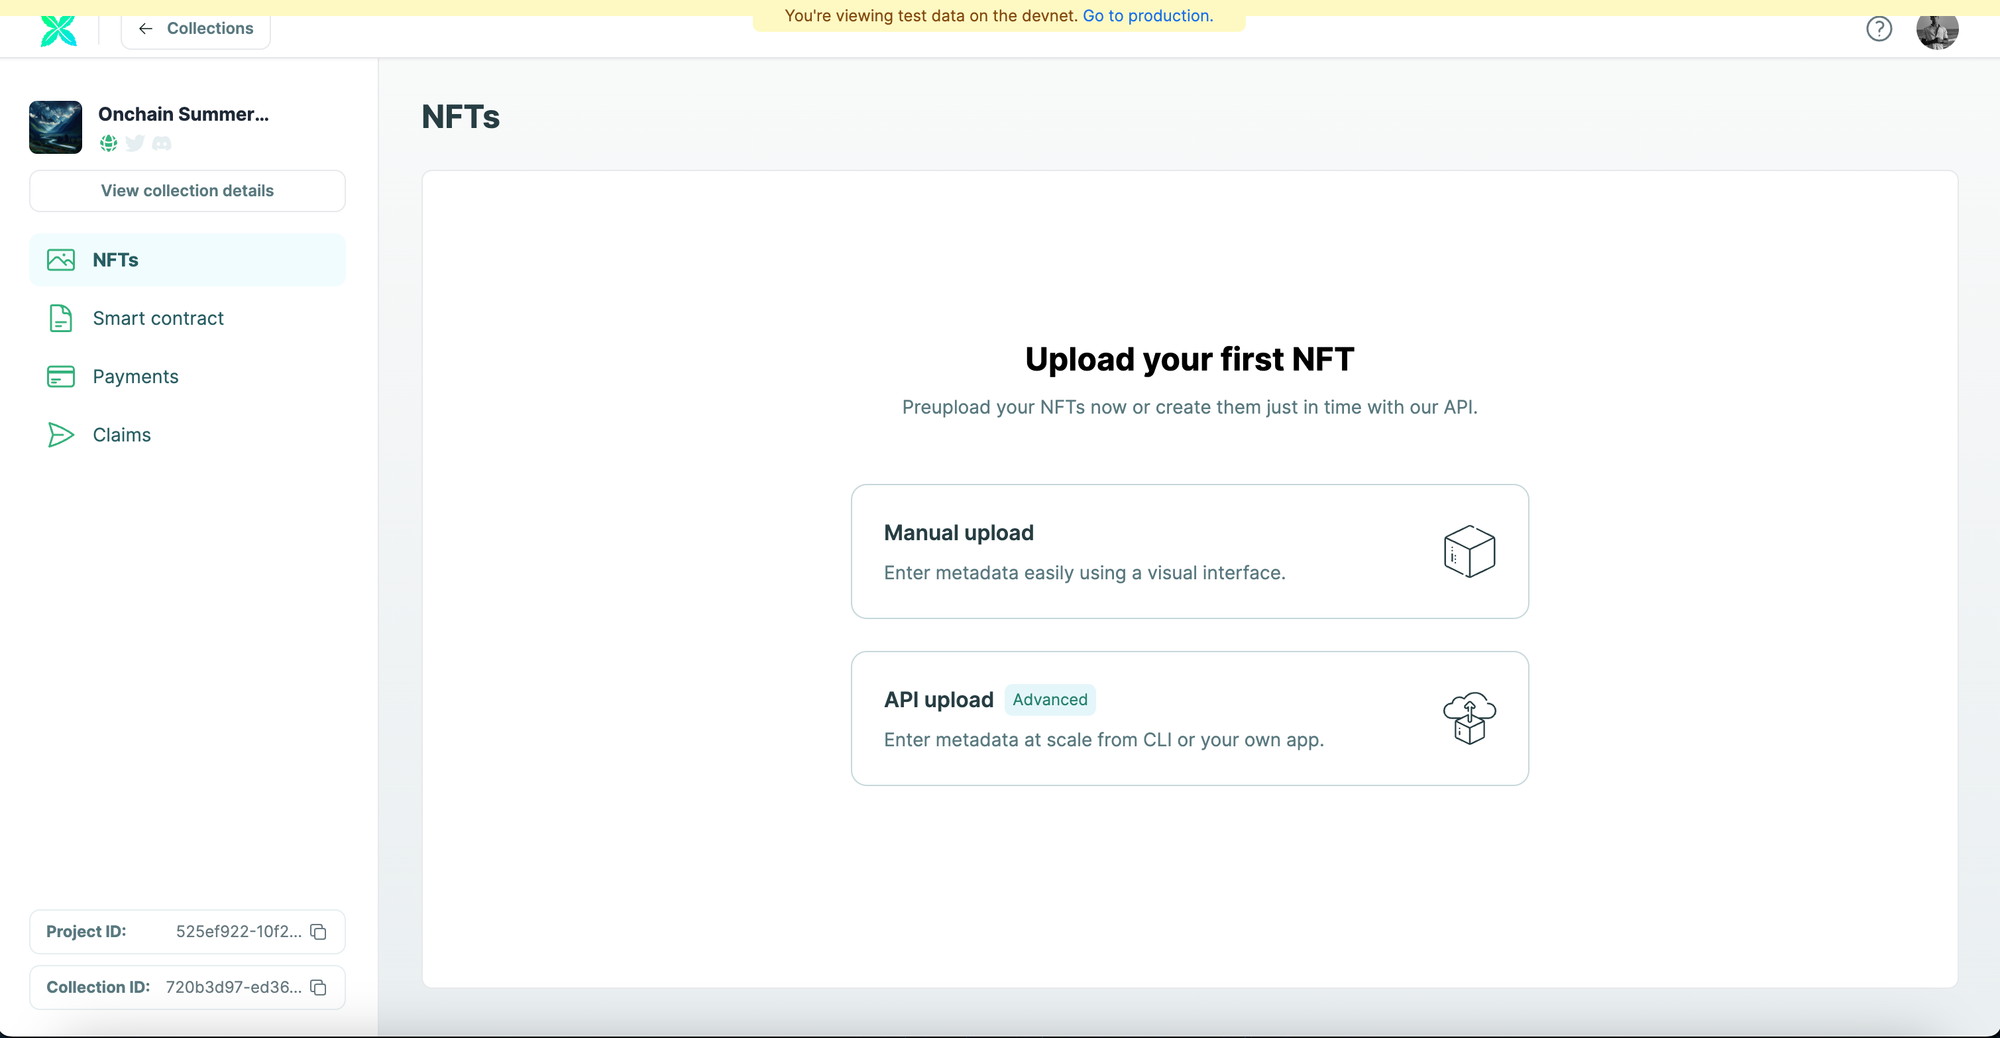
Create NFTs on Base
You can either create NFTs via Crossmint's API or create them manually via the Console. For the sake of simplicity, we will be using the "Manual Upload" option.
Click on "Manual Upload" and you will be prompted to configure the metadata for your NFT.
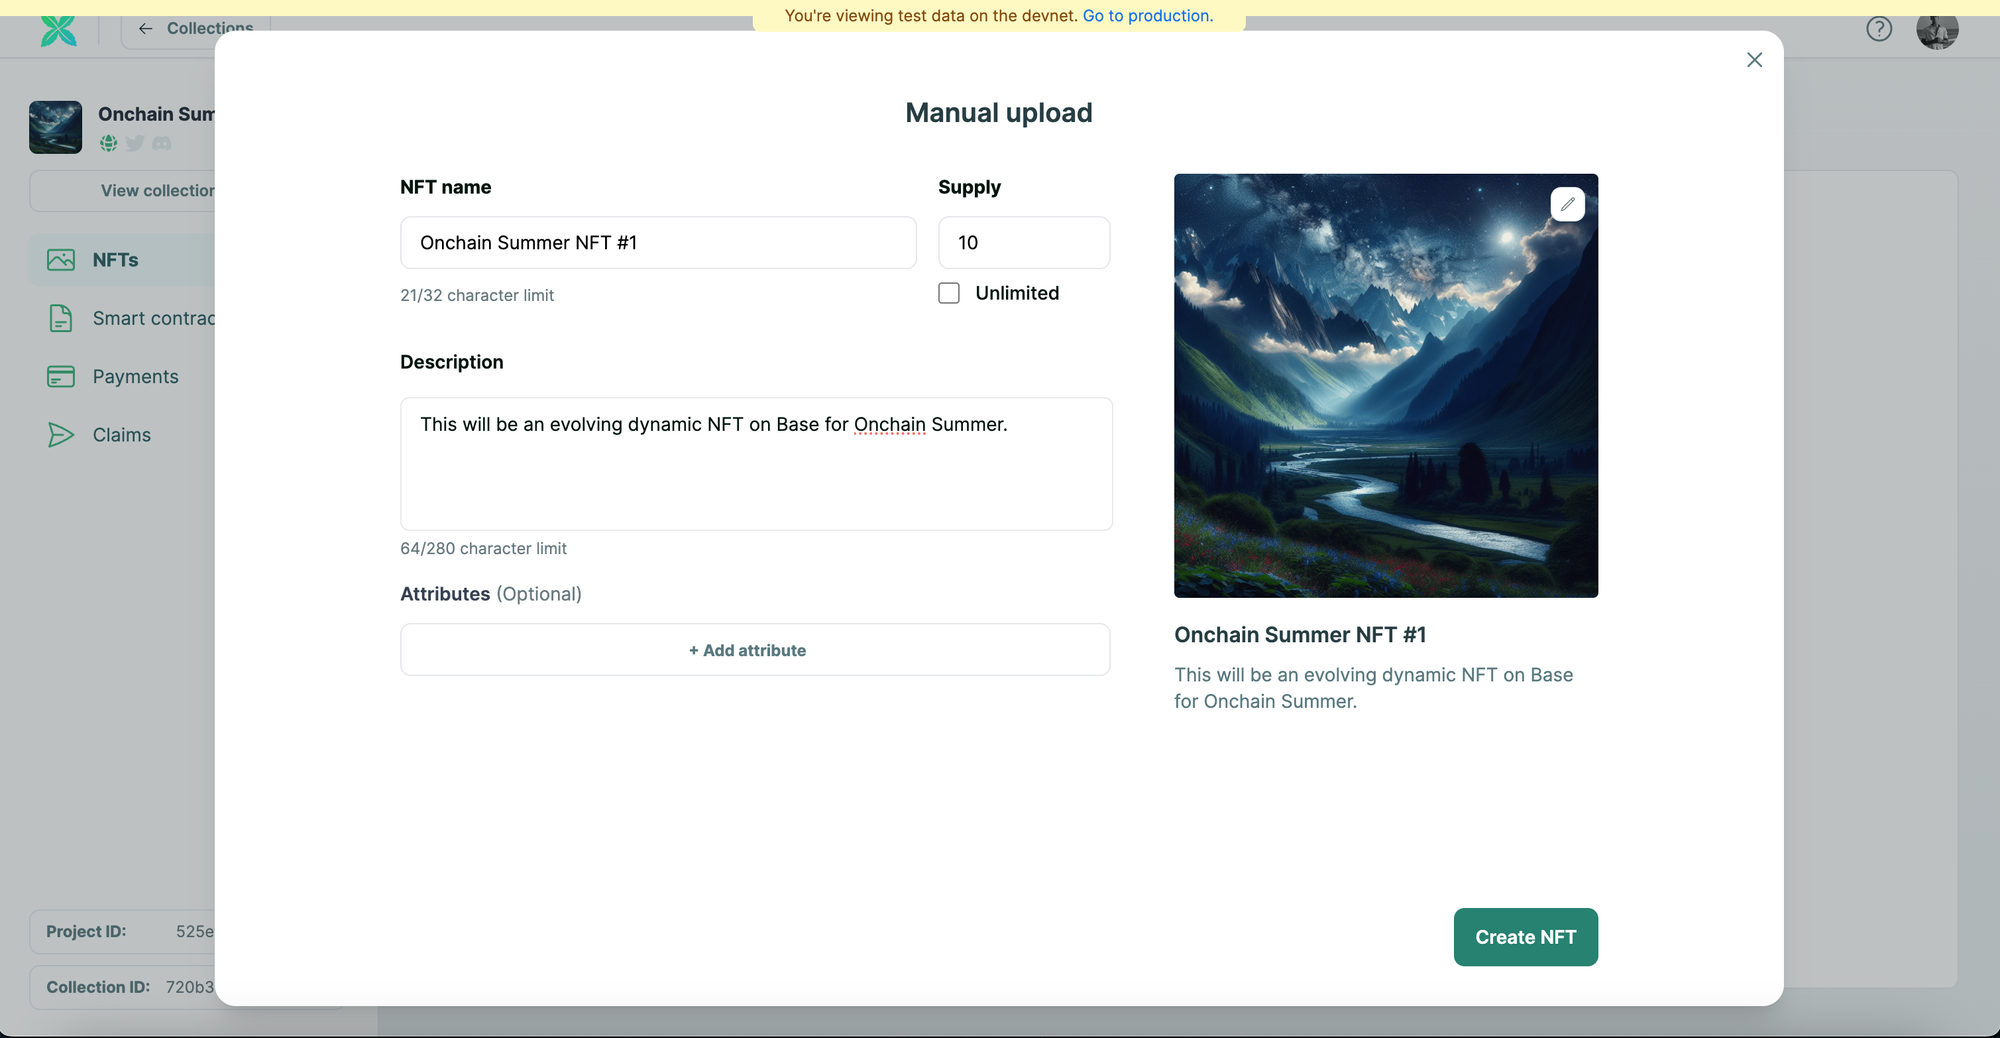
Create an NFT on Base
Now you need to upload the NFT image and enter the NFT's details such as the "NFT name", "Supply", and "Description". You can also add attributes for your NFT, however this is optional.
After you have filled out the details for your NFT, click on "Create NFT".
You will be able to see the NFT was created.
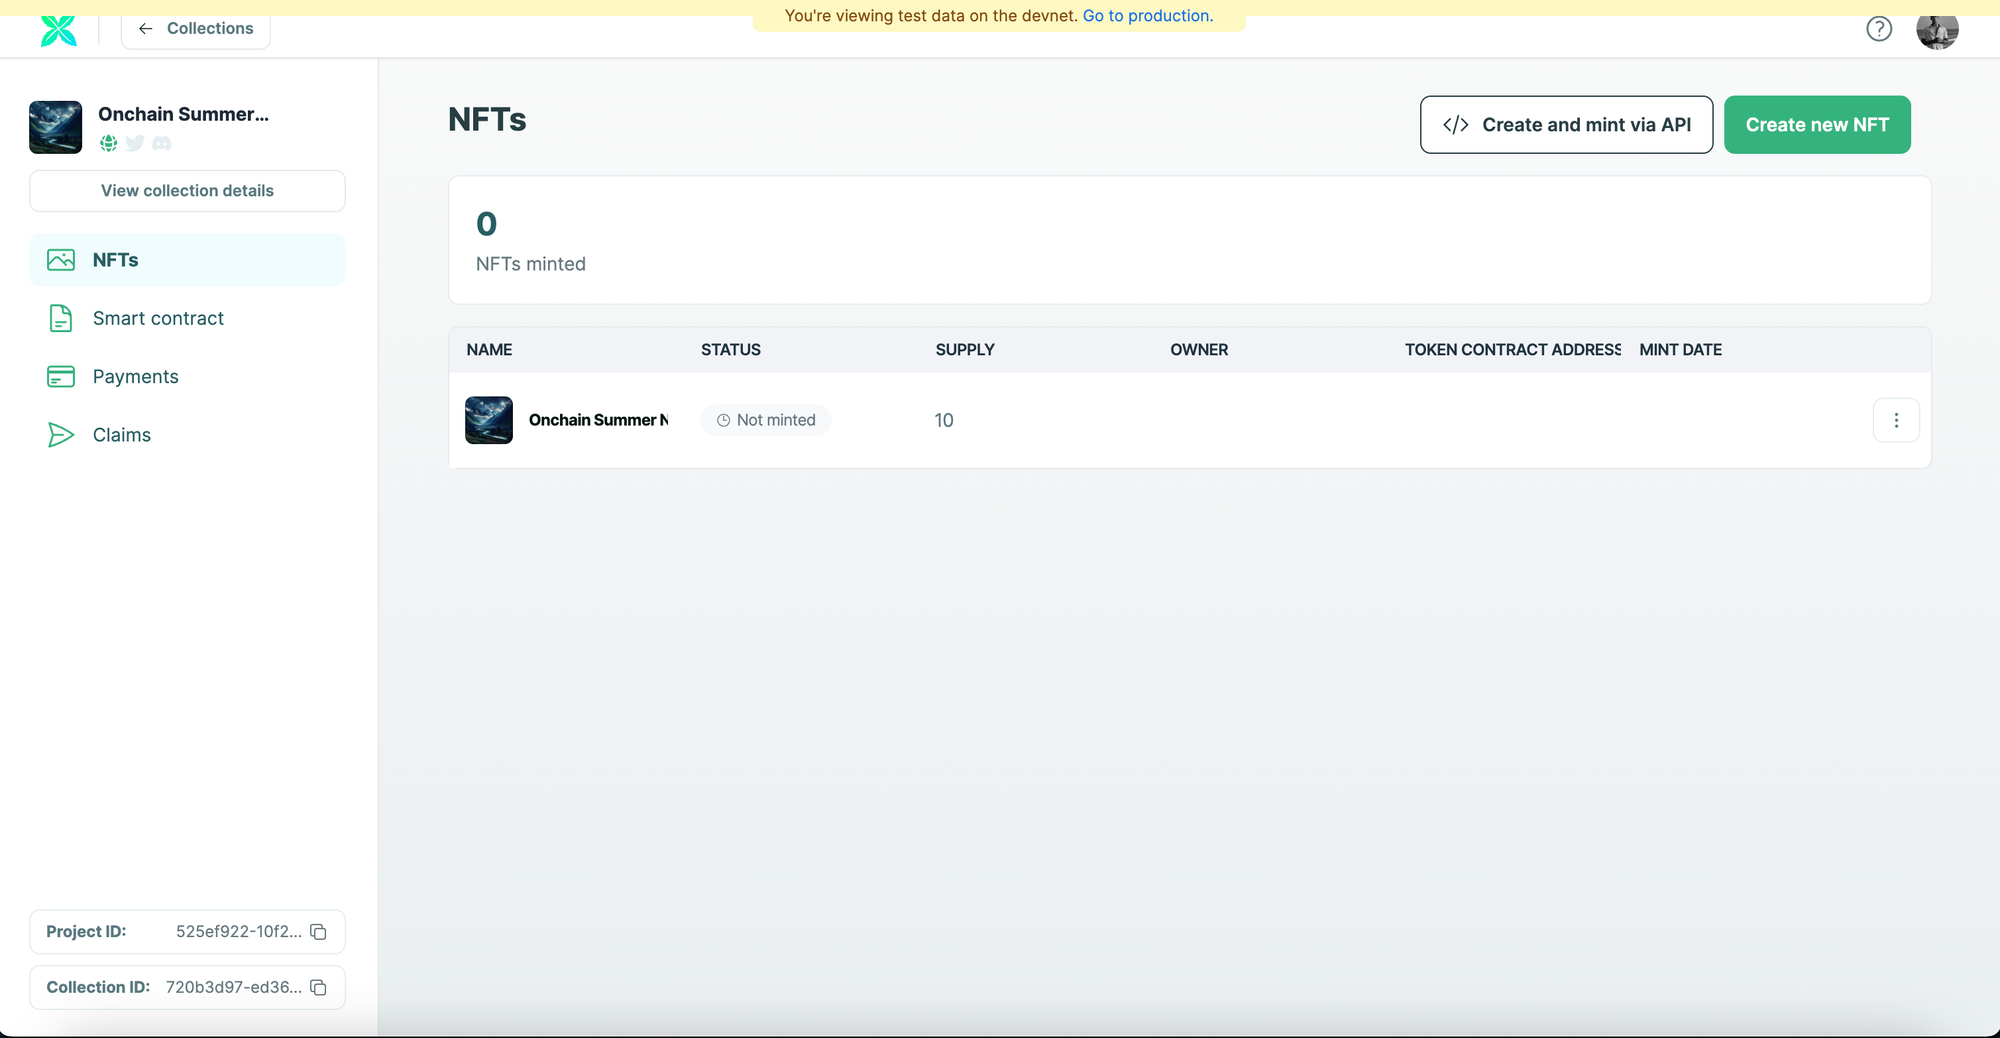
Mint the NFT
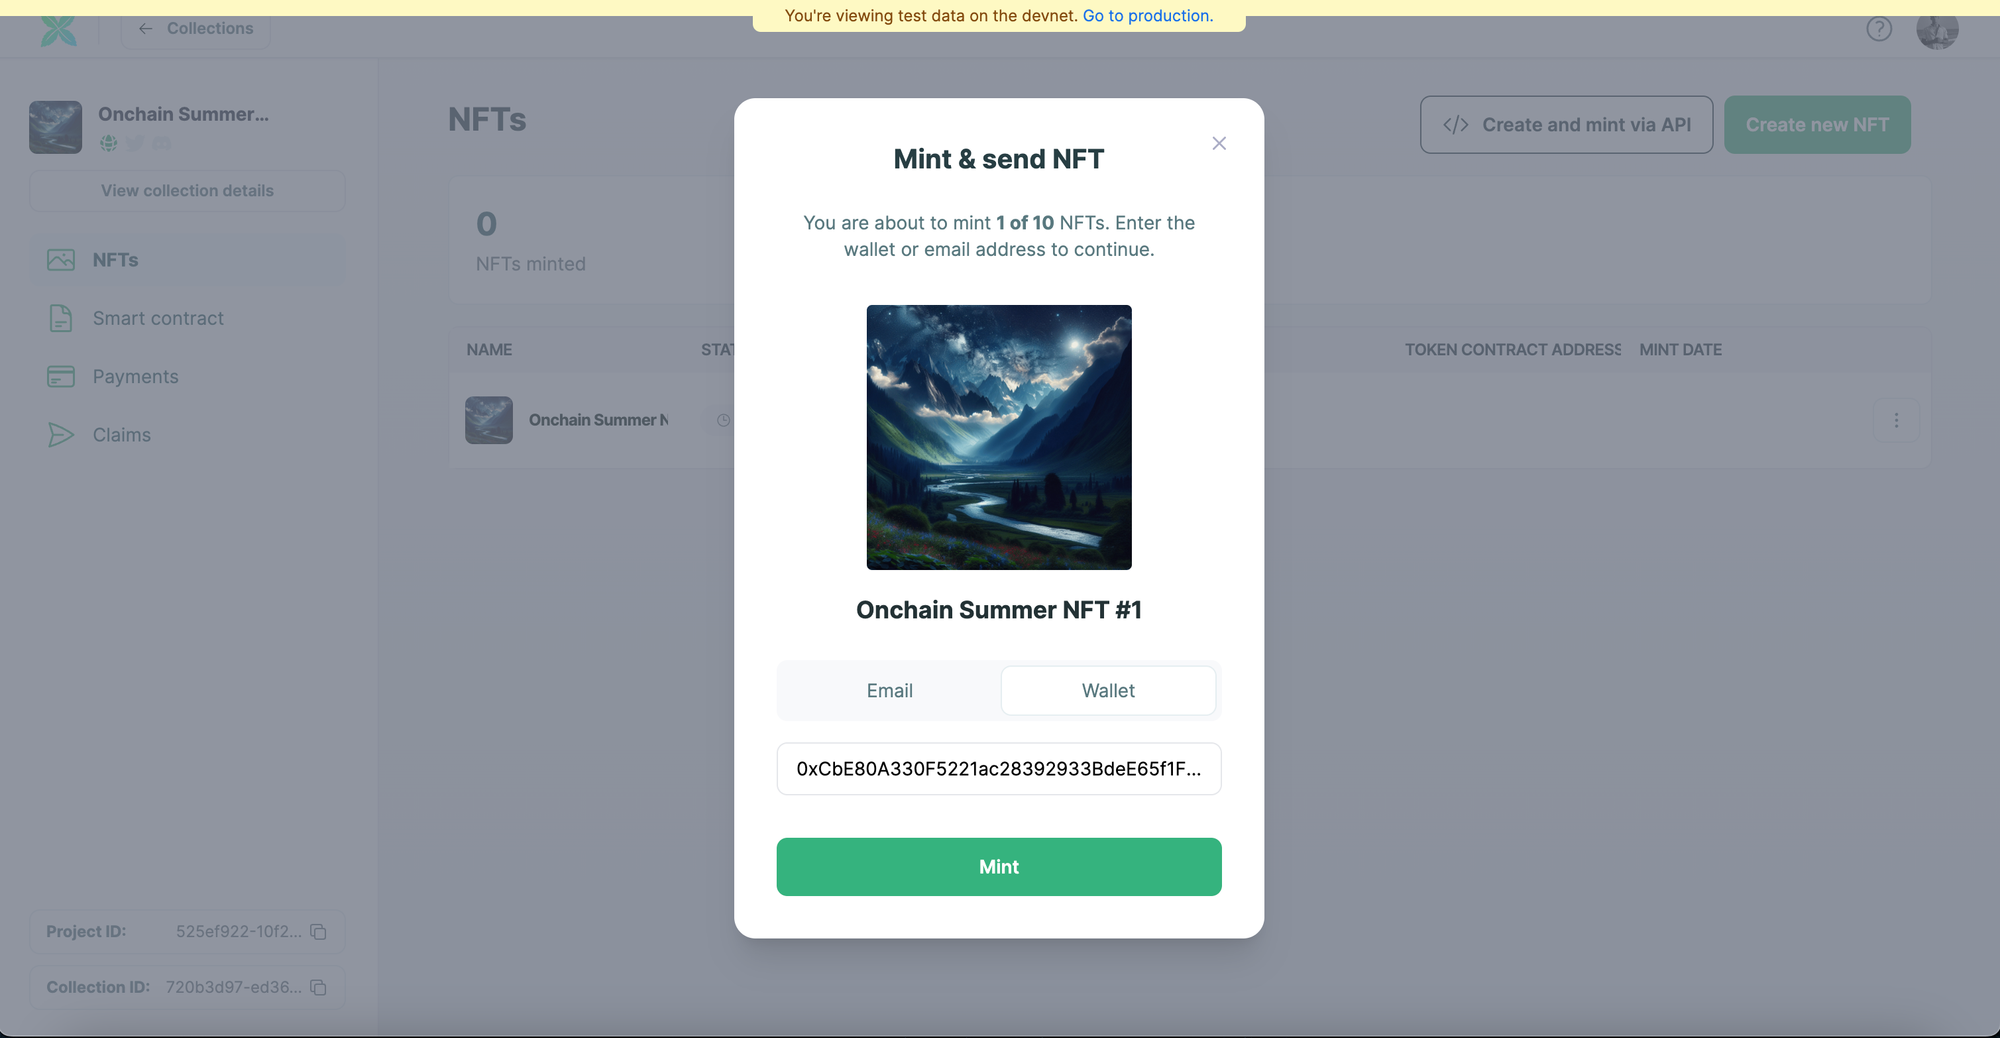
You can now choose to airdrop it any wallet or email address. In order to do that, you need to click on the three dots in the same row as the created NFT. Click on "Mint & send" to proceed.

Now, you can either send it to a wallet address or an email address. After you have entered the respective address, click on "Mint".
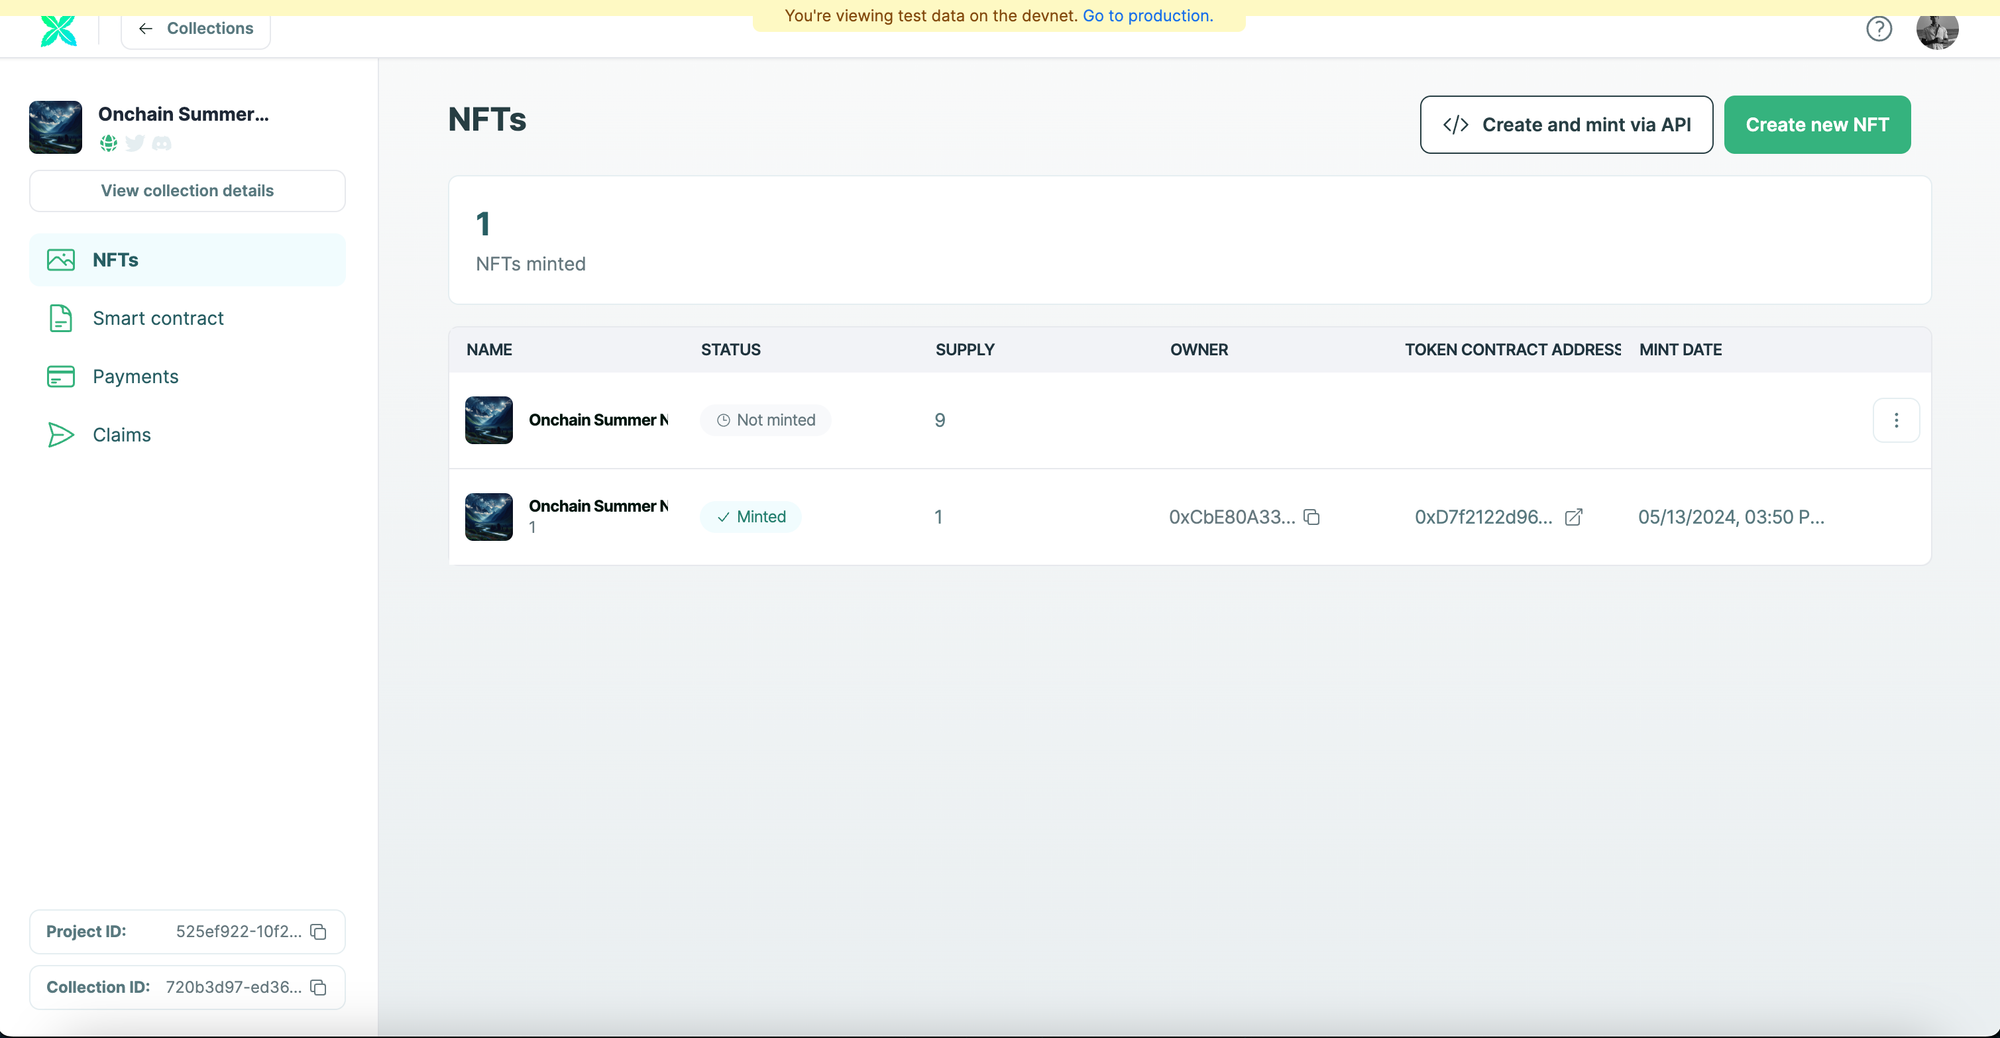
You will be able to see that one NFT was minted to the specified wallet address along with the mint date.
Create and Mint NFTs using an API
If you are wondering how you can create and mint NFTs on Base using Crossmint's API, please refer to the guide linked below.
 Rohit Ramesh
Edit the NFT
Now that we have created and minted an NFT on Base, let's look at how you can update or edit the minted NFT's metadata. Before you do this, you need to create an API key.
You will be using the API key to make a call to Crossmint's endpoint to read and update the NFT that you just minted.
Create an API Key
Go back to the home page of the Crossmint Console, click on "Developers" and click on "API Keys".
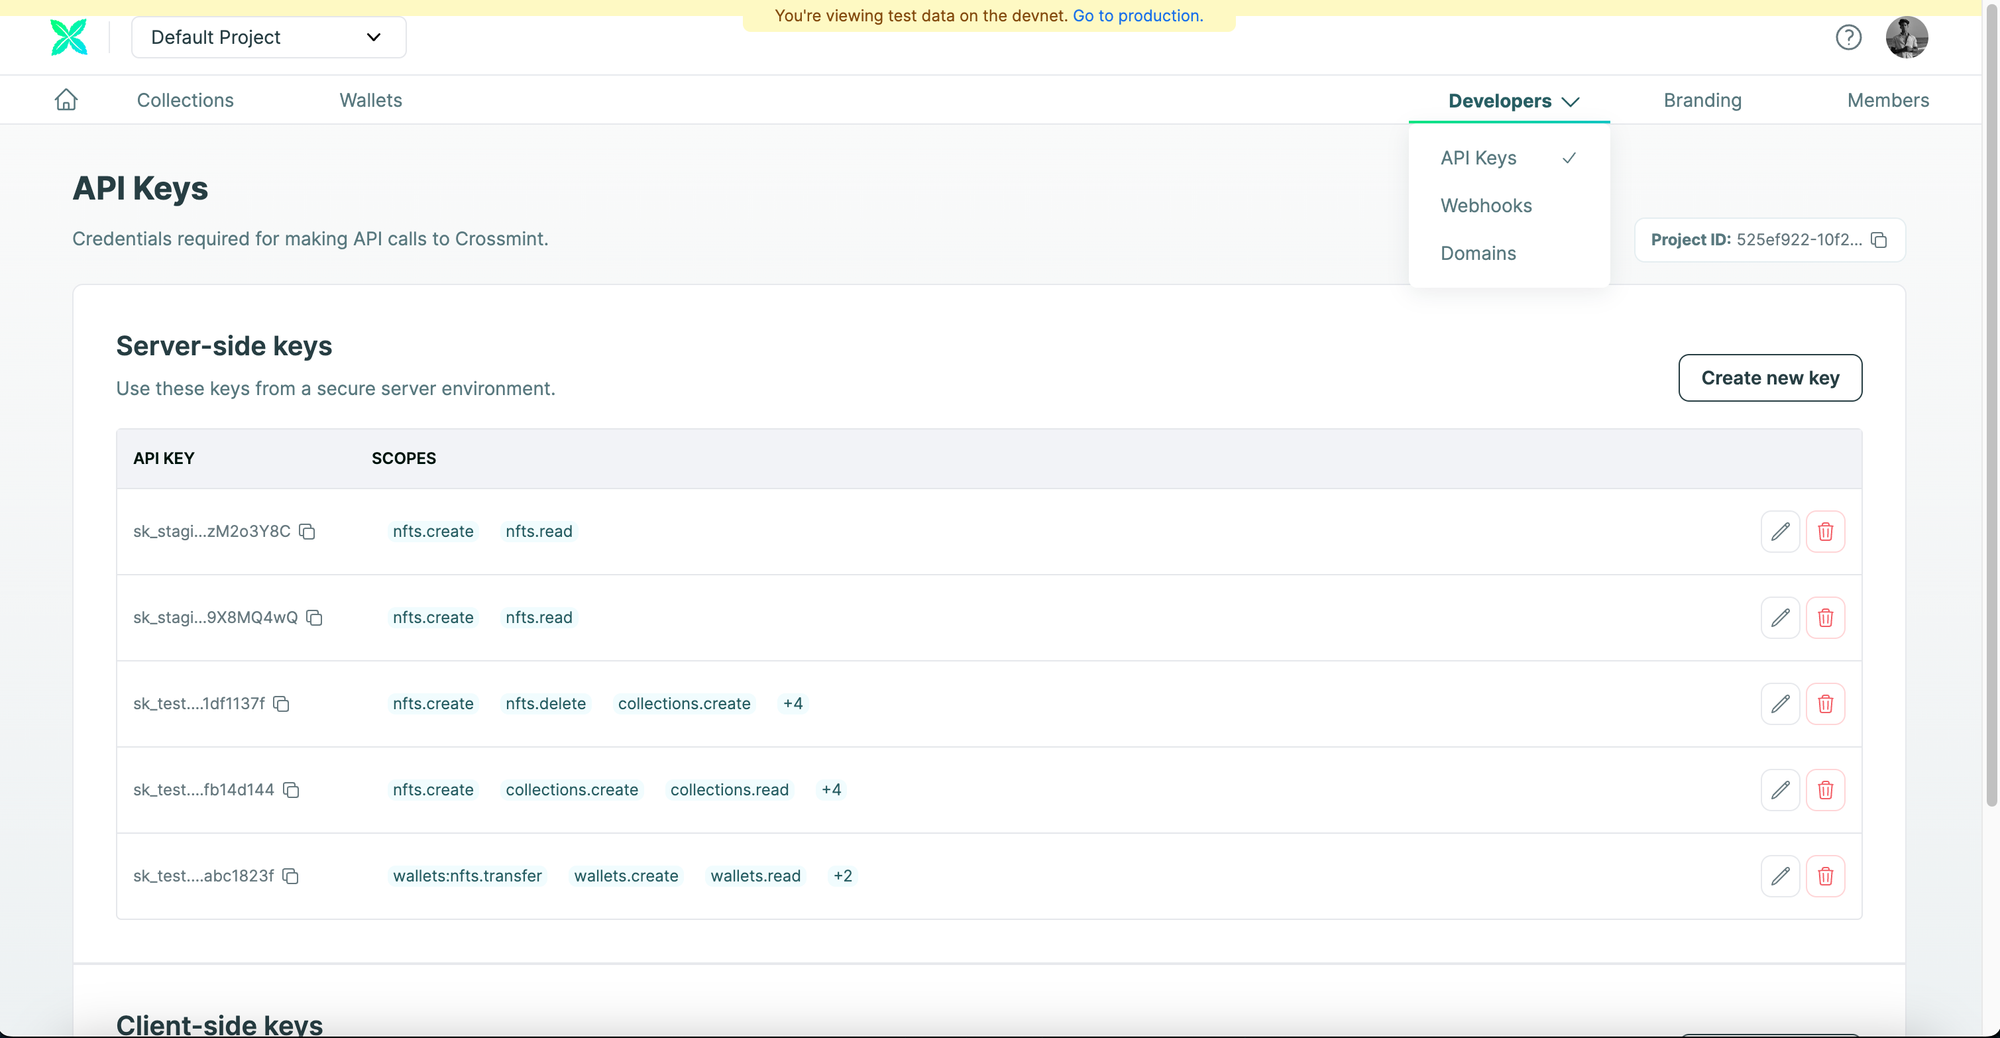
Click on "Create new key" and select the following scopes:
- "nfts.update" - Update NFTs - This scope is required to update or edit a minted NFT.
- "nfts.read" - Read NFTs - This scope is required to retrieve the metadata of a minted NFT.
After selecting the specified scopes, click on "Create server key".
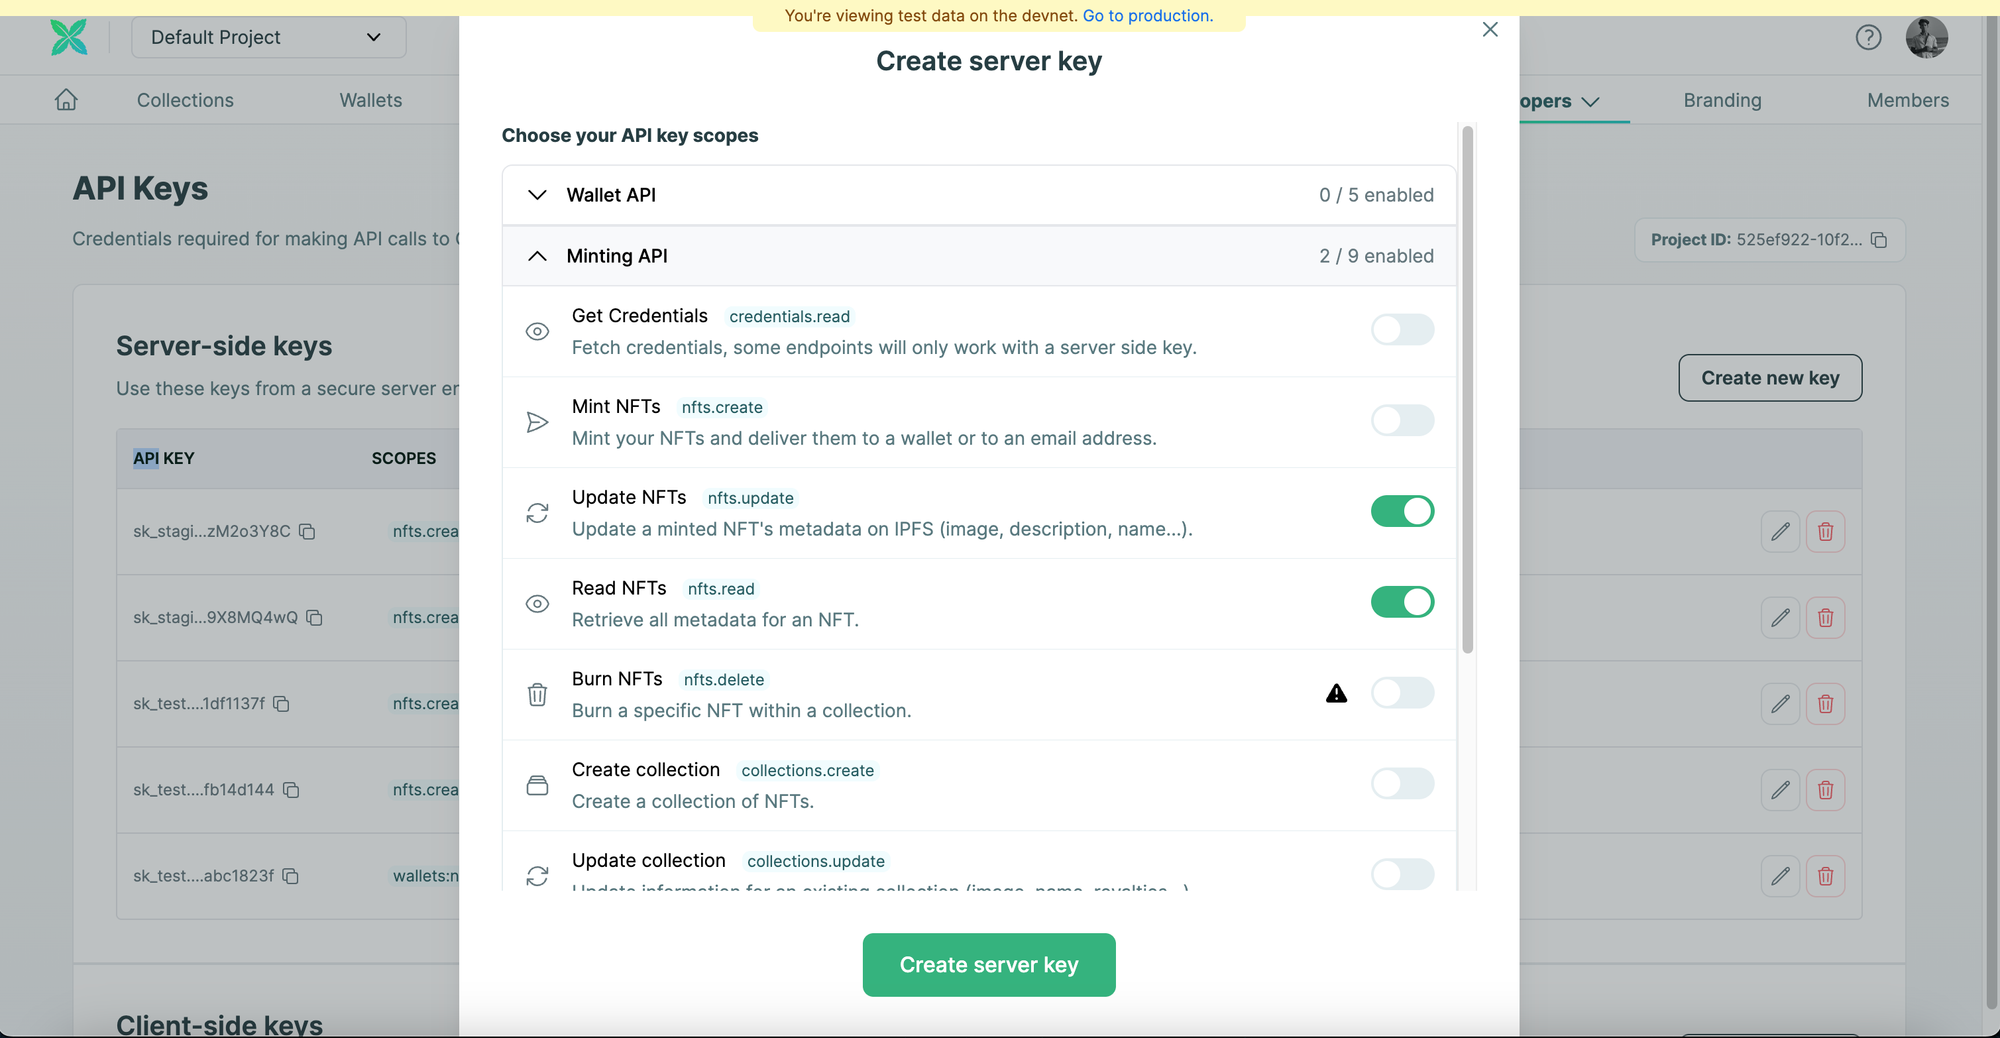
You will see that a new API key was created for you with the scopes as "nfts.update" and "nfts.read".
Get the Id of the Minted NFT
Since we created and minted the NFT directly from the Crossmint Console, the "Id" for the minted NFT is not displayed within the Console. You need to use the "Get All NFTs" API provided by Crossmint to get the unique "Id" returned for the NFT that you minted.
Note: If you created and minted the NFTs via Crossmint's API, then you should have received an "actionId" in the mint response returned by the API call.
Now, let's use Javascript to make an API call to Crossmint's endpoint to read all the minted NFTs within our new NFT Collection. Create a new Javascript code file called "readNFT.js" and copy and paste the code below.
const options = {
  method: "GET",
  headers: { "X-API-KEY": "<YOUR_API_KEY>" }, //replace <YOUR_API_KEY> with the actual Crossmint API key generated via the Crossmint Console.
};

collectionId = "<YOUR_COLLECTION_ID>";

fetch(
  `https://staging.crossmint.com/api/2022-06-09/collections/${collectionId}/nfts?page=1`,
  options
)
  .then((response) => response.json())
  .then((response) => console.log(response))
  .catch((err) => console.error(err));
readNFT.js
- Replace "<YOUR_API_KEY>" with the API key that you created using the Crossmint Console.
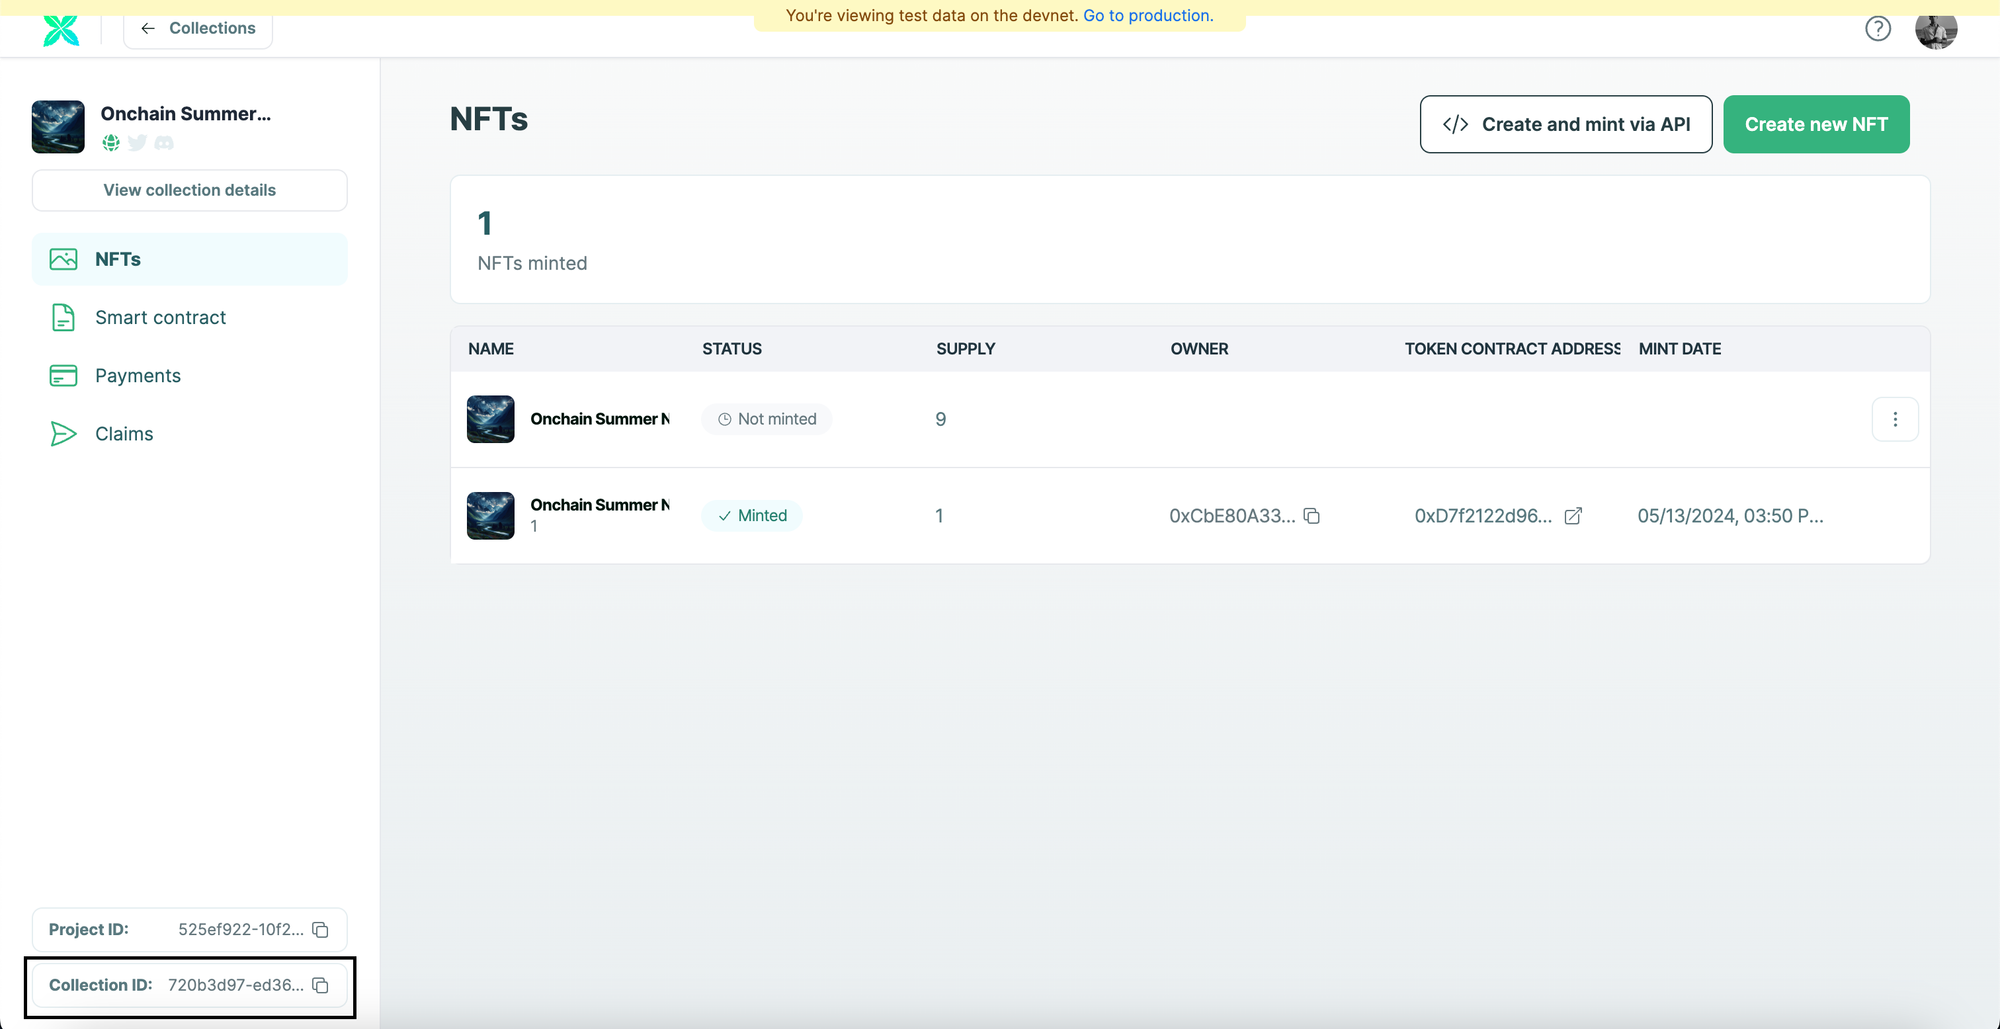
- Replace "collectionId" with your NFT Collection's collection id. This value can be found on the Crossmint Console. Refer to the highlighted black box in the image below.
Run "node readNFT.js" within your terminal to run the Javascript code. It will return a response that will have details of the minted NFT.
[
  {
    id: '267c9f2c-d5d9-4c32-a09e-ee108765e69a',
    metadata: {
      name: 'Onchain Summer NFT #1',
      image: 'ipfs://QmaNvceQyNLJp2Nd7mnERKDteUKfTAxMaozuDmZkK2uKd2',
      description: 'This will be an evolving dynamic NFT on Base for Onchain Summer.',
      attributes: []
    },
    onChain: {
      status: 'success',
      tokenId: '1',
      owner: '0xCbE80A330F5221ac28392933BdeE65f1F2dAb834',
      txId: '0xe1e8e605477355432b7581a10b82c9fda08ac857ab6fbcfa1173956d70209055',
      contractAddress: '0xD7f2122d969A387985B59B7d0D95dd44d11c75b0',
      chain: 'base-sepolia'
    }
  }
]
Note down the "id" returned in the response. In my case, it is "267c9f2c-d5d9-4c32-a09e-ee108765e69a".
Edit the NFT's metadata
Now that we have the "id" of the minted NFT, you can call use Crossmint's "Edit NFT" API to update/edit the minted NFT's metadata.
Now, create a new Javascript code file called "editNFT.js" and copy and paste the code below to make the API call to Crossmint's endpoint and edit the NFT's metadata.
const options = {
  method: "PATCH",
  headers: {
    "X-API-KEY": "<YOUR_API_KEY>",
    "Content-Type": "application/json",
  },
  body: '{"metadata":{"name":"Onchain Summer II","image":"https://base-frame-xi.vercel.app/2.png","description":"Updated the NFT\'s metadata. This is a Dynamic NFT!"},"reuploadLinkedFiles":true}',
};

collectionId = "<YOUR_COLLECTION_ID>";
id = "<YOUR_NFT_ID>"; //267c9f2c-d5d9-4c32-a09e-ee108765e69a is the id for my NFT

fetch(
  `https://staging.crossmint.com/api/2022-06-09/collections/${collectionId}/nfts/${id}`,
  options
)
  .then((response) => response.json())
  .then((response) => console.log(response))
  .catch((err) => console.error(err));
editNFT.js
- Replace "<YOUR_API_KEY>" with the API key that you created using the Crossmint Console.
- Replace "collectionId" with your NFT Collection's collection id. This value can be found on the Crossmint Console. Refer to the section above.
- Replace "id" with your NFT Id returned in the section above.
Run "node readNFT.js" within your terminal to run the Javascript code. It will return a response that will have details of the minted NFT.
After you run the code, the API call will be made and a response will be returned. You will be able to notice that the "status" shows "pending" which means the NFT's metadata is currently being updated.
{
  actionId: 'd14d4d9b-03dd-49c6-a952-1c2a95a1bf72',
  action: 'nfts.update',
  status: 'pending',
  data: {
    chain: 'base-sepolia',
    collection: {
      id: '720b3d97-ed36-444d-bed7-5a1f1af190a9',
      contractAddress: '0xD7f2122d969A387985B59B7d0D95dd44d11c75b0'
    },
    token: {
      id: '267c9f2c-d5d9-4c32-a09e-ee108765e69a',
      owner: [Object],
      tokenId: '1'
    },
    changes: [ 'metadata' ]
  },
  startedAt: '2024-05-13T15:09:14.000Z',
  resource: 'https://staging.crossmint.com/api/2022-06-09/collections/720b3d97-ed36-444d-bed7-5a1f1af190a9/nfts/d14d4d9b-03dd-49c6-a952-1c2a95a1bf72'
}
In a few seconds, you will be able to see the NFT with the changes/edits we made.
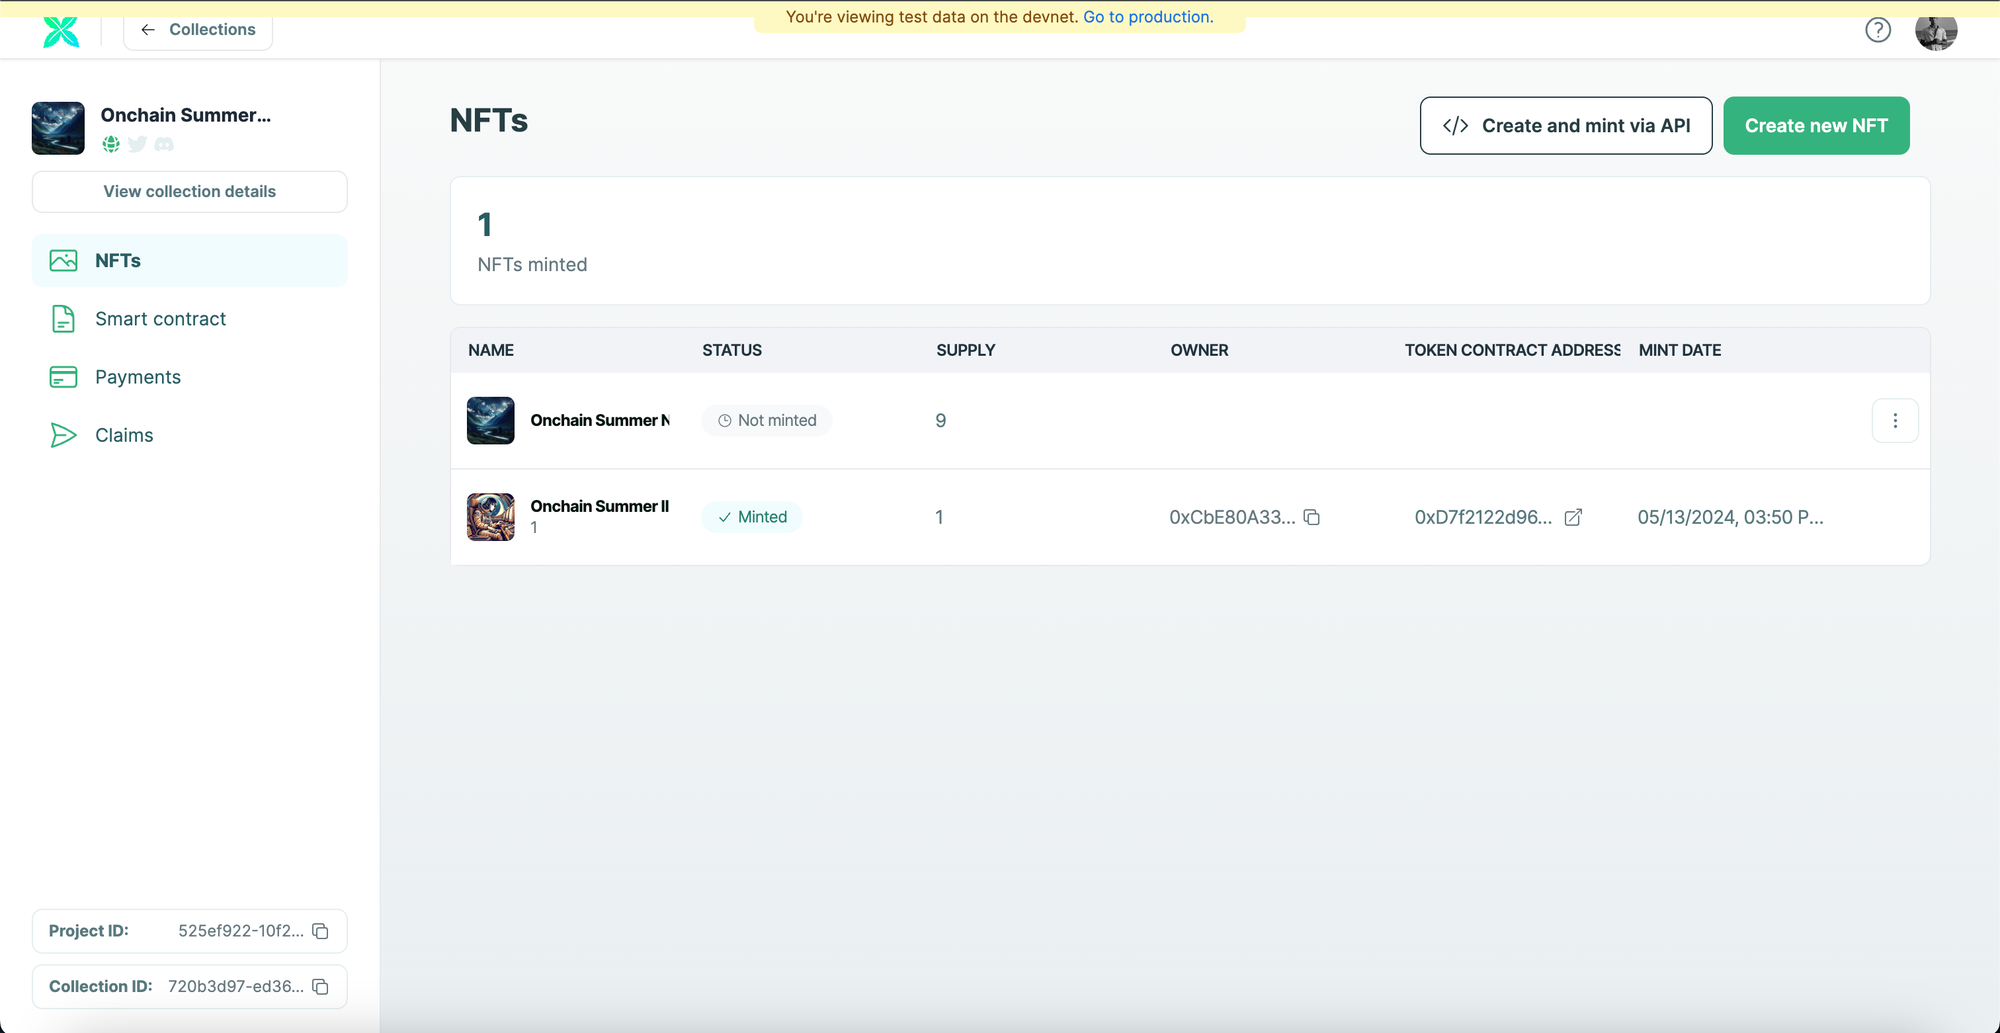
On the Console, you can see that the NFT's name has changed to "Onchain Summer II". You can view the NFT on the explorer or a marketplace to see what it looks like.
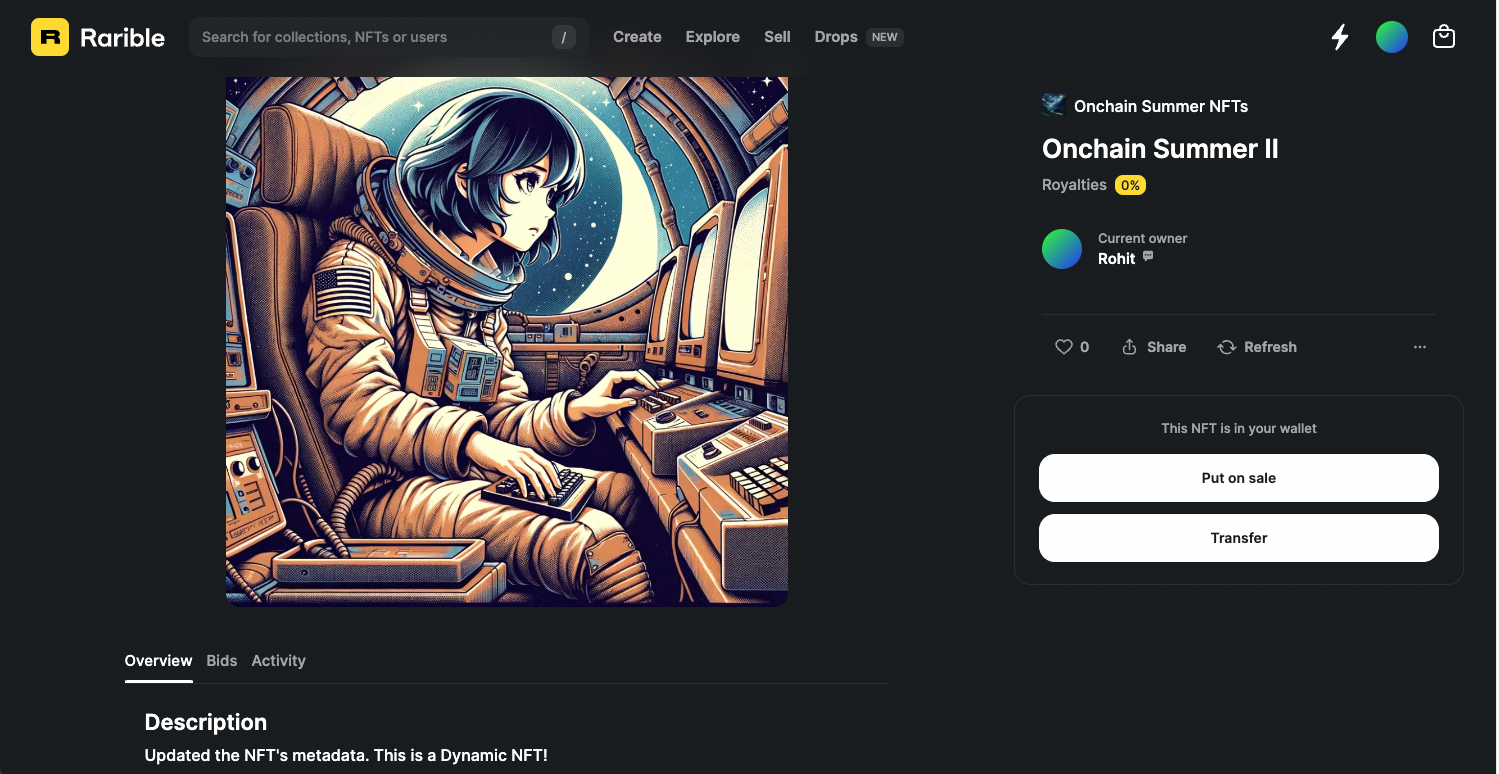
This is what the NFT looks like after we edited the metadata.
And that's it! You have now learned how to create dynamic NFTs on Base!
What's Next?
If you are wondering how Crossmint has helped enterprises and brands by powering their NFT Drops, you can click on the link below to read all our Case Studies.

If you want to learn how to use the Crossmint to enable cross-chain payments with Crossmint's embedded NFT checkout, refer to the guide below.
Danny Mulvihill
Need help?
For support, please join the official Crossmint Discord Server. You can also use Crossmint Help Page for the same.
Rohit Ramesh